
Shortcuts aren’t just about speed. They change how you think about design work.
Most designers memorize five or six basics. But mastering the right 15 shortcuts transforms your workflow completely. Instead of hunting through menus, your hands move automatically. That’s when creative work flows naturally.
Let’s break down the shortcuts that matter most for professional Illustrator work.
Toggle Fill Properties Without Breaking Focus
Switching between fills determines your design rhythm. Three shortcuts control this instantly.
Press < for solid colors. Press > for gradients. Press / to remove fills entirely.
Why does this matter? Because every menu click interrupts your creative flow. Instead, your fingers toggle fills while your eyes stay on the canvas. Plus, these shortcuts work perfectly for creating transparent overlays and clipping masks.
Here’s a pro move. After setting gradients with >, open the Gradient panel with Ctrl + F9 (Windows) or Command + F9 (Mac). Now you can fine-tune colors and directions without touching your mouse.
Fix Text Errors in Seconds
Typography mistakes happen constantly. The spell check shortcut catches them before clients do.
Press Cmd + I (Mac) or Ctrl + I (Windows) to launch spell check. But here’s what most designers miss. This tool scans every text object across all artboards simultaneously.
So you can catch typos in multiple designs at once. Then combine it with Find & Replace using Cmd + F (Mac) or Ctrl + F (Windows). That lets you fix recurring mistakes across your entire project in one pass.
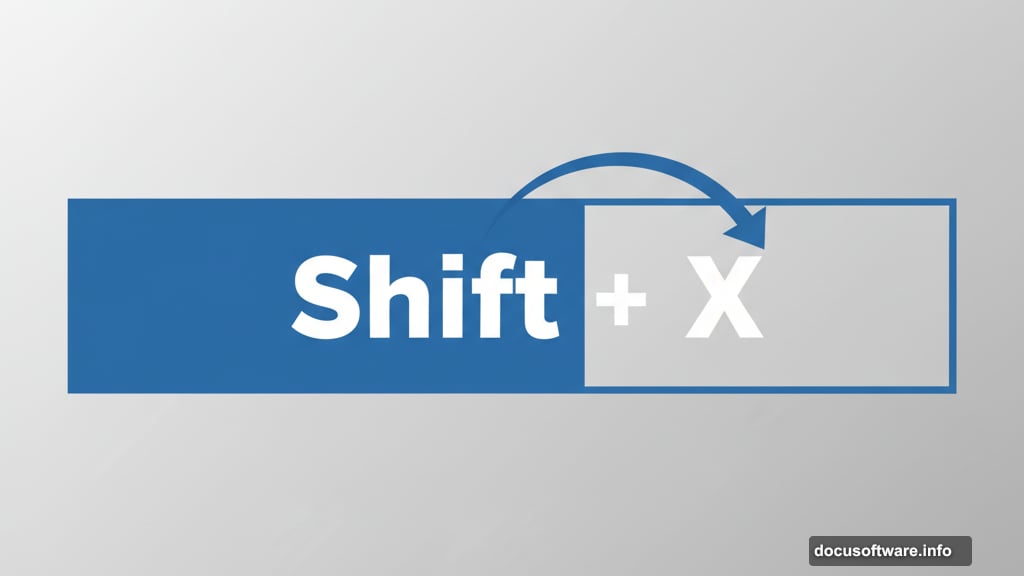
Swap Fills and Strokes Instantly
Press Shift + X on either Mac or Windows. Your fill becomes your stroke and vice versa.
This seems simple. But it enables rapid design iterations. You can transform solid shapes into minimalist line art instantly. That’s perfect for wireframes and mockups where you need to test different visual approaches quickly.
Control Typography Like a Pro
Two panels control all text styling. Character properties and paragraph properties.
Open the Character panel with Cmd + T (Mac) or Ctrl + T (Windows). Open the Paragraph panel with Opt + Cmd + T (Mac) or Alt + Ctrl + T (Windows).
Most designers use these separately. But combining both panels gives complete control over text appearance. Plus, you can navigate settings using arrow keys instead of clicking repeatedly.
Adjust Font Sizes on the Fly
Need bigger text? Press Shift + Cmd + > (Mac) or Shift + Ctrl + > (Windows). Need smaller? Press Shift + Cmd + < (Mac) or Shift + Ctrl + < (Windows).
Here’s the refinement trick. Hold Alt (Windows) or Option (Mac) while pressing these shortcuts. That makes micro-adjustments instead of large jumps. Perfect for fine-tuning headlines and body copy.
Align Text Perfectly Every Time
Four shortcuts handle all text alignment needs.
Shift + Cmd + L (Mac) or Shift + Ctrl + L (Windows) aligns left. Shift + Cmd + R (Mac) or Shift + Ctrl + R (Windows) aligns right. Shift + Cmd + C (Mac) or Shift + Ctrl + C (Windows) centers text. Shift + Cmd + J (Mac) or Shift + Ctrl + J (Windows) justifies paragraphs.
Combine these with guides for pixel-perfect positioning. Right alignment creates particularly strong visual impact for pricing and call-to-action elements.
Lock Layers to Prevent Mistakes
Press Cmd + 2 (Mac) or Ctrl + 2 (Windows) to lock the selected layer. Press Opt + Cmd + 2 (Mac) or Alt + Ctrl + 2 (Windows) to unlock everything.
This prevents accidentally moving finished elements while working on new ones. Plus, you can lock guides separately using Cmd + Alt + ; (Mac) or Ctrl + Alt + ; (Windows). That protects your layout grid during intense design sessions.
Sample Colors Like a Designer
Press I to activate the Eyedropper tool. Click any object to copy its properties.
But here’s the advanced move. Hold Shift while clicking to sample only color from text objects. That prevents copying font properties you don’t want.
The Eyedropper works with gradients too. And you can sample colors from external sources by clicking outside Illustrator while the tool is active.
Convert Text to Shapes
Press Shift + Cmd + O (Mac) or Shift + Ctrl + O (Windows) to create outlines from text.
This turns typography into editable vector shapes. Essential for logos and custom lettering. But always duplicate your text first. Once you create outlines, you can’t edit the text anymore.
Then combine outlined text with Pathfinder tools to create custom typography effects that aren’t possible with fonts alone.
Blend Objects Smoothly
Press Opt + Cmd + B (Mac) or Alt + Ctrl + B (Windows) to blend selected objects.
This creates smooth transitions between shapes and colors. Perfect for gradients, morphing effects, and illustrations. But open Blend Options first to customize the number of steps between objects.
You can also align blends to paths for unique flowing effects. That’s how professional illustrators create organic-looking transitions.
Combine Shapes Intelligently
Press Shift + M to activate the Shape Builder tool. Then drag across shapes to merge them or Alt-drag to delete sections.
This feels more intuitive than Boolean operations. You see preview outlines before committing changes. Plus, holding Shift while dragging creates precise shape combinations aligned to your grid.
Create Variable Width Strokes
Press Shift + W to activate the Width tool. Click and drag on any stroke to adjust thickness at that point.
This creates calligraphic effects and dynamic line work. But here’s the refinement. Double-click on width handles to adjust both sides symmetrically. That maintains balance in your stroke variations.
Then combine width adjustments with the Appearance panel to stack multiple variable-width strokes on a single path.
Warp Objects Creatively
Press Opt + Cmd + C (Mac) or Alt + Ctrl + C (Windows) to apply Envelope Distort.
This warps objects while maintaining their vector properties. Great for perspective effects and organic shapes. But group objects before distorting. That maintains their relationships during warping.
You can also edit the envelope shape after applying distortion. That gives you precise control over the final effect.
Paste Objects Strategically
Press Cmd + F (Mac) or Ctrl + F (Windows) to paste in front. Press Cmd + B (Mac) or Ctrl + B (Windows) to paste in back.
These shortcuts paste objects in the exact position of the original. Essential for creating shadows, highlights, and layered effects. Combine them with Align tools for pixel-perfect positioning.
Or use Paste in Place with Cmd + Shift + V (Mac) or Ctrl + Shift + V (Windows). That pastes objects in the same position across different artboards.
Join Disconnected Paths
Press Cmd + J (Mac) or Ctrl + J (Windows) to join selected endpoints.
This connects open paths into closed shapes. Critical for cleanup work and creating compound paths. But refine joined paths with the Pen tool afterward. That smooths out any awkward connections.
Then use the Smooth tool to polish transitions between joined segments. That creates more natural-looking curves.
Making Shortcuts Second Nature
These 15 shortcuts handle most daily Illustrator work. But memorizing them isn’t enough.
Practice using shortcuts exclusively for one week. Cover your mouse. Force yourself to use keyboard commands for everything. It feels slow at first. But after seven days, muscle memory takes over.
Then your hands move automatically while your brain focuses on creative decisions. That’s when shortcuts transform from time-savers into workflow enablers. Your designs improve because you’re thinking about composition instead of menu navigation.
Start with five shortcuts today. Master those before adding more. In two weeks, you’ll wonder how you ever worked without them.