
Adobe Illustrator hides incredible features in plain sight. Most designers never discover them.
After years of daily use, I’ve compiled the tricks that genuinely changed how I work. These aren’t gimmicks. They’re practical shortcuts that save hours and reduce frustration. Plus, several of these features have been sitting in Illustrator for years without anyone talking about them.
Let’s dive into the tools that separate casual users from professionals.
See Through Your Canvas Instantly
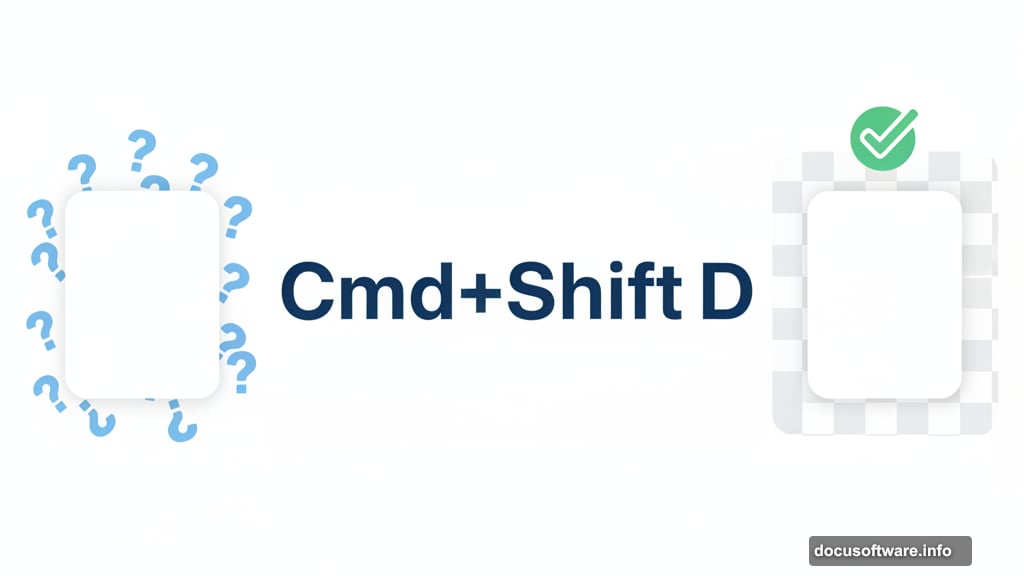
Hit Cmd/Ctrl + Shift + D to toggle the transparency grid. Sounds basic, right? But this simple shortcut solves a massive headache.
Working with white artwork on a white background creates confusion. You can’t tell where shapes end and the canvas begins. The transparency grid shows exactly what’s transparent versus what’s actually white.
So instead of squinting at your screen, you see your artwork clearly. This matters especially when preparing files for clients or production. No more accidentally sending logos with white backgrounds instead of transparent ones.
Control the Pen Tool Like a Pro
The Pen Tool feels clunky until you learn two hidden modifiers. First, hold Alt/Opt when dragging out tangent handles. This pulls the leading handle back in while leaving the trailing handle extended.
Why does this matter? It prepares the next path segment perfectly. Without this trick, you get awkward curves that require constant adjustment. With it, your paths flow naturally from the start.
Also, press spacebar while placing an anchor point. This lets you reposition the point before committing. So if you clicked slightly off target, you can nudge it into place without undoing and starting over.
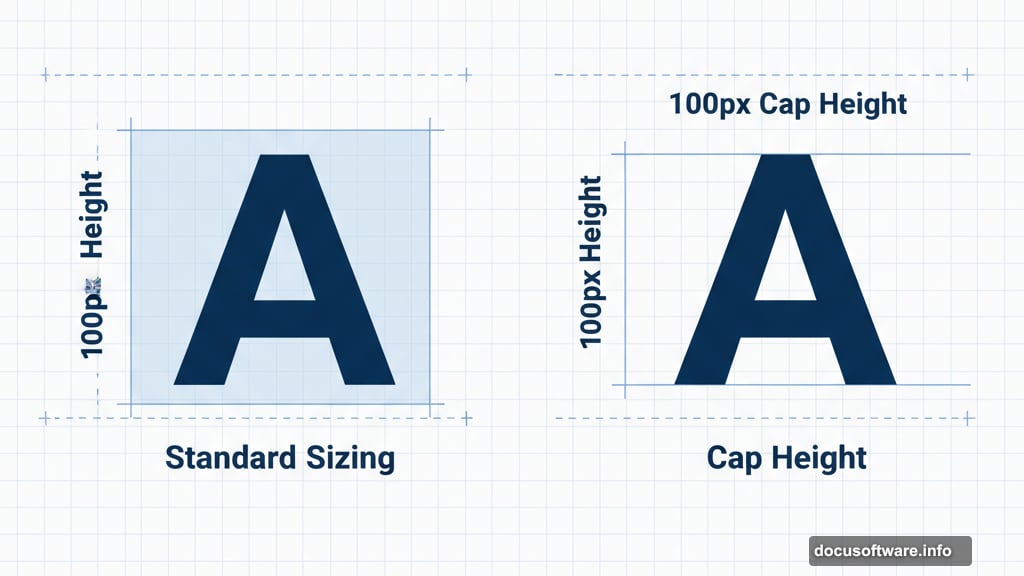
Size Type by Cap Height Instead
Open the Character panel’s hamburger menu. Choose “Show Font Height Options” and select “Cap Height” sizing. This changes everything about text alignment.
Normal font sizing includes invisible space above and below letters. Cap height measures only the actual visible letters. So when you set type to 100px cap height, it actually appears 100px tall.
This proves critical when aligning text to icons or shapes. Match the cap height of your text to your icon’s height. Now they align perfectly without mathematical guessing or endless nudging.
Align to Actual Letters, Not Text Boxes
Illustrator’s align function usually aligns to text box boundaries. That includes invisible padding around the actual letters. The result? Text that looks misaligned even though Illustrator says it’s centered.
Open the Align panel menu and choose “Align to Glyph Bounds.” Select your text. Now alignment happens based on the visible letters themselves.
Plus, turn on View > Snap to Glyph. This makes objects snap to letter edges when you drag them around. No more outlining type just to get proper alignment. The time savings add up fast across projects.
Customize Type on a Path Properly
Creating type on a path takes seconds. Customizing it intelligently takes knowledge most designers lack.
Go to Type > Type on a Path > Type on a Path Options. This dialog reveals controls for exactly how text interacts with your path. Adjust baseline position, flip orientation, or change spacing effects.
So instead of fighting with text that sits awkwardly on curves, you control every aspect of the relationship. This becomes essential for complex logo work or decorative typography.
Move Individual Letters Without Outlining
Press Shift + T to grab the Touch Type Tool. Click any letter and move, rotate, or resize it independently. No outlining required. The text stays fully editable.
This tool shines for optical adjustments. Sometimes a letter looks slightly off even when technically correct. Nudge it a pixel or two with Touch Type. The difference feels subtle but impacts the overall polish dramatically.
Note: You can’t hold Shift to constrain movement. Use your keyboard arrows for precise nudging instead.
Build Grids of Artwork in Seconds
Hold Alt/Opt and drag artwork to create a copy. Hit Cmd/Ctrl + D to repeat that exact movement and duplication. Keep hitting it to build a complete row.
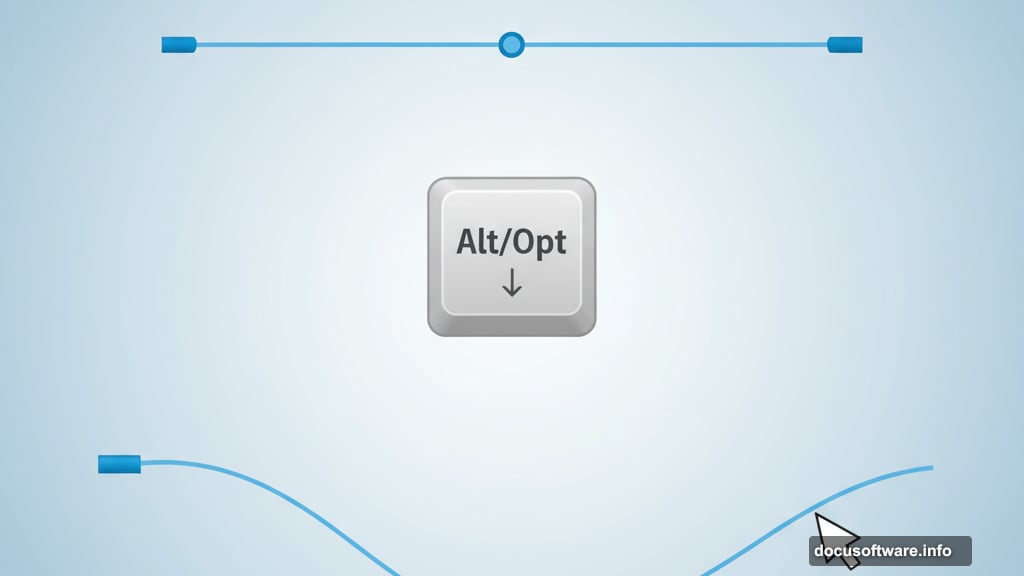
Now select the entire row. Alt/Opt drag it down to create a second row. Hit Cmd/Ctrl + D again to duplicate that vertical movement. You just created a perfect grid in under ten seconds.
This technique works for mockups, pattern creation, or any time you need multiple copies arranged precisely. So much faster than manually copying and aligning each piece.
Lock Alignment to a Key Object
Select two shapes. Click the shape you want as the anchor a second time. That second click designates it as the “key object” with a blue outline.
Now use the align tools. Everything aligns to the key object without moving it. This prevents the frustrating situation where both objects shift when you only wanted to move one.
So you maintain precise positioning while aligning other elements around a fixed anchor point. Game-changing for complex layouts.
Smooth Paths Four Different Ways
Illustrator offers multiple smoothing approaches. Each suits different situations.
The Smooth tool itself works by selecting a path and dragging along it. Illustrator automatically removes excess anchor points and creates cleaner curves. Quick but requires practice to control.
Better yet, open the Pencil tool options. Enable “Use Alt key to Smooth tool” and check “Keep Selected.” Now draw rough shapes with the Pencil tool. Hold Alt/Opt and drag along the path to smooth it before moving on.
For mathematical smoothing, select a path and choose Object > Path > Simplify. This reduces anchor points and smooths curves based on precise tolerance settings.
Finally, the Brush tool hides the Smooth tool inside it too. Hold Alt/Opt while painting to smooth strokes on the fly.
Change Colors Globally Across Artwork
Select your artwork and open the Swatches panel menu. Choose “New Color Group” and enable “Global color.” This creates swatches that control color across your entire project.
Double-click any swatch in the group. Change the color. Watch it update everywhere instantly. This includes fills, strokes, gradients, blend modes, patterns, and even complex nested objects.
So instead of hunting down every instance of a color, you adjust once and everything updates. This saves hours during client revisions or brand updates.
Bend Complex Shapes with Puppet Warp
Puppet Warp lets you push and pull artwork like it’s made of rubber. Pin down areas you want stable. Then drag other pins to bend and distort the surrounding paths.
This tool excels at organic adjustments. Need to make a logo fit a curved surface? Puppet Warp handles it better than manual path editing. Want to add life to rigid illustrations? A few pins create natural movement.
The key: Pin conservatively at first. Too many pins restrict movement. Start with a simple skeleton and add pins only where you need more control.
Transform with Visual Feedback
Press E to grab the Free Transform tool. Unlike normal transformations, this shows exactly how your artwork will look before you commit.
Drag corners while holding Cmd/Ctrl to distort freely. Hold Shift to constrain proportions. The tool updates in real-time so you can see precisely what you’re getting.
This becomes invaluable for perspective work. Create a grid, group it with your artwork, and use Free Transform to map the artwork onto surfaces or match existing perspective. Much faster than manual path adjustment.
Pro tip: Always duplicate your artwork before using Free Transform. It’s a destructive tool. Having an original lets you start over if needed.
The Real Advantage Hidden Here
These tricks share a common thread. They reduce friction between your ideas and executing them.
Every time you fight with alignment, hunt for colors, or manually adjust curves, you lose momentum. Creativity suffers. Frustration builds. Projects take longer than they should.
Master these tools and Illustrator stops fighting you. It becomes an extension of your thinking instead of an obstacle. That’s the difference between adequate work and truly polished results.
Your choice: Keep working the hard way or spend an hour learning these shortcuts. The time investment pays back within days.