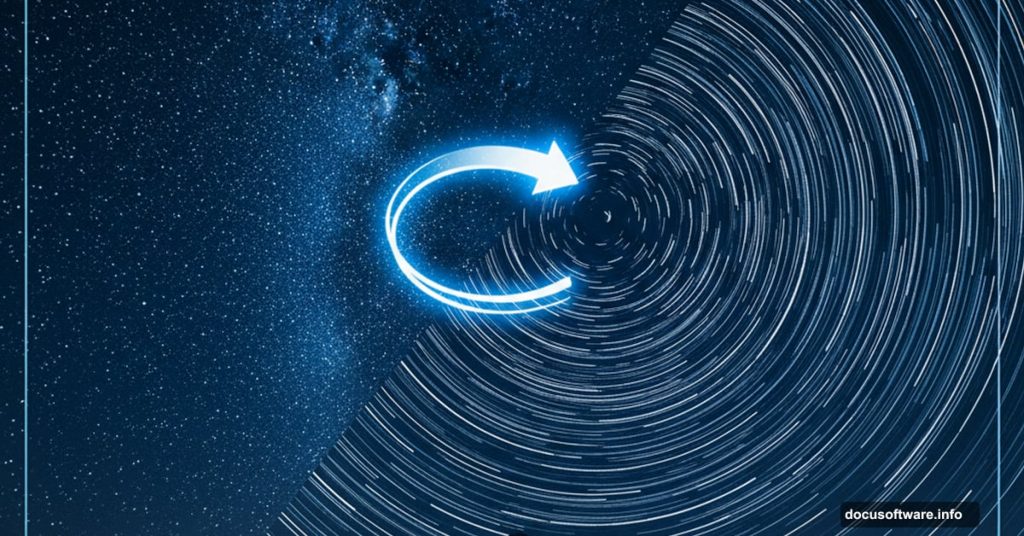
Star trail photography usually requires hours of shooting and expensive equipment. But what if you could fake it convincingly using just one starry night photo?
Turns out, Photoshop has a hidden trick that makes this surprisingly easy. You’ll use a seldom-mentioned “Duplicate Transform” technique to turn static stars into sweeping trails of light. Plus, I’ll show you how to fix the most common problems that trip people up.
Let’s dive in.
What You’ll Need Before Starting
First, grab a decent starry night photo. Darker skies work best. You want visible stars but not too much light pollution or haze.
Also, make sure your foreground is interesting. A barn, mountain, or person creates a strong anchor point for those sweeping star trails. Without a good foreground, the effect falls flat.
Finally, be ready to duplicate layers many times. This technique creates dozens of layers, so your file size will balloon. Save your work often.
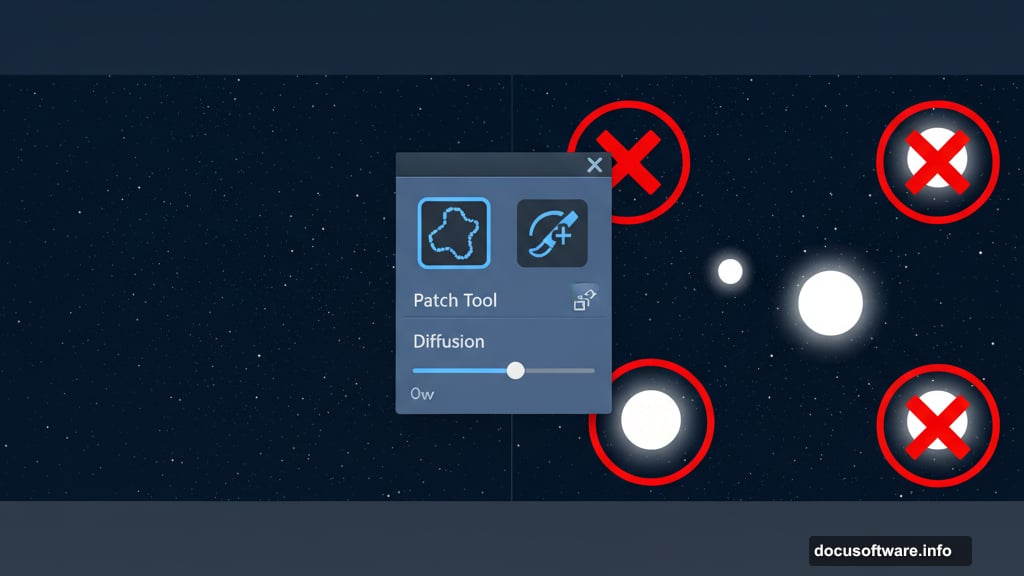
Clean Up Your Sky First
Before creating trails, you need to prep the sky. Big bright spots like planets, airplanes, or satellites will create ugly streaks when duplicated.
Duplicate your background layer. Then grab the Patch Tool or Healing Brush and remove those bright problem areas. Just rough it in. Perfection isn’t necessary here.
Here’s a critical tip most tutorials skip: Reduce the Diffusion setting on your Patch and Healing tools. The default setting smears stars too much. Lower diffusion preserves the natural star texture while removing unwanted bright spots.
Separate Foreground from Sky
Next, use the Quick Selection tool to roughly select your foreground. Don’t worry about perfect edges. Close enough works fine.
Hit Cmd/Ctrl + J to pop that selection onto its own layer. Now you have your foreground safely isolated.
Select the layer below (the one with both foreground and sky). Duplicate this entire layer. This becomes your working sky layer.
Make sure this sky layer sits below your isolated foreground but above everything else. Set its blend mode to Lighten. This is crucial. The Lighten mode lets only brighter pixels show through, which makes the star trails blend naturally.
The Magic Duplicate Transform Trick
Here’s where things get interesting. With your sky layer selected, hit Cmd/Ctrl + T for Free Transform.
Look at the top control bar. Find the Rotate field. Type in exactly “0.1” and hit Enter. This rotates the layer by just one-tenth of a degree. You’ll barely notice any change.
Now comes the hidden hotkey that changes everything: Cmd + Shift + Opt + T (Mac) or Ctrl + Shift + Alt + T (Windows).
This duplicates your current layer AND applies that same tiny rotation. So now you have two layers, each rotated 0.1 degrees from the last.
Hit that hotkey about 40 times. Yes, really. Each duplicate adds another 0.1-degree rotation, building those gorgeous star trails layer by layer.
Why This Works So Well
The Lighten blend mode compares each pixel with the layers below. It only shows pixels that are brighter than what’s underneath.
So each rotated star leaves a faint trail as it moves across the sky. Multiply that by 40 layers and you get beautiful, natural-looking star trails.
The rotation angle matters a lot. Too small (like 0.05 degrees) and you’ll need 80+ duplicates. Too large (like 0.5 degrees) and the trails look choppy and fake. Stick with 0.1 for best results.
Create Trails in Both Directions
Want more dramatic results? Create trails rotating both ways.
Go back to your original sky layer (the one you haven’t transformed yet). Duplicate it and shut off the duplicate. You might need this backup later.
Now transform this sky layer by -0.1 degrees (negative number). Duplicate it 20 times using that same hotkey.
You now have 20 layers rotating clockwise and 20 rotating counterclockwise. The trails meet in the middle, creating a stunning circular pattern around the center of rotation.
Fix the Most Common Problems
Problem number one: Trails look too strong or artificial.
Solution: Group all your duplicated layers into a folder. Then merge or convert to a Smart Object. Add a tiny Gaussian Blur (0.5 to 1 pixel). This softens the trails just enough to look natural.
Problem number two: Too many faint stars creating noise.
Solution: Apply a Levels adjustment to your initial sky layer before duplicating. Boost the black point slightly. This eliminates dim stars while keeping bright ones. You’ll get fewer but more defined trails.
Problem number three: The foreground gets blurry or develops weird halos.
Solution: That’s why we separated the foreground early. Make sure it sits on top with Normal blend mode. If you see halos, refine your selection mask.
Fine-Tune with Blend If Sliders
The Blend If sliders are your secret weapon for natural-looking results.
Double-click your merged star trails layer to open Layer Styles. Find the Blend If section at the bottom. Drag the black point on “This Layer” slightly to the right while holding Option/Alt to split the slider.
This tells Photoshop to gradually fade out the darkest parts of your star trails. The result blends more naturally with the original sky.
You can also clip a Levels adjustment directly to your star trails layer. Adjust the black input slider to control how much of the effect shows through. This gives you real-time control over trail intensity.
When the Effect Looks Wrong
Sometimes you’ll duplicate 40 layers and the trails look terrible. Either too faint, too strong, or just wrong.
Usually this means your initial sky prep needs work. The Levels adjustment you applied before duplicating (or didn’t apply) makes or breaks the final result.
Here’s the fix: Delete all those duplicate layers. Go back to your original sky layer. Apply a different Levels adjustment. Then start the duplication process again.
Annoying? Yes. But way faster than trying to fix it after the fact.
Smart Objects vs Merged Layers
You have two options when combining all those duplicate layers.
Merge them: Smaller file size. Faster performance. But you lose access to individual layers.
Convert to Smart Object: Keeps all layers accessible inside the Smart Object. Lets you go back and adjust. But your file size explodes to hundreds of megabytes.
For most projects, merging works fine. Only use Smart Objects if you’re positive you’ll need to tweak individual rotation amounts later.
The Anchor Point Matters More Than You Think
Where Photoshop rotates your layer depends on the Free Transform anchor point. By default, it’s centered. That’s usually fine.
But sometimes you want trails to rotate around a specific point in your image. Maybe a bright star or constellation.
Before transforming, drag the anchor point to that spot. Then all your duplicates will rotate around that exact location. This creates more intentional, composed results.
Why This Beats Real Star Trail Photography
Real star trails require dark skies, a tripod, and hours of shooting. Plus, you need an intervalometer to take hundreds of photos automatically.
Then you stack all those photos in post-processing. It’s time-consuming and requires perfect conditions.
This Photoshop method takes 10 minutes. You can do it from your desk with any starry photo. Plus, you control exactly how the trails look. Want more rotation? Add more duplicates. Want subtle trails? Add fewer.
The trade-off? Experts can spot the fake. Real star trails show progression over time. Clouds move. The foreground might change lighting. This method creates perfectly smooth trails that scream “Photoshop.”
But for most uses, nobody will notice or care. It looks gorgeous and saves huge amounts of time.
Make It Your Own
Once you master the basic technique, experiment with variations.
Try different rotation amounts. Maybe 0.2 degrees for bolder trails. Or 0.05 for subtle hints of movement.
Rotate around off-center anchor points to create asymmetric compositions. Add color grading to enhance the mood. Blend multiple versions together at different opacities.
The technique is just a starting point. Your creative decisions make the image special.
One Warning About File Sizes
Duplicating layers 40+ times creates massive files. A 20MB photo easily balloons to 200MB or more.
Save your work frequently. Photoshop can choke on files this large, especially on older computers. If performance gets sluggish, merge your duplicate layers into a single layer or Smart Object.
Also, close other apps while working. You need all available RAM for smooth performance.
Star trail effects in Photoshop used to require complicated techniques or expensive plugins. Now you know the simple duplicate transform method that works every time. The results look natural enough for most projects and take a fraction of the time real star trail photography requires.