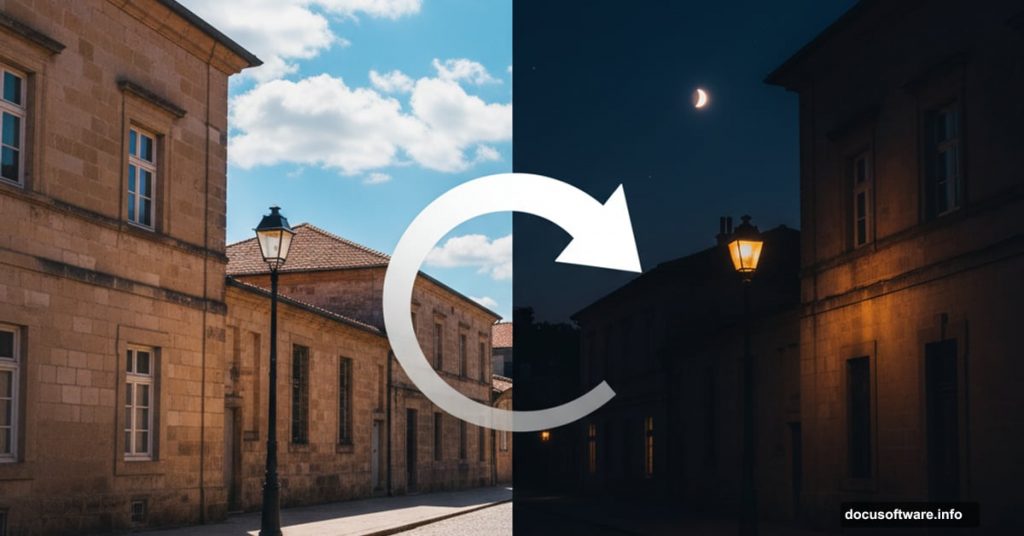
Turning daylight photos into nighttime scenes sounds tricky. But Lightroom makes this classic photography technique surprisingly accessible.
I’ve been teaching “day for night” conversions since my visual effects school days. Back then, this skill was fundamental training. Now anyone can achieve professional results with Lightroom’s powerful tools.
This technique works identically in Lightroom Classic, regular Lightroom, and Adobe Camera RAW. So you can follow along regardless of which version you use.
Start With the Right Mindset
Day for night isn’t just about darkening your image. You’re creating believable artificial lighting that tells a story.
Think about how moonlight actually looks. It casts a cool, bluish tone across everything. Plus, any artificial lights in your scene become the focal points. They create pools of illumination that draw the eye.
The key is balancing these elements so viewers believe they’re looking at a genuine night photo.
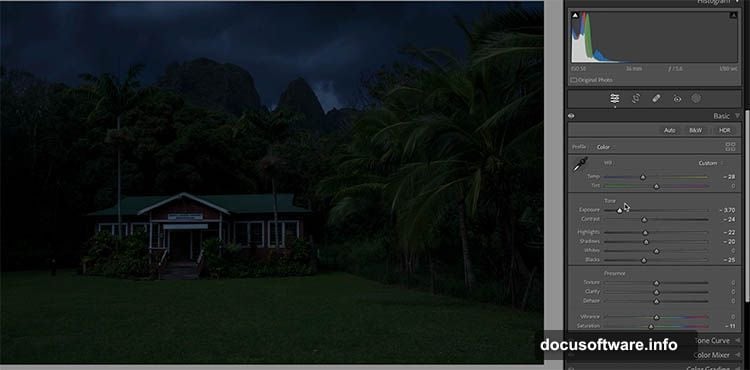
Darken the Entire Scene First
Your first move sets the foundation for everything else. Drop the exposure significantly in Lightroom’s develop module.
Then shift your white balance toward blue. Moonlight has a cooler color temperature than sunlight. This simple change makes the darkened image feel like night instead of just underexposed.
Don’t worry about losing detail yet. You’ll bring back selective areas with artificial lighting in the next steps.
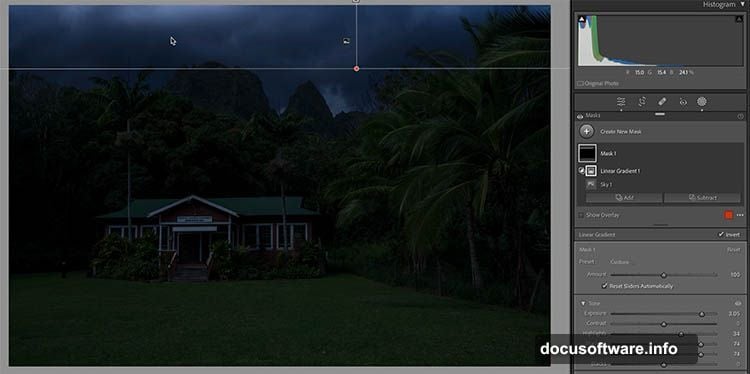
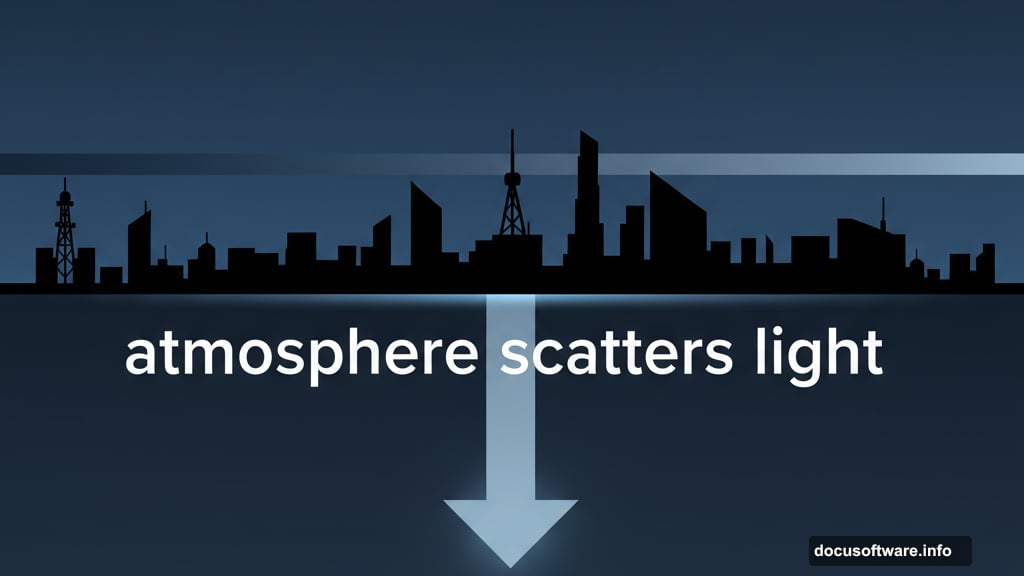
Add Subtle Moonlight to the Sky
Real nighttime scenes often have some ambient light in the sky. Even without a visible moon, the atmosphere scatters light.
Use a linear gradient at the top of your frame. Increase the brightness slightly. This creates the impression of distant light pollution or moonlight above the horizon.
Keep this effect subtle. Too much brightness destroys the nighttime illusion you just created.
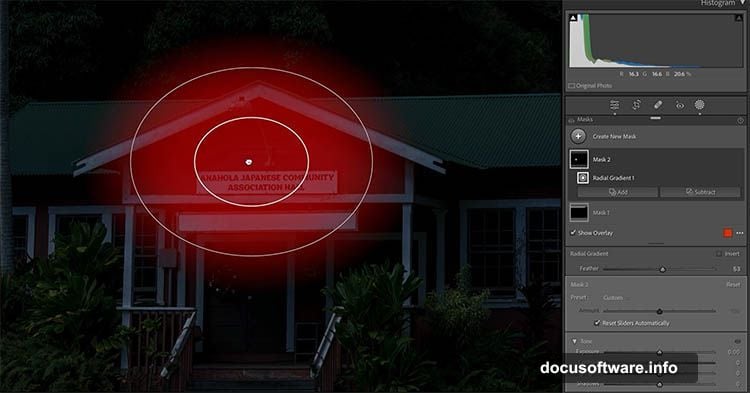
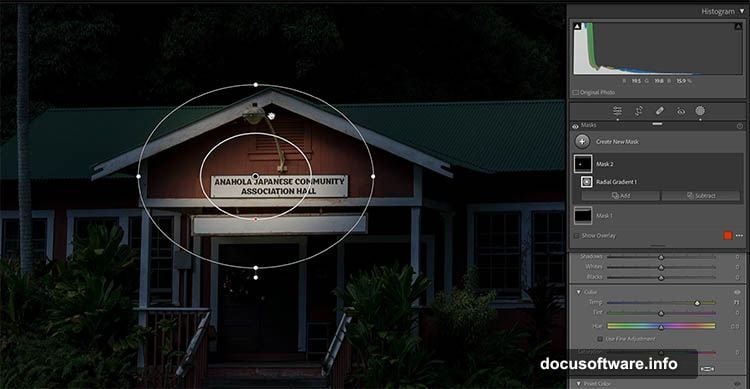
Turn On Practical Lights in Your Scene
Now comes the fun part. Look for light fixtures in your photo. These become your artificial illumination sources.
Use a radial gradient around each light source. Brighten the area to simulate the light spilling outward. Make sure to feather the gradient heavily for soft, realistic lighting.
Then use a bright brush to paint directly on the light bulb itself. This makes the fixture appear switched on and glowing.
Create Ground Light Pools
Light fixtures cast illumination downward onto surfaces below them. This detail sells the realism of your nighttime conversion.
Add another radial gradient on the ground beneath each light. Increase brightness to create a soft pool of light. Heavy feathering is crucial here because light dissipates gradually across surfaces.
Adjust the intensity until it looks natural. Too bright appears artificial, but too dim loses the effect entirely.
Light Up Nearby Surfaces Strategically
Stairs, walls, and other surfaces near your light source need individual attention. Use the brush tool to paint light onto these areas.
But here’s where physics matters. Light travels in straight lines. So surfaces facing away from your light source shouldn’t receive illumination.
Paint light only on surfaces that directly face the light fixture. This selective approach creates dimensional, believable lighting.
Add Shadows to Front-Facing Surfaces
Shadows are just as important as highlights. They create depth and reinforce the lighting direction.
Use a second brush with reduced brightness. Paint shadows on the front faces of stairs or other surfaces that face away from the light.
These shadows also appear under overhangs and architectural features. Anywhere the light can’t reach directly needs shadow treatment.
Paint Edge Lighting on Objects
Objects near light sources get subtle edge lighting on their facing sides. This detail separates good day-to-night conversions from great ones.
Turn on “Detect edges” in your brush settings. Paint the edges of leaves, railings, and other objects facing toward the light source.
This edge lighting adds a professional touch. It mimics how light wraps around three-dimensional objects in real nighttime scenes.
Balance All Your Light Sources
Step back and evaluate your entire image. Do the light pools feel consistent? Does the illumination make physical sense?
Adjust individual gradients and brush strokes until everything harmonizes. Sometimes you need to reduce one area while boosting another.
The goal is creating a cohesive nighttime scene where viewers naturally understand where light comes from and how it behaves.
Consider Adding Window Glow
If your scene includes buildings with windows, lighting them creates additional interest. Use the same radial gradient technique on windows.

Brighten each window slightly. Then add a subtle glow extending outward onto nearby walls or ground. This suggests interior lighting spilling outside.
Window lighting adds life to architectural night scenes. Empty dark windows look abandoned, but lit windows suggest occupancy and activity.
Fine-Tune Your Final Adjustments
Review your conversion one last time. Look for areas that need refinement.
Maybe some shadows are too dark. Perhaps a light pool needs softening. Small adjustments at this stage polish your final result.
This iterative refinement separates acceptable results from stunning ones. Take your time and trust your eye.
These techniques work beyond full day-to-night conversions too. You can use parts of this workflow to turn on individual lights, add shadows, or create edge lighting in regular daytime photos.
I find this work oddly relaxing. There’s something satisfying about crafting light and shadow until everything clicks. Plus, you’re creating something impossible – a nighttime version of a daytime scene that never existed.
Try this technique on your own photos. Start with images that have existing light fixtures or architectural features. Those elements give you natural focal points for your artificial lighting.
The more you practice, the more intuitive the process becomes. Soon you’ll instinctively know where to add light, where to deepen shadows, and how to balance everything for maximum impact.