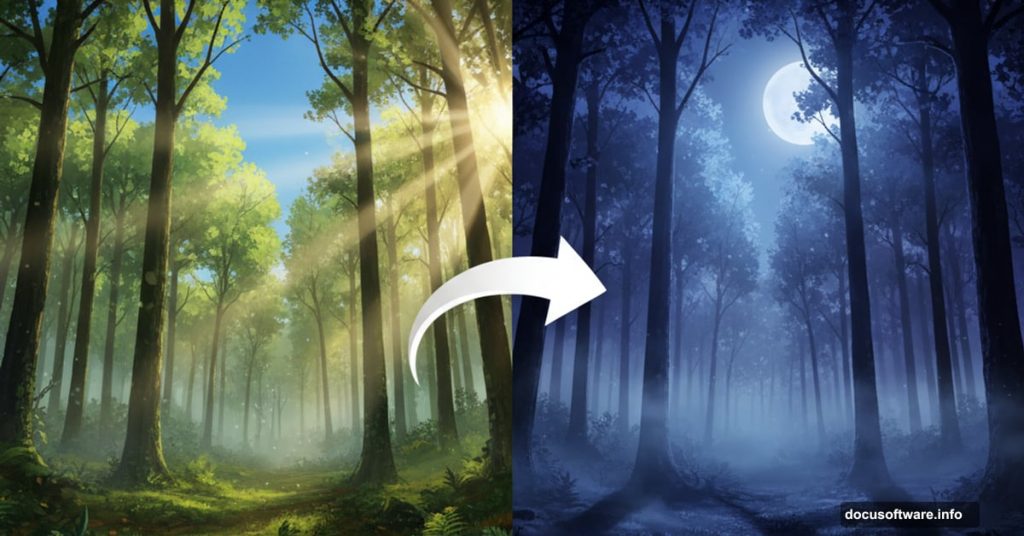
Want to transform an ordinary forest photo into something straight out of a fantasy novel? This technique works better than you’d think.
Most photo manipulations feel fake because people skip the color grading. But this tutorial nails it. You’ll learn how to extract complex forest details, shift daylight to moonlight, and add atmospheric fog that actually looks believable.
Plus, the techniques work for way more than just forests. Once you understand these blending methods, you can apply them to portraits, landscapes, or any moody scene you’re creating.
Grab These Resources First
You’ll need specific stock images to follow along. Here’s what works:
- Model photo from mjranum-stock
- Forest background by HumbleBeez
- Ivy elements from Black-B-o-x
- Dead tree images from gd08 and Pixabay
- Sky textures from Pixabay
- Fog and light ray brushes from Brusheezy
Having the right starting images matters more than most people realize. A bright, sunny forest gives you way more flexibility than a cloudy one. You can always add darkness. Taking it away is harder.
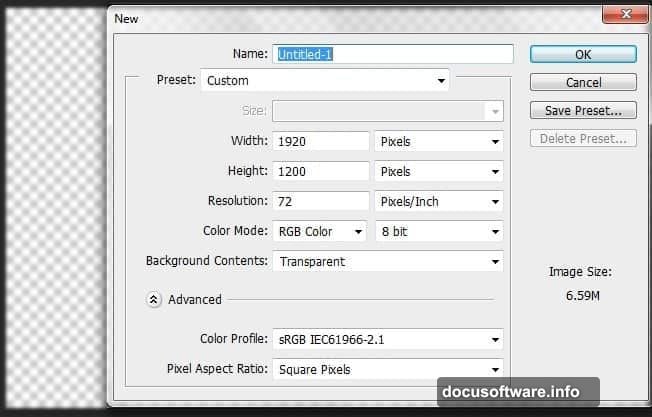
Set Up Your Canvas
Start with a landscape document: 1920 x 1200 pixels with a transparent background.
Why transparent? You’ll build up layers of atmosphere and color. Starting with white or black locks you into decisions too early. Transparent lets you adjust the base tone later if needed.
Extract the Forest Without Losing Detail
Open your forest stock image. Notice the bright sky? That’s gotta go.
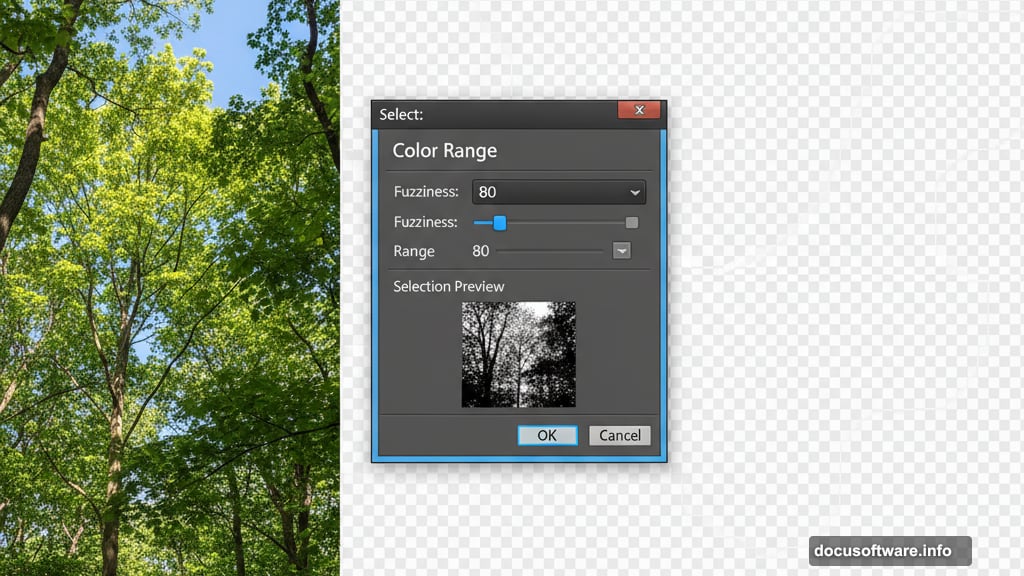
Here’s the smart way to handle it. Select the entire image with Ctrl + A, then navigate to Select > Color Range. This tool is ridiculously good for complex extractions.
Hold Shift and click on the sky areas. Keep clicking until the forest parts turn black in the preview. Watch your Fuzziness setting though. Keep it under 80 or Photoshop starts grabbing parts you want to keep.
Color Range beats the Magic Wand for forests and trees. It understands the subtle color variations in leaves and branches. Plus, it preserves those tiny details that make the final piece look real instead of cut out.
Shift From Daylight to Darkness

Paste your extracted forest into the main document. Resize it to fill the canvas but leave room at the top for sky later.
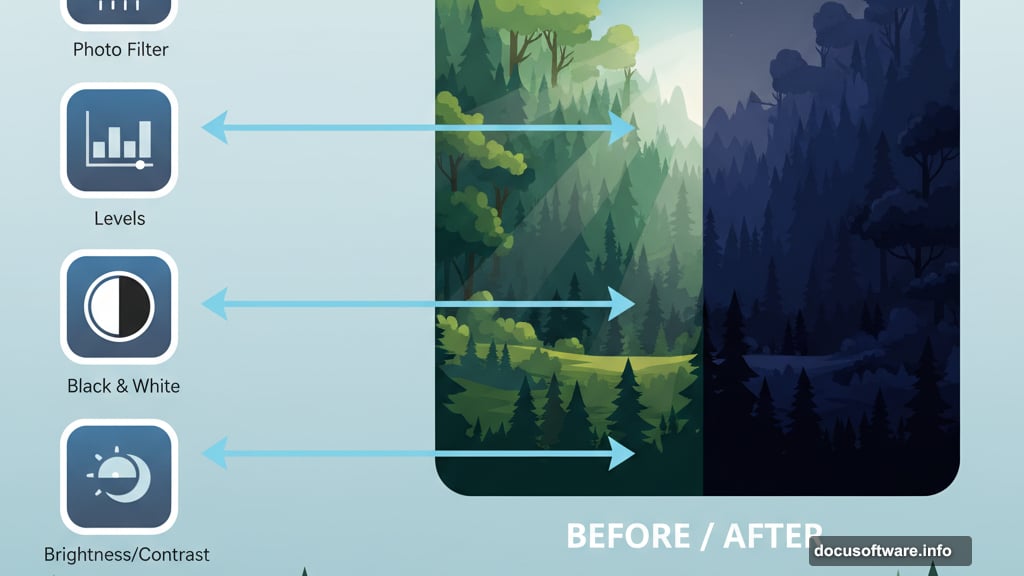
Now comes the color transformation. Add these adjustment layers in order, each clipped to the forest layer:
- Brightness/Contrast – Pull brightness way down
- Levels – Crush the blacks, lift midtones slightly
- Black & White – Removes color cast
- Photo Filter – Adds back controlled blue tone
Why this specific order? Each layer builds on the last. Brightness first removes the daylight feel. Levels gives you shadow depth. Black & White creates a neutral base. Photo Filter introduces your color theme without fighting existing tones.
The result should look like late twilight, not pure night yet.
Add Directional Shadow
Create a new layer above everything. Grab a soft black brush at low opacity.
Paint shadows on the left and bottom portions of the forest. Build up gradually. Better to make multiple light passes than one heavy stroke.
Switch this layer’s blend mode to Soft Light at 75% opacity. Soft Light darkens without killing all the detail underneath. It’s way more forgiving than Multiply for this kind of work.
Lock In Your Color Theme
Dark blue works perfectly for mystic forest scenes. It suggests moonlight without being obvious about it.
Go to Layer > New Fill Layer > Solid Color. Choose #4273b0 – a deep, slightly desaturated blue. Change the blend mode to Color with 77% opacity and 78% fill.
This step is magic. The Color blend mode replaces hues while preserving luminosity. Your forest keeps its depth and detail but takes on that moonlit quality.
But some areas look too blue now. Add a layer mask to the color fill. Paint black on the mask wherever the effect is too strong. Usually that’s the brightest areas and anything close to the viewer.
Build Atmospheric Fog
Download fog brushes from Brusheezy. You need variety – some wispy, some dense.
Create a new layer. Grab a fog brush at large size. Use white or very light blue (#c5d5e8 works great). Paint fog in the mid-ground and background.

Here’s the key most people miss: fog isn’t uniform. It pools in low areas and thins out higher up. It’s denser farther away and almost transparent close by.
Build it up with multiple layers. Each layer should use a different brush shape and slightly different color. Vary your opacity between 20-50% for each stroke.
Add Forest Floor Details
This is where dead trees and ivy come in. Place twisted branches in the foreground. They create depth and frame your scene.
For each element you add, repeat the color grading process. Clip adjustment layers to each new piece. Match the blue tone and darkness level to your forest base.
Ivy works great climbing up trees or hanging from branches. It adds organic movement and helps connect different elements visually.
Use layer masks aggressively. Blend the edges where new elements meet the background. Hard edges scream “fake composite.”
Create Light Rays
Light rays breaking through fog sell the atmospheric effect like nothing else.
Grab a light ray brush from your resources. Create a new layer above the fog. Paint rays coming from a single light source – usually top right or top left.
Use white at very low opacity. Maybe 10-15% to start. The rays should be barely visible. If they’re obvious, they look cheesy.
Change this layer’s blend mode to Screen. Reduce opacity until the effect is subtle. You want viewers to feel the light more than see it directly.
Balance the Overall Tone
Step back and look at the whole piece. Does anything feel too light or too dark?
Add a Curves adjustment layer at the very top of your stack. Create a subtle S-curve. This adds contrast without crushing your carefully built shadows.
If the blues feel too strong, add a Hue/Saturation adjustment. Drop saturation by 5-10%. Overly saturated blues look digital and harsh.
Final Atmospheric Touch
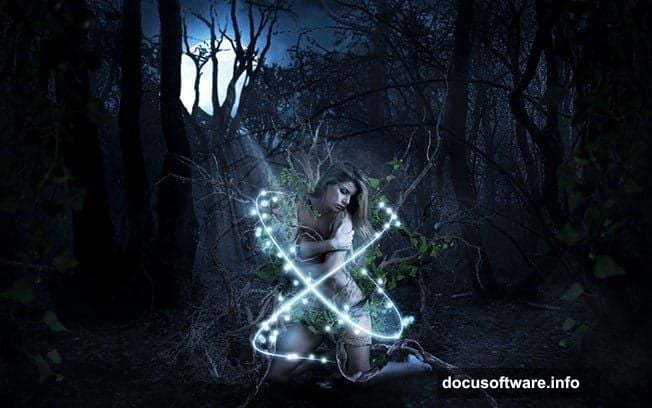
Create one last fog layer at the very top. Use a huge soft brush with light blue. Paint a gentle haze across the entire upper portion of the scene.
Set this to Screen blend mode at maybe 15% opacity. It unifies everything and adds that final layer of atmosphere.
This top-level haze mimics how our eyes see distance. It makes the whole scene feel more cohesive and real.
Why This Technique Actually Works
Most photo manipulations fail because artists try to force mismatched elements together. This method works differently.
You’re not just stacking images. You’re rebuilding the lighting and atmosphere from scratch. Every element gets adjusted to match a consistent light source and color palette.
The Color Range extraction preserves detail. The layered color grading creates depth. The atmospheric fog ties everything together. Each step supports the others.
Plus, this isn’t just for forests. These same principles work for any scene where you need to shift mood dramatically. Urban scenes, portraits, product shots – the workflow adapts.
When It Goes Wrong
Common mistakes to watch for:
Your fog looks flat? Add more layers with varied opacity and color. Real fog has depth and movement.
Colors look muddy? You probably adjusted brightness before removing color casts. Always neutralize color first, then reintroduce it deliberately.
Elements don’t blend? Check your shadows. Every object needs shadow that matches your light direction. Even subtle shadow makes a huge difference.
Scene feels empty? Add more foreground elements. Dead branches, rocks, or ground vegetation help establish scale and depth.
Practice Makes This Faster
First time through this takes hours. That’s normal. You’re learning both technical skills and artistic judgment.
But after a few attempts, you’ll memorize the adjustment layer order. You’ll develop intuition about fog placement. You’ll spot color cast issues immediately.
The technique becomes muscle memory. Then you can create these atmospheric scenes in under an hour. That’s when it gets really fun – when you can execute your vision quickly instead of fighting with tools.
Start with a simple forest. Master the basics. Then experiment with different environments and moods. Each scene teaches you something new about light and atmosphere.
