Want to build a stunning neon cyborg scene but feel intimidated by complex Photoshop techniques? You’re not alone. Most tutorials overcomplicate the process with unnecessary steps.
This guide breaks down exactly how to create a professional-looking cyborg composition. We’ll blend futuristic cityscapes with robotic elements, add dramatic lighting effects, and finish with that perfect dystopian atmosphere. Plus, you’ll learn the specific tools and settings that actually matter.
No fluff. No confusing jargon. Just practical steps that work.
What You’ll Need Before Starting
First, gather your resources. You’ll need several images to complete this composition.
A nighttime cityscape works best for the background. Look for images with existing light sources like neon signs or street lights. These give your scene instant atmosphere and make blending easier.
Next, find a high-quality robot or cyborg image. The higher the resolution, the better your final result. You’ll also need texture overlays, rain brushes, and light ray effects. Many free resources exist online, but premium packs often save time.
Finally, make sure you’re working with Photoshop CC or later. Older versions lack some filters we’ll use. However, you can adapt most techniques for earlier versions with minor adjustments.
Setting Up Your Canvas
Create a new document with specific dimensions for best results. Go to File > New and input these settings.
Set width to 3080 pixels and height to 3850 pixels. This gives you plenty of room to work while maintaining professional print quality. Choose 300 DPI resolution for crisp details. RGB color mode works perfectly for digital display.
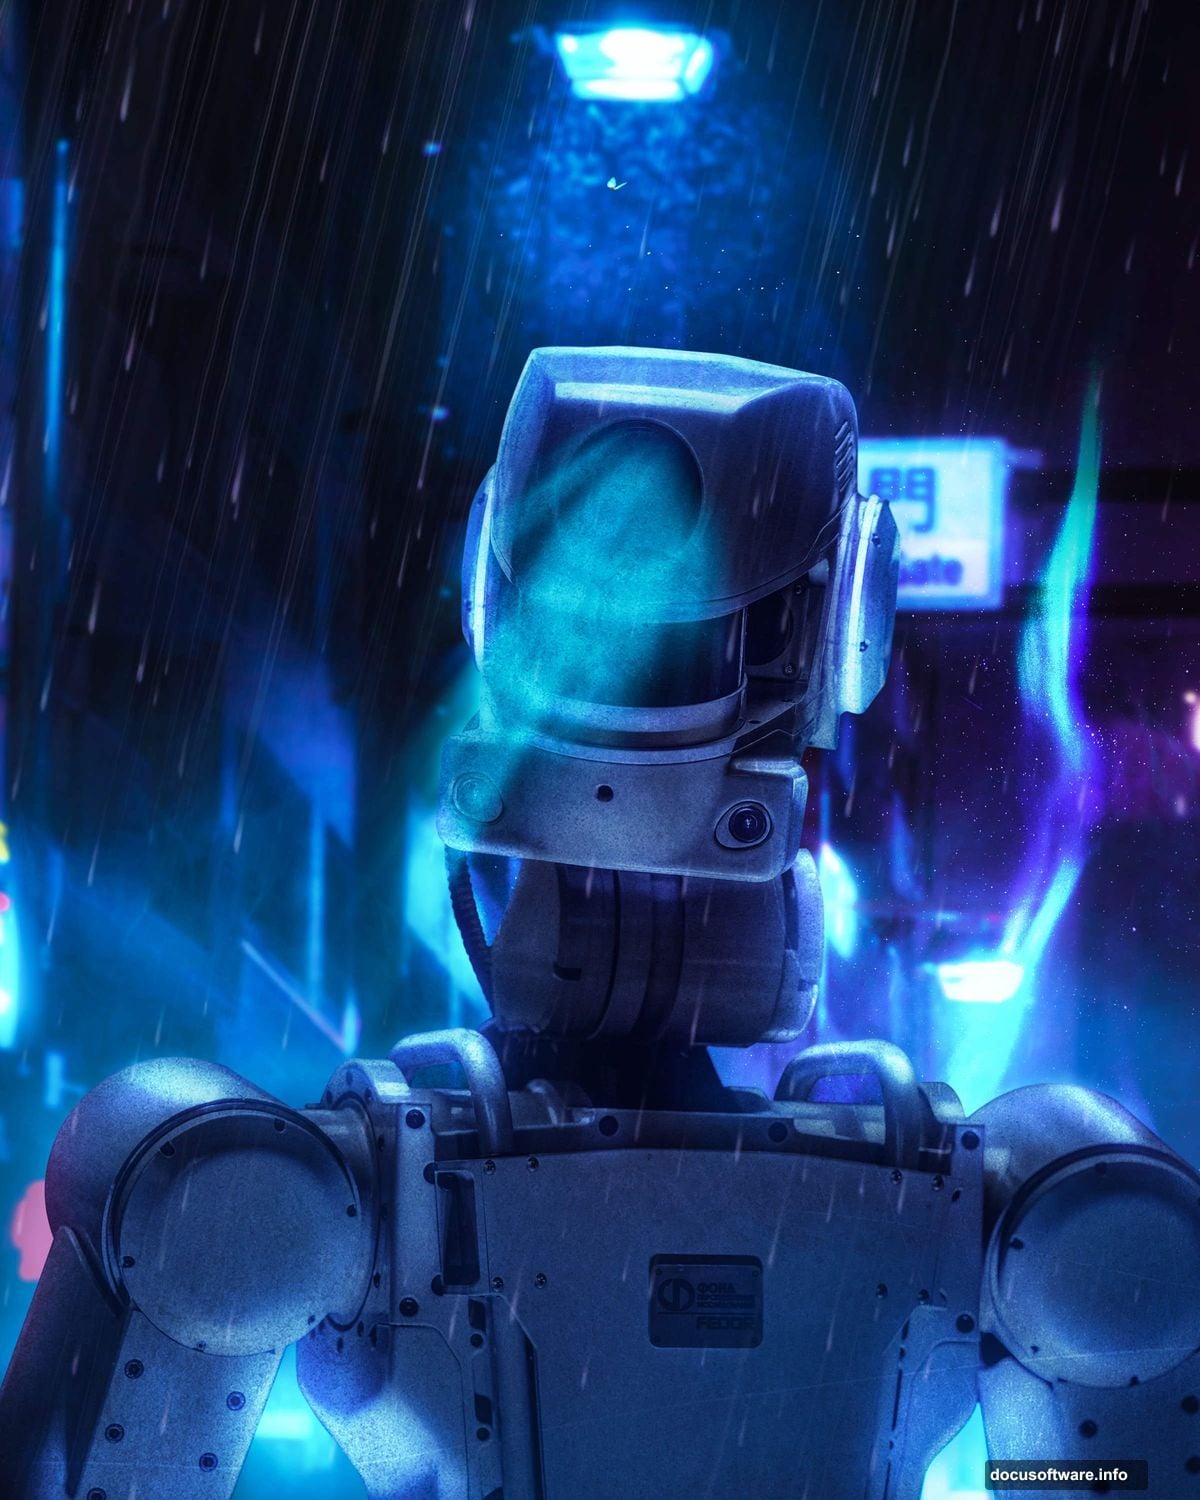
Start with a transparent background. This flexibility helps later when you’re blending elements together. You can always add background colors or gradients after placing your main elements.
These dimensions might seem large. But trust me, you’ll appreciate the extra canvas space when positioning multiple elements and adding effects.
Building Your Cyberpunk Foundation
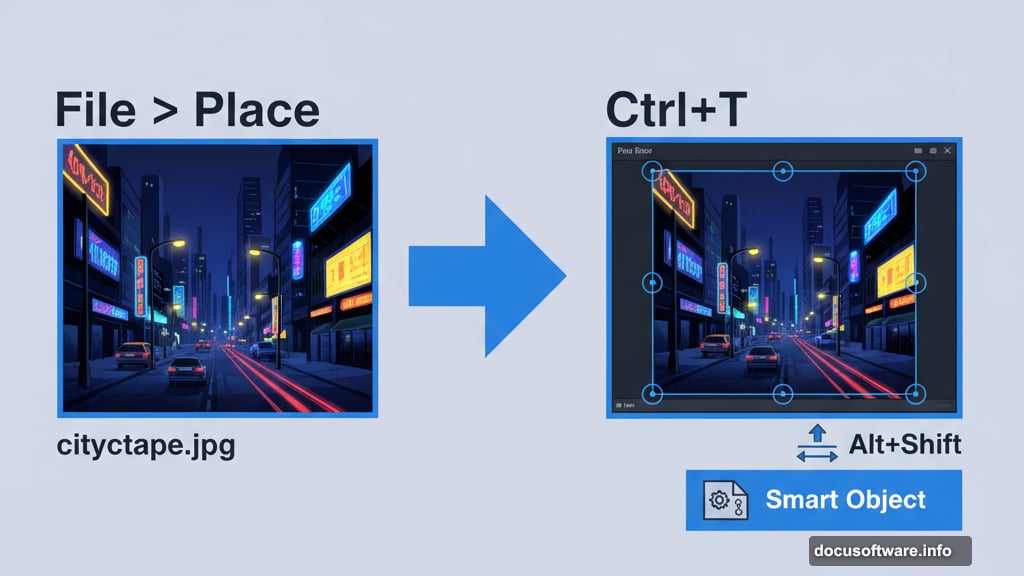
Place your cityscape image first. Go to File > Place and select your city photo. Then use the transform tool (Ctrl/Cmd + T) to position and scale it properly.
Hold Alt + Shift while dragging corners to resize proportionally. In Photoshop CC, Alt alone maintains aspect ratio. Right-click and convert the layer to a Smart Object. This preserves image quality through future edits.
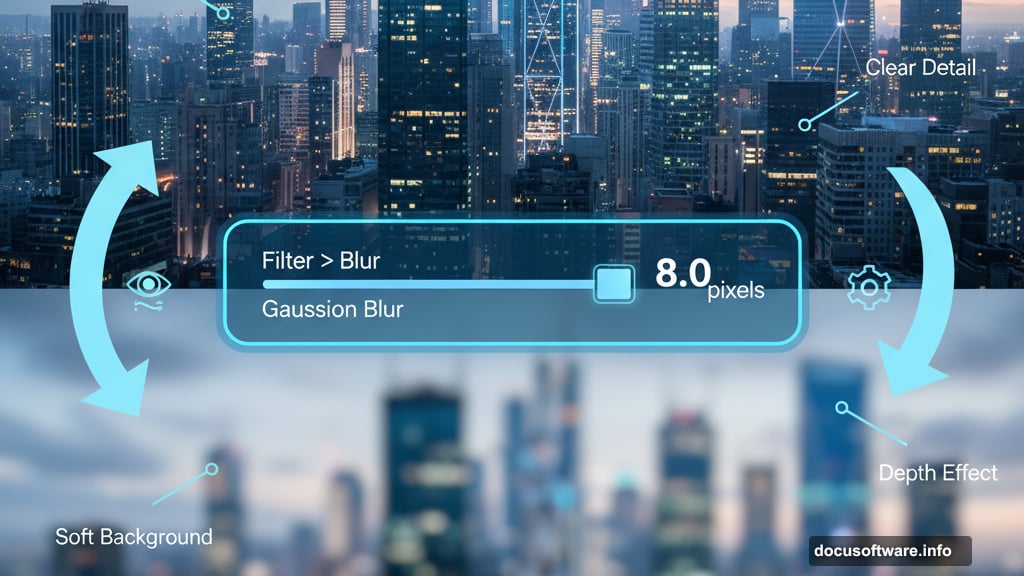
Now add some atmospheric depth. Go to Filter > Blur > Gaussian Blur and set radius to 8.0 pixels. This softens the background slightly and makes foreground elements pop. Smart Objects let you adjust this blur later if needed.
The slight blur mimics how cameras capture depth of field. Your eyes naturally focus on sharp elements while blurred areas recede. This simple trick instantly adds professional polish to your composition.
Shaping Light and Shadow
Lighting makes or breaks cyberpunk scenes. Start with a Curves adjustment layer to control overall brightness.
Press Ctrl/Cmd + I to invert the layer mask. This hides the adjustment initially. Then grab a soft round brush (B) with white foreground color. Paint on areas where light naturally hits buildings and surfaces.
Think about light sources in your scene. Where do neon signs cast glow? Which surfaces catch streetlight? Paint those areas to reveal your Curves adjustment. This targeted approach creates realistic lighting without affecting dark areas.
Next, add another Curves layer for shadows. Again, invert the mask and paint with white on dark regions that need deepening. This pushes your value range further and adds dramatic contrast.
Remember, cyberpunk aesthetics love extreme contrast. Don’t be shy about making darks darker and lights brighter.
Punching Up the Atmosphere
Add a Brightness/Contrast adjustment layer now. Bump contrast slightly to emphasize the difference between light and dark areas.
However, don’t go overboard here. Too much contrast crushes details in shadows and blows out highlights. Subtle adjustments work better than extreme changes.
Create a new layer and change blend mode to Linear Dodge (Add). This blend mode creates glowing light effects. Select a vibrant blue color like #2367c1 using the color picker.
Paint light rays streaming through your scene with a soft brush. Start with low opacity and build up intensity gradually. Linear Dodge makes colors appear to emit light naturally. This simulates neon glow and atmospheric haze perfectly.
Focus light rays near your light sources. They should appear to emanate from neon signs, streetlights, or windows. This grounds your effects in reality even within a fantastical scene.
Integrating Your Cyborg Subject
Now comes the fun part. Open your cyborg or robot image in a separate window.
Use the Lasso Tool (L) to select your subject. Don’t worry about perfect precision yet. Get close to the edges but leave a little breathing room. You can refine the selection later with better tools.
After creating your selection, copy (Ctrl/Cmd + C) and paste (Ctrl/Cmd + V) into your main composition. Then use the transform tool (Ctrl/Cmd + T) to position and scale your cyborg.
Again, hold Alt + Shift while resizing to maintain proportions. Place your subject slightly off-center for more dynamic composition. Dead-center placement feels static and boring.
Consider your cyborg’s position relative to light sources. Where does light hit metal surfaces? These details matter for realistic integration.
Matching Your Cyborg to the Scene
Your cyborg probably doesn’t match the background lighting yet. Fix this with another Brightness/Contrast adjustment layer.
Right-click the adjustment layer and select Create Clipping Mask. This constrains the adjustment to only affect your cyborg layer below. Now you can tweak brightness and contrast without touching the background.
Darken your subject if the background is dim. Brighten it for daytime scenes. The goal is making the subject feel like it exists in the same lighting environment as everything else.
Pay special attention to the edges. If your cyborg has bright edges against a dark background, it looks cut out. Add subtle darkening around edges to embed the subject naturally.
Adding Texture and Grit
Cyberpunk worlds feel weathered and used. Pristine surfaces don’t fit the aesthetic. So add texture overlays to introduce visual interest.
Place your first texture image above your cyborg layer. Change the blend mode to Overlay or Soft Light. These modes let texture details show through while maintaining underlying colors.
Adjust opacity until the effect feels right. Usually somewhere between 20-40% works well. Too much texture overwhelms the image. Too little disappears entirely.

You can use photos of rust, scratches, or abstract patterns. Experiment with different textures until you find combinations that work. Sometimes unexpected textures create the coolest effects.
Consider adding a second texture layer over the entire composition. This unifies all elements with a consistent surface quality. Again, keep opacity low for subtlety.
Creating Atmospheric Rain
Rain instantly adds mood and drama. Plus it helps integrate foreground and background elements through repeated patterns.
Create a new layer and fill it with black. Go to Filter > Noise > Add Noise and set amount high. Choose Gaussian distribution and enable Monochromatic. This creates a grainy texture base.
Next, apply Filter > Blur > Motion Blur. Set angle to vertical (90 degrees) and increase distance until you see clear rain streaks. The blur transforms noise into falling rain.
Change blend mode to Screen. This makes black areas transparent while white streaks become visible rain. Adjust opacity to control rain intensity.
For variety, duplicate the rain layer and apply different Motion Blur distances. This creates rain at multiple depths, simulating closer and farther droplets. Very close rain appears more blurred while distant rain stays sharper.
Painting Light Rays and Atmosphere
Remember those ray brushes in your resource pack? Time to use them. Create a new layer and set blend mode to Linear Dodge (Add) or Screen.
Select a bright color that matches your scene’s color palette. Usually cool blues or warm oranges work well. Then choose a ray brush and stamp it into your scene.
Position rays so they appear to stream from light sources. Rotate brushes (using the bracket keys) to angle rays naturally. Lower opacity lets you layer multiple rays for complex lighting effects.
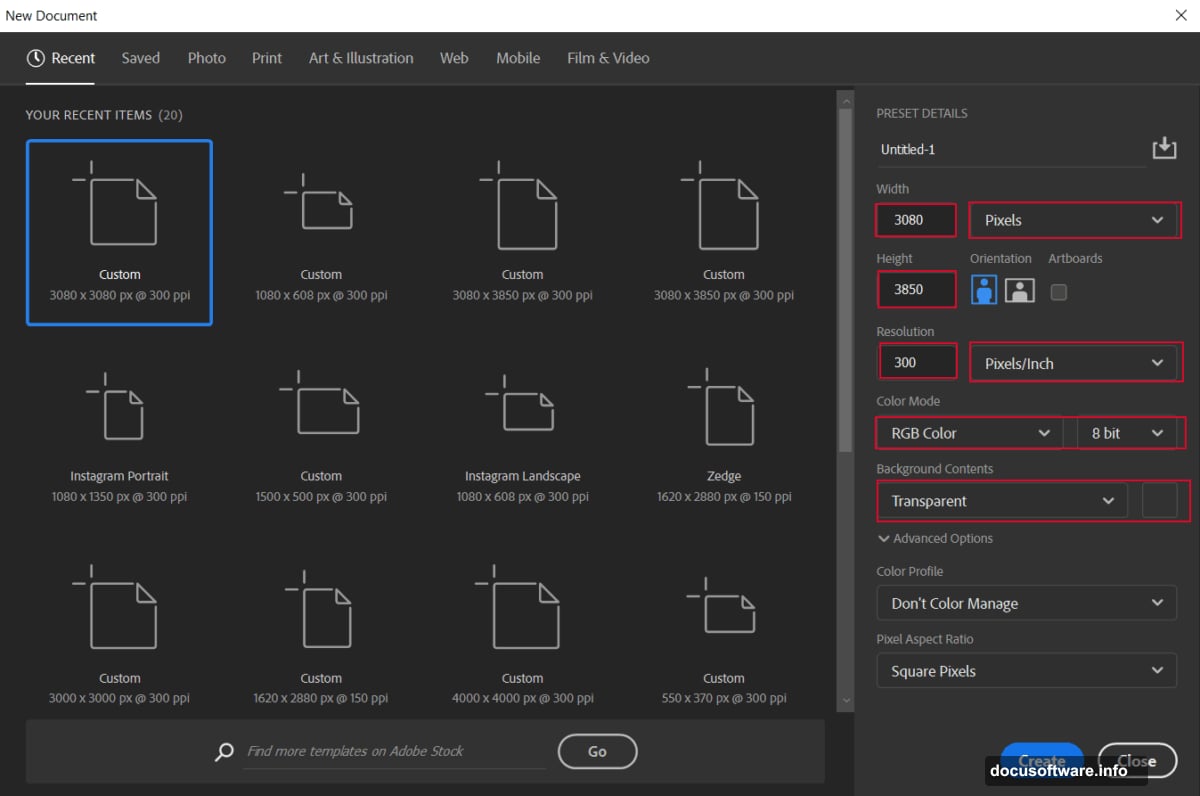
These rays simulate atmospheric haze catching light. They add depth and direct viewer attention toward important areas. Place the brightest, most prominent rays near your main subject.
You can also use a large soft brush on the same layer to paint general glow around bright areas. This reinforces the idea that light spills into surrounding space.
Enhancing With Camera Raw Filter
Almost done. Now we’ll apply Camera Raw filter for final color grading and polish.
Select all visible layers and press Ctrl/Cmd + Alt/Option + Shift + E. This creates a merged copy of everything on a new layer. Then go to Filter > Camera Raw Filter.
Start with the Basic panel. Adjust exposure, contrast, highlights, shadows, whites, and blacks to perfect your tonal range. Usually I decrease highlights slightly and boost shadows to recover detail.
Then move to the Color panel. Tweak temperature toward blue for cooler cyberpunk vibes or orange for warmer tones. Adjust vibrance to intensify colors without oversaturating skin tones.
The Effects panel adds finishing touches. Vignette darkens edges and focuses attention inward. Clarity adds micro-contrast and crispness. Dehaze cuts through fog and increases contrast simultaneously.
Finally, check the Detail panel. Add slight sharpening to crisp up your final image. However, be careful not to over-sharpen or you’ll introduce artifacts and halos.
Common Mistakes to Avoid
New creators often make predictable errors with composite images. Let’s address the biggest ones.
First, don’t skip proper selection refinement. Rough selections with visible background remnants look amateurish. Spend time on clean edges. The Select and Mask workspace (Alt/Option + Ctrl/Cmd + R) helps tremendously with edge refinement.
Second, watch your lighting consistency. If light comes from the right in your background, it should also hit your subject from the right. Conflicting light directions immediately reveal composites as fake.
Third, color matching matters enormously. If your background has warm orange tones but your subject appears cool blue, they’ll never integrate properly. Use adjustment layers to harmonize color temperatures across all elements.
Fourth, don’t over-process your image. More filters don’t equal better results. Sometimes subtle adjustments outperform heavy-handed effects. If something looks fake, you probably went too far.
Taking Your Scene Further
This basic technique creates solid cyberpunk scenes. But you can push further with additional elements.
Consider adding more subjects or objects. Multiple cyborgs or humans create narrative possibilities. Interactive elements like reaching hands or exchanged objects tell stories.
Particle effects add movement and energy. Sparks, embers, or glowing fragments suggest action and danger. These work especially well near industrial or damaged areas in your composition.
Typography and graphic elements enhance the cyberpunk aesthetic. Add fictional corporate logos, warning signs, or holographic interfaces. These environmental details build believable worlds.
Experiment with color grading styles too. Teal and orange remains popular but limiting. Try unexpected color combinations for unique results. Purple and gold creates regal atmospheres. Green and magenta feels toxic and synthetic.
Why This Technique Works
This approach succeeds because it follows how light actually behaves. We’re not randomly throwing effects onto images. Instead, we’re simulating real-world phenomena digitally.
Smart Objects maintain flexibility throughout the process. You can revisit and adjust blur amounts, colors, or positioning without starting over. This non-destructive workflow saves enormous time during revisions.
Layer blend modes mathematically combine pixels in specific ways. Understanding which mode produces which effect lets you predict results. Linear Dodge adds light. Multiply darkens. Overlay maintains brightness while adding contrast.
The Camera Raw Filter replicates the color grading and adjustments professional photographers perform. These controls give you film-like color palettes and tonal ranges impossible to achieve otherwise.
So this isn’t just throwing filters at images hoping something looks cool. It’s deliberate use of tools designed for specific visual results.
Your Cyberpunk Journey Starts Now
Creating compelling cyborg scenes takes practice. Your first attempt probably won’t look like professional artwork. That’s completely normal.
The key is understanding why each step matters. When you grasp the underlying principles, you can adapt techniques to any image. You’re not memorizing recipes. You’re learning to see and manipulate light digitally.
Start simple with fewer elements. Master blending a single subject into a background before adding complex effects. Build your skills progressively rather than attempting everything simultaneously.
Save your work frequently at different stages. This lets you backtrack if you take a wrong turn. Nothing feels worse than losing hours of work to an accidental destructive edit.
Most importantly, experiment fearlessly. Digital art costs nothing to fail. Try wild color combinations. Place subjects in unexpected positions. Break rules deliberately once you understand them. That’s where interesting work lives.
Your cyberpunk masterpiece awaits. Start building it now.
Post Title: Create Cyborg Scenes in Photoshop: Complete Guide
Meta Description: Want to build a stunning neon cyborg scene but feel intimidated by complex [Photoshop](https://www.adobe.com/products/photoshop.html) techniques? You’re not alone. Most tutorials
