Photoshop‘s latest features make creating complex urban landscapes easier than you’d think. No need for advanced 3D modeling or hours of manual masking.
This tutorial shows you how to build a drone-friendly metropolis inspired by New York’s skyline. We’ll combine stock photos with Photoshop’s Sky Replacement tool, blend celestial elements, and add atmospheric effects. The whole process takes about 30 minutes once you understand the workflow.
Let’s turn a basic cityscape into a sci-fi dreamscape.
Start With Your Canvas
Create a new document in Photoshop. Go to File > New and set these dimensions:
- Width: 3080px
- Height: 3850px
- Resolution: 300 DPI
- Color Mode: RGB, 8-bit
- Background: Transparent
These proportions work great for vertical compositions. Plus, the high resolution keeps details sharp when you zoom in or crop later.
Build Your Base City Layer
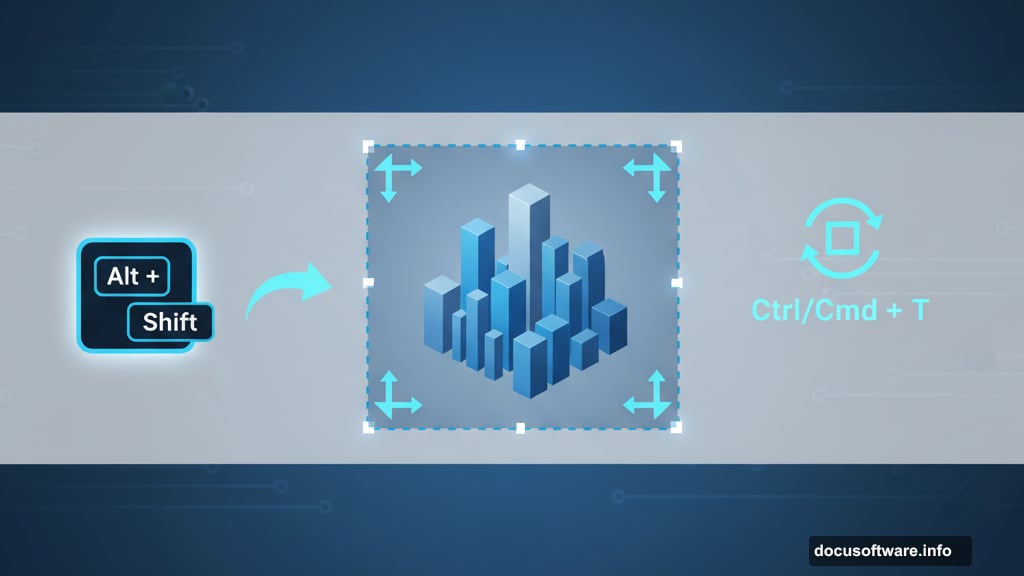
Place your city stock photo by going to File > Place. Position it using the Transform tool (Ctrl/Cmd + T).
Here’s a pro tip. Hold Alt + Shift while dragging corner handles to resize proportionally. In Photoshop CC, you only need Alt. This keeps your cityscape from getting distorted.
Once positioned, rasterize the layer so you can edit it freely. Right-click the layer and select Rasterize.
Replace the Sky Instantly
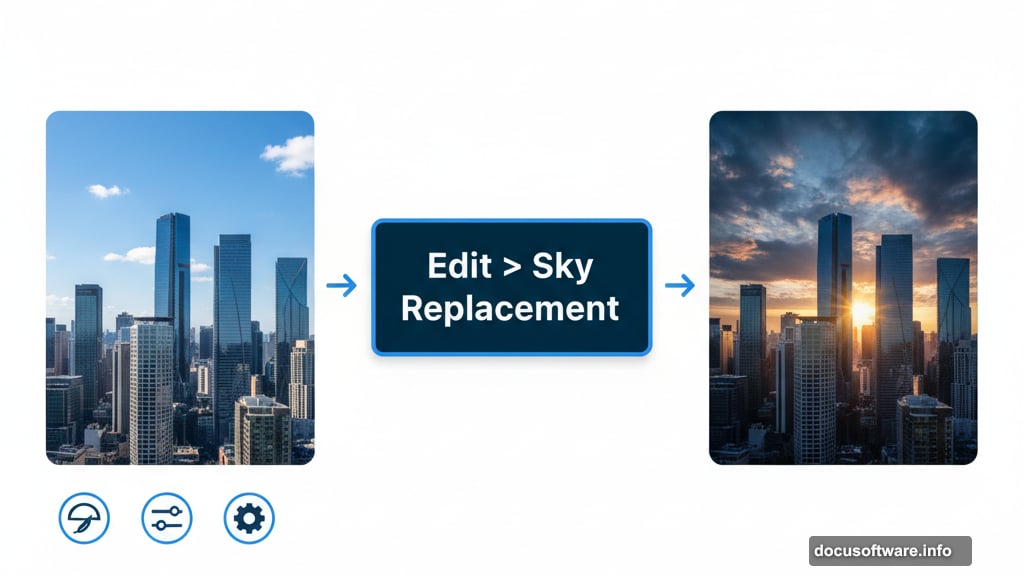
Photoshop’s Sky Replacement feature saves massive amounts of time. Previously, you’d spend 20 minutes masking clouds and buildings manually.
Navigate to Edit > Sky Replacement. Browse the sky presets until you find one that matches your vision. The algorithm automatically detects the horizon and blends the new sky with your cityscape.
Hit OK when you’re satisfied. The feature creates multiple adjustment layers automatically. You can tweak them individually later if needed.
Adjust City Colors and Mood
Add a Hue/Saturation adjustment layer. Click the adjustment layer icon at the bottom of your Layers panel.
This lets you shift the entire color palette without permanently altering pixels. Try cooling down the city tones to create a nighttime atmosphere. Drag the Hue slider left slightly and reduce Saturation by 10-15%.
The adjustments feel subtle but make a big difference in the final mood.
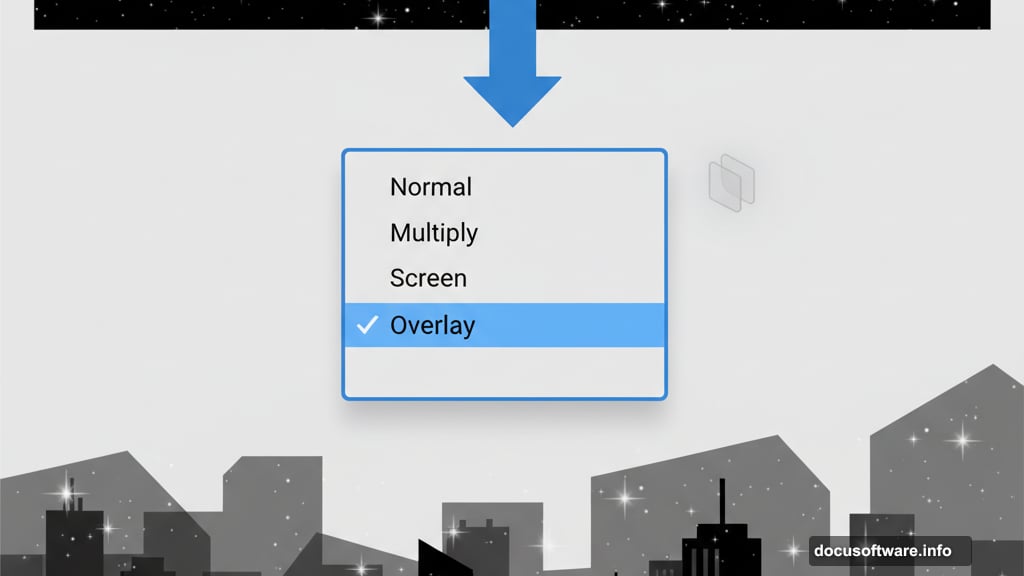
Layer in the Night Sky
Place your star field image the same way you added the city. File > Place, then transform to fit.
Change the blend mode to Screen. This makes black areas transparent while keeping bright stars visible. It’s the fastest way to composite celestial elements.
Create a layer mask by clicking the mask icon at the bottom of your Layers panel. Select a soft round brush with black as your foreground color. Paint over the bottom portion of the stars where they overlap the city. This creates a natural fade effect.
Fine-Tune Star Visibility
Add a Curves adjustment layer clipped to your stars. Right-click the Curves layer and select Create Clipping Mask.
Drag the curve upward in the highlights to brighten stars. Pull down slightly in the shadows to deepen space between them. This increases contrast and makes individual stars pop more.
The clipped adjustment only affects the stars layer. Your city remains untouched.
Add a Dramatic Moon
Place your moon stock photo and resize it with the Transform tool. Position it where you want focus drawn.
Change blend mode to Screen with 50% opacity. This creates a glowing effect without making the moon look pasted on.
Here’s where it gets interesting. Right-click the moon layer and select Blending Options. In the Blend If section, hold Alt and drag the Underlying Layer slider. Move it from 44 to 188.
This advanced blending removes the darkest tones from your moon layer based on what’s underneath. The result looks naturally integrated with your sky.
Create Atmospheric Depth
Download cloud brushes or use Photoshop’s default cloud presets. Create a new layer and set it to Screen or Lighten blend mode.
Paint wispy clouds in the mid-ground between your city and sky. Use varying opacity (30-60%) for different cloud densities. Layer multiple strokes for realistic depth.
This technique adds atmosphere that makes the scene feel more three-dimensional. Foreground, mid-ground, and background separation matters in any composite.
Add Comet Streaks for Motion
Create another new layer. Select a star brush or use a small hard brush manually.
Paint bright dots where you want comets to originate. Then use the Smudge tool or Motion Blur filter to stretch them into streaks. Angle them so they appear to fall toward your city.
Keep streaks subtle. Two or three well-placed comets create drama without overwhelming your composition.
Final Polish With Camera Raw
Flatten your image or create a stamped layer (Ctrl/Cmd + Alt + Shift + E). This combines all visible layers into one new layer while preserving the originals below.
Go to Filter > Camera Raw Filter. This opens Adobe’s powerful color grading interface.
Boost Clarity by 10-15 to enhance mid-tone contrast. Add 5-10 points of Vibrance to make colors pop. Slightly increase Dehaze to cut through any muddiness from multiple blend modes.
In the Color Grading panel, add cool blue tones to shadows and warm orange to highlights. This creates a cinematic split-tone effect that elevates the entire scene.
Why This Workflow Works
Traditional compositing requires extensive masking and manual adjustments. Blend modes and clipping masks automate much of that work.
Screen blend mode eliminates tedious selections when adding light elements like stars and moons. Layer masks give you precise control over transitions. And Camera Raw provides industry-standard color grading without third-party plugins.
The key is building your scene in logical layers. Sky first, then celestial objects, then atmospheric effects. Each layer interacts with those below it, creating depth through stacking rather than complex selections.
Beyond the Basics
Once you master this workflow, experiment with variations. Try adding flying vehicles using the same Screen blending technique. Place small human figures on rooftops for scale reference.
You can also create multiple versions by swapping sky replacements or adjusting color grades. The non-destructive workflow means you’re never locked into decisions.
Urban sci-fi scenes offer endless creative possibilities. The techniques here apply to any composite work where you’re blending photographic elements. Master the fundamentals and you’ll speed through projects that used to take hours.