Creating emotional photo composites requires more than dropping images onto a canvas. You need precise techniques that transform separate elements into cohesive, believable scenes.
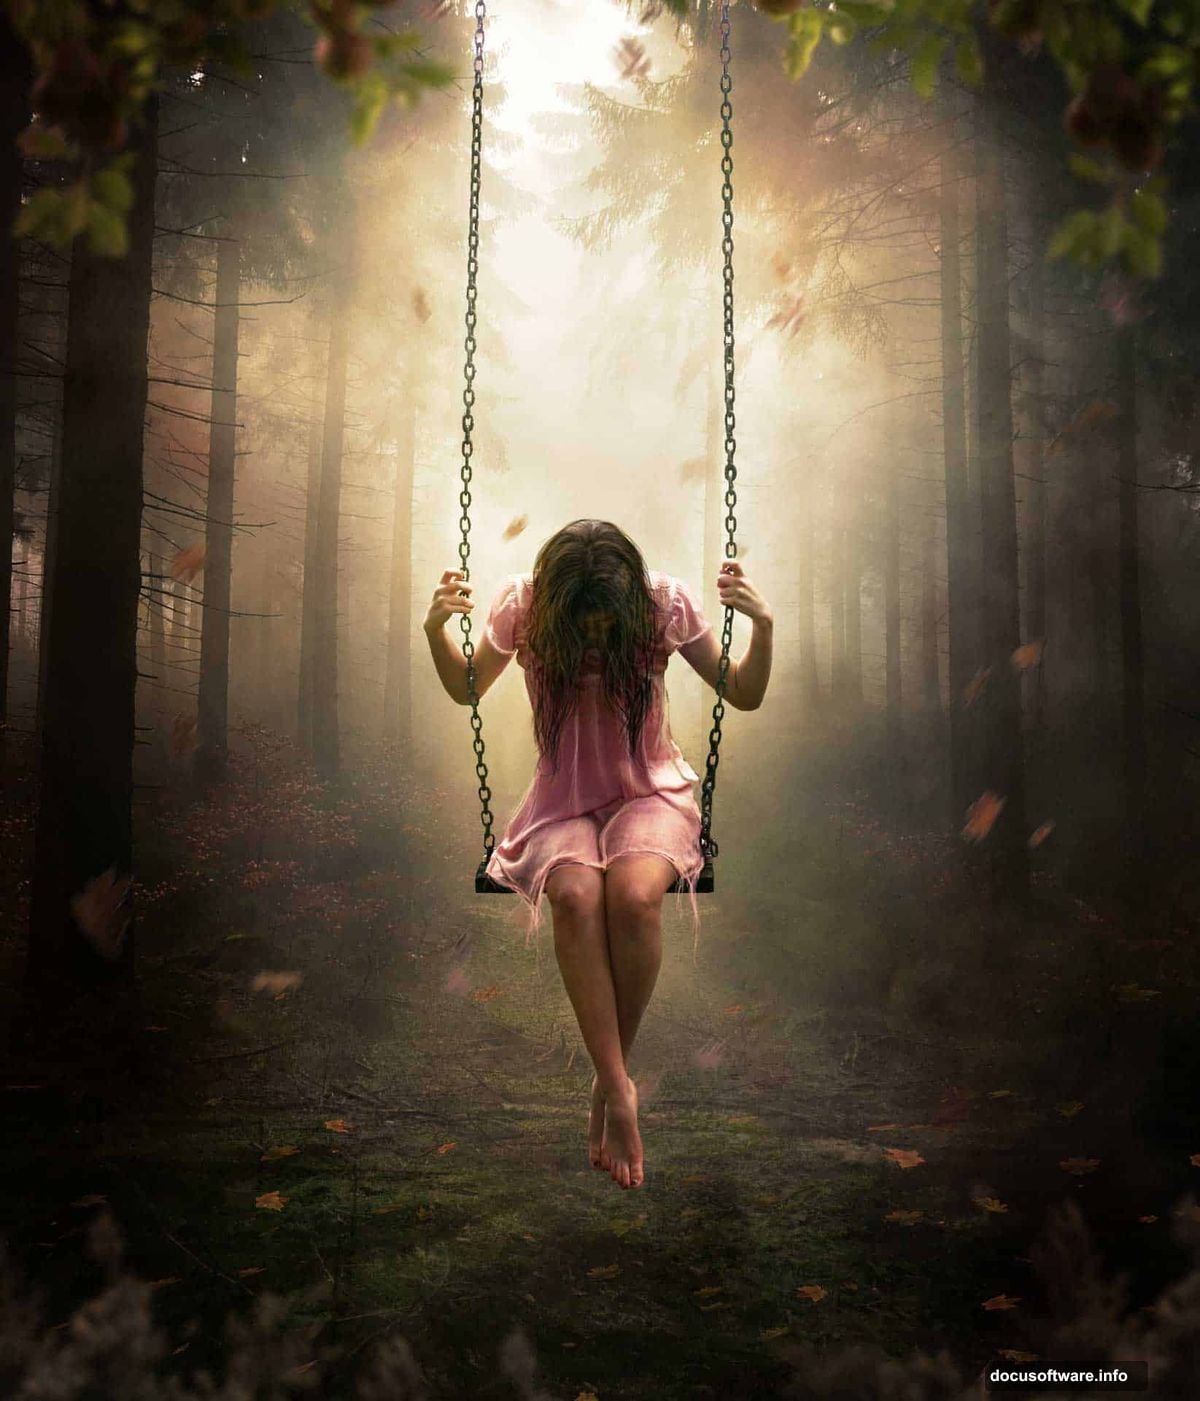
This tutorial walks through building a dramatic portrait manipulation featuring a model in a mystical forest setting. More importantly, it teaches non-destructive workflows that make editing faster and more flexible. Plus, you’ll learn lighting tricks that add depth and focus to any composite work.
The techniques here apply to portraits, product photography, and conceptual art. So even if you’re not creating this exact image, these methods will improve your photo manipulation projects.
Set Up Your Canvas for Success
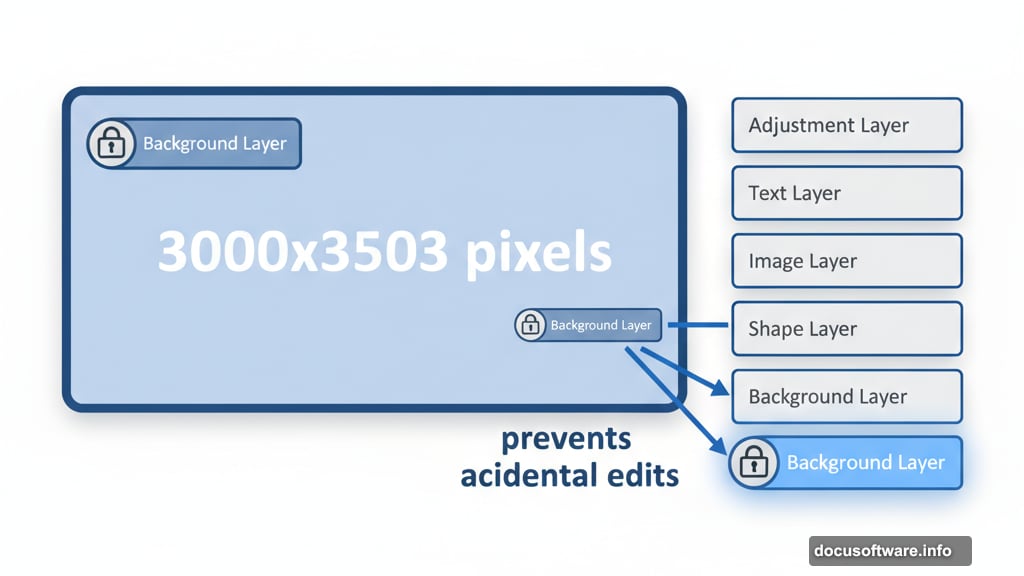
Start with proper dimensions. This project uses 3000×3503 pixels, which gives enough resolution for print work while remaining manageable for most computers.
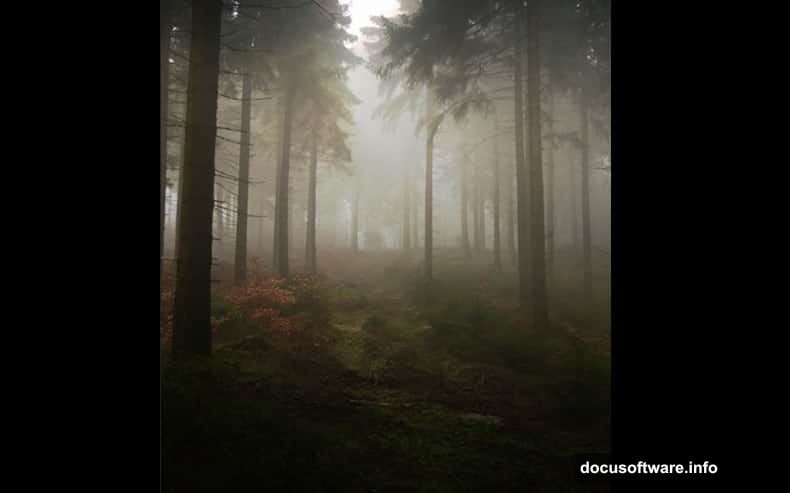
Choose a forest background as your base layer. Dark, atmospheric woods work best because they provide natural shadows you can enhance later. Plus, organic textures blend more forgivingly than urban environments when you’re learning manipulation techniques.
Before adding elements, lock your background layer. This prevents accidental edits that could ruin your foundation. Simply click the lock icon in the Layers panel.
Create Dramatic Lighting From Scratch
Natural-looking light makes or breaks photo manipulation. Here’s how to build it from nothing.
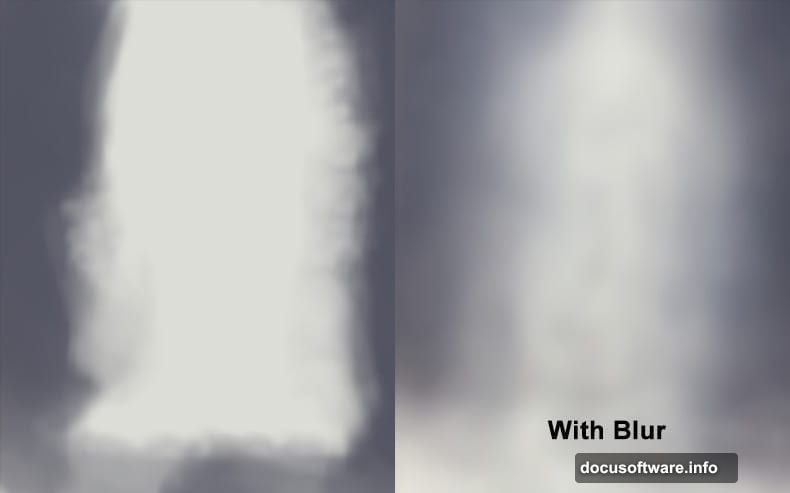
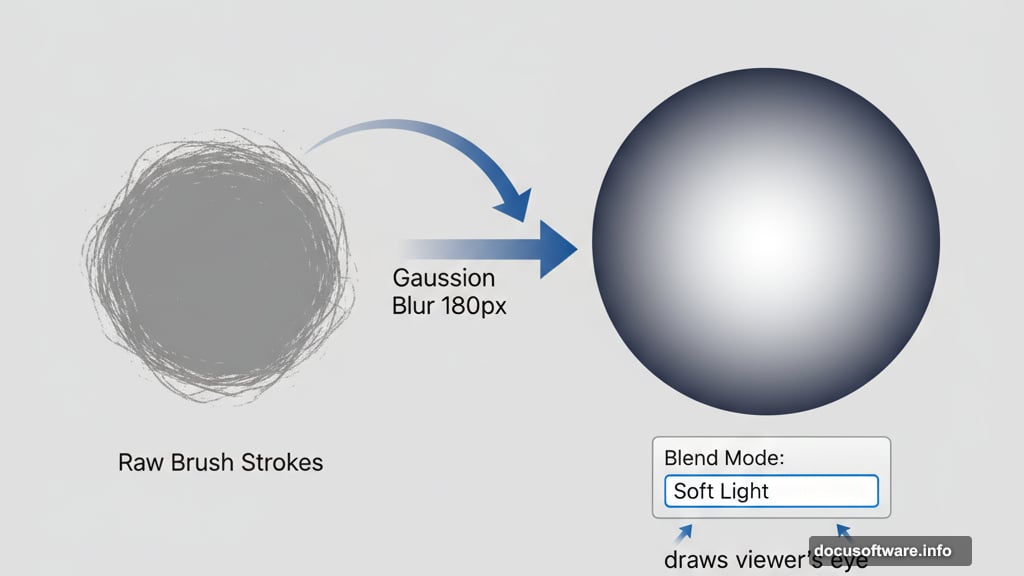
First, create a new layer above your background. Paint the center area with light gray (#deded8). Then paint darker gray (#545563) around the edges. Don’t worry about making it perfect yet.
Next, apply Gaussian Blur at 180 pixels. This smooths harsh brush strokes into gradual transitions. Go to Filter > Blur > Gaussian Blur and adjust the slider until the transition looks natural.
Now change the blend mode to Soft Light. This creates brightness in the center while darkening edges, which naturally draws viewers’ eyes to your focal point. Moreover, Soft Light mode preserves underlying details better than Overlay or Hard Light.
Extract Your Subject Cleanly
The Pen Tool delivers cleaner selections than Quick Selection or Magic Wand tools. Yes, it takes longer. But the precision pays off in professional results.
Select the Pen Tool and verify “Path” appears in the top menu, not “Shape.” Click around your subject’s outline, placing anchor points every few inches. For curves, click and drag to create smooth lines instead of jagged edges.
After completing the path, right-click and choose “Make Selection.” Set Feather Radius to 0.5 pixels for sharp edges or 2-3 pixels for softer transitions. Then click OK.
Add a layer mask by clicking the mask icon at the bottom of the Layers panel. This hides everything outside your selection without deleting pixels. So you can refine edges later if needed.
Build Depth With Foreground Elements
Flat compositions bore viewers quickly. Add depth by placing elements at different distances from the camera.
Position bushes and foliage in front of your subject. Use larger, sharper leaves closest to the camera. Then add smaller, softer elements further back. This mimics how cameras focus, which tricks the eye into seeing three dimensions.
Blur background elements slightly using Gaussian Blur at 3-5 pixels. Meanwhile, keep foreground details sharp. This contrast reinforces depth perception and guides attention to your main subject.
Add Motion With Strategic Placement
Falling leaves suggest movement and emotion. But random placement looks amateurish.
Download leaf stock photos or brushes. Then scatter them following imaginary wind patterns. Most leaves should flow from one direction, with a few stragglers moving differently. This creates believable chaos instead of obvious randomness.
Apply Motion Blur to some leaves (Filter > Blur > Motion Blur). Use different angles and distances for variety. Leaves closer to the camera need more blur than distant ones. Plus, varying the blur amount makes movement feel more dynamic.
Layer Textures for Atmosphere
Texture overlays add richness that flat images lack. But subtle application matters more than obvious effects.
Place a grunge or cloud texture over your entire composition. Set the blend mode to Overlay or Soft Light, then reduce opacity to 20-40%. This adds visual interest without overwhelming your subject.
Try multiple textures at low opacity rather than one heavy layer. Stack different textures with varied blend modes. This creates complex, professional-looking atmosphere that can’t be traced to a single stock photo.
Match Colors Across Elements
Different photos have different color temperatures. Mixing them creates obvious composites that scream “fake.”
Create a Color Balance adjustment layer above all elements. Adjust shadows, midtones, and highlights until everything shares similar color casts. For forest scenes, add slight green and yellow tones. For magical effects, push toward blue or purple.
Then add a Hue/Saturation layer. Reduce overall saturation by 10-15%. This unifies colors and creates a more cohesive final image. Moreover, slightly desaturated images often feel more professional than oversaturated ones.
Paint Light Effects That Look Real
Painted light highlights faces, adds drama, and directs attention. But heavy-handed painting looks fake immediately.
Create a new layer set to Overlay blend mode. Choose a soft brush at 10-20% opacity. Paint white on areas where light would naturally hit: shoulders, hair, raised surfaces.
Build gradually with multiple brush strokes instead of one strong pass. This creates realistic light falloff. Plus, you can erase mistakes on Overlay layers without affecting underlying pixels.
For rim lighting, paint thin white lines along edges where subjects meet bright backgrounds. This separates elements from their surroundings and adds professional polish.
Adjust Shadows for Believability
Every light source creates shadows. Missing or misaligned shadows immediately reveal fake composites.
Create a new layer under your subject. Set it to Multiply blend mode. Paint soft black shadows where the subject touches the ground or other surfaces.
Match shadow direction to your light source. If light comes from the upper right, shadows fall toward the lower left. Also, shadows closer to objects appear darker and sharper. Shadows further away get lighter and softer.
Apply Final Color Grading
Professional images have signature color looks. Color grading creates mood and ties everything together.
Add a Gradient Map adjustment layer at the top of your stack. Choose colors that match your desired mood. Dark blue to warm orange creates dramatic tension. Green to yellow suggests nature and growth.
Reduce the Gradient Map opacity to 30-50%. Full strength overpowers your image. Instead, subtle color shifts enhance existing tones without replacing them.
Finally, add a Curves adjustment for contrast. Create an S-curve by pulling shadows down slightly and highlights up. This adds punch while maintaining detail in midtones.
Non-Destructive Editing Saves Time
Every technique here preserves original pixels. That’s intentional.
Layer masks hide instead of delete. Adjustment layers modify without changing source files. Blend modes create effects without permanent changes. So you can experiment freely and change your mind later.
Always work on separate layers above your original elements. Never paint directly on imported photos. This workflow lets you refine indefinitely without starting over.
This approach takes longer initially. But it saves hours when clients request changes or you want to explore different directions. Plus, you can reuse elements in future projects since nothing gets permanently altered.
Photo manipulation combines technical skill with artistic vision. Master the technical fundamentals first. Then creative possibilities become endless. These techniques provide a foundation for building any composite scene you imagine.