
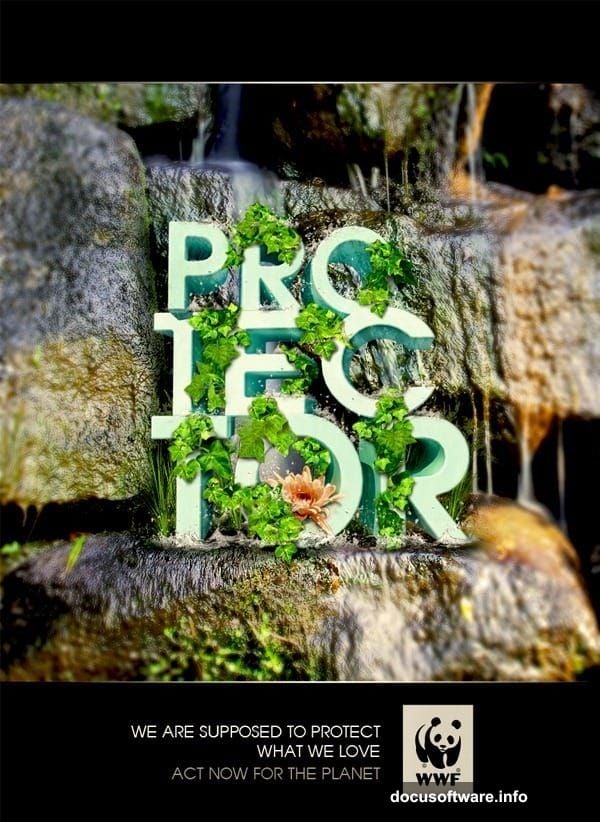
Want to create those stunning nature-themed posters where text becomes landscape? You know, the ones where letters sprout grass and waterfalls cascade down typography. This technique looks complex but breaks down into manageable steps.
I’ll walk you through building WWF-style environmental posters. We’ll use free 3D software plus Photoshop to blend natural imagery into dimensional text. No expensive plugins required.
Start With SketchUp for 3D Letters
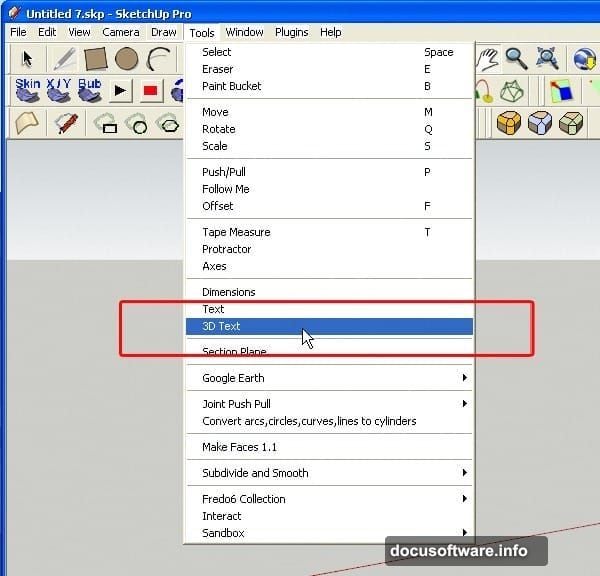
SketchUp Pro gives you free 3D text tools. Better than wrestling with Photoshop’s limited 3D features.
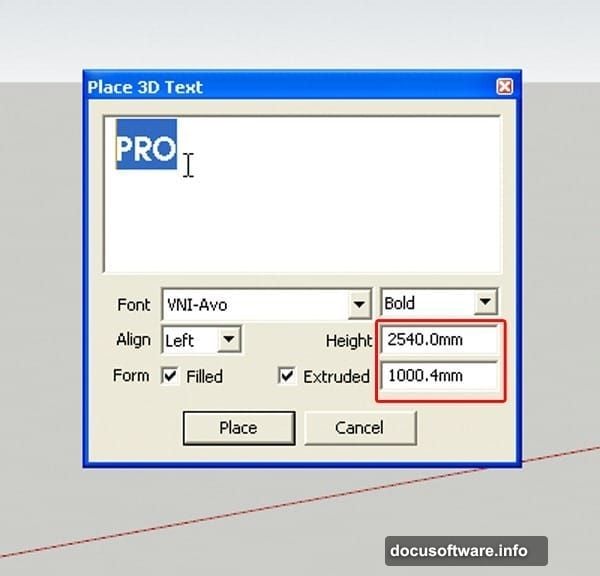
Open SketchUp and navigate to Tools > 3D Text. A dialogue box appears where you’ll type your message. For this example, I used “PROTECTOR” but any word works.
Pick a bold font. Thick letters hold nature imagery better than thin elegant fonts. Set your text height around 100-150 units. For the extrusion depth, go with 50-75 units. This creates enough dimension without making letters too chunky.
Click Place and your 3D text materializes in the workspace.
Position Your Letters for Drama
Here’s where you add visual interest. Don’t leave letters in a boring straight line.
Press M to activate the Move tool. Click and drag each word segment to different positions. I separated “PRO,” “TEC,” and “TOR” into three groups at varying heights.
Next, press R for the Rotate tool. Click on the side of your text group, then drag along the blue axis. This stands your letters upright instead of lying flat. Think vertical billboard rather than floor mat.
Press S to access the Scale tool. Click and drag to make letters thicker. This builds more surface area for your nature elements later. I scaled mine about 150% wider.
Round Those Sharp Corners
Blocky text looks amateurish. The Round Corner plugin fixes this fast.
Double-click a letter to select it. Keep double-clicking until blue dots cover every surface. That means full selection.
Find the Round Corner button in your toolbar. Set the radius to 10-15 units depending on your text size. Hit Enter and wait a few seconds. The plugin smooths all those harsh edges into organic curves.
Repeat this for every letter. The rounded forms blend better with natural imagery.
Add Color Before Rendering
Press M to open the Materials dialogue. Pick a light cyan or pale color. Pure white works too, but subtle color helps the final render.
Click each letter to fill it with your chosen material. I used light blue-green to complement the nature theme.
Now position your camera for the best angle. Middle-click and drag to orbit around your text. Scroll to zoom in and out. Find a dynamic perspective that shows depth and dimension.
Export Your 3D Render
Time to get this into Photoshop. Go to File > Export > 2D Graphic. Save as PNG with transparency enabled. Set your image dimensions large—at least 3000 pixels wide. You’ll lose quality if you scale up later.
Export at the highest resolution SketchUp allows. This gives you crisp edges when you blend natural elements.
Open your exported PNG in Photoshop. This becomes your base layer for everything that follows.
Gather Nature Stock Images
You’ll need high-quality photos of:
- Grass or moss textures
- Water splashes or waterfalls
- Flowers and plants
- Sky or clouds
- Any other natural elements you want
Search for images with good resolution and clear details. Blurry stock photos ruin the realism. I recommend at least 2000 pixels on the shortest side.
Make sure you have permission to use these images. Free stock sites like Unsplash and Pexels work great for practice projects.
Blend Grass Into Letters
Open your grass texture. Select the entire image with Ctrl+A, then copy with Ctrl+C.
Back in your main document, create a layer mask on your 3D text layer. Alt-click the mask thumbnail to view just the mask. Paste your grass texture with Ctrl+V.
Press Ctrl+T to transform. Scale and rotate the grass to fill your letters naturally. The texture should flow with the letter shapes, not against them.
Exit mask view by clicking the layer thumbnail again. Now grass fills your text but follows the dimensional shading.
Set the grass layer to Multiply or Overlay blend mode. This preserves the 3D lighting and shadows underneath. Adjust opacity around 70-85% so the depth shows through.
Add Water Elements
Water creates dynamic contrast against grass. Open your waterfall or splash image.
Use the Quick Selection tool to isolate just the water. Refine the edge using Select and Mask. Water needs soft transitions to look believable.

Copy the water selection and paste into your main document. Position it cascading down one side of your letters.
Create a layer mask and use a soft brush to blend the water edges. The top should fade naturally into your letters while the bottom flows off dramatically.
Change the blend mode to Screen or Lighten. This makes water highlights pop while keeping transparency in darker areas. Drop the opacity to 60-70% for realism.
Layer Flowers for Detail
Small floral elements add visual interest to plain areas. Open your flower images and extract individual blooms.
Create a new layer above your grass. Use a soft brush to paint where you want flowers to appear. This becomes your selection guide.
Paste flower elements and scale them appropriately. Smaller flowers near the back, larger ones in front—this builds depth perception.
Use layer masks to blend flower bases into the grass texture. The stems should disappear naturally rather than floating awkwardly.
Apply subtle shadows under each flower. Create a new layer set to Multiply at 30% opacity. Paint soft dark spots where flowers contact the letters.
Build Atmospheric Depth
Foreground elements need more contrast than background sections. This creates focal hierarchy.
Select letters in the front. Apply a Curves adjustment layer clipped to just those letters. Boost the midtones and highlights slightly.
For background letters, add a separate Curves layer. Reduce contrast and add a subtle blue tint. This pushes them back visually.
Create a new layer at the top of your stack. Set it to Overlay blend mode at 15% opacity. Use a large soft brush with white paint. Brush gentle highlights on the front-facing surfaces of your foreground letters.
This subtle lighting sells the dimensional effect.
Add Final Polish
Almost done. Time for finishing touches that elevate the composition.
Create a new layer and fill it with 50% gray. Set blend mode to Overlay. Apply a slight Gaussian Blur around 2-3 pixels. This adds a subtle glow and softens any harsh edges.
Add a Color Lookup adjustment layer. Try the “Teal and Orange” or “Forest” presets. Adjust opacity until colors feel cohesive rather than harsh.
Create a Selective Color adjustment layer. Boost greens by adding yellow and cyan. Enhance blues by adding cyan and reducing yellow. This intensifies the nature theme without oversaturating.
Finally, add a slight vignette. Create a new layer and fill with black. Add a layer mask and use a large soft brush to reveal the center. Set blend mode to Multiply at 20-30% opacity.

Common Problems and Fixes
Letters look flat despite 3D render: You need more dramatic lighting contrast. Go back to SketchUp and adjust your light source angle. Or boost contrast in Photoshop using Curves adjustments.
Nature textures don’t follow letter curves: Your layer mask technique needs work. Use the Warp tool on masked textures to conform them to the dimensional surfaces. It takes practice.
Colors clash instead of blending: Reduce saturation on individual elements. Use a Hue/Saturation adjustment layer clipped to problem layers. Shift hues toward a unified color scheme.
Edges look too sharp and fake: Apply a 0.5-1 pixel Gaussian Blur to texture layer masks. This softens transitions. Also try the Refine Edge tool for more organic blending.
Worth the Effort
This technique takes time to master. Your first attempt probably won’t match professional examples. That’s normal.
The key is patience with layer blending. Small adjustments to blend modes and opacity make huge differences. Don’t rush the masking process—clean selections create believable results.
Once you understand the workflow, you can create variations quickly. Swap different nature elements for entirely different moods. Desert landscapes. Ocean themes. Mountain scenery. The method stays consistent.
Practice makes these environmental text effects feel natural. Start simple with one or two nature elements. Add complexity as your comfort grows. The results speak for themselves when you nail the technique.