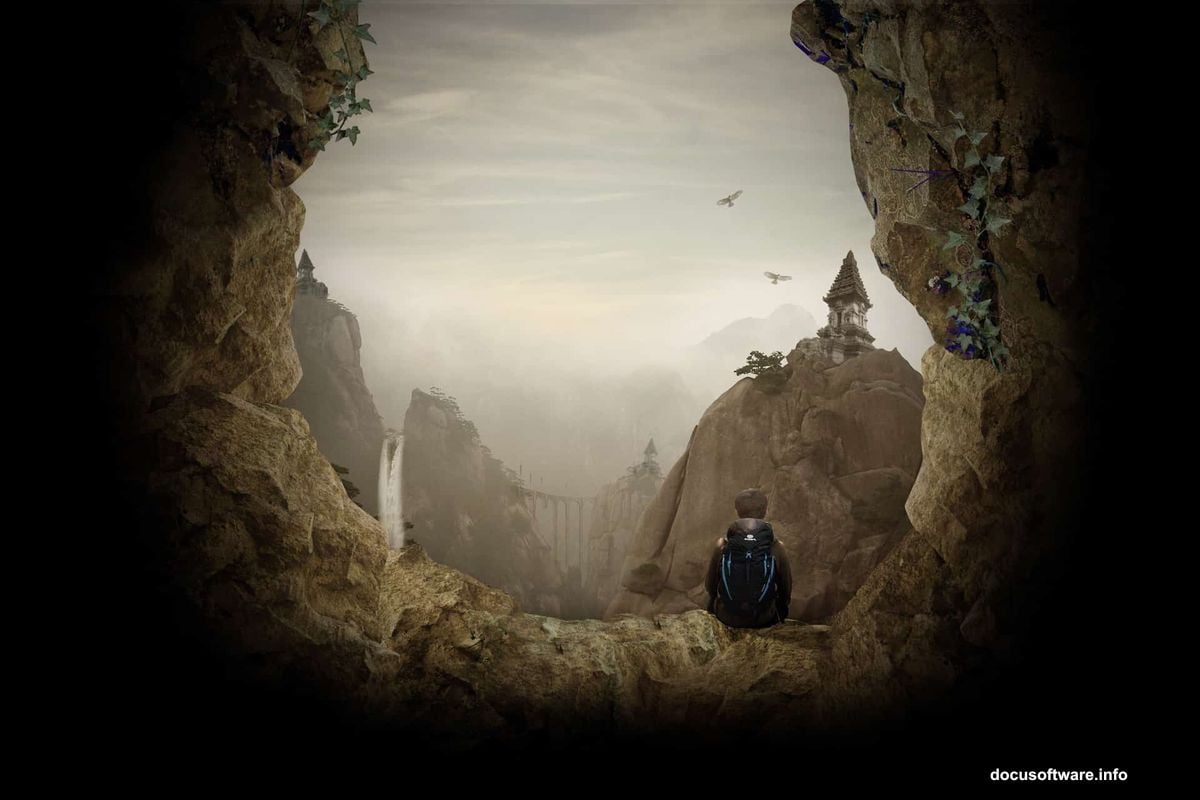
Photo manipulation in Photoshop seems intimidating at first. But the right techniques transform scattered images into believable fantasy worlds.
This guide walks through creating an otherworldly cave scene step-by-step. You’ll learn how to blend multiple photos seamlessly, add realistic lighting and shadows, and finish with color grading that ties everything together. Plus, these techniques work for any photo manipulation project.
By the end, you’ll understand the core skills that separate amateur composites from professional-looking work.
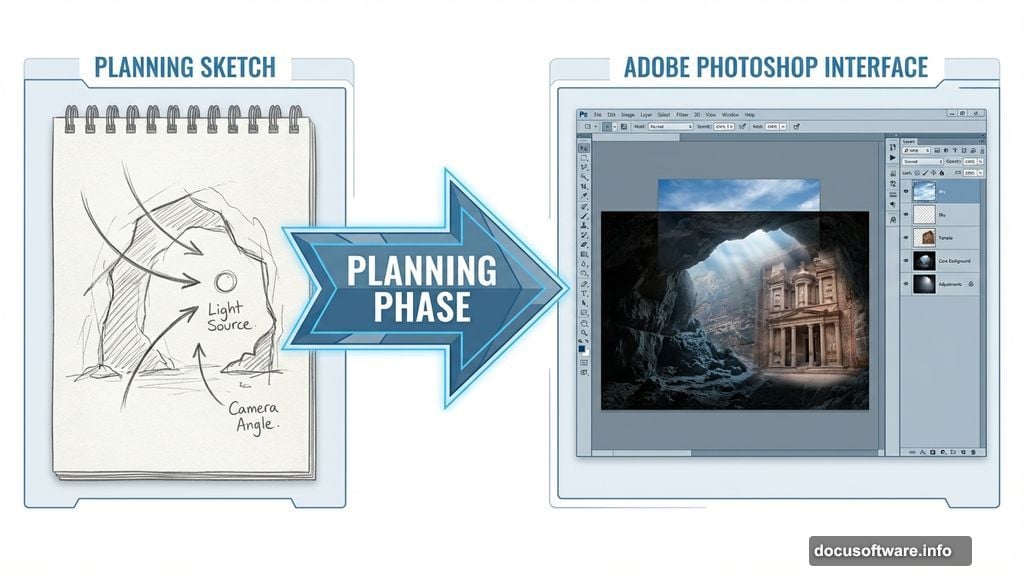
Sketch Your Concept First
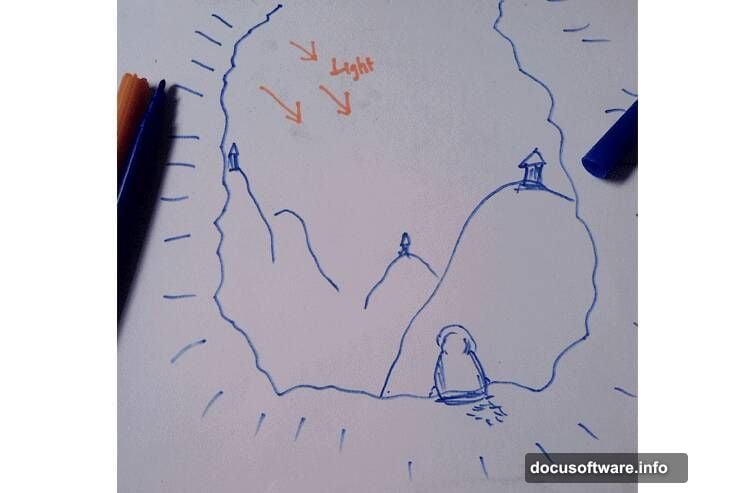
Most failed photo manipulations start without a plan. Smart artists sketch their vision before opening Photoshop.
Your sketch doesn’t need artistic perfection. Simple shapes and rough placement work fine. The goal is mapping out composition, light direction, and which elements go where.
This planning saves hours of frustration later. You’ll know exactly what stock photos to find and how they’ll fit together. Plus, you can spot composition problems before investing time in execution.
Take 10 minutes to draw your idea. That small investment prevents massive headaches down the road.
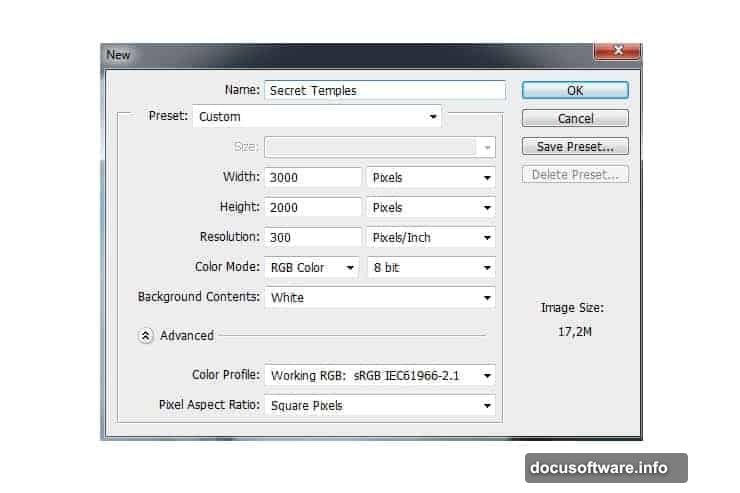
Set Up Your Canvas Properly
Document setup matters more than beginners realize. Create a new file (File > New or Ctrl/Cmd+N) with dimensions that match your final output.
For this project, use 3000×2000 pixels. That resolution gives plenty of room to work while maintaining image quality. Smaller documents save file size but limit your options for large prints or detailed work.
Always start larger than you think you need. You can always scale down later without quality loss. But scaling up reveals every flaw and pixelation issue.
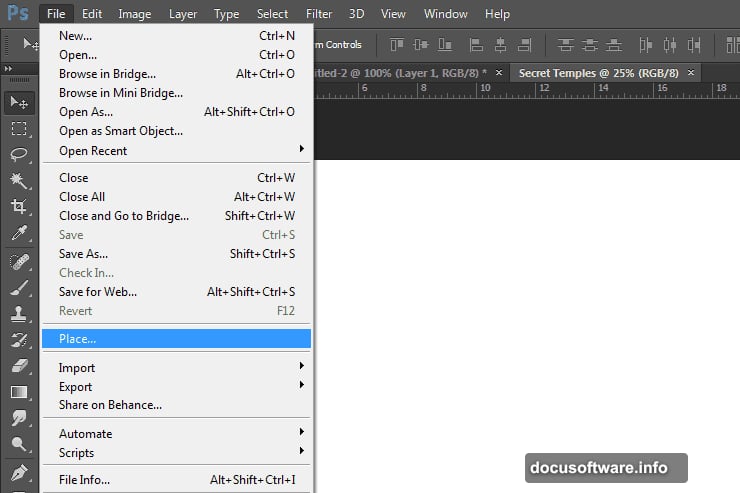
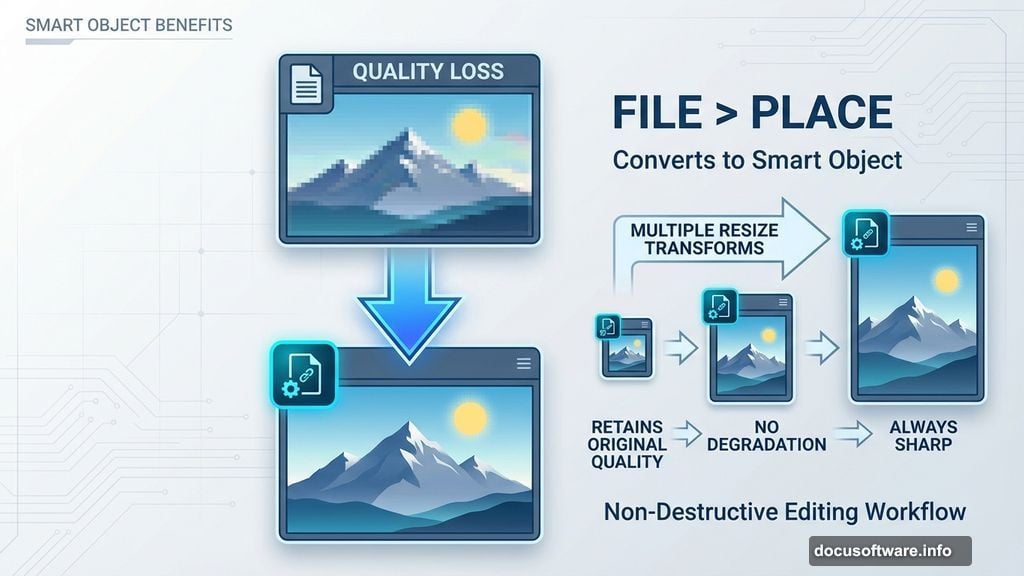
Use Place Instead of Open for Stock Photos
Here’s a technique that streamlines workflow dramatically. Instead of opening stock photos separately and copying them over, use File > Place.
Placing automatically imports images as Smart Objects. Smart Objects let you resize and transform without permanent quality loss. Regular layers lose detail every time you scale them.
This simple habit protects image quality throughout your entire project. Plus, placed images appear centered and ready to position, which speeds up initial layout considerably.
Master Color Balance for Mood
Color Balance adjustments (Layer > New Adjustment Layer > Color Balance) control the emotional tone of your scene. Warm tones create inviting, comfortable feelings. Cool tones suggest mystery or danger.
For this fantasy cave scene, add warmth to match the golden temple lighting. Push midtones toward yellow and red. Shadows can stay neutral or go slightly blue for depth contrast.
Always use adjustment layers with clipping masks instead of direct adjustments. Clipping masks apply effects only to specific layers, giving you precise control. That flexibility lets you fine-tune individual elements without affecting the entire composition.
Organize Layers into Groups Immediately
Messy layer panels kill productivity fast. Group related elements together right away.
Select all layers for one element (like the sky). Then press Ctrl/Cmd+G or drag them to the folder icon. Name your groups clearly: “Sky,” “Mountains,” “Temple,” “Character.”
This organization pays off massively as projects grow complex. You’ll spend less time hunting for layers and more time actually creating. Plus, grouped layers collapse to save visual space, keeping your panel clean and manageable.
Build Depth with Multiple Photo Layers
Single background images look flat and unconvincing. Professional composites layer multiple photos to create realistic depth.
Start with distant elements like sky and mountains. Add mid-ground elements like cliffs and structures. Finally, place foreground objects like rocks and vegetation.
Each layer should have slightly different lighting and atmospheric perspective. Distant objects appear hazier and less saturated. Closer objects show more detail and contrast. This subtle variation tricks the eye into perceiving genuine three-dimensional space.
Master Puppet Warp for Organic Changes
The Puppet Warp tool (Edit > Puppet Warp) bends and reshapes elements naturally. It’s perfect for adjusting poses, fixing fabric draping, or conforming objects to curved surfaces.
Place pins on points you want to anchor in place. Then drag other pins to reshape the image. The tool maintains texture and detail while transforming the overall shape organically.
This beats manual cutting and transforming by miles. Use it for adjusting character poses, fitting ivy to cave walls, or making rigid objects conform to irregular surfaces.
Blend Edges with Layer Masks
Hard edges scream “fake composite” immediately. Layer masks solve this problem elegantly.
Add a mask to any layer (Layer > Layer Mask > Reveal All). Then paint with a soft black brush on the mask to gradually fade edges. This technique blends elements seamlessly into their surroundings.
For objects like rocks or vegetation, use a textured brush on your mask. Hard-edged geometric brushes create natural-looking irregular boundaries that mimic real material edges.
Add Realistic Shadows in Three Steps
Shadows sell realism more than almost any other element. Here’s a reliable three-step shadow process.
First, duplicate your subject layer. Fill it with black and place it below the original. Second, use Free Transform (Ctrl/Cmd+T) to skew the shadow in the correct direction based on your light source. Third, blur the shadow (Filter > Blur > Gaussian Blur) and reduce opacity to 30-50%.
Remember that shadows closer to objects appear darker and sharper. Shadows farther away become lighter and blurrier. This variation adds convincing depth to your scene.
Unify Everything with Color Grading
Even perfectly blended elements can look disconnected without unified color treatment. Color grading ties everything together visually.
Add a Gradient Map adjustment layer at the top of your layer stack. Choose warm tones that complement your scene’s mood. Set the blend mode to Soft Light or Overlay at 20-30% opacity.
This subtle color wash makes disparate elements feel like they exist in the same lighting environment. It’s the finishing touch that elevates good composites to great ones.
Save Progress with Smart Objects
Throughout your work, convert complex layer groups to Smart Objects. This protects your work and adds flexibility.
Right-click any layer or group and choose “Convert to Smart Object.” Smart Objects preserve everything inside while letting you apply filters and transformations non-destructively.
Plus, you can double-click Smart Objects to edit their contents separately. This organization keeps your main document clean while maintaining access to detailed editing when needed.
Photo manipulation takes practice and patience. But these techniques give you a solid foundation for creating believable fantasy scenes. The key is planning ahead, organizing carefully, and building depth through layering.
Start with simpler projects to master these skills. Then tackle increasingly complex compositions as your confidence grows. Every project teaches something new about light, composition, and blending techniques.