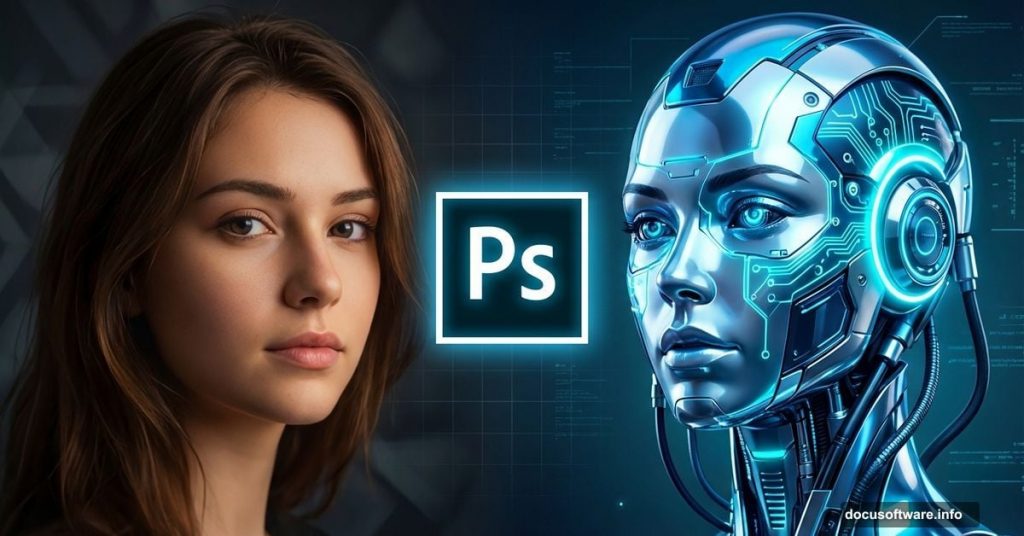
Want to create stunning sci-fi artwork that looks professionally edited? This cyborg manipulation technique transforms ordinary portraits into futuristic masterpieces.
Most photo manipulation tutorials skip the crucial details. They assume you already know advanced techniques or gloss over the tricky parts. Not this one. I’ll walk you through every step needed to build a complete cyborg woman artwork from scratch.
You’ll learn how to blend technological elements seamlessly, create realistic lighting effects, and add that polished sci-fi look that makes viewers do a double-take.
Set Up Your Futuristic Canvas
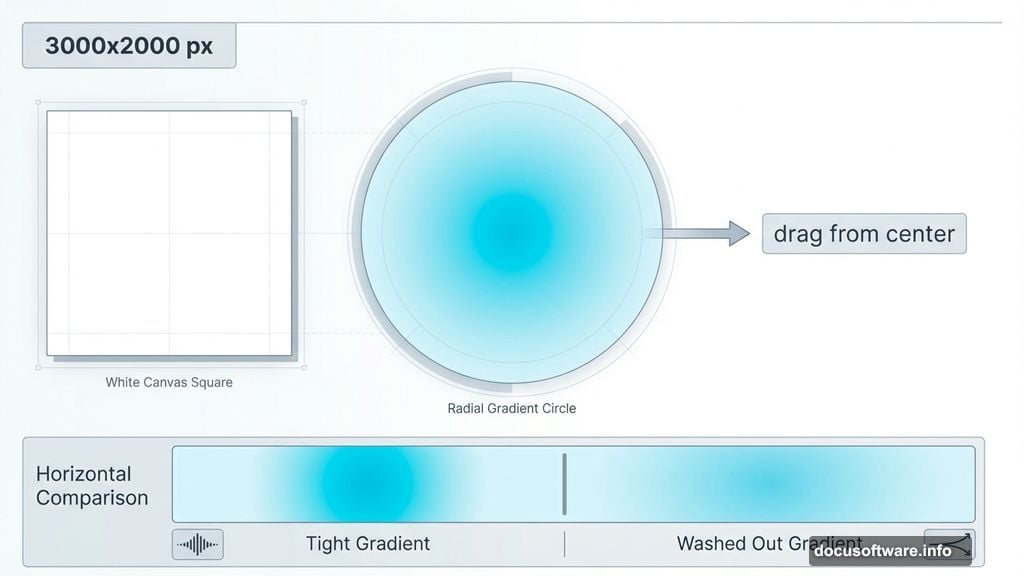
Start with a 3000×2000 px document in Photoshop. This resolution gives you plenty of room to work without sacrificing quality.
First, fill your canvas with white. Then create a new layer and grab the Gradient Tool. Select Radial Gradient mode with two specific colors: #6ec1d6 for the center and #c9eff7 for the edges.
Here’s the trick most tutorials miss. Drag from the center outward, but keep your line short. A long gradient looks washed out. A controlled, tight gradient creates that atmospheric sci-fi glow that sets the mood perfectly.
Build Layered Tech Backgrounds
Place your first background image and change the blend mode to Soft Light at 100%. This creates depth without overwhelming your composition.
However, stock images often include unwanted text or details. Fix this by creating a new layer and using the Rectangular Marquee Tool to select problem areas. Fill those selections with colors sampled from nearby regions.
For the second background, use the same Soft Light technique. Then add a layer mask and paint away edges with a soft black brush. This blending method keeps your backgrounds atmospheric without competing for attention.
Plus, this layered approach lets you adjust individual elements later without starting over.
Position Your Subject Strategically
Cut out your model from the original background and place her center stage. Precision matters here. Use the Pen Tool for clean edges around hair and intricate details.
Next, create a new layer set as a Clipping Mask above the model. This lets you paint changes that affect only the model, not your entire composition.

Want to change lip color for that cyborg aesthetic? Use a soft brush with color #99918e and paint directly on the lips layer. Change the blend mode to Color at 60% opacity. This technique maintains natural texture while shifting hue.
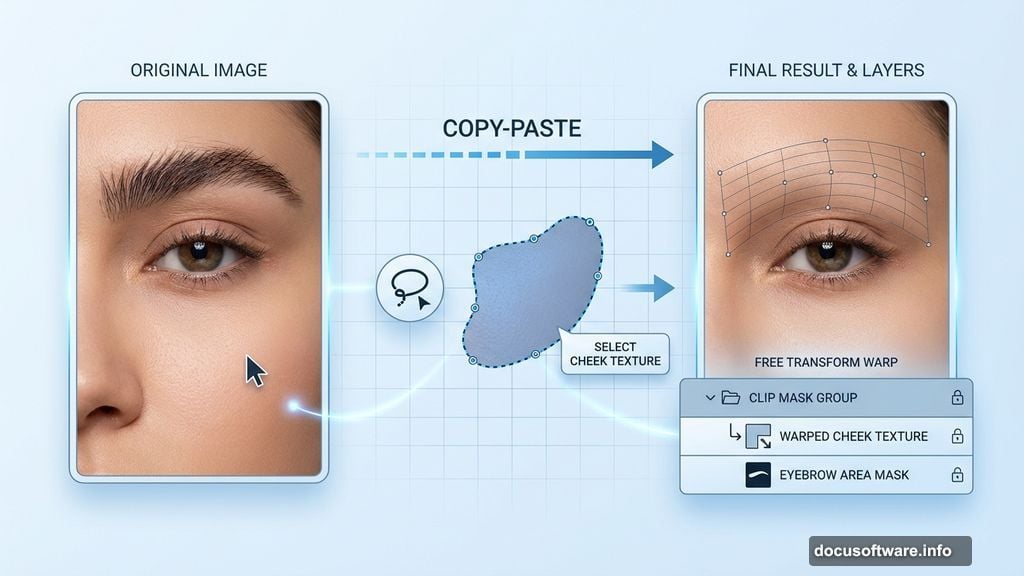
Remove Human Features Naturally
Cyborgs need fewer human characteristics. Start by removing eyebrows using a clever copy-paste technique.
Select a clean skin area from the model’s cheek with the Lasso Tool. Copy this selection and paste it onto a new Clipping Mask layer. Use Free Transform with Warp mode to bend the copied skin over the eyebrow area.
This method beats cloning because it preserves natural skin texture and lighting. The result looks organic, not patched together.
Moreover, working on separate layers means you can adjust or remove changes without affecting your base image.
Add Mechanical Elements Convincingly
Now comes the fun part. Place cyborg technology images over your model. Focus on areas where mechanics would logically replace human parts: temples, jaw, neck, and shoulders.

Use layer masks aggressively. Paint away hard edges where technology meets skin. Blend modes like Overlay and Multiply help mechanical parts interact with existing shadows and highlights.
Remember, less is often more. A few well-placed tech elements look more convincing than covering everything in metal. Strategic placement sells the illusion.
Create Glowing Circuit Effects
Cyborg artwork needs those signature glowing elements. Download tech brushes or create your own using the Pen Tool for precise circuit patterns.
Paint circuits on a new layer using bright colors like #00f2ff. Apply a Gaussian Blur of 2-3 pixels to create a soft glow. Then change the blend mode to Screen or Linear Dodge.
Add a second layer with sharper, brighter lines along the same paths. This two-layer technique creates depth in the glow effect. The blurred layer provides the atmospheric haze while the sharp layer delivers the bright core.
Vary your opacity to make some circuits more prominent than others.

Match Lighting Across Elements
This step separates amateur work from professional results. Every element you add needs lighting that matches your background and model.
Create Curves adjustment layers as Clipping Masks for each major element. Increase brightness where light sources hit directly. Decrease brightness in shadowed areas.
Use a soft brush on layer masks to control where these adjustments appear. Paint with black to remove the effect, white to reveal it.
Pay special attention to edges where different elements meet. Slight highlights along borders help separate foreground from background without creating harsh lines.
Enhance Color Harmony
Your artwork probably looks pieced together at this point. Color adjustments unify everything into a cohesive image.
Add a Color Balance adjustment layer above all other layers. Push shadows toward cyan and blue. Nudge highlights toward yellow and red. This creates that sci-fi color palette everyone recognizes.
Then add a Hue/Saturation layer. Reduce overall saturation by 10-15%. Oversaturated images look cartoonish. Slightly desaturated artwork feels more cinematic and refined.
Finally, add a Curves adjustment layer and create a subtle S-curve. This increases contrast and makes colors pop without looking processed.
Add Atmospheric Effects
Sci-fi scenes need atmosphere. Create a new layer above everything and fill it with black. Change the blend mode to Screen so the black becomes transparent.
Use the Brush Tool with white at low opacity (10-15%) to paint soft, misty areas. Focus on light sources and edges. These subtle highlights add depth and draw the eye through your composition.
You can also add lens flares sparingly. Use Filter > Render > Lens Flare on a black layer set to Screen mode. This adds drama without overwhelming your subject.
Sharpen Strategic Areas
Before finishing, add selective sharpening. Duplicate your base layer and apply Filter > Sharpen > Unsharp Mask with Amount: 80%, Radius: 1.5, Threshold: 0.
Add a black layer mask and paint with white only on areas you want sharp: eyes, technological details, and important edges. This technique adds punch without making the entire image look oversharpened.
Soft areas like out-of-focus backgrounds should remain soft for depth.
Fine-Tune Final Details
Zoom out and look at your complete composition. Does anything stick out awkwardly? Does the lighting feel consistent? Are mechanical elements integrated smoothly?
Make micro-adjustments to layer opacity. Sometimes reducing an effect by just 10-20% makes it look more natural. Check blend modes again. Switching from Overlay to Soft Light often produces subtler, more refined results.
Add a final Curves adjustment if overall brightness needs tweaking. Use the layer mask to control where this affects your image.
These polished finishing touches transform good artwork into portfolio-worthy pieces. Professional results come from patience with details, not dramatic techniques.