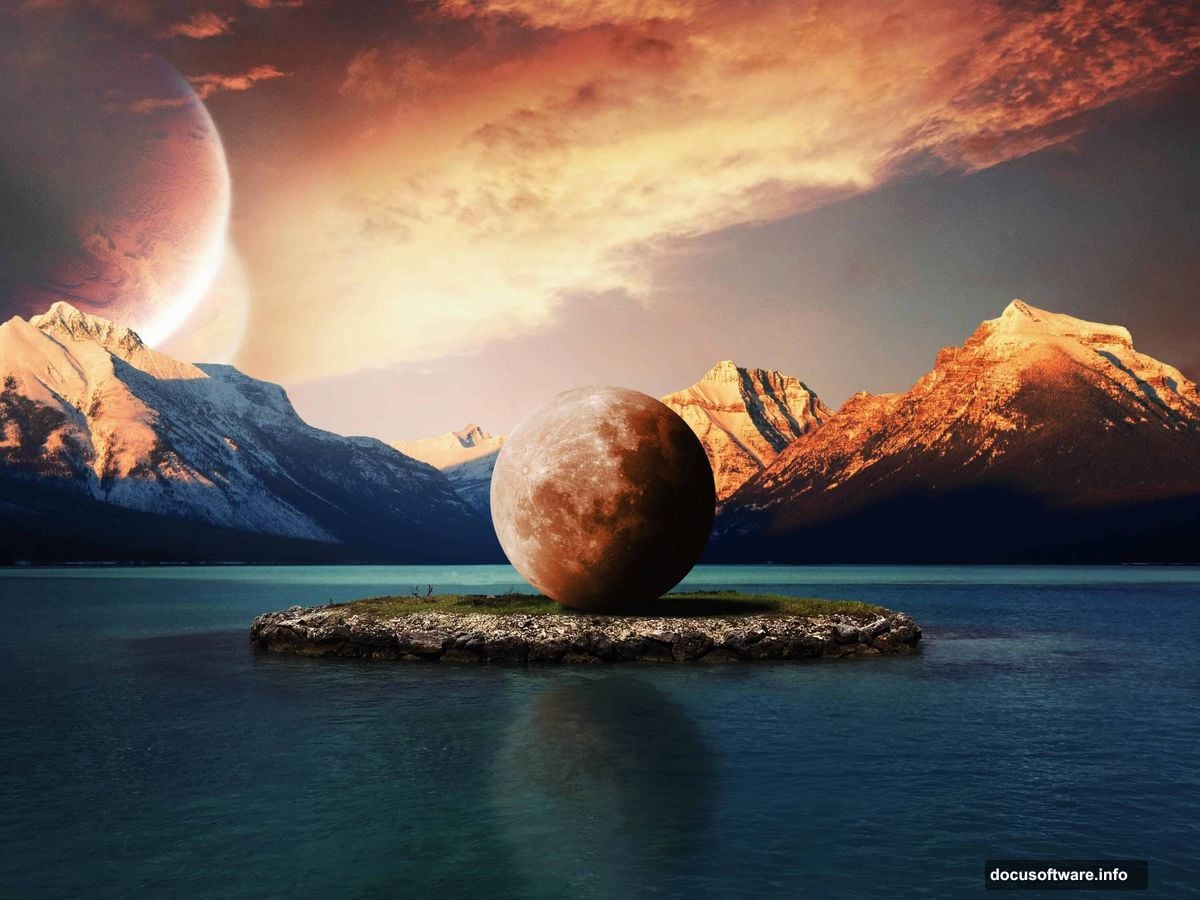
Want to create dreamlike landscapes that look like they belong in a fantasy novel? This Photoshop manipulation combines islands, mountains, and an oversized moon into one striking scene.
But here’s the thing. Most photo manipulation tutorials skip the hard parts. Not this one. We’ll tackle realistic water reflections, seamless blending, and lighting that actually makes sense.
Plus, you’ll learn techniques that work for any composite project. These aren’t just steps to follow blindly. They’re skills you’ll use again and again.
What You’ll Need Before Starting
Grab these stock images first. You’ll need an island photo, mountain range, moon shot, and dramatic sky. The tutorial uses specific stocks, but similar images work fine.
Also, make sure you’re comfortable with basic Photoshop tools. We’ll use layer masks, adjustment layers, and the Clone Stamp tool heavily. If those terms sound foreign, practice the basics first. Otherwise, you’ll get frustrated quickly.
One more thing. Set aside at least two hours for your first attempt. This isn’t a quick 15-minute project. Rushing guarantees mediocre results.
Building Your Canvas Foundation
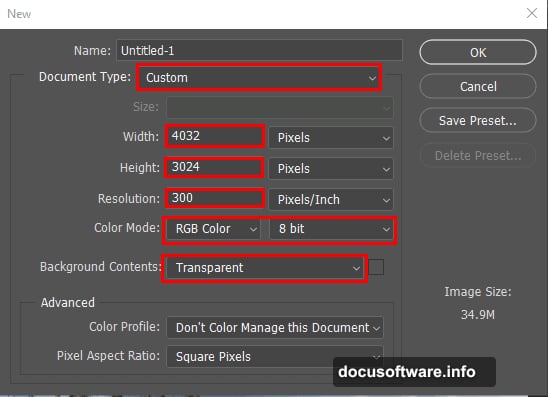
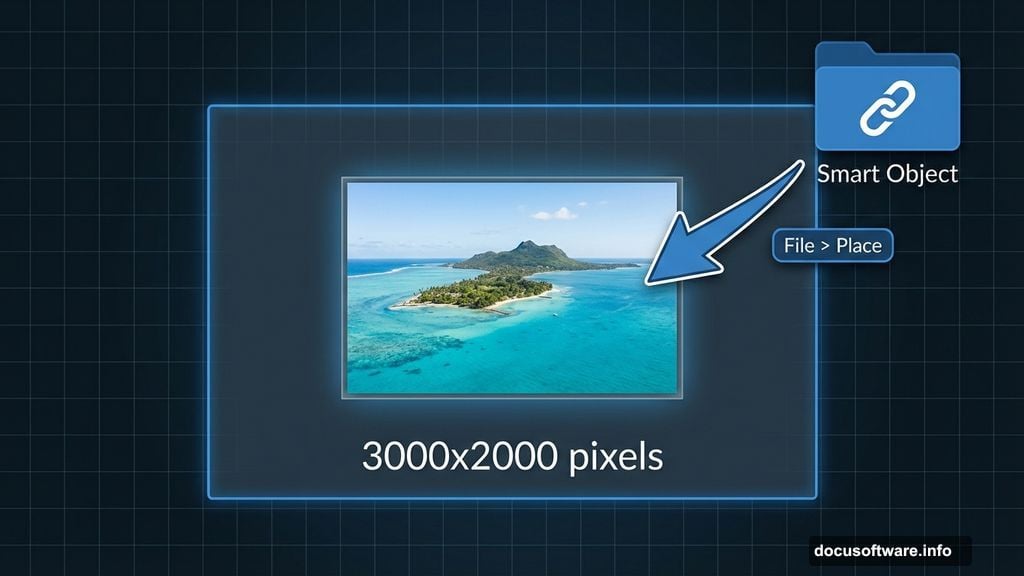
Start with a new document at 3000×2000 pixels. That resolution gives you enough detail for professional-looking output without slowing down your computer.
Next, place your island image as the base layer. Use File > Place to import it. This keeps the image as a Smart Object, which means you can resize later without losing quality.
Then comes the cleanup work. Islands rarely photograph perfectly. Yours probably has palm trees, rocks, or other elements that don’t fit your vision.
Removing Unwanted Elements the Smart Way
Duplicate your island layer first. Always work on copies. That way, you can always go back if something goes wrong.
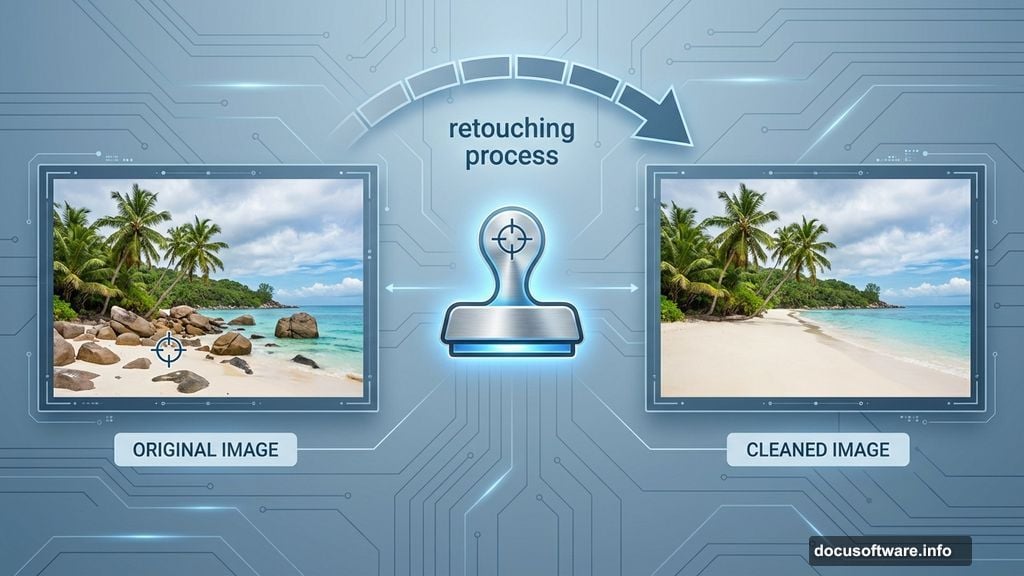
Now grab the Clone Stamp tool. Here’s the trick most tutorials don’t mention: Alt-click to set your sample point near the area you want to fix. Not far away. Near.
Why does this matter? Because matching texture and lighting gets harder as you sample from distant areas. Keep your source point close, and your retouching looks natural.
As you brush over problem areas, you’ll see a crosshair showing where Photoshop copies from. Move slowly. Take breaks. Your eyes get tired and stop noticing mistakes after 20 minutes of retouching.
Adjusting Colors for Mood
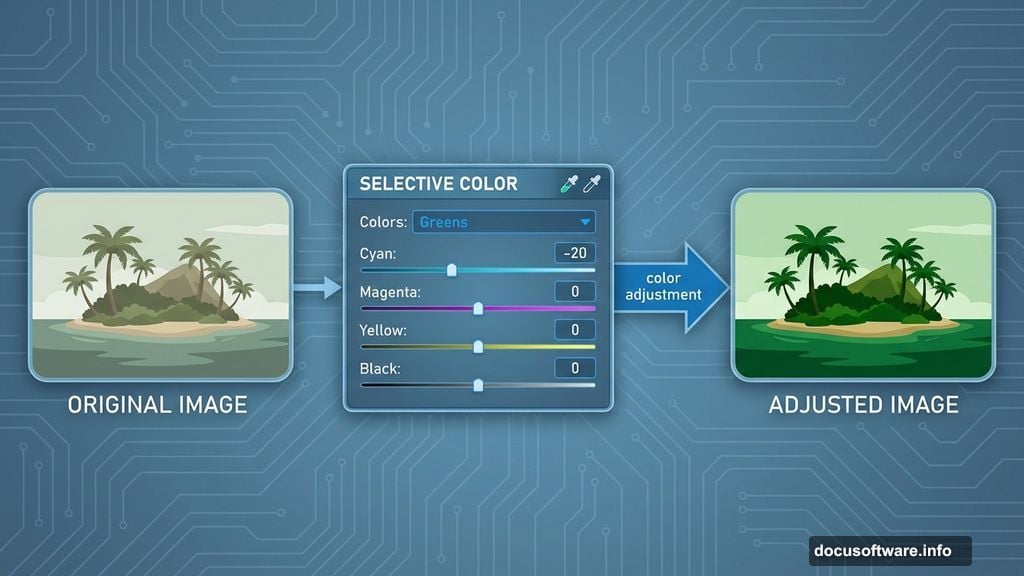
Add a Selective Color adjustment layer above your island. This gives you precise control over specific color ranges without affecting the entire image.
Focus on the greens and cyans first. Islands typically need deeper, more saturated greens to feel lush and alive. Slide the cyan slider in the Greens channel toward negative values. This adds warmth.
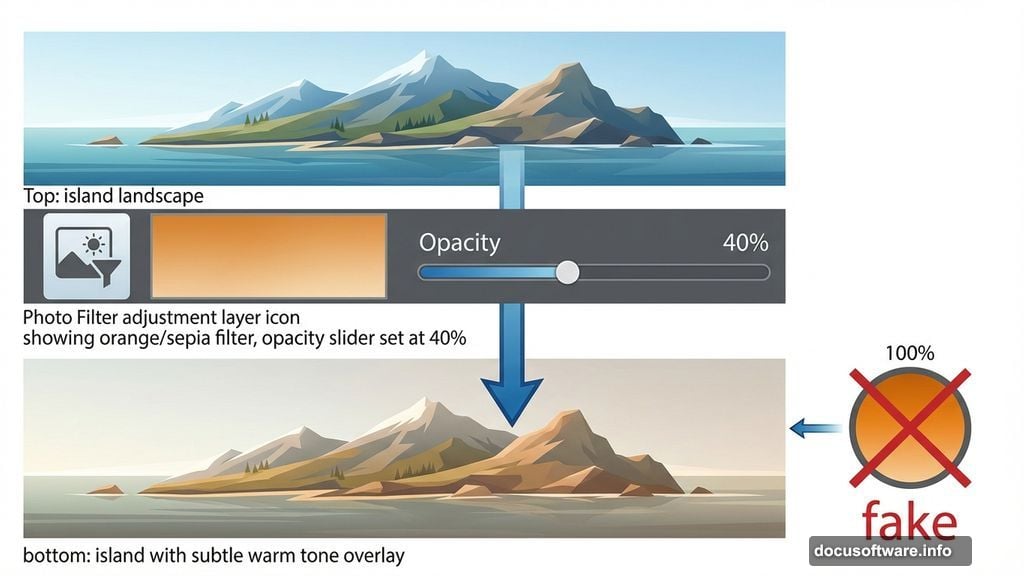
Then add a Photo Filter adjustment layer. Choose a warm filter like Sepia or Orange. But here’s critical: Drop the opacity to 40%. Full-strength photo filters look fake. Subtle warmth feels natural.
Integrating Mountain Elements
Open your mountain stock photo in a separate window. Use the Rectangular Marquee tool to select just the mountain range. Don’t grab the entire image.
Here’s why precision matters. Every extra pixel you bring over means more work masking later. Select tight around the mountains you actually want.
Copy and paste the selection into your main document. Then press Ctrl/Cmd + T to transform. Hold Alt + Shift while dragging corners to resize proportionally from the center.
In newer Photoshop versions, you only need Alt. The software assumes you want proportional scaling. Check which version you’re running.
Masking Mountains for Perfect Blending
Create a layer mask on your mountains layer. Now switch to the Pen tool for precise selection work.
Why the Pen tool instead of Quick Selection? Control. Mountains have complex edges against sky. The Pen tool lets you trace exactly where you want the cutout.
Trace carefully around the mountain peaks. Take your time on jagged edges. When you finish the path, right-click and choose Make Selection. Set Feather Radius to 0.5 pixels. This creates a tiny soft edge that blends better than hard selections.
Press Ctrl/Cmd + Shift + I to invert your selection. Then grab a black brush and paint the selected area on your mask. The sky disappears, leaving only mountains.
Creating Realistic Water Reflections
This separates amateur composites from professional work. Real reflections aren’t just flipped copies of objects. They interact with water movement and light.
Duplicate your island and mountain layers. Flip them vertically using Edit > Transform > Flip Vertical. Position these flipped layers below the originals to simulate reflections.
But don’t stop there. Add motion blur to your reflections using Filter > Blur > Motion Blur. Set the angle to 90 degrees (straight down) and distance around 10-15 pixels. This mimics water ripples distorting the reflection.
Then reduce opacity to 60-70%. Real reflections are never as bright as the original object. Water absorbs some light.
Adding the Oversized Moon Drama
Place your moon image above all other layers. Scale it larger than realistic. That’s the point. Surreal means bending reality deliberately.
Position the moon where it creates visual interest. Off-center usually works better than dead center. The rule of thirds applies even in fantasy scenes.
Next, add a subtle glow around the moon. Create a new layer beneath the moon. Use a soft white brush at low opacity to paint a gentle halo. This simulates atmospheric scattering of moonlight.
Then adjust the moon’s color temperature to match your overall scene. If you added warm filters earlier, the moon needs slight warming too. Use Color Balance adjustment layer clipped to the moon layer.
Lighting Consistency Across Elements
Here’s where most photo manipulations fail. Elements from different photos have different lighting. Your job is making everything look like it belongs in the same scene.
Add a new layer set to Overlay blend mode above everything. Paint with a soft white brush where moonlight should hit surfaces. Focus on the tops of mountains and the island’s highest points.
Then create another layer in Multiply mode. Paint with dark blue or purple in shadowed areas. This deepens shadows and adds nighttime atmosphere.
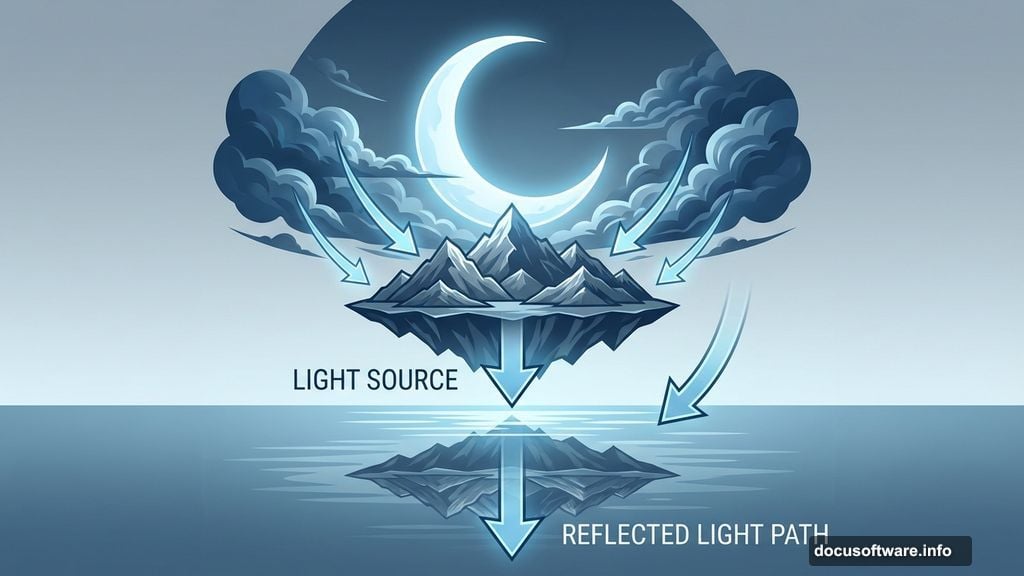
Remember: Light should come from one main direction. Pick where your moon sits, then make all highlights and shadows consistent with that light source.
Final Color Grading for Unity
Add a Curves adjustment layer at the very top of your layer stack. Make subtle S-curve adjustments in the RGB channel. This increases overall contrast while maintaining detail.
Then switch to individual color channels. Add slight blue to shadows in the Blue channel. This creates that cinematic night-time look.
In the Red channel, add warmth to midtones. This prevents your image from going too cold and lifeless.
Finally, add a subtle vignette. Create a new layer, fill it with black, and add a layer mask. Use a large soft brush with black to reveal the center, leaving darker edges. Set this layer to 20-30% opacity.
Why This Technique Matters Beyond This Project
You didn’t just learn how to make one specific image. You learned fundamental compositing principles.
The Clone Stamp technique works for any cleanup job. The masking approach applies to all photo manipulation. Color adjustment strategies transfer to every project.
Plus, understanding light direction and reflection physics makes you better at all Photoshop work. These concepts separate people who follow tutorials from people who create original work.
So don’t just make this exact island scene. Take these techniques and build something completely different. That’s when you know you’ve really learned the skills.
Your first attempt probably won’t be perfect. Mine wasn’t. But each composite you create improves your eye for detail and your technical execution. That’s how skills develop. Through practice and iteration, not perfection on the first try.