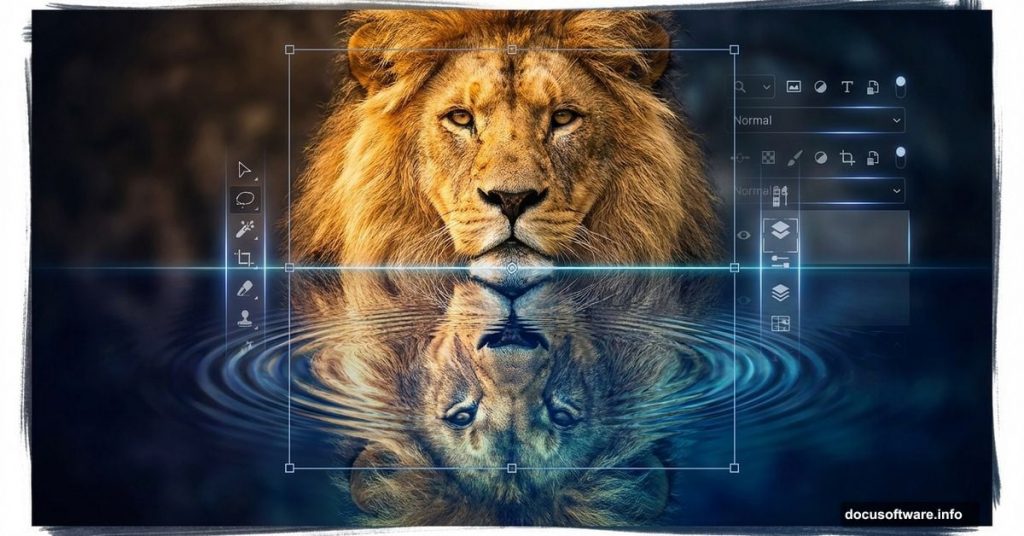
Want to create dramatic wildlife photo manipulations? This guide shows you exactly how to build a powerful lion-and-water scene from scratch.
Photo manipulation combines technical skill with creative vision. Plus, water reflections add that professional polish that makes images pop. Let’s break down each step so you can recreate this effect yourself.
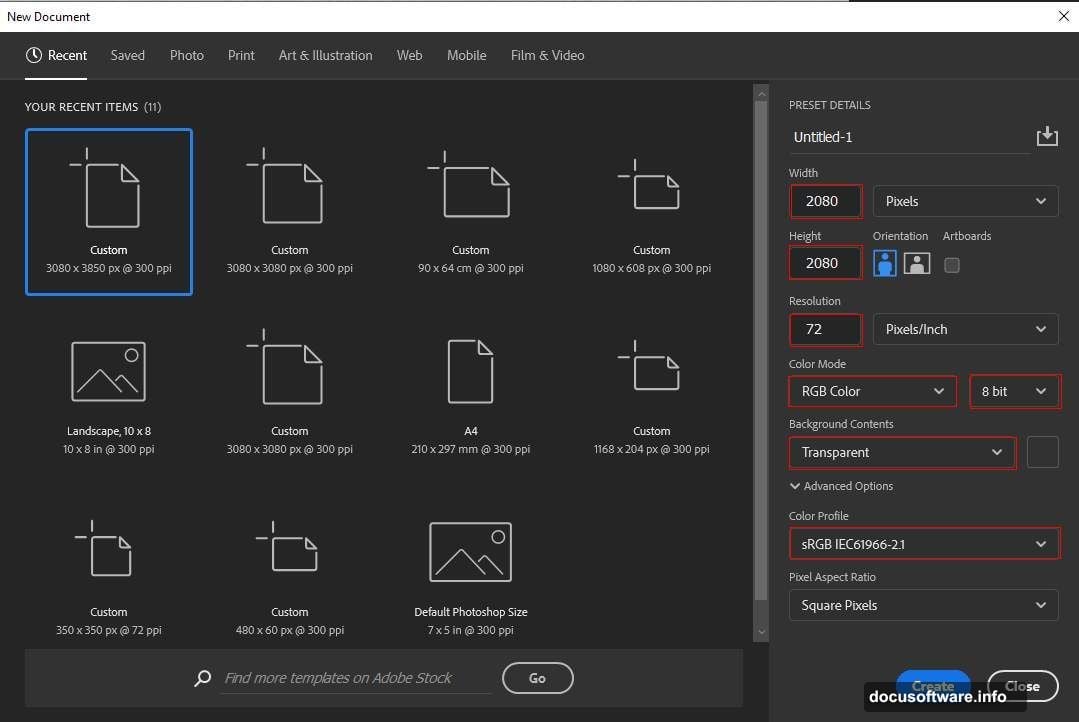
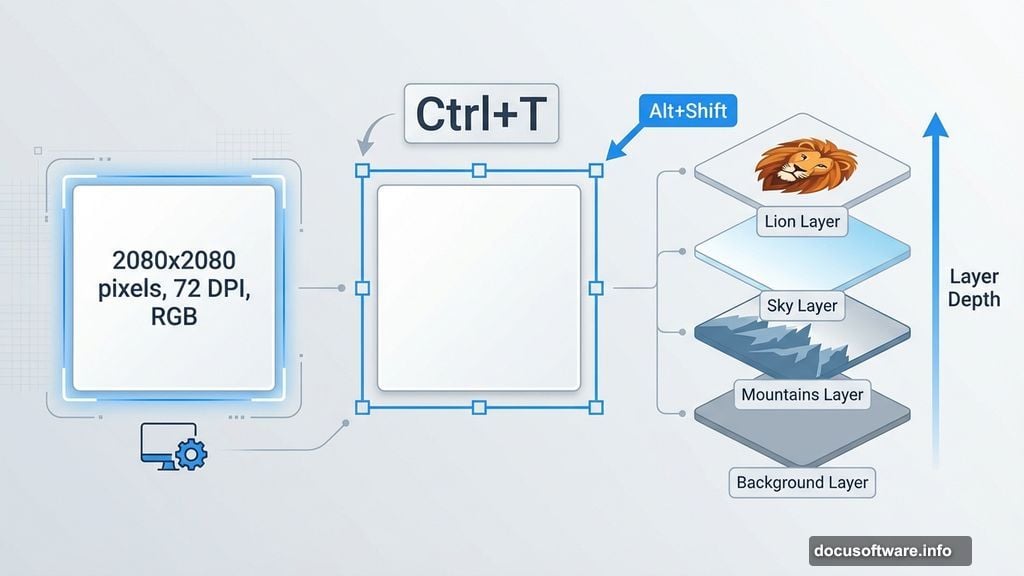
Set Up Your Canvas Right
Start with proper dimensions. This matters more than people realize.
Create a new file in Photoshop. Set width and height to 2080 pixels. Use 72 DPI resolution for web work. Choose RGB color mode at 8-bit depth. Start with a transparent background so you maintain flexibility later.
Why square? It gives you options. You can crop to landscape or portrait later without losing important elements. Plus, social media loves square formats.
Place Your Base Background
Now add your foundation layer. Go to File > Place and select your background image.
Position it carefully. Use the transform tool with Ctrl/Cmd + T. Hold Alt + Shift while dragging corners to maintain proportions. In newer Photoshop CC versions, just Alt works fine. This keeps everything symmetrical.
The background sets your entire mood. Choose carefully. Natural landscapes work best for wildlife scenes because they feel authentic.
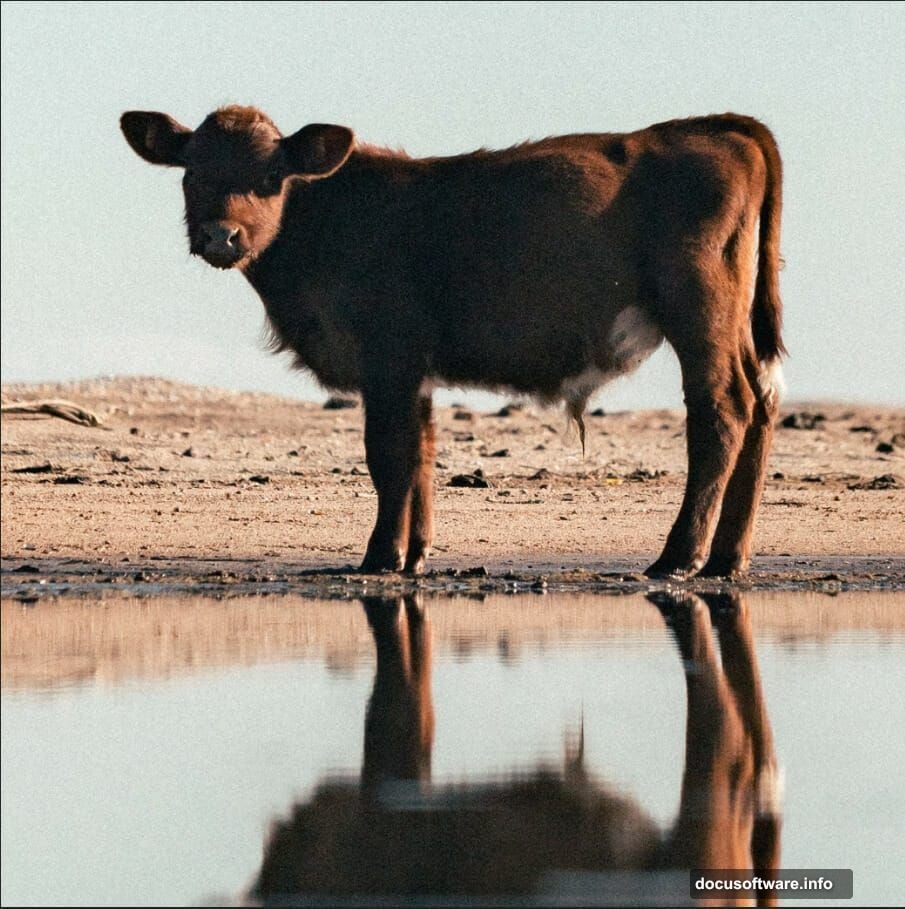
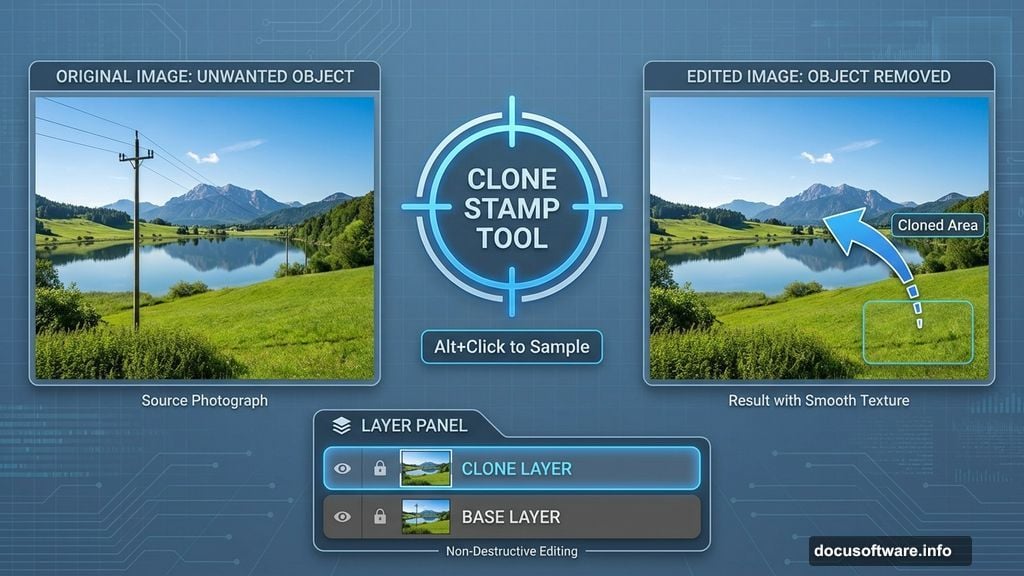
Remove Unwanted Objects with Clone Stamp
Here’s where patience pays off. The Clone Stamp tool becomes your best friend.
Select a soft brush first. Size it to cover the object you’re removing. Medium softness works best for smooth edges. Too hard creates obvious lines. Too soft looks blurry.
Hold Alt and click near the object. This samples clean pixels. Then paint over what you want gone. The cursor shows exactly what you’re cloning. So you can see before you commit.
Work on a new layer. Always. This lets you undo mistakes without destroying your base. If it looks obvious, sample different pixels and try again. Natural textures hide edits better than uniform areas.
Group your layers when done. Select all and press Ctrl/Cmd + G. Organization saves headaches later.
Add Mountains and Sky Layers
Time to build depth. Place your mountain and sky images next.
Mountains create midground interest. They break up empty space between foreground and sky. Position them carefully using the same transform techniques from earlier.
Sky determines lighting mood. Dramatic clouds suggest power and energy. Clear skies feel peaceful. Match your sky to the emotion you want viewers to feel.
Blend these layers naturally. Use soft erasers on edges where they meet other elements. Sharp boundaries scream “fake photoshop job.” Soft transitions look real.
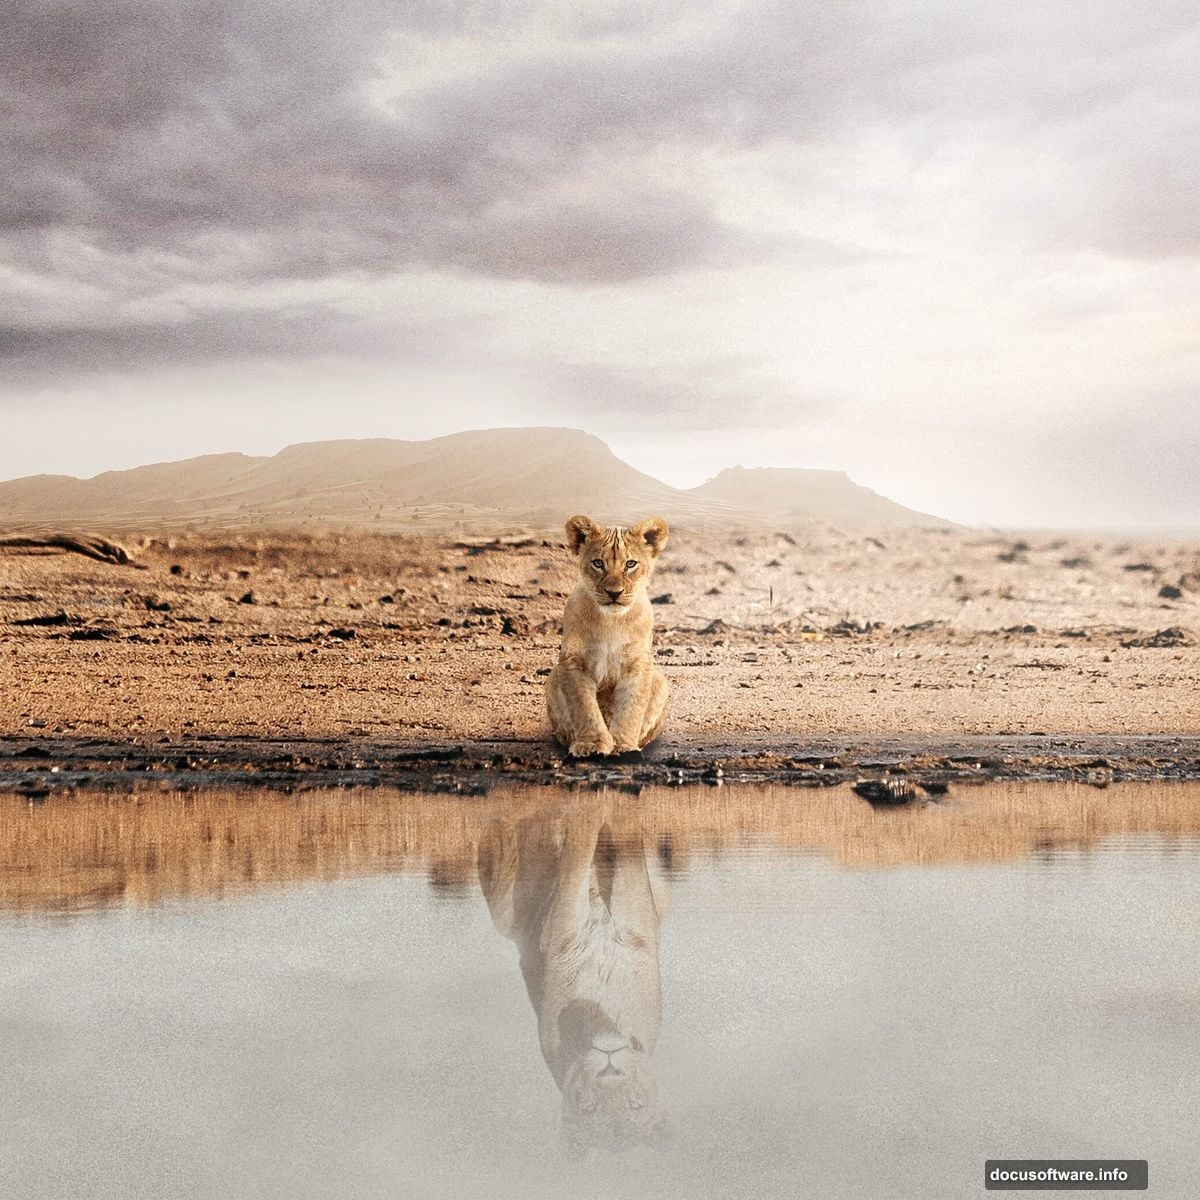
Position Your Young Lion
Now for the star of your scene. Place the young lion image.
Transform and scale appropriately. Lions in nature rarely sit perfectly centered. Slight off-center placement feels more dynamic. Plus, it follows the rule of thirds for stronger composition.
Pay attention to lighting direction. Your lion’s highlights should match the sky lighting. If the sky shows sunset from the right, lion highlights need to come from the right too. Mismatched lighting kills believability instantly.
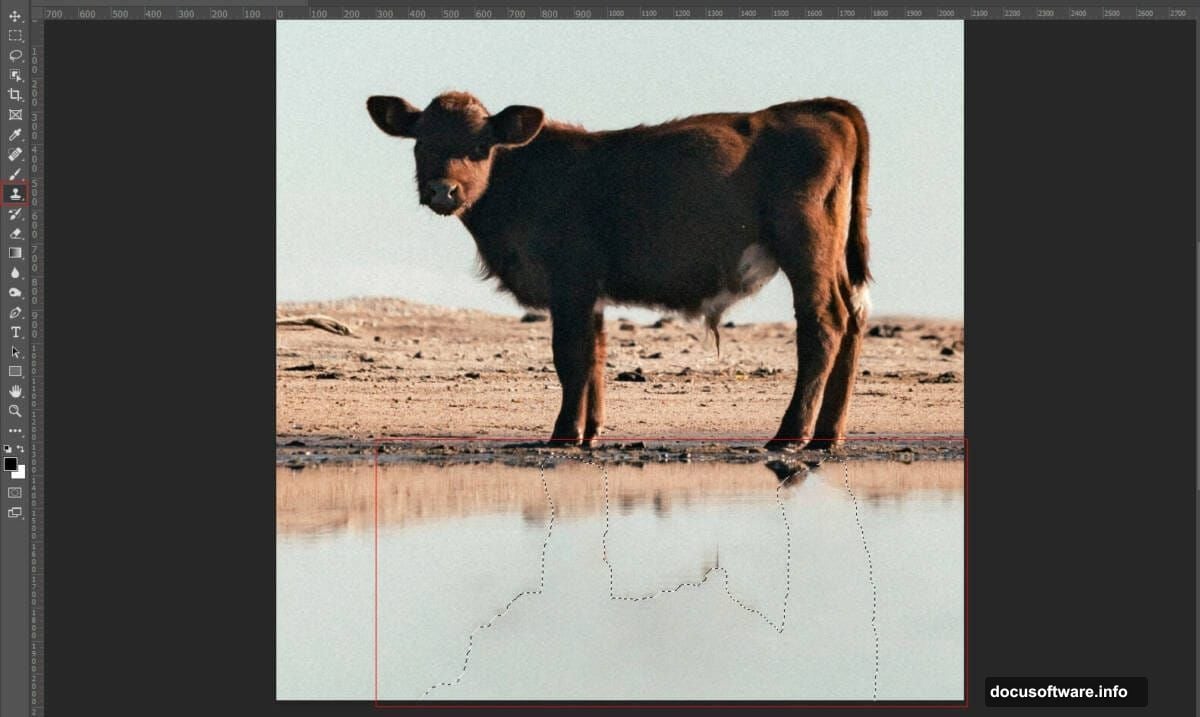
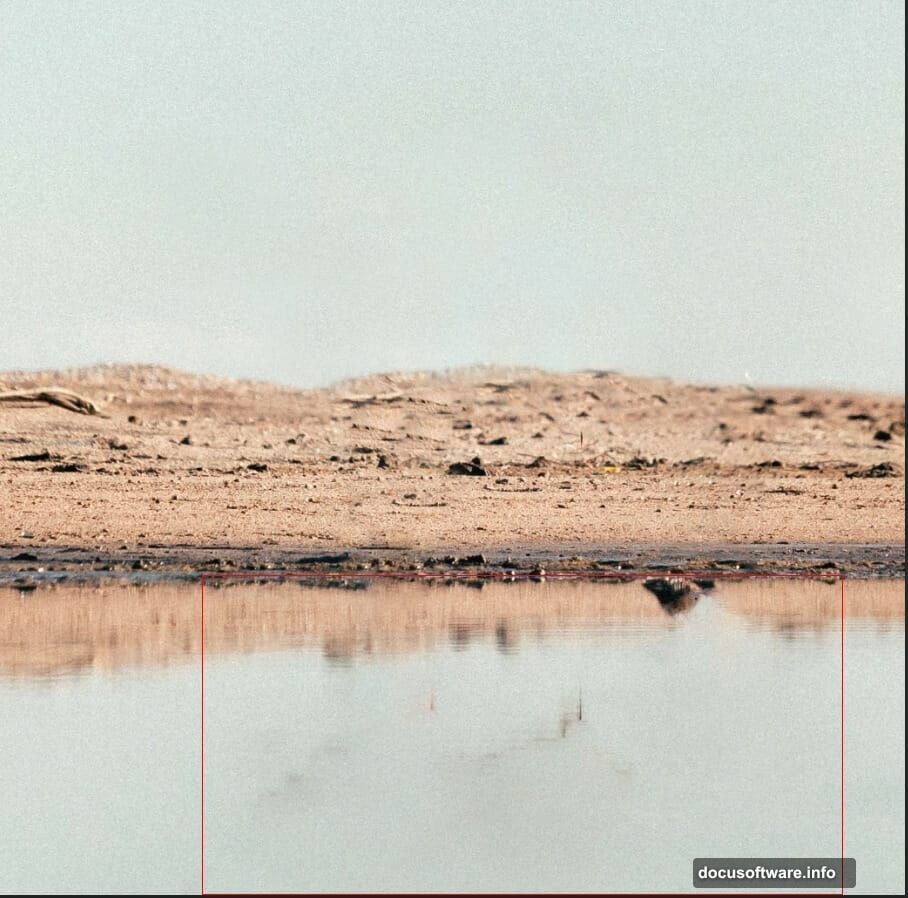
Create the Water Reflection Effect
Reflections make or break water scenes. Here’s how to nail them.
Duplicate your lion layer. Flip it vertically using Edit > Transform > Flip Vertical. Position this flipped version below the original. Line up the bottom of the lion with the top of the reflection.
But don’t stop there. Real reflections aren’t perfect mirrors. Add motion blur to simulate water movement. Go to Filter > Blur > Motion Blur. Keep it subtle. Too much looks like wind, not water.
Reduce opacity slightly on the reflection. Water absorbs light. So reflections always appear slightly darker than the original object. Drop opacity to 85-90% for realistic results.
Add ripple effects if you want. Filter > Distort > Ripple creates water texture. Use very low settings. Overdoing ripples makes it look like a cartoon pond.
Balance Everything with Adjustment Layers
Adjustment layers unify your composition. They make separate photos look like one cohesive scene.
Add a Curves adjustment layer. Press Ctrl/Cmd + I to invert the layer mask to black. This hides the adjustment initially.
Use a soft white brush on the mask. Paint where you want the adjustment to show. This gives you precise control over which areas get darker or lighter. Target specific zones instead of affecting everything.
Add another Curves layer for different areas. Maybe brighten the lion while darkening the background. This creates depth through contrast. Foreground subjects should generally be brighter than backgrounds.
Experiment with different curve shapes. S-curves add contrast. Lifting shadows brightens dark areas. Pulling down highlights creates moody drama.
Add Atmospheric Light Rays
Light rays inject energy and drama. They’re easier to add than you might think.
Use custom ray brushes or create your own. Position rays coming from your light source direction. If your sky shows sun on the left, rays must come from the left.
Set ray layers to Screen or Lighten blend mode. This makes them interact naturally with underlying layers. Lower opacity until they look subtle. Obvious rays feel cheesy and overdone.
Color your rays to match scene lighting. Warm golden rays for sunset. Cool blue rays for overcast. White works for midday sun. Small color choices create big mood differences.
Apply Camera Raw Filter for Final Polish
The Camera Raw filter gives you pro-level color grading. It’s like Instagram filters but actually good.
Go to Filter > Camera Raw Filter. This opens a powerful editing interface. Start with basic adjustments. Bump clarity slightly for sharper details. Add vibrance to make colors pop without oversaturating.
Adjust temperature to unify color tone. Warm up for golden hour vibes. Cool down for mysterious moody feels. Small temperature shifts change entire emotional tone.
Play with the tone curve. Lift shadows for airier looks. Crush blacks for dramatic contrast. The curve gives you precise control over every tonal range.
Don’t skip the detail panel. Add subtle sharpening to your lion. But avoid sharpening the background too much. Selective sharpness creates depth by guiding viewer focus.
Common Mistakes to Avoid
Most beginners make the same errors. Learn from them instead of repeating them.
Mismatched lighting kills realism instantly. Check every layer’s light direction. Sun coming from two directions looks fake no matter how good your techniques are.
Over-editing creates that “photoshopped” look everyone hates. Subtle always wins over dramatic. If an adjustment feels too strong, dial it back 30%. You probably just found the right amount.
Ignoring scale relationships makes scenes feel off. A lion shouldn’t be bigger than mountains unless you’re creating fantasy art. Real-world proportions ground your images in believability.
Forgetting to blend edges creates floating cutout looks. Every placed element needs soft edge treatment. Use soft erasers or layer masks with feathered brushes. Hard edges only work for specific stylistic choices.
Practice Makes These Techniques Automatic
This workflow seems complex at first. But each step becomes intuitive with practice.
Start simple. Master backgrounds before adding complex subjects. Learn Clone Stamp thoroughly before tackling reflections. Build skills progressively instead of trying everything at once.
Save your work in layers. Always. PSD files let you revisit and adjust later. Flattened JPEGs lock you into mistakes forever. Flexibility matters more than file size.
Study real photos of your subject matter. How do actual lion reflections look in water? What happens to light in nature? Observation improves manipulation skills faster than any tutorial.
Your first attempts won’t look professional. That’s normal and expected. But each project teaches techniques that compound over time. Suddenly you’ll create stunning images without consciously thinking through every step.
That’s when photo manipulation becomes art instead of just following instructions.