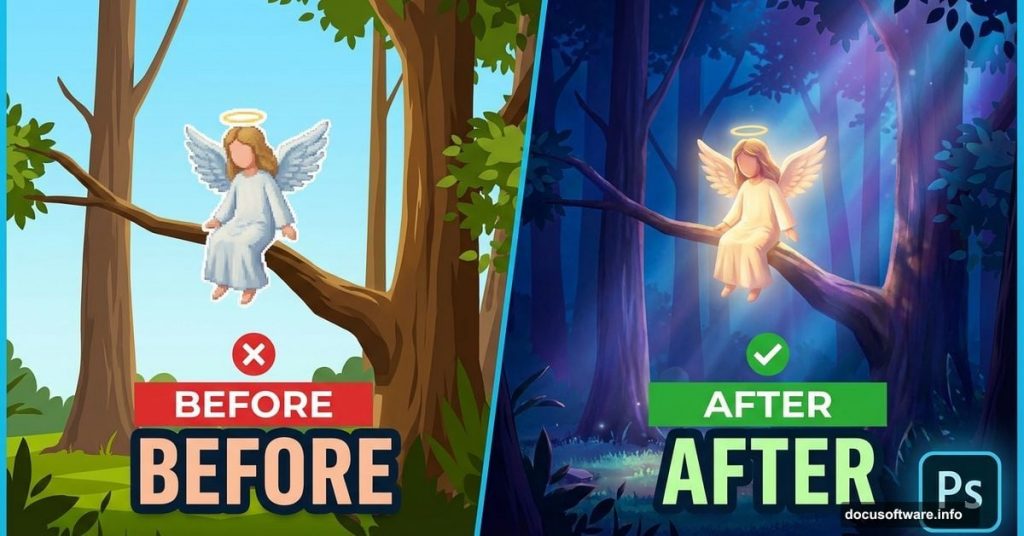
Most fantasy composites scream “beginner project.” The lighting feels wrong. Colors clash. Shadows don’t match. You can spot them instantly.
But night forest scenes with angels? Those are especially tricky. The contrast between magical light and dark woods requires careful balance. Plus, adding wings to a person without them looking pasted on takes real technique.
This tutorial breaks down exactly how to avoid those amateur mistakes. You’ll learn how to transform daylight forest photos into convincing nighttime scenes, add realistic angel wings, and create light shafts that actually look like they belong in the image.
Let’s fix those fake-looking composites.
Why Most Night Forest Edits Fail
Here’s the problem. People rush straight to adding the subject without fixing the background first.
Daylight forest photos have warm tones and bright highlights. So when you paste in a person and try to make it “nighttime” with one adjustment layer, everything looks off. The lighting direction doesn’t match. Shadow colors are wrong. The whole scene feels disconnected.
The solution? Build the night atmosphere first. Then add your subject. Finally, integrate them with proper shadows and color matching.
This approach takes more steps upfront. But it saves hours of frustration trying to make mismatched elements look cohesive.
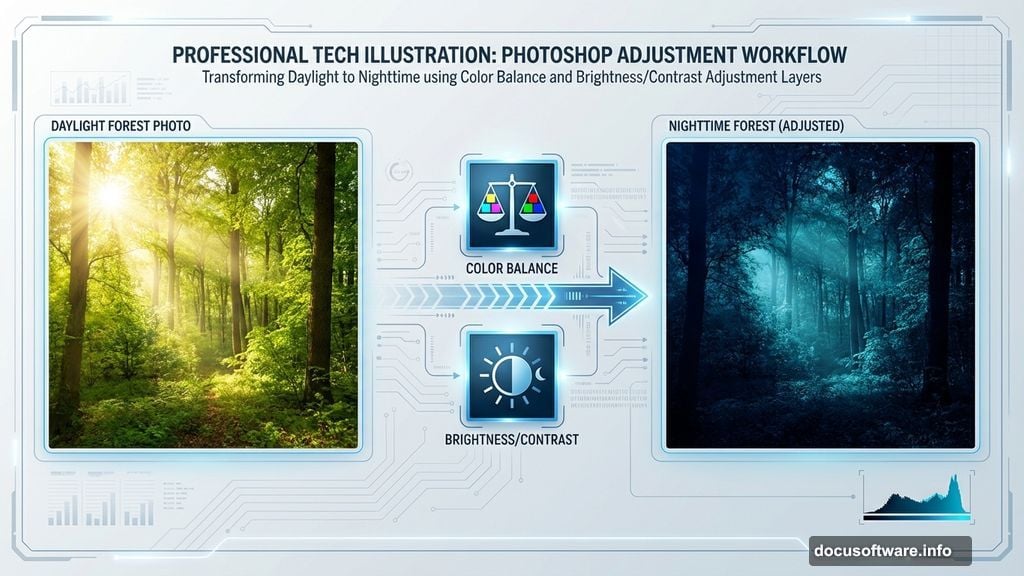
Transform Daylight Into Night Forest
Start with a 1600x1200px canvas. Place your forest stock photo as the base layer.
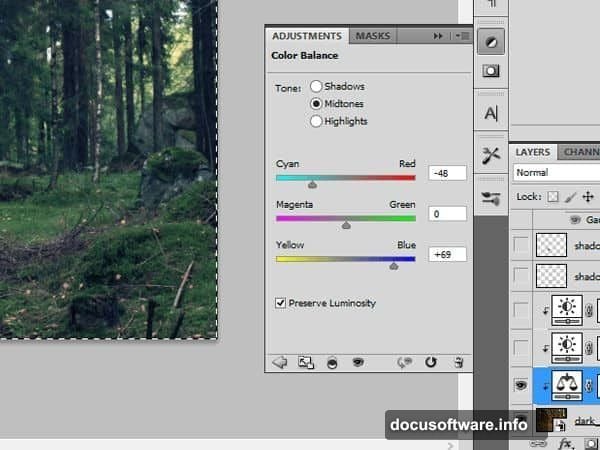
Now we’ll convert it to night. Add a Color Balance adjustment layer. Push the shadows toward blue and cyan. Night scenes always lean cooler in tone. For midtones, add slight blue. Keep highlights relatively neutral but with a touch of blue.
Next comes the darkness itself. Add a Brightness/Contrast adjustment layer. Drop brightness significantly. Forests at night are dark. Don’t be afraid to really push it down.
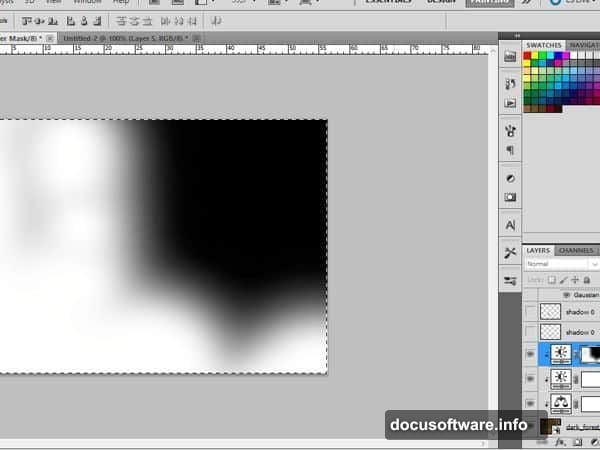
But wait. Real nighttime forests aren’t uniformly dark. Some areas catch more moonlight or ambient light than others. So add another Brightness/Contrast layer. This time, drop it even darker. Then use a soft brush on the layer mask to paint back lightness in strategic spots.
Think about where light would naturally fall. Maybe the upper portions of trees catch more skylight. Perhaps there’s a clearing that stays brighter. Vary the darkness across your scene for realism.
Create Believable Shadows Before Adding Your Subject
Most tutorials skip this step. They add the subject first, then try to fix shadows. That’s backward.
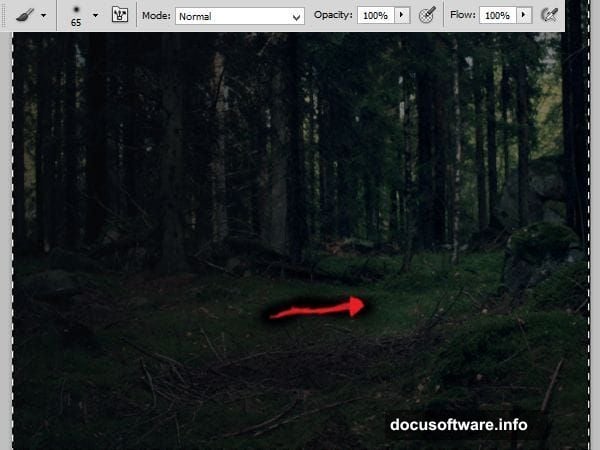
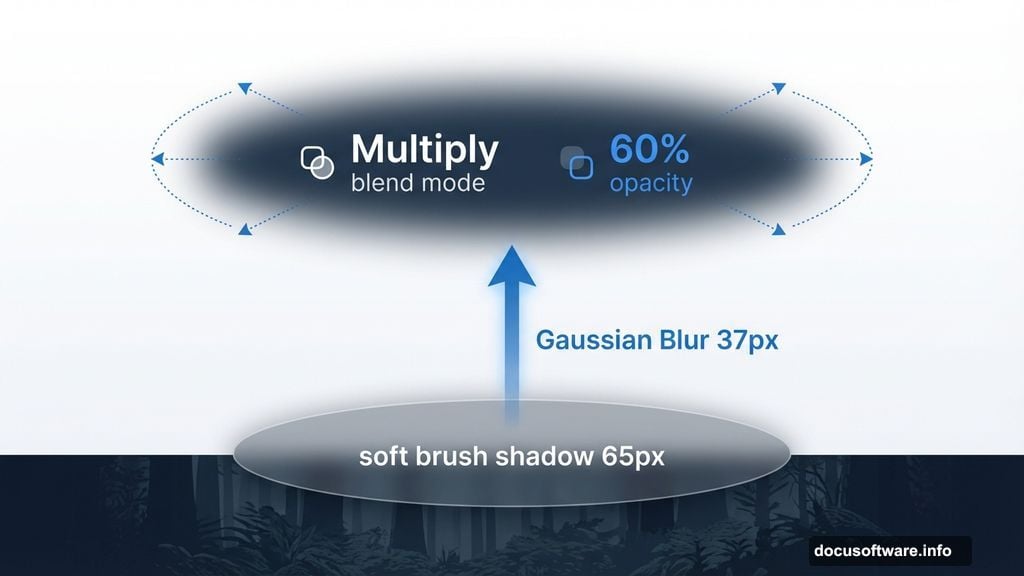
Instead, build your shadow foundation now. Create a new layer. Use a soft round brush (around 65px) with a dark gray color. Paint where your angel will stand. This creates the base shadow pool.
Now blur it with Gaussian Blur (around 37px). Real shadows have soft edges, especially in low light. Change the blending mode to Multiply. Drop opacity to about 60%. Shadows in dim lighting are rarely pitch black.
Add another layer. Use the same brush technique but smaller (around 123px). Paint a darker center spot with a dark gray. Then add a lighter gray accent with a 23px brush. This creates depth variation in your shadow.
Keep building shadow layers. Each one represents different shadow densities. Dark core shadows where the body blocks light. Medium shadows extending outward. Soft ambient shadows at the edges.
For wing shadows specifically, create another layer. Paint a gentle curved shadow shape where wings will extend. Blur it softly. These shadows should be lighter than body shadows since wings are translucent and allow some light through.
Add and Mask Your Model
Now paste in your model. Center her in the scene. Time for careful masking.
Use a hard-edged brush for body contours. You want clean edges along arms, legs, and torso. But switch to a soft brush for hair. Hair benefits from softer mask edges that blend naturally.
Don’t stress about grass overlapping the bottom of your subject yet. We’ll handle that later with additional grass elements layered on top.
For the cleanest mask, zoom in close. Take your time. Work in sections. Body first, then hair, then any problem areas. The mask quality determines whether your composite looks professional or amateur.
Match Your Subject to the Scene
Your model comes from a different photo. Different lighting. Different color temperature. Different brightness. So she won’t match the dark forest automatically.
Add a Brightness/Contrast adjustment layer clipped to your model. Drop the brightness significantly. She needs to match the dark forest environment. Use the layer mask to keep some areas slightly brighter where forest light would hit her.
Now add a Color Balance adjustment layer, also clipped to your model. Push her tones cooler to match the blue night atmosphere. Pay attention to skin tones especially. They should feel moonlit, not warm and sunny.
Add another Brightness/Contrast layer for refined shadow control. Drop it darker. Then mask it carefully. Light comes from the upper right in this scene. So the left side of your model and any areas facing away from that light direction need to be darker.
Build up these adjustments gradually. Multiple subtle layers work better than one extreme adjustment. You can fine-tune each aspect separately this way.
Add Wings That Don’t Look Pasted On
Here’s where most angel edits fall apart. People just paste wings and call it done. The wings look flat and obviously added.
Instead, paste your wing stock. Try different wing positions and sizes. Wings should feel proportional to your subject. Too small looks weird. Too large overwhelms the composition.
For natural integration, add a layer mask to the wings. Soften the edges where wings connect to the model’s body. Use a soft brush to create a gradual blend. Real wings would have slight translucency at the edges, not hard cutoffs.
Now match the wing lighting to your scene. Add adjustment layers clipped to the wings. Drop brightness where wings face away from your light source. Add slight blue tones to match the night atmosphere.
For extra realism, add subtle shadows from wings onto the model’s body. Create a new layer set to Multiply. Paint soft shadows where wing edges cross in front of or behind the body. This sells the spatial relationship.
Consider adding a very subtle glow along wing edges that face your light source. Real feathers catch and scatter light. A barely-visible warm rim light on the upper edges makes wings feel three-dimensional.
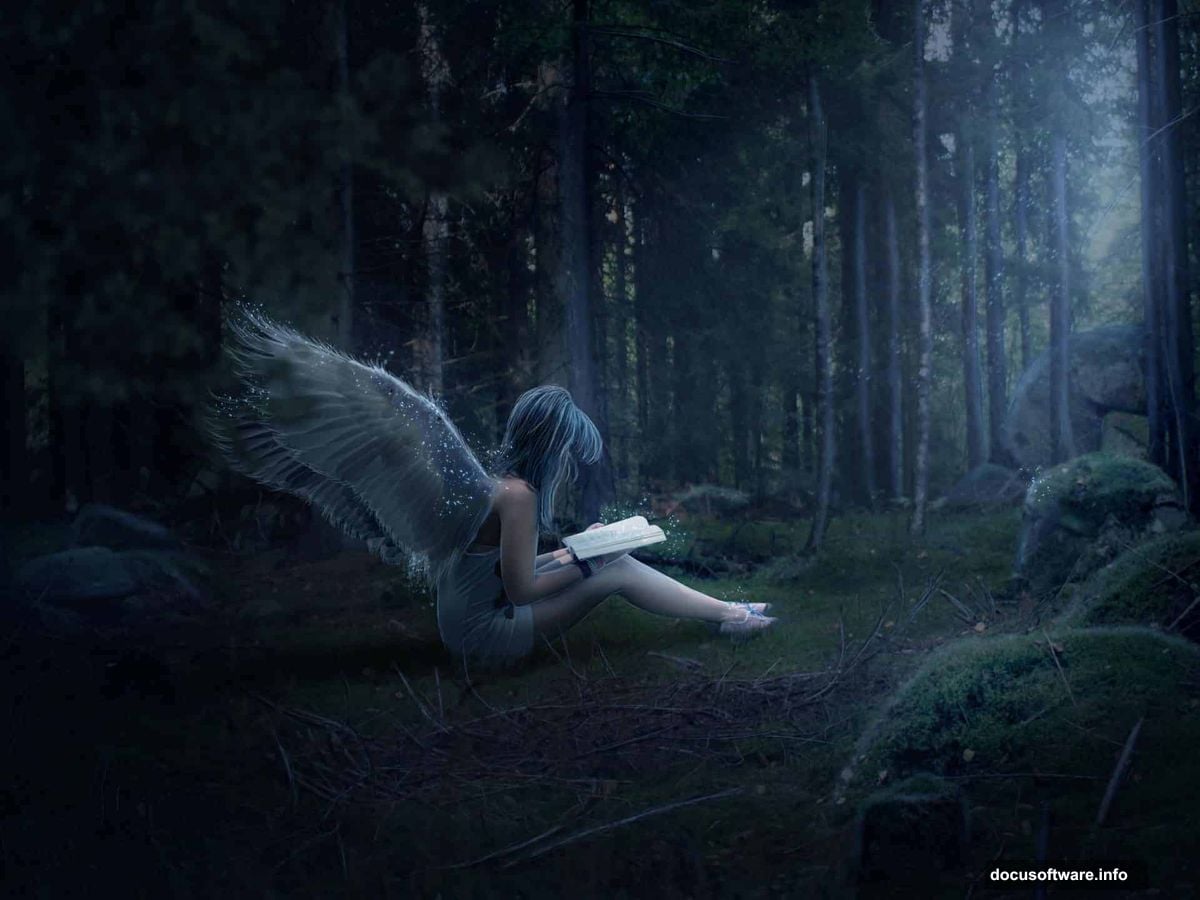
Build Light Shafts Through Trees
Night forests with divine figures need atmospheric light. Those dramatic shafts cutting through darkness.
Create a new layer. Use a soft white brush. Paint several vertical or angled streaks where you want light to break through the canopy. Keep these fairly subtle at first.
Lower the layer opacity significantly. Real light shafts in forests are diffuse, not spotlights. Maybe 20-30% opacity works well.
Add a Gaussian Blur. Light shafts aren’t sharp beams. They’re soft, hazy, and atmospheric. Blur them until they feel natural.
For extra atmosphere, add dust particles in the light beams. Create a new layer. Use a small, soft white brush. Click randomly throughout your light shafts. Vary the size and opacity. Then blur slightly. These particles catch light and make shafts visible.
Consider changing the light shaft layer to Screen or Linear Dodge blending mode. These modes create that glowing quality light has when it cuts through darkness.
Layer Grass Over Subject’s Feet
Remember that grass issue? Time to fix it. Download some grass PNG overlays with transparent backgrounds.
Place grass elements in front of your subject’s lower legs and feet. This sells the illusion that she’s standing in the forest, not floating above it.
Use layer masks to blend grass edges naturally. Some blades should partially obscure the feet. Others should tuck behind. This depth variation looks more realistic than a flat grass layer.
Adjust grass colors to match your scene. Add Color Balance and Brightness/Contrast adjustments. The grass should feel part of the same nighttime environment. Slightly blue-tinted and darker than in its original photo.
Add multiple grass layers at different depths if possible. Foreground grass, middle-ground grass, and background grass all at slightly different scales and densities. This creates convincing depth of field.
Add Atmospheric Glow
Angelic figures need that ethereal quality. Not cheesy, obvious glowing. Subtle, convincing luminosity.
Create a new layer above your subject. Use a large, soft white brush at very low opacity. Paint gently around the figure, especially near the book or any focal point. This creates a subtle aura.
Change the layer to Screen or Soft Light blending mode. Drop opacity to 15-25%. The glow should be barely perceptible. You’re aiming for “something feels special about this figure” not “someone went crazy with the glow tool.”
Consider adding a warmer glow near the book specifically. If she’s reading, that could be the light source. Create another layer. Use a soft orange or golden brush. Paint subtle warmth emanating from the book pages. This gives viewers a reason for some illumination on her face.
For the ultimate polish, add a subtle gradient map adjustment layer over everything. A slight blue-purple gradient enhances the mystical night atmosphere. Keep it extremely subtle. The adjustment should be felt more than seen.
Final Color Grading
Your composite is nearly complete. Now tie everything together with cohesive color grading.
Add a Curves adjustment layer. Lift the shadows slightly in the RGB channel. Pure black shadows are rare. Even night scenes have some fill light.
In the Blue channel, lift the shadows further. This reinforces that cool night atmosphere. Maybe add a very slight S-curve in the RGB channel for micro-contrast. This makes details pop without looking oversaturated.
Consider adding a subtle vignette. Create a new layer filled with black. Use a large soft eraser to clear the center. Lower opacity to 20-30%. This draws the eye toward your angel and adds depth.
For the finishing touch, add a subtle grain or noise. Real photos have texture. Perfectly smooth composites look artificial. Add a 1-3% noise layer. It’s barely visible but makes the whole image feel more cohesive and photographic.
The Integration Detail Most People Miss
Here’s the secret that separates amateur composites from professional work: reflected light.
Your subject doesn’t exist in isolation. The environment should affect her appearance. So add subtle color tints where forest elements would cast colored light onto her.
If there’s green foliage near her arm, add a very subtle green tint to that arm area. If the ground is brown earth, add a slight warm reflection underneath. These micro-adjustments are barely noticeable individually. But together they sell the illusion that your subject truly exists in this space.
Most people never do this step. They match overall colors and brightness but ignore localized color contamination. That’s why their composites always look slightly off even when technically correct.
Take an extra 10 minutes. Study where different colored elements in your scene sit near your subject. Add those subtle color influences. The difference is remarkable.
Creating mystical forest scenes takes patience. You can’t rush through adjustment layers or skip masking details. But the result is fantasy composites that actually look believable instead of obviously fake.
Focus on building your night atmosphere first. Then add your subject and integrate her with multiple adjustment layers. Finally, tie everything together with atmospheric effects and careful color grading.
The techniques here work for any fantasy composite. Master them and your forest angels, fairy scenes, and magical creature edits will stop looking like beginner projects and start turning heads.