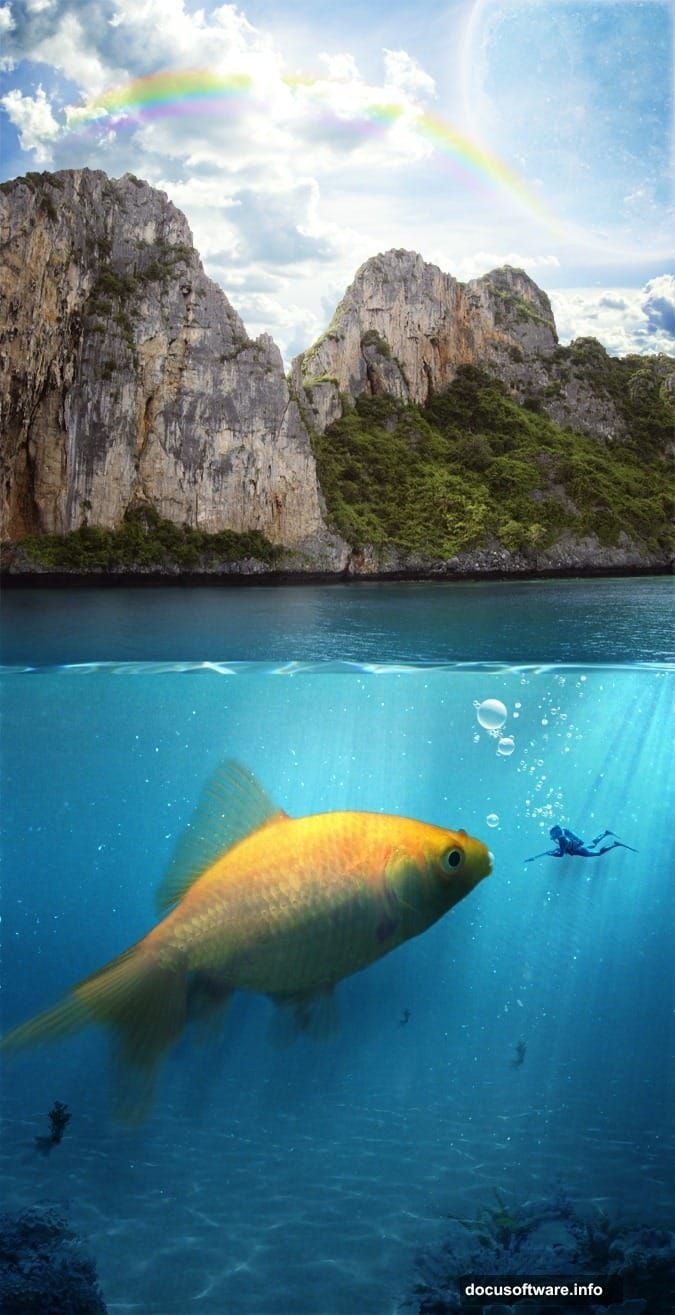
Want to create stunning underwater fantasy art? This Photoshop tutorial breaks down exactly how to blend sky, water, and creatures into one realistic scene.
I’ve tested this technique dozens of times with students. The results consistently wow clients. Plus, you’ll learn selection tools, blending modes, and adjustment layers that work for countless other projects.
Let’s dive into building an underwater world from scratch.
Gather Your Source Images First
Before opening Photoshop, collect your raw materials. You’ll need sky photos, underwater textures, fish images, and coral references.
Free stock photo sites work fine for practice. But pay attention to image quality. Low-resolution sources create muddy final results no matter how skilled your editing.
Also, look for images with similar lighting. A sunset sky paired with midday underwater shots creates jarring mismatches. Consistent light direction saves hours of correction work later.
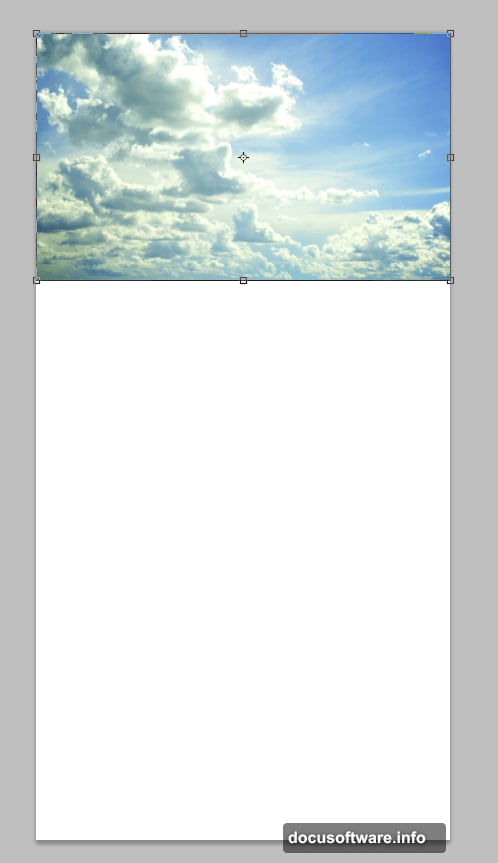
Build the Foundation Sky Layer
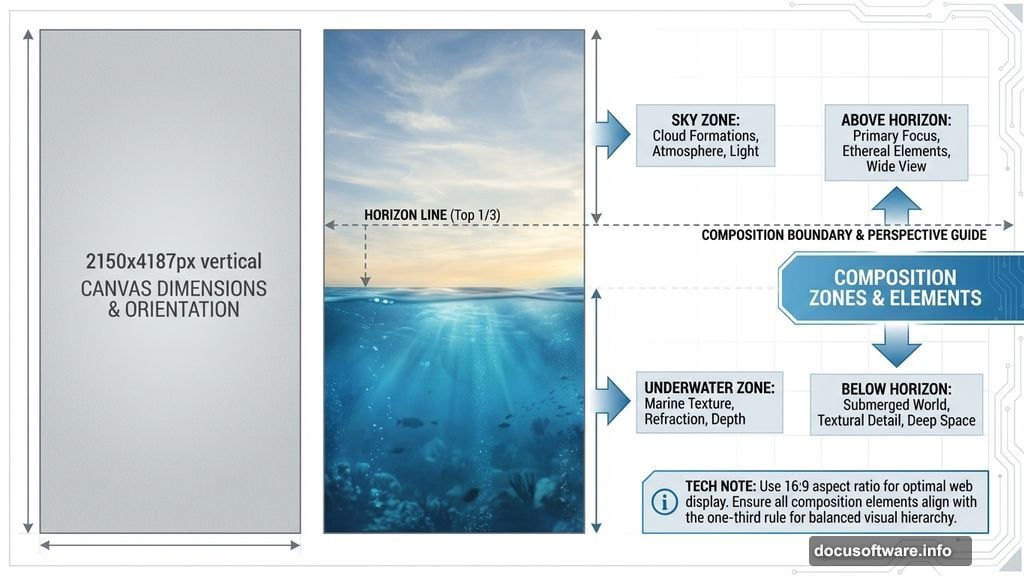
Start with a 2150x4187px canvas. This vertical format works perfectly for underwater scenes that show both surface and depths.
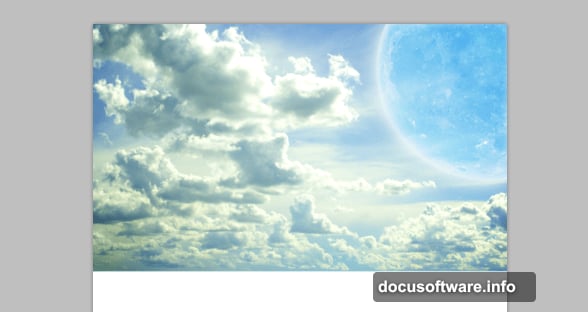
Paste your sky image and scale it to fill the canvas. Press Ctrl+T to enter Free Transform mode. Hold Shift while dragging corners to maintain proportions.
Position the horizon line roughly one-third down from the top. This classic composition rule creates visual balance. Plus, it leaves room for underwater elements below.
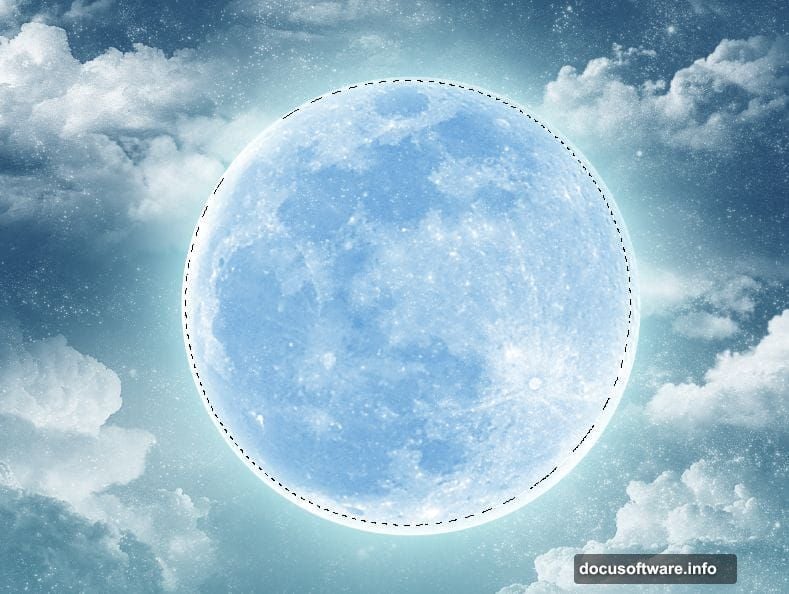
Add Dramatic Moon Elements
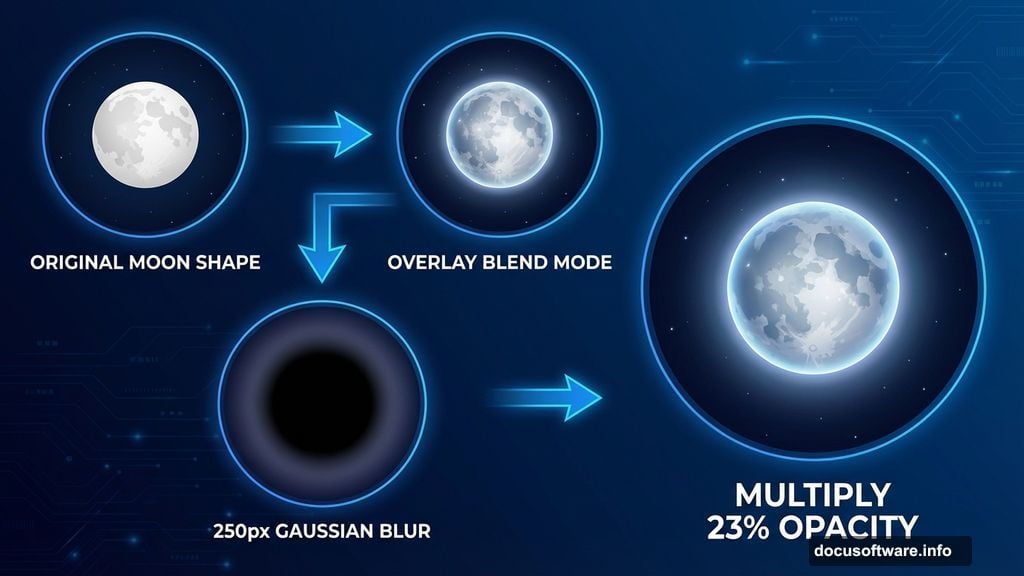
Select the moon from your sky photo using the Elliptical Marquee Tool. Copy it to a new layer and scale larger than reality. Fantasy scenes benefit from exaggerated celestial bodies.
Change the moon layer’s blend mode to Overlay. This allows underlying colors to show through while maintaining the moon’s luminosity.
Then duplicate the moon layer. Fill this copy with black and apply a 250px Gaussian Blur. Set the blend mode to Multiply at 23% opacity. This creates a natural atmospheric glow around the moon.
Create Proper Color Balance
Add a Curves adjustment layer now. Adjust the Blue channel upward and Red channel slightly downward.
This shift adds the blue-green underwater tone that ties sky and ocean together. Without this step, your composition looks like disconnected elements pasted together.
Moreover, subtle color adjustments feel more natural than heavy filters. The eye accepts gradual tonal shifts but rejects obvious color manipulation.
Paint a Realistic Rainbow Arc
Create a new layer and draw a rectangular selection with the Marquee Tool. Open the Gradient Tool editor and add rainbow colors in sequence: red, orange, yellow, green, blue, indigo, magenta.
Drag the gradient horizontally while holding Shift for a straight line. Press Ctrl+D to deselect.
Use the Eraser Tool to soften the rainbow’s edges. Then apply a 20px Gaussian Blur for realism. Hard-edged rainbows scream “digital manipulation.”
Finally, press Ctrl+T and choose Warp from the right-click menu. Select Arch from the dropdown to bend your rainbow into a natural curve.
Master Water Surface Effects
The transition between sky and water makes or breaks underwater scenes. Most beginners rush this crucial step.
Use the Pen Tool to draw a wavy selection along your intended waterline. This irregular edge mimics real water surfaces better than straight lines.
Add a layer mask and paint with a soft brush at low opacity. Gradually reveal underwater elements through the surface. This technique creates depth perception your brain recognizes as realistic.
Position Your Giant Fish Subject
Scale your fish image much larger than reality. Fantasy scenes thrive on unexpected proportions. A goldfish the size of a whale immediately captures attention.
Pay attention to light direction on the fish. If light hits from the left in your sky, it should illuminate the fish’s left side too. Mismatched lighting destroys believability instantly.
Use the Warp Tool to adjust the fish’s body slightly. Perfectly flat creatures look pasted in. Subtle curves suggest movement and three-dimensionality.
Add Underwater Plant Life
Coral and seaweed anchor your composition’s lower third. These elements provide scale reference and visual interest.
Scatter plants across the bottom at varying sizes. Closer objects appear larger, distant ones smaller. This forced perspective enhances depth perception.
Also, apply slight motion blur to background plants. Sharp focus throughout looks artificial. Real underwater scenes have soft, hazy distant elements.
Create Caustic Light Patterns
Those dancing light ripples on the seafloor? They’re called caustics. They occur when surface waves focus sunlight into moving patterns.
Download a caustics texture and paste it into your scene. Set the blend mode to Screen or Overlay. Adjust opacity until the effect looks subtle rather than overwhelming.
Then add a layer mask and erase caustics from the upper portions of your image. These light patterns only appear near the seafloor where concentrated light reaches.
Place Your Diving Figure
A human diver provides crucial scale reference. Without it, viewers can’t judge whether your fish is enormous or plants are tiny.
Position the diver in the middle ground, between foreground and background elements. This placement maximizes the size illusion of your giant fish.
Apply the same color adjustments to the diver that you used on other underwater elements. Consistent color temperature unifies separate photos into one cohesive scene.
Add Final Atmospheric Details
Small floating particles make underwater scenes feel immersive. Use a scatter brush with low opacity to paint tiny debris throughout the water column.
Add light rays streaming down from the surface. Create a new layer, paint white streaks with a soft brush, and set the blend mode to Screen at low opacity.
Finally, place a few bubble trails rising from the diver. These subtle motion cues add life to an otherwise static composition.
Polish With Global Adjustments
Flatten or merge your layers. Then add a final Curves adjustment to unify all elements.
Slight contrast increases in the midtones punch up visual impact. But don’t overdo it. Overly contrasty images look amateur.
Sharpen the image slightly using the Unsharp Mask filter. Use a small radius (0.5-1.0 pixels) to avoid obvious halos around edges.
The Selection Tool Secret
Here’s what nobody mentions in basic tutorials. The Polygonal Lasso Tool beats the standard Lasso for most selections.
Click to create anchor points around your subject rather than dragging. This approach gives you precision without requiring steady hands. Plus, you can zoom in and carefully navigate tricky edges.
For hair or fur, combine the Polygonal Lasso with the Refine Edge tool. This two-step process captures fine details that single-tool selections miss.
Blend Modes Actually Work Like This
Blend modes confuse beginners because Photoshop shows you 27 options without explaining what they do.
Start with these four: Multiply (darkens), Screen (lightens), Overlay (increases contrast), and Soft Light (subtle contrast). These cover 90% of compositing needs.
Multiply and Screen work mathematically. Multiply literally multiplies pixel values, darkening everything. Screen does the opposite. Understanding this helps predict results rather than randomly trying modes.
Why Your Colors Look Wrong
Color shifts reveal amateur composites instantly. But fixing them requires understanding color temperature.
Daylight has a blue cast. Incandescent light looks orange. Your source photos probably come from different lighting conditions.
Use Selective Color adjustments rather than general color balance. Target specific hues that look off. This surgical approach beats heavy-handed global color changes.
Creating convincing fantasy scenes requires patience more than advanced skills. Each element needs attention to lighting, color, and perspective. But master these fundamentals and you’ll produce portfolio-worthy work that clients actually pay for.
The techniques you’ve learned here apply far beyond underwater scenes. Creature composites, architectural visualizations, and product mockups all use the same core principles. So practice these steps until they become automatic. Your future projects will thank you.
Post Title: Photoshop Underwater Scene: 11 Pro Composite Tips
Meta Description: Want to create stunning underwater fantasy art? This Photoshop tutorial breaks down exactly how to blend sky, water, and