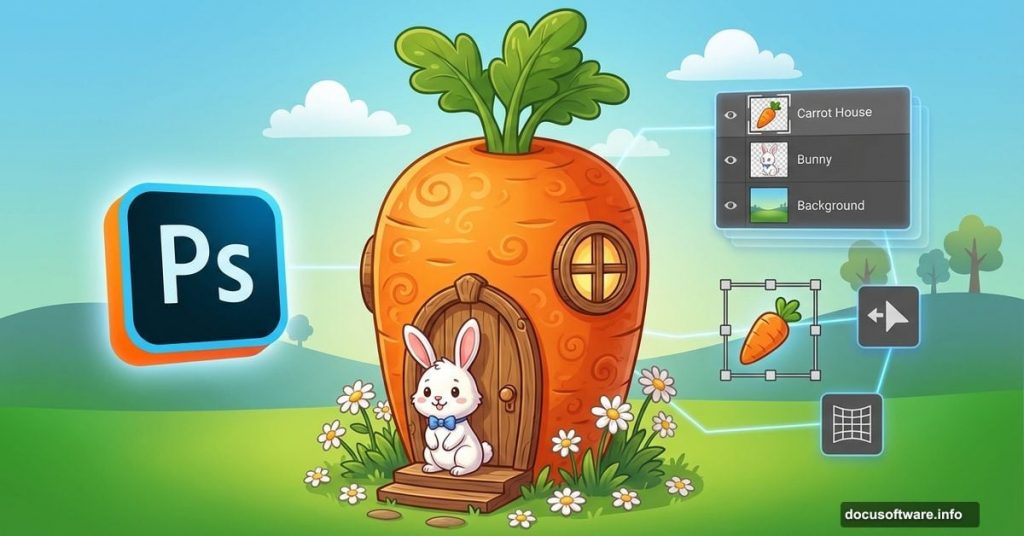
Want to build a whimsical carrot house filled with fluffy bunnies? This photo manipulation tutorial shows you how to blend multiple images into a charming cartoon-style scene.
The techniques work for any fantasy landscape project. Plus, you’ll learn to make ordinary photos look hand-illustrated. Let’s dive in.
What You’ll Need
Before starting, grab these free stock images:
- Grass texture
- Sky background
- Road and hillside
- Carrot images (one large, three small)
- Bunny photos (three different poses)
- Daisy flowers
- Wooden elements (signpost, fence, door, window)
- Small props (rug, roof texture)
Most come from free stock sites like Morguefile, Stockfreeimages, and sxc.hu. You can substitute similar images if these specific ones aren’t available.
Building Your Canvas
Start with a new document. Use bright colors for the background—white works great. Make it taller than it is wide. A 1000×1300 pixel canvas gives you plenty of room to work.
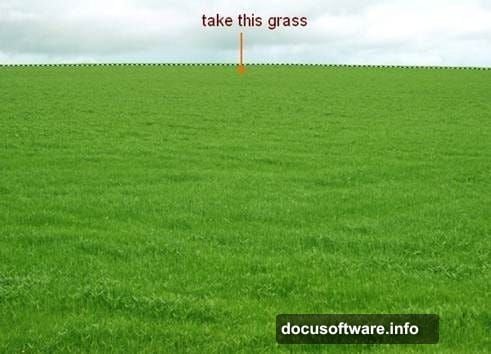
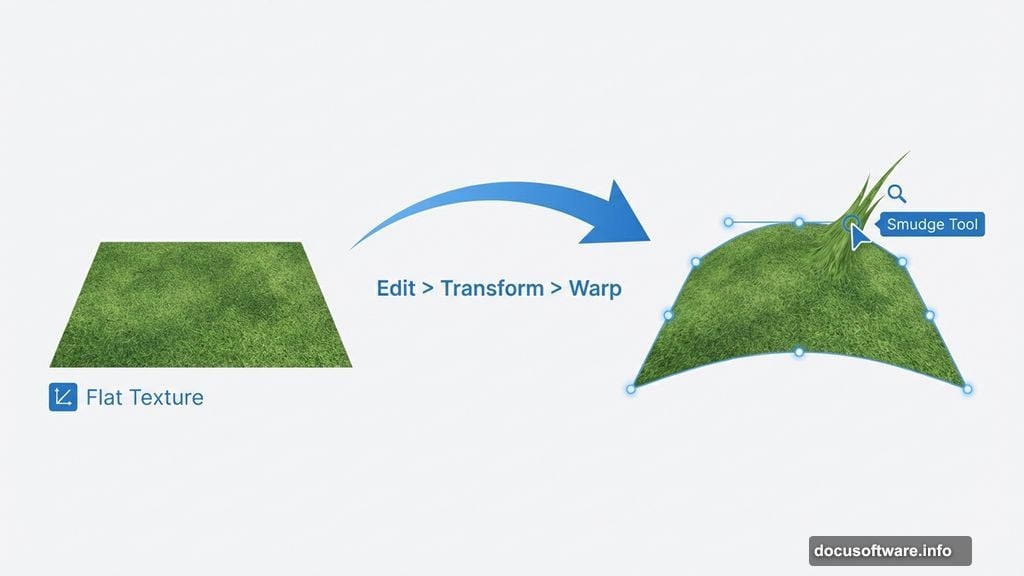
Open your grass stock image. Extract just the grass portion using your preferred selection tool. Move it onto your white canvas and resize it to fit.
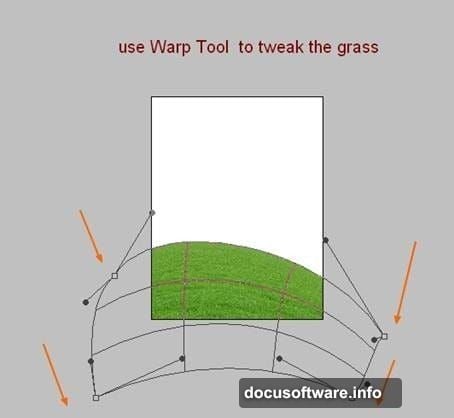
Shaping the Hill
Now comes the fun part. Go to Edit > Transform > Warp. Drag the control points to bend the grass into a rounded hill shape. Take your time here. The curve sets the foundation for your entire scene.
However, warping alone won’t cut it. The edges look too sharp and artificial.
Create a new layer above your grass. Grab the Smudge Tool by pressing R. Set the strength to 50% and check “Sample All Layers” in the properties bar.
Turn off the background layer temporarily. Use a tiny brush (6-8 pixels) to gently stretch individual grass blades outward. Follow the hill’s contour. This creates realistic texture.
The result? A natural-looking hillside instead of a flat cutout.
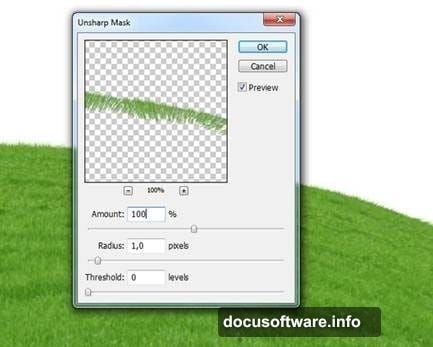
Want sharper details? Apply Filter > Sharpen > Unsharp Mask. Go easy—too much looks crunchy.
Adding Sky and Background
Open your sky stock photo. Drag it into your main document using the Move Tool (press M). Place this layer beneath your hill.
Pick whichever section of sky you like best. The beauty of photo manipulation is total creative control.
Next, add the road image. Extract the road portion and position it below the hill but above the sky. Name this layer “road” so you can find it easily later.
Flip it horizontally via Edit > Transform > Flip Horizontal. This helps the perspective flow better with your hill angle.
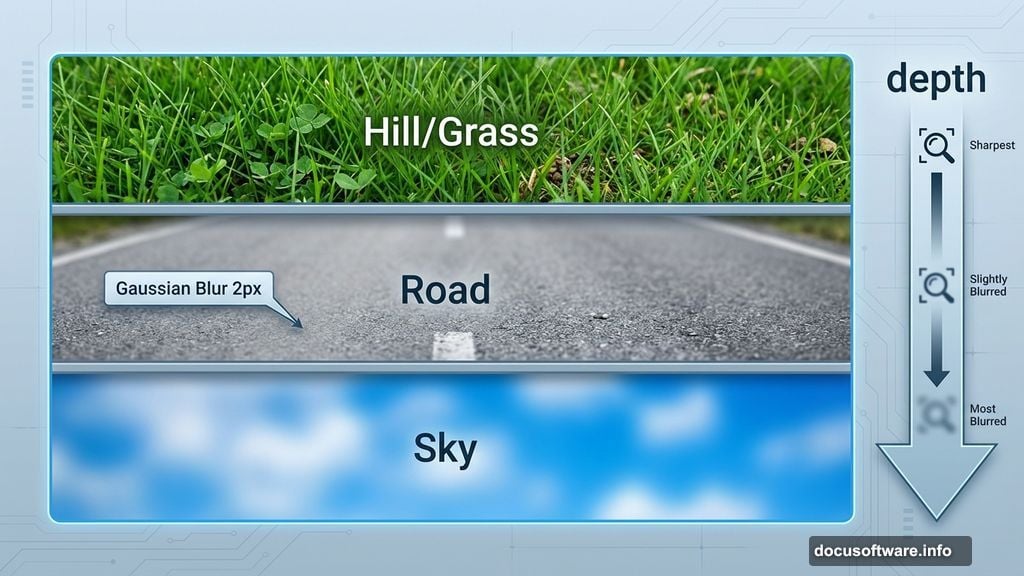
Creating Depth
The road looks too sharp compared to the soft background. Fix this with a Gaussian Blur. Go to Filter > Blur > Gaussian Blur and set the radius to 2 pixels.
Subtle blur creates depth. Objects farther away appear slightly softer than foreground elements.
But there’s another problem. The road’s colors look too dark and muddy against the bright grass and sky.
Adjusting Road Colors
Add adjustment layers with clipping masks to fix the road’s tone. On the road layer, go to Layer > New Adjustment Layer > Curves. Boost the midtones slightly to brighten it.
Then add another adjustment layer. Choose Layer > New Adjustment Layer > Color Balance. Shift the colors toward warmer tones to match the cheerful scene.
Clipping masks are your friend here. They affect only the road layer, not everything else in your document.
Lighting the Path
Since the main light comes from the upper right, the road needs directional lighting. Create a new layer with a clipping mask above the road adjustments.
Grab a soft white brush. Paint along the right side of the road where light would naturally hit. Change the blend mode to Soft Light at 100% opacity.
This adds dimension. The road now looks three-dimensional instead of flat.
Smart Blending Tricks
Here’s a technique that makes huge differences. When combining multiple photos, always consider:
- Light direction (keep it consistent across all elements)
- Color temperature (warm sunset vs cool morning)
- Blur amount (background softer than foreground)
- Shadows (they ground objects in the scene)
Match these factors and your composite looks believable instead of obviously fake.
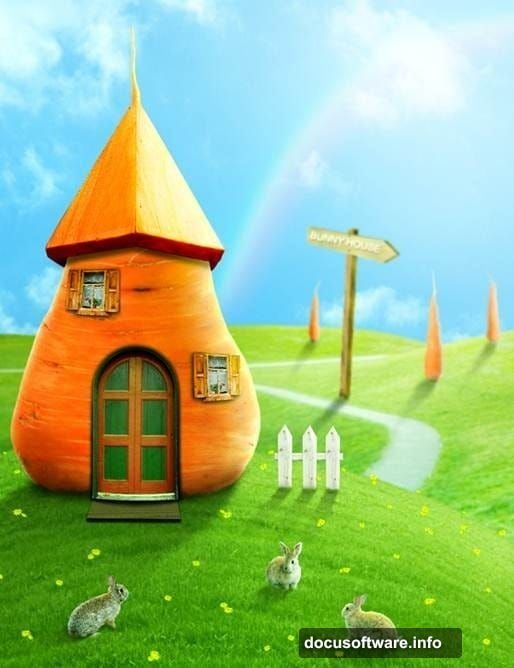
Building the Carrot House
Now for the centerpiece. Open your large carrot image. This becomes the house structure. Extract it cleanly—use the Pen Tool for precision around the leafy top.
Resize the carrot to fit your scene. It should dominate the hill without overwhelming everything.
Add the roof texture. Find a section that matches a rounded surface. Use Warp to bend it over the carrot’s top. Add a shadow where the roof meets the carrot body.
Place the door and window. Keep them proportional. A tiny door on a massive carrot looks wrong. Use Free Transform to adjust size and perspective.
Adding Small Details
Details sell the illusion. Add small carrots near the house entrance. They make the scene feel inhabited and loved.
Place the fence along the hillside. It guides the viewer’s eye toward the house. Vary the fence post heights slightly—perfect uniformity looks computer-generated.
Scatter daisies across the grass. Don’t distribute them evenly. Natural flowers grow in clusters.
Add the welcome mat by the door. Little touches like this build character and story.
Placing the Bunnies
Open your bunny images one at a time. Extract each bunny carefully—fur requires patience. The Refine Edge tool works wonders here.
Position your first bunny near the house entrance. Make it slightly larger since it’s closest to the viewer.
Place the second bunny mid-hill. Make it smaller to show distance. Add subtle blur to match the background focus.
The third bunny goes near the road. Keep it even smaller and slightly blurrier than the mid-ground bunny.
This size progression creates proper depth perception. Your brain reads the scene as three-dimensional space.
Shadow Work Matters
Every object needs a shadow. Otherwise it floats awkwardly. Create a new layer beneath each element.
Use a soft black brush at low opacity (20-30%). Paint shadows where objects touch the ground. Make shadows longer and softer for background items.
The light comes from upper right, remember? So shadows extend toward the lower left. Keep this angle consistent across all elements.
Shadows in bright sunlight have sharp edges close to the object, fading softer farther away. Mimic this by using harder edges near the object and feathering outward.
Color Harmony
All your elements came from different photos with different lighting. They look mismatched right now.
Add a Color Balance adjustment layer at the top of your layer stack. Don’t use a clipping mask—this affects everything. Shift the overall palette toward warm yellows and soft greens.
Then add a Curves adjustment layer. Lift the shadows slightly to brighten the entire scene. This creates that cheerful, storybook feeling.
Final Polish
Zoom out and look at your whole composition. Does anything stick out as weird or disconnected?
Add a subtle vignette. Create a new layer at the very top. Fill it with white. Add a layer mask and use a large soft black brush to reveal the center while darkening the edges.
Set this layer to Multiply at 10-15% opacity. It focuses attention on the carrot house while adding professional polish.
Sharpen your main subjects. Select the house and foreground bunny layers. Apply a light Unsharp Mask. Background elements stay soft.
Making It Your Own
This tutorial gives you the foundation. But the magic happens when you add personal touches.
Try different house structures. Use a mushroom instead of a carrot. Or build a treehouse. The techniques stay the same.
Experiment with weather effects. Add fog layers for morning mist. Or use snow textures for a winter scene.
Change the color palette. Cool blues create a nighttime version. Warm oranges give you golden hour lighting.
Photo manipulation rewards experimentation. Don’t worry about perfection on your first try. Each project teaches new tricks.