
Creating dark, atmospheric scenes in Photoshop sounds intimidating. But this tutorial breaks it down into simple steps anyone can follow.
You’ll learn how to build an eerie, magical scene from scratch. Plus, the techniques work for any moody photo manipulation you want to create. The best part? You only need basic Photoshop skills to pull it off.
Start With Your Canvas Setup
First things first. Create a new file in Photoshop with these settings:
- 2000×2000 pixels
- 300 DPI resolution
- RGB color mode
- Transparent background
Why these dimensions? They give you plenty of room to work without slowing down your computer. Plus, you can always scale down later without losing quality.
The transparent background matters too. It lets you see exactly how your layers blend together as you build the scene.
Build Your Foundation: Floors and Walls
Now comes the fun part. You’ll need stock images of stone floors and old walls to create your ancient room.
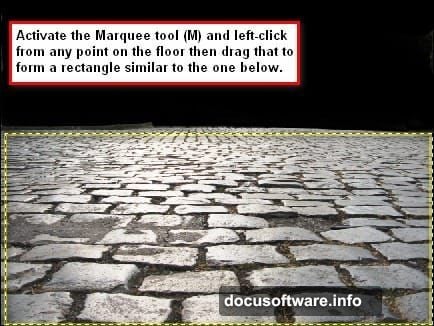
Start by opening your stone floor image. Use the Marquee tool (M) to select the area you want. Then drag it onto your canvas with the Move tool (V).
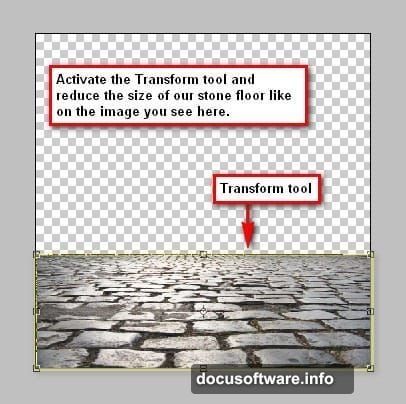
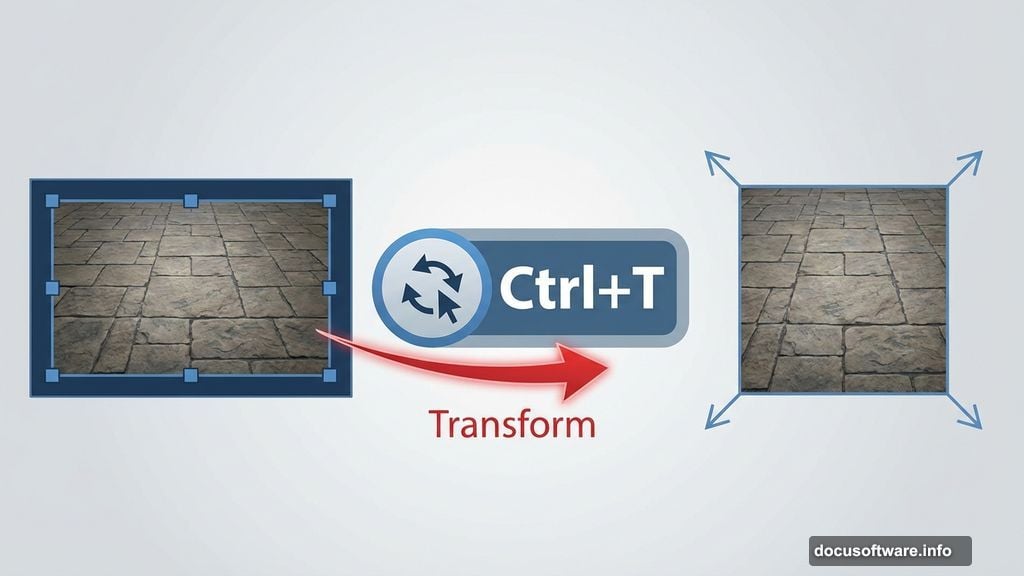
Here’s the key. The image will probably be too large. So press Ctrl+T (or Cmd+T on Mac) to activate the Transform tool. Drag those corner boxes inward until the floor fits your canvas perfectly.
Next up, the walls. Open your gate or wall stock image. But here’s where it gets interesting. You won’t use the whole image—just the wall sections.
Grab the Polygonal Lasso tool (L). Click around the wall area you want to select, creating a custom shape. This tool lets you make precise selections by clicking point to point. Much better than trying to use a regular selection tool on irregular shapes.
Create Depth With Shadows
Flat images look fake. Shadows make everything believable.
After positioning your walls, add a new layer beneath them. Set your brush to soft black with low opacity (around 20-30%). Paint shadows where the walls meet the floor.
Think about where light would naturally hit. Corners should be darker. Areas facing your imaginary light source should be lighter.
Don’t go overboard. Subtle shadows work better than dramatic ones. You can always add more later if needed.
Add Your Main Subject
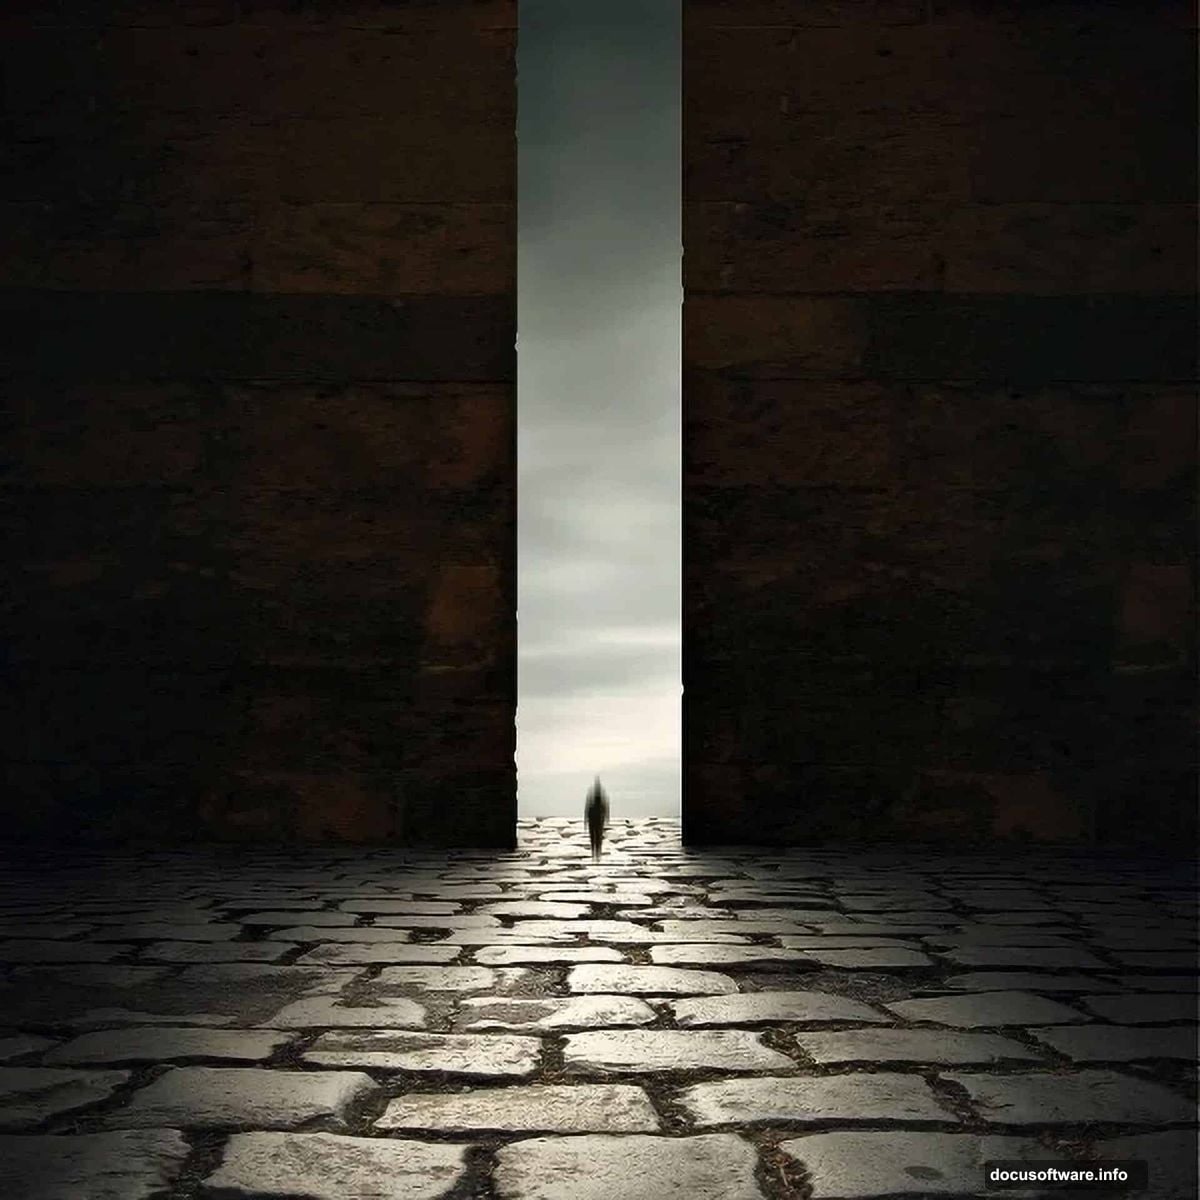
Time to bring in your character or focal point. For this tutorial, that’s a ghostlike figure.
Open your subject image. Select the person using your preferred selection method. The Quick Selection tool works great for this. Move them to your canvas.
Here’s where the magic happens. Go to Filter > Blur > Motion Blur. This creates that ethereal, ghostly effect. Adjust the angle and distance until it looks right.
The blur direction matters. Horizontal blur suggests movement across the scene. Vertical blur makes your subject look like they’re fading in or out.
Blend Everything Together With Adjustment Layers
Your scene probably looks pretty disjointed right now. Different colors, different lighting, different moods. Adjustment layers fix that.
Add a Curves adjustment layer. Darken the overall scene by dragging the curve line down slightly. This unifies your different stock images under one lighting scheme.
Then add a Color Balance layer. Push the sliders toward cooler tones (more blue, less yellow). This creates that eerie, unsettling atmosphere.
Pro tip: Use layer masks to control where these adjustments apply. Maybe your subject needs to stay lighter than the background. Just paint black on the adjustment layer’s mask over your subject.
Create Atmospheric Lighting
Dark scenes need strategic light sources. Otherwise they just look muddy.
Create a new layer. Set it to Screen or Overlay blend mode. Use a soft white brush at low opacity to paint light areas. Focus on edges of objects, areas near windows, or wherever you imagine light entering the scene.
This technique adds dimension. It makes flat images pop into three-dimensional space.
Remember: less is more. A few well-placed light spots beat covering everything in glow.
Add the Final Touch: A Dramatic Vignette
Vignettes focus attention. They darken the edges and keep eyes on your focal point.
Create a new layer at the top of your stack. Fill it with black (Alt+Backspace or Option+Delete). Set the blend mode to Multiply.
Now grab the Elliptical Marquee tool. Draw a large oval in the center of your image. Feather the selection heavily (Select > Modify > Feather, set to at least 200 pixels).
Press Delete. This removes the black from the center while leaving darkened edges. Adjust the layer opacity until it looks natural. Around 40-50% usually works well.
Final Adjustments and Polish
Step back and look at your scene. What needs tweaking?
Maybe some areas need more shadow. Perhaps the colors aren’t quite unified. This is your chance to fine-tune everything.
Add a final Brightness/Contrast adjustment layer if needed. Don’t crank the contrast too high though. You want mood, not a blown-out mess.
Check your focal point. Does your eye go straight to your main subject? If not, add more contrast or lighting around them.

Why This Approach Actually Works
This tutorial teaches fundamental compositing skills. You learn layer management, selection techniques, and how to blend disparate images into a cohesive scene.
These skills transfer to any photo manipulation project. Product composites, fantasy landscapes, surreal portraits—they all use these same basic techniques.
The key is practice. Your first attempt might not look perfect. That’s fine. Each project teaches you something new about how light, shadow, and color work together.
Start simple. Master these basics. Then push further with more complex scenes and techniques.
Your dark, eerie masterpiece awaits. Just remember: patience beats rushing every time.