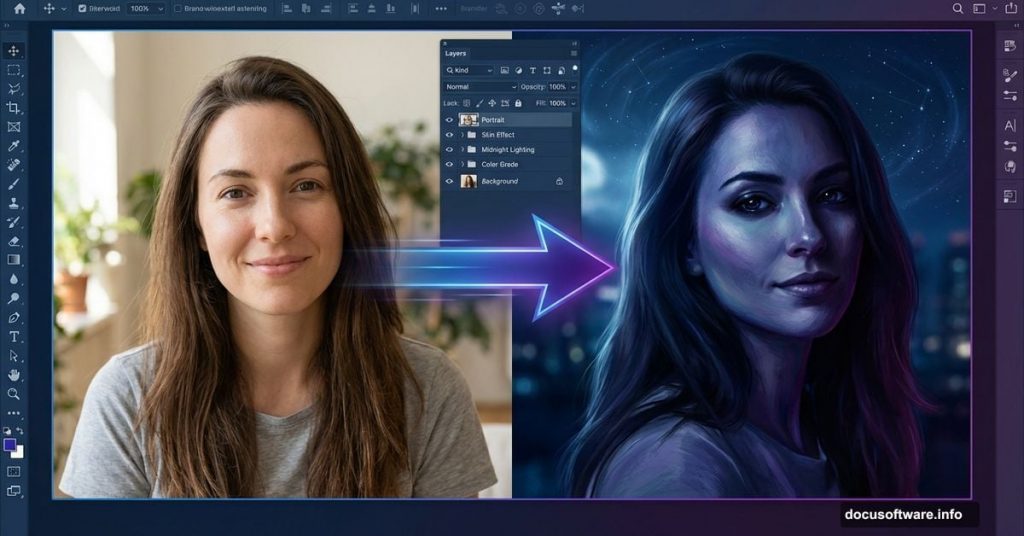
Want to transform ordinary portraits into moody, painting-like nighttime scenes? This technique combines photo compositing with skin retouching to create dramatic results.
I’ll walk you through building this emotional midnight manipulation from scratch. You’ll learn how to blend multiple stock images, smooth skin with painting effects, and apply cinematic lighting. Plus, I’ll show you the exact settings that make everything work together.
What You’ll Need Before Starting
Grab these stock images first. Having everything ready makes the process smoother.
Required Images:
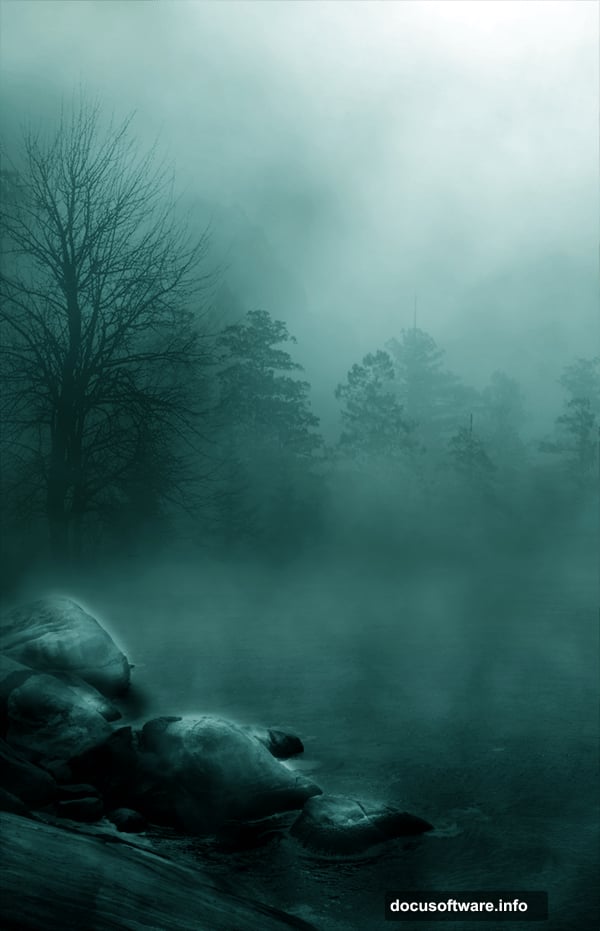
- Background landscape (alternatives work fine if the original link dies)
- Night sky photo
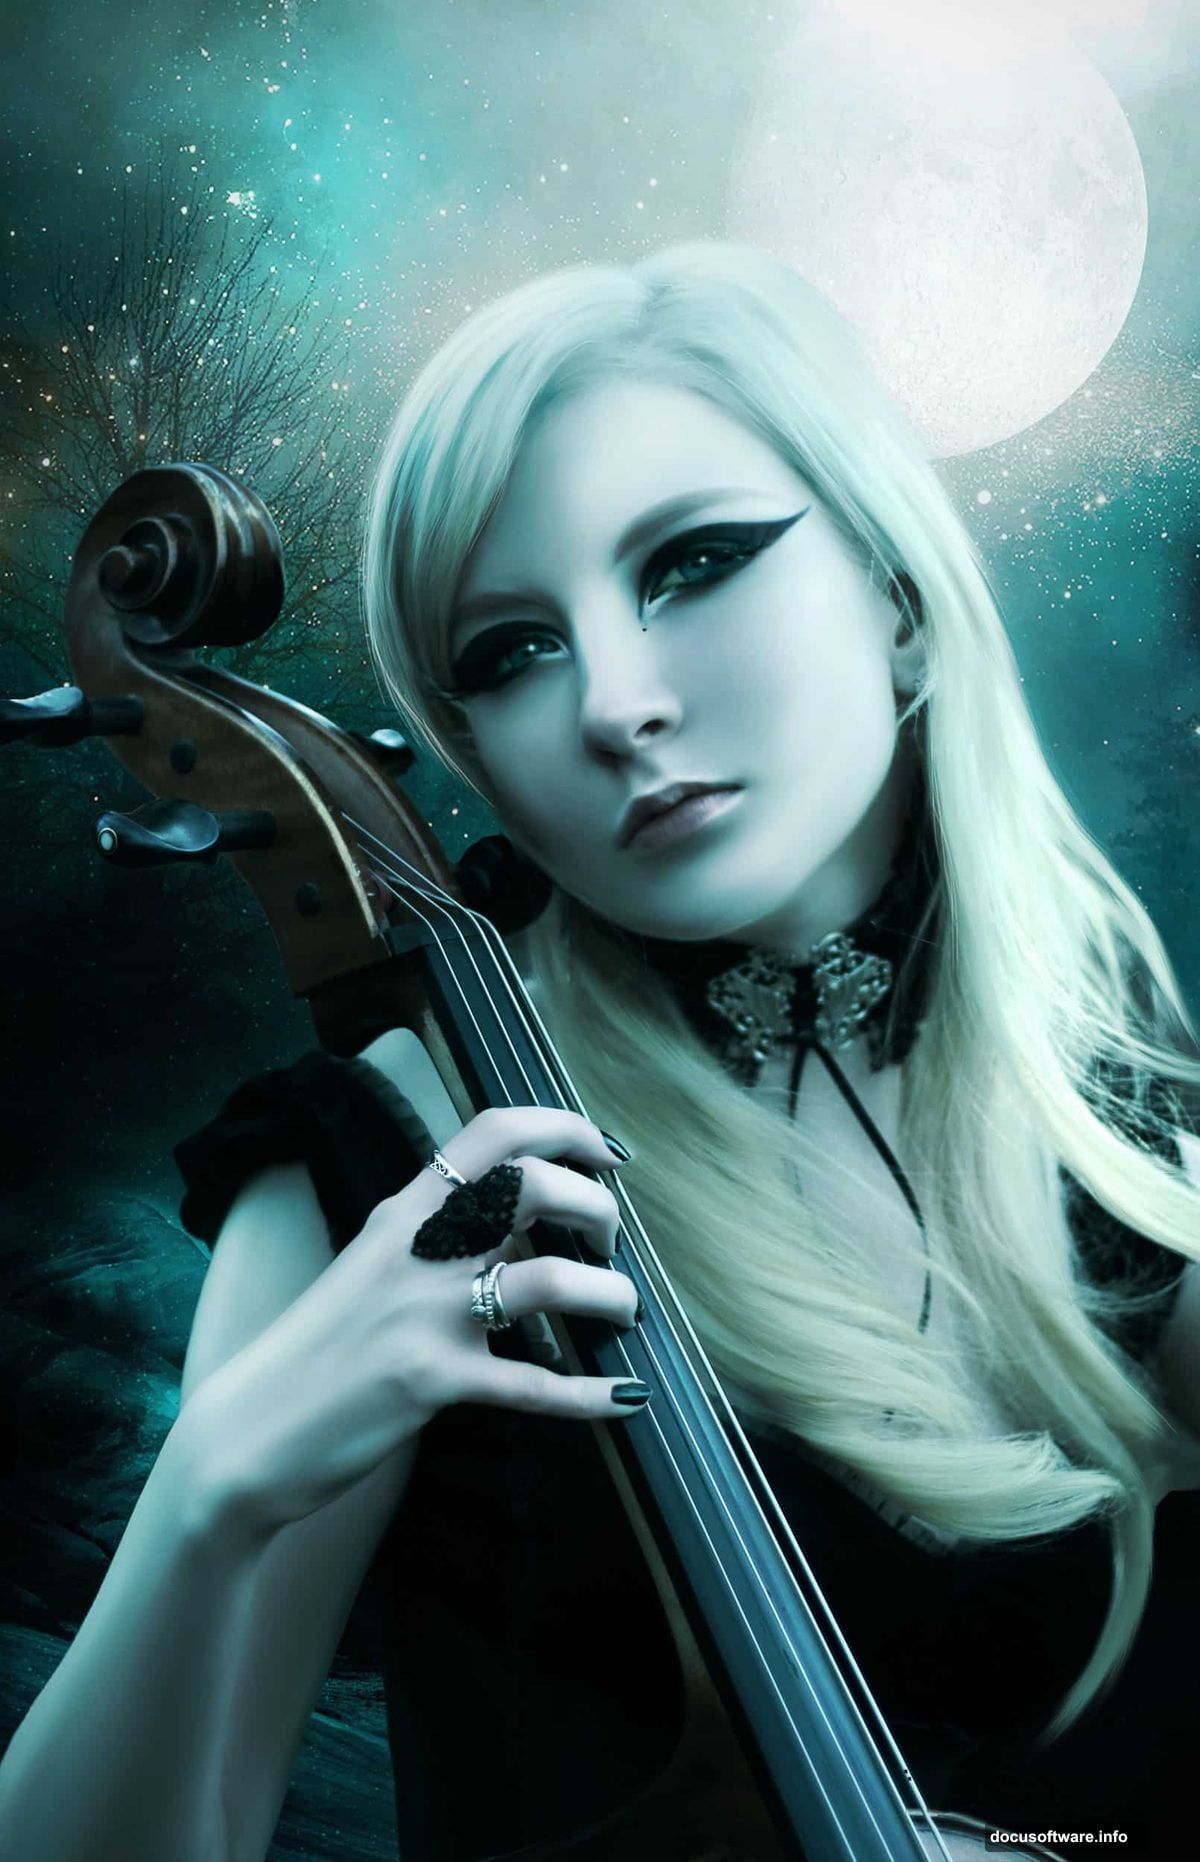
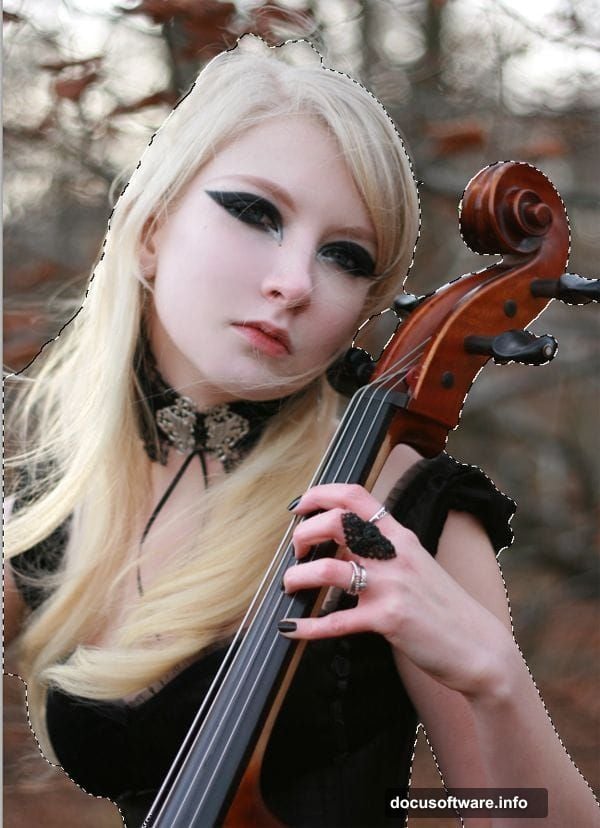
- Portrait of your subject
- Moon image
- Star texture
- Hair brush pack
Most of these come from free stock sites. Just make sure your portrait has good lighting to start with. Dark, muddy photos won’t give you clean results.
Build Your Night Sky Foundation
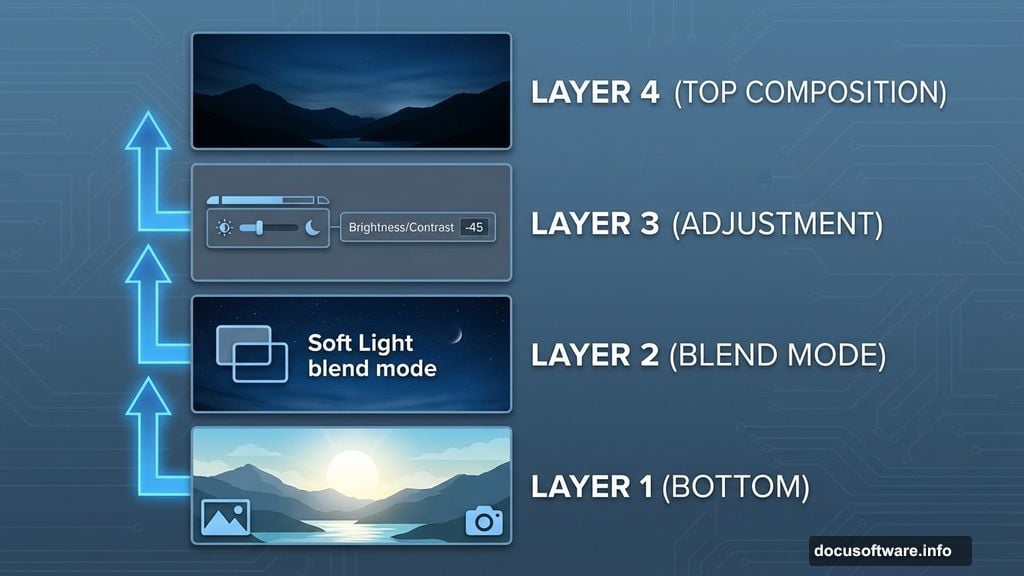
Open your background landscape in Photoshop. This forms your base layer.
Next, add the sky image in a new layer above the background. Hit CTRL+T to transform it. Scale and flip it vertically until it matches your composition. Then change the blend mode to Soft Light.
Now the sky looks too bright. Add a Brightness/Contrast adjustment layer. Set brightness to -45. This darkens everything and creates that midnight atmosphere.
See how the sky now blends naturally with the landscape? That’s what we’re after.
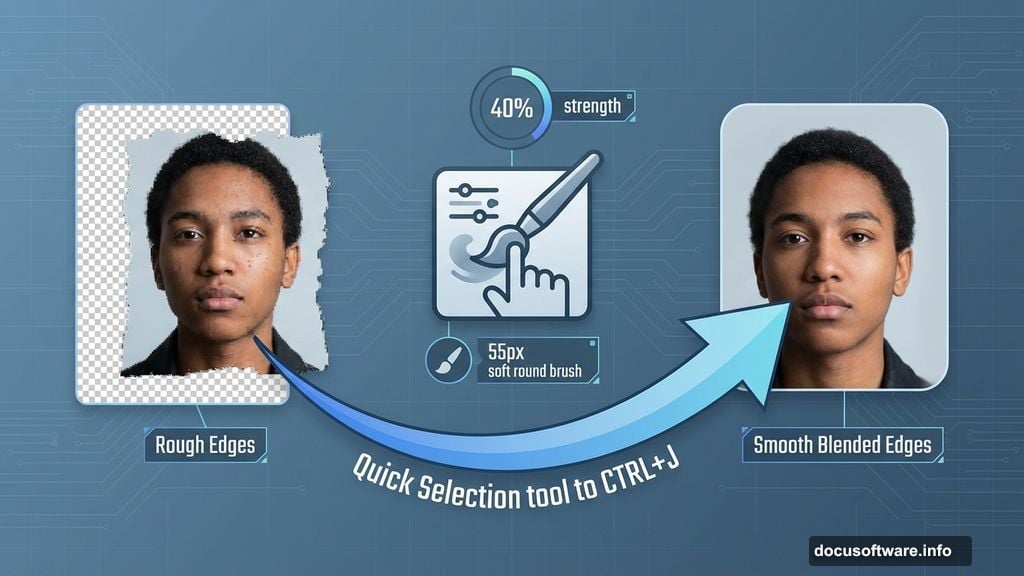
Extract and Position Your Subject
Open your portrait image. Use the Quick Selection tool to grab your subject. Don’t stress about perfect edges yet.
Hit CTRL+J to copy your selection onto a new layer. Delete the original background layer underneath.
Those rough edges? Let’s fix them now. Grab the Smudge tool. Set strength to 40% with a 55px soft round brush. Gently smudge along the edges to blend and remove harsh cutouts.
Delete any remaining bits you don’t want. Hair doesn’t need to be perfect yet. We’ll handle that later.
Place your subject layer above everything else. Transform (CTRL+T) and scale her down. Flip horizontally if needed to match your light source. Position her on the left side of the frame.
Crop the right side of your background now. This tightens your composition and removes distracting elements.
Create Smooth, Painted Skin
This step takes practice. But it’s what gives that painting-like quality everyone asks about.
First, duplicate your subject layer. Always work on the copy. If something goes wrong, you’ve still got your original.
Select the Smudge tool. Use a 28px soft round brush. Set strength between 15-20%. Lower strength gives you more control.
Work in small circular motions across the skin. Think of it like blending paint. Focus on large areas first – forehead, cheeks, neck. Avoid eyes, nose, and mouth details initially.
For tricky spots like hair falling across the face, reduce your brush size. Use lighter pressure. The goal isn’t to eliminate texture completely. You want soft, glowing skin that still looks somewhat real.
This technique works best on high-resolution images. Low-res photos turn muddy instead of smooth.
Add Dramatic Lighting with Dodge and Burn
Dodging and burning sculpt dimension into your subject. This separates good manipulations from great ones.
Create a new layer. Fill it with 50% gray. Change blend mode to Overlay. This layer becomes invisible but still affects everything underneath.
Grab the Dodge tool. Set exposure around 10-15%. Use a soft brush. Paint light onto areas that naturally catch light – tops of shoulders, cheekbones, forehead, arms. Build up gradually. Multiple passes work better than one heavy application.

Switch to the Burn tool. Same settings. Darken areas that fall in shadow – under the chin, sides of the neck, underneath arms. This creates depth and matches your nighttime environment.
The contrast between dodged and burned areas makes your subject pop against the background. Take your time here. Small adjustments add up.
Integrate Atmospheric Elements
Drop your moon image into the composition. Scale it down and position it in the upper right. This establishes your primary light source.
Add a Gaussian Blur. Just enough to soften sharp edges. Real moons look slightly hazy through atmosphere.
Bring in your star texture. Set the blend mode to Screen. This makes the black disappear and leaves only the bright star points. Adjust opacity until it looks natural – around 40-60% usually works.
Use a layer mask to erase stars where they shouldn’t appear. Remove them from in front of your subject and from bright areas of the sky. Stars only show up in dark parts of the sky.
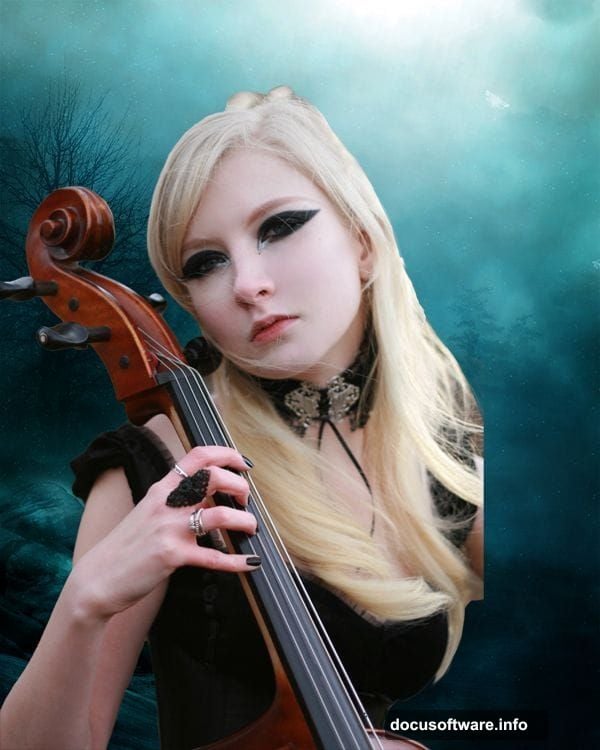
Paint Flowing Hair Details
Import your hair brush pack. Select individual hair strands from the brush presets.
Create a new layer above your subject. Sample hair color from your existing image using the Eyedropper tool. Paint flowing strands that extend beyond the rough edges you created earlier.
Vary your brush size and opacity. Some strands should be sharp and defined. Others soft and wispy. This randomness looks natural.
Add lighter highlights to some hair strands using a brighter color. This catches the moonlight and adds dimension.
Don’t overdo it. A few well-placed strands beat dozens of messy ones. Less is more.
Fine-Tune Color and Atmosphere
Add a Color Balance adjustment layer at the top. Shift shadows toward blue. Move midtones slightly toward cyan. This reinforces that cool, nighttime color palette.
Include a Curves adjustment. Slightly lift the shadows. This prevents pure black areas and adds that painted, atmospheric quality.
Create a new layer. Set it to Soft Light. Use a large, soft brush with dark blue. Paint gently around the edges of your canvas. This creates subtle vignetting and focuses attention on your subject.
Add a final Hue/Saturation adjustment. Reduce overall saturation by 10-15%. Too much color looks fake in nighttime scenes. Slightly muted tones feel more authentic.
Common Problems and Quick Fixes
Harsh edges around your subject? Go back to your smudge work. Use a smaller brush and lighter pressure. Blend more carefully.
Subject doesn’t match the lighting? Check your dodge and burn layer. Make sure light areas align with your moon position. Darken the opposite side more aggressively.
Colors look off? Revisit your Color Balance adjustment. Nighttime scenes need cooler tones. Push those blues and cyans harder.
Too much or too little contrast? Adjust your Curves layer. Lift shadows if things look too dark. Deepen them if the image lacks drama.
Hair looks painted on? Reduce opacity on your hair brush layer. Add more variation in color and thickness. Real hair has different tones and textures throughout.
Taking This Technique Further
This method works for any nighttime scene. Try different subjects – couples, animals, even vehicles.
Experiment with your light source. Swap the moon for streetlights or fire. Just adjust your dodge and burn to match the new direction.
Play with different sky textures. Cloudy nights create different moods than clear, starry ones. Storm clouds add drama.
The skin smoothing technique applies beyond this tutorial. Use it on any portrait where you want that soft, painted look. Just adjust your smudge strength based on image resolution.
Practice makes perfect with compositing. Your first attempt might not match the preview exactly. That’s normal. Each project teaches you something new about blending, lighting, and color harmony.
Keep experimenting. Save your PSD files so you can revisit and improve them later. You’ll be amazed how much your eye develops over time.