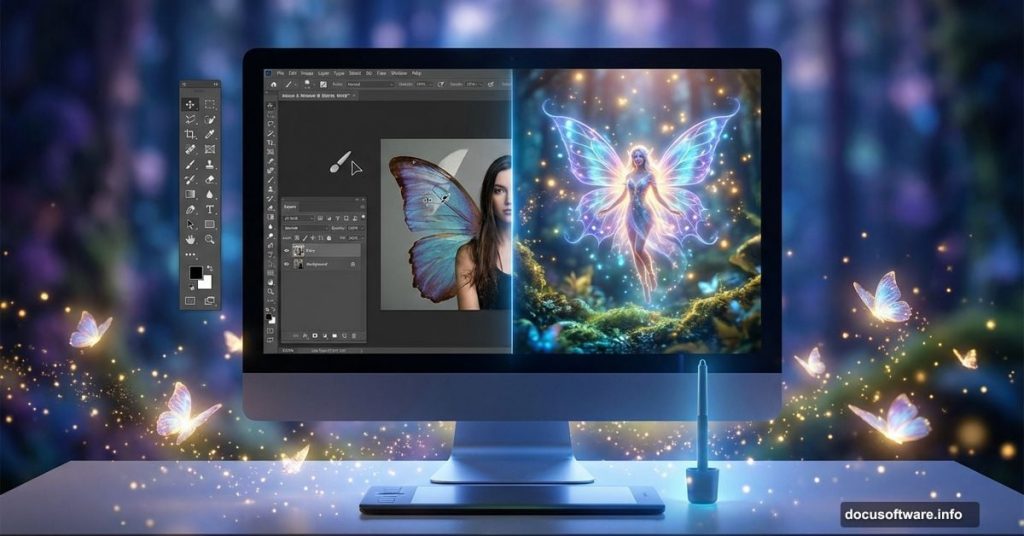
Want to build dreamy fantasy worlds in Photoshop? This step-by-step guide shows you how to craft a whimsical fairy scene complete with glowing effects and butterfly-leaf wings.
No advanced skills required. Just follow along and watch your magical composition come to life. Plus, you’ll learn essential photo manipulation techniques that work for any fantasy project.
Set Up Your Canvas and Background
Start with a fresh 2204×1666 px document in Photoshop. Fill it white as your base layer.
Now drag in your background image using the Move Tool (V). Position the brightest area toward the top middle. This creates natural light flow for your scene.
Here’s the important part. Right-click your background layer and convert it to a Smart Object. This protects your original image while you work.
Add Depth With Strategic Blur
Fantasy scenes need separation between foreground and background. Otherwise everything looks flat.
Go to Filter > Blur > Gaussian Blur. Set the radius to 15 px. This softens your background and makes it recede naturally.
The exact radius depends on your image size. Experiment until the background looks slightly out of focus. Too much blur kills the effect. Too little does nothing.
Remember, you’re creating depth perception. Your main subjects will pop against this softer backdrop.
Adjust Background Colors for Magic
Open a Hue/Saturation adjustment layer. Make sure it’s set as a Clipping Mask so it only affects your background.
Adjust the Master settings to shift colors toward cooler, dreamier tones. Fantasy scenes typically lean blue, purple, or soft green. Harsh yellows and reds break the illusion.
Play with the saturation slider too. Sometimes reducing saturation by 10-15% creates that ethereal quality you want.
Add Your Butterfly Element
Open your butterfly image. Use the Lasso Tool (L) to select a butterfly with interesting wing patterns.
Drag it onto your main canvas. Hit Ctrl+T to activate Free Transform. Rotate and scale the butterfly until it fits your composition.
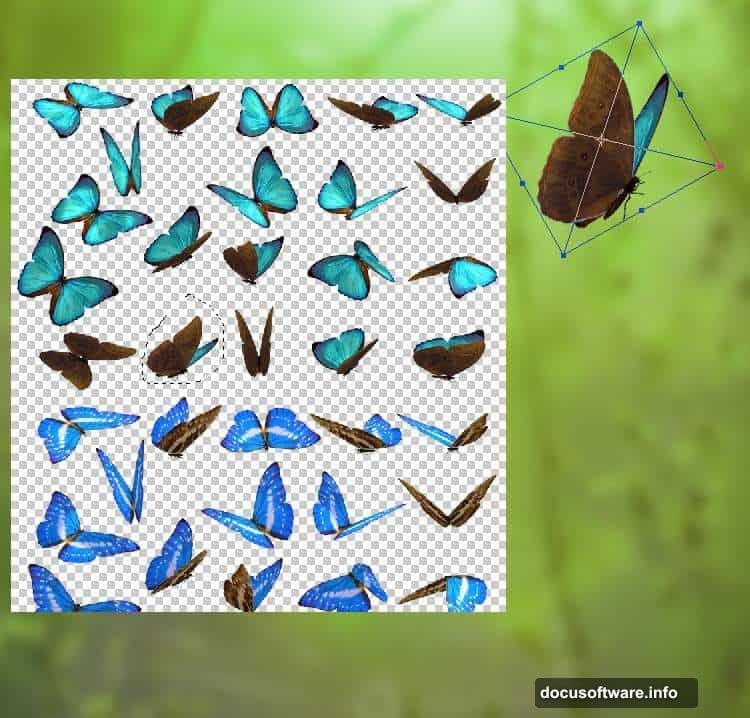
Go to Edit > Transform > Flip Horizontal if the butterfly faces the wrong direction. Position it near the top middle where your light source hits strongest.
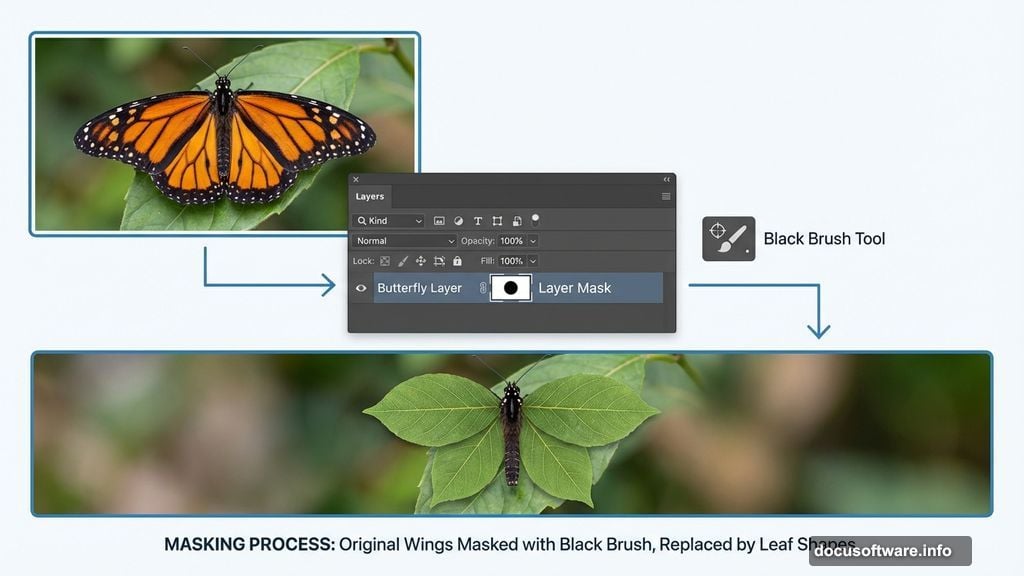
Remove Butterfly Wings for Custom Ones
Click the mask icon at the bottom of your Layers panel. This adds a layer mask to your butterfly.
Select the Brush Tool (B) with a hard round brush. Set foreground color to black. Paint over the butterfly’s original wings to erase them.
Why remove the wings? Because you’re replacing them with magical leaf wings. That’s what makes this scene special.
Take your time here. Clean edges matter. Zoom in if needed.
Color Match Your Butterfly
The butterfly probably doesn’t match your background colors yet. Fix that with a Hue/Saturation adjustment layer.
Set it as a Clipping Mask so it only affects the butterfly. Adjust the Master values until the butterfly’s colors harmonize with your scene.
For fantasy art, slightly desaturated and cooler tones work best. You want everything to feel like it exists in the same magical world.
Brighten and Balance Colors
Add a Color Balance adjustment layer. Push the midtones toward greens and cyans. This makes the butterfly feel illuminated by your scene’s light.
Fantasy scenes thrive on consistent color temperature. Everything should share similar color casts. That’s what sells the illusion.
Next, create a Curves adjustment layer. Lift the curve slightly to brighten the butterfly and add that dreamy glow.
Add Selective Lighting Effects
Here’s where your scene starts feeling magical. Create another Curves adjustment layer.
This time, brighten only the upper portion of the butterfly’s body. On the layer mask, paint with a soft black brush at 20% opacity over areas you want darker.
This selective brightening mimics natural light hitting the butterfly from above. Small details like this separate amateur work from professional-looking fantasy art.
The lower body should stay slightly darker. This creates form and dimension.
Build Custom Leaf Wings
Import your leaf images. Select individual leaves with interesting shapes and good detail.
Use the Lasso Tool to isolate each leaf. Drag them onto your main canvas. Position them where the butterfly’s wings used to be.
Transform each leaf (Ctrl+T) to match wing proportions. Rotate, scale, and flip until they look natural. Butterfly wings typically angle backward slightly.
Layer multiple leaves if needed. Overlap them to create fuller, more interesting wing shapes.
Blend Leaf Wings Naturally
Your leaf wings probably look too opaque and separate from the butterfly body. Fix this with blending modes and masks.
Try setting the leaf layers to Soft Light or Overlay mode. This helps them integrate better. Reduce opacity slightly if they’re too strong.
Add layer masks and use a soft brush to blend wing edges into the butterfly body. Gradual transitions look more believable than hard edges.
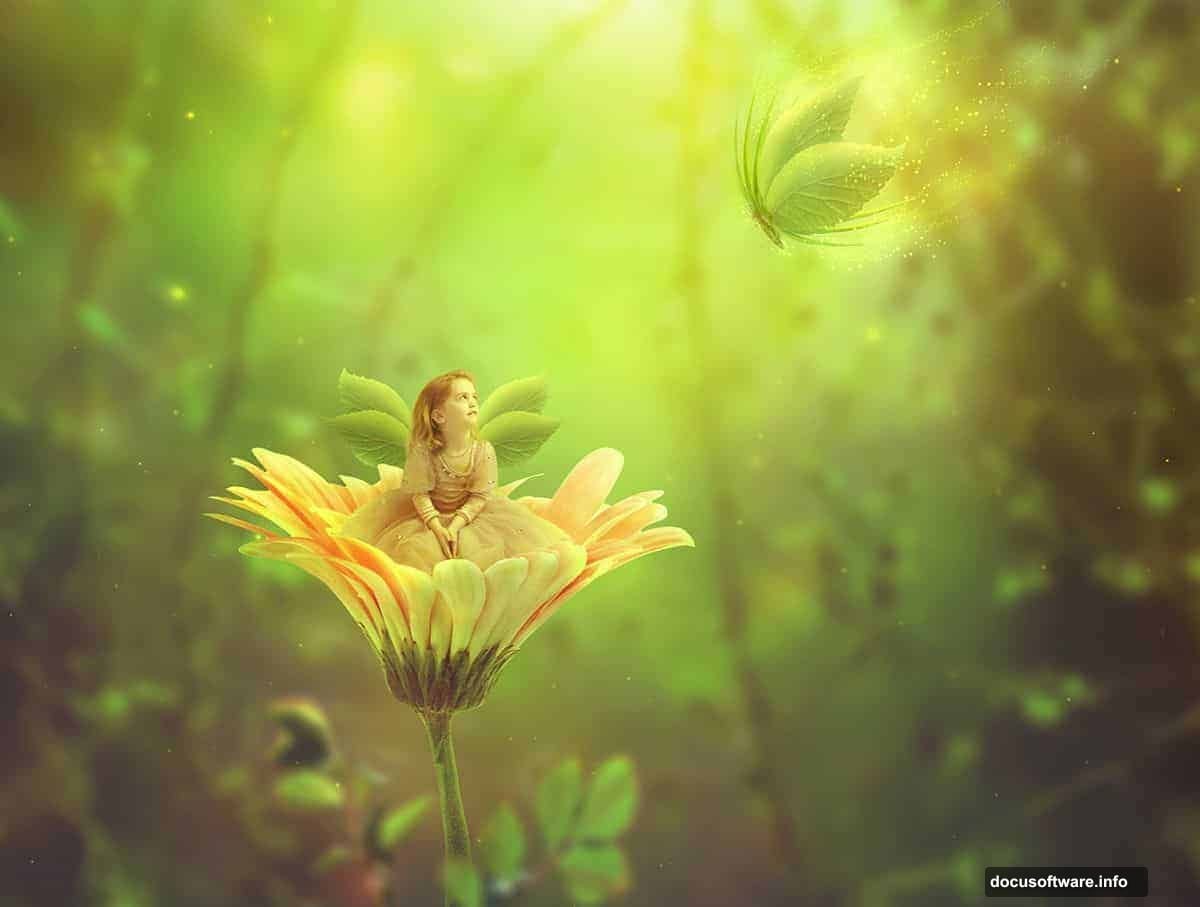
Add Your Fairy Subject
Import your child image. Use the Pen Tool (P) or Select and Mask to carefully extract the subject from its background.
Place your fairy near the flower or butterfly. Scale appropriately. In fantasy scenes, size relationships create the magic. A tiny child next to a normal-sized butterfly instantly reads as “fairy.”
Match the lighting on your subject to your scene’s light direction. Use Curves and Color Balance adjustment layers.
Create Magical Glow Effects
Open your light texture image. Set the blend mode to Screen or Linear Dodge (Add). Position it where you want glowing light sources.
Reduce opacity until it looks magical but not overwhelming. Around 40-60% usually works.
Add a Gaussian Blur to soften the light texture. Hard edges break the fantasy illusion. Soft, diffused glows feel more otherworldly.
Add Flower Elements
Import flower images and position them throughout your scene. They fill empty space and reinforce the natural fantasy theme.
Use the same color matching techniques. Add Hue/Saturation and Color Balance layers to each flower element.
Make foreground flowers slightly sharper and more saturated. Background flowers should be softer and less saturated. This reinforces depth.
Enhance Overall Color Harmony
Create a Color Lookup adjustment layer at the top of your layer stack. Try different presets until you find one that enhances your color palette.
Moonlight and Late Sunset presets often work well for fantasy scenes. They push colors toward complementary schemes that feel cohesive.
Reduce the layer opacity if the effect is too strong. Subtlety matters in fantasy art.
Add Final Atmospheric Effects
Create a new layer at the very top. Set blend mode to Soft Light. Fill it with 50% gray (Edit > Fill > 50% Gray).
Use the Dodge Tool (O) to brighten specific areas where light should hit. Use the Burn Tool to darken shadows. This hand-painted lighting adds depth and atmosphere.
Paint light particles with a soft brush on a new layer. Set to Screen mode. Add tiny dots of light scattered through the scene. This sells the magical atmosphere.
Final Color Grading Pass
Add a final Curves adjustment layer. Make subtle adjustments to the RGB curve and individual color channels.
Lift shadows slightly to prevent them from going completely black. This maintains the dreamy quality. Bring down highlights just a touch to prevent blowout.
Adjust individual color channels to push your overall color palette in a consistent direction. Fantasy scenes benefit from unified color schemes.
Fantasy photo manipulation rewards patience and attention to small details. Each adjustment layer contributes to the overall magical atmosphere. The butterfly with leaf wings creates an impossible element that anchors the fantasy. Strategic lighting and color grading sell the illusion.
Your biggest tools are layer masks and adjustment layers. Master these and you can create any fantasy scene you imagine. The techniques here work for fairy gardens, magical forests, or underwater fantasy worlds.
Practice combining realistic elements in impossible ways. That’s where fantasy art lives.