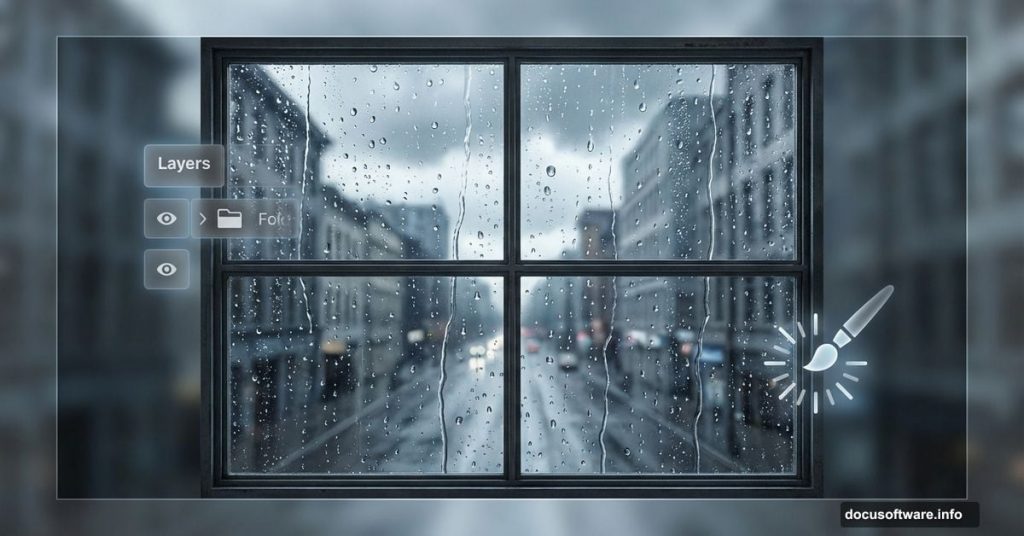
Want to create moody, atmospheric window scenes in Photoshop? This technique combines photo manipulation with digital painting to build surprisingly realistic results.
Most tutorials overcomplicate rainy window effects. But the secret is layering simple techniques systematically. Plus, you’ll learn skills that translate to dozens of other photo manipulation projects.
Let’s break down how to build this effect from scratch.
Start With the Right Canvas Setup
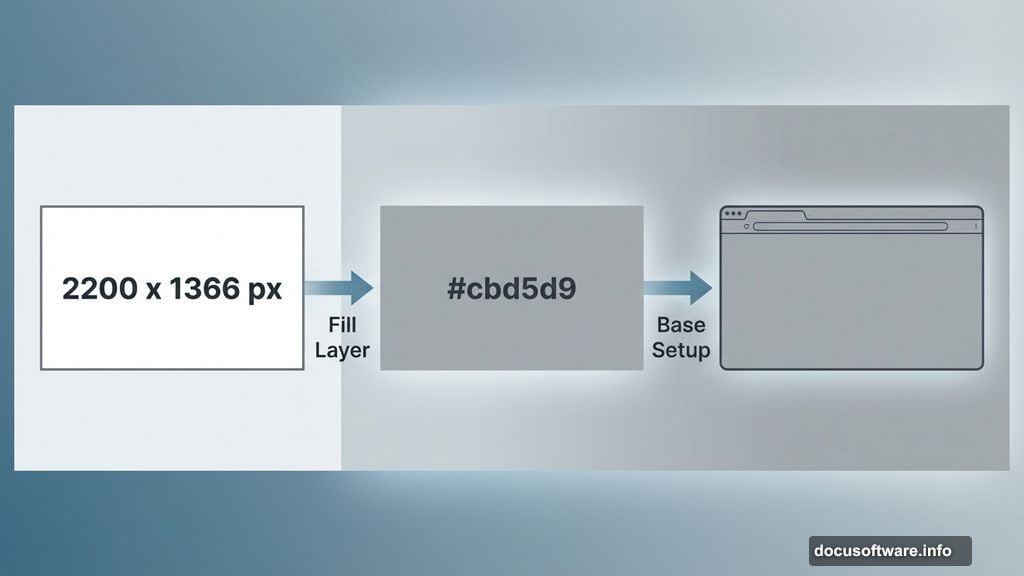
Your foundation matters more than you think. Create a 2200 x 1366 px document and fill it with white initially.
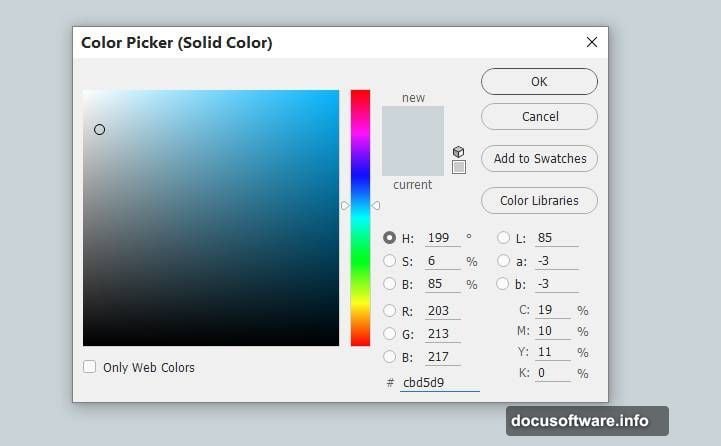
Then add a solid color fill layer. Navigate to Layer > New Fill Layer > Solid Color and choose #cbd5d9. This cool, overcast tone instantly sets your rainy day mood.
Why this specific color? It mimics the diffused light you see through windows on cloudy days. Moreover, it gives you a neutral base that won’t clash with your window frame colors later.

Build Your Window Frame Strategically
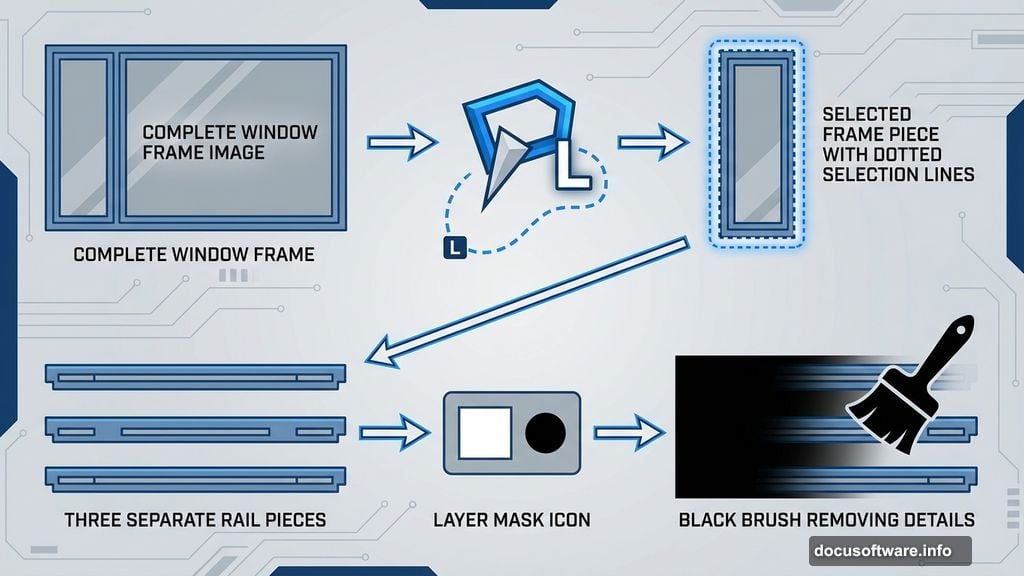
Here’s where precision matters. Open your window image and grab the Polygonal Lasso Tool (L).
Select just the frame sections on both sides of the window. Drag these pieces onto your main canvas with the Move Tool (V). But here’s the trick: show only the left and lower frame parts initially.
Why? You’re building the window piece by piece. This approach gives you better control over perspective and lighting. Plus, it’s easier to adjust individual sections than trying to manipulate one giant selection.
Next, go back to your original window image. Use the Polygonal Lasso Tool again to grab the rail from the left frame. Add this to your main document’s left side.
Fill in the Bottom Rail
The lower window rail needs special attention. Select a rail section from the bottom of your original window frame.
Duplicate this layer and move the copy to the right. Then click the second icon at the bottom of your Layers panel to add a mask.
Activate the Brush Tool (B) with a hard round brush. Set your color to black. Use this masked brush to remove any small unwanted details on the upper rail section.
This masking technique is crucial. It lets you blend pieces seamlessly without permanently deleting pixels. So you can always go back and adjust if something looks off.
Complete the Right Side
Now add the right rail section. Use the Polygonal Lasso Tool to select the rail part from the right side of your original frame.
Once you’ve added this piece, it needs tonal adjustment. Go to Layer > New Adjustment Layer > Curves and set it as a Clipping Mask.
Increase the brightness and contrast slightly. This matches the lighting of your newly added section to the rest of the window. The goal is making all pieces look like they came from the same photo.
Clean Up Frame Imperfections

Create a new layer above your window pieces. Select the Clone Tool (S).
Use this tool to fix any visible seams, holes, or unwanted details on your window frames. The Clone Tool samples clean areas and paints over problem spots.
Take your time here. Small imperfections destroy believability in photo manipulation. So zoom in and carefully clone out anything that looks wrong.
For the lower frame section, use the Rectangular Marquee Tool (M). Select a clean portion of the lower frame and hit Ctrl+C to copy it.
Make a new layer and press Ctrl+V to paste. Move this copied section to cover any holes or damaged areas on the right side of your window frame.
Paint Your Atmospheric Background
This is where your scene gets its mood. Behind your window, you’ll paint a blurred outdoor view.

Use soft brushes with various blue and gray tones. Layer these colors to create depth. Darker blues go further back while lighter grays come forward.
The key is keeping everything soft and out of focus. Real rainy day views through windows rarely have sharp details. So blur is your friend here.
Add Realistic Raindrops
Raindrops make or break this effect. Don’t just scatter random dots across your window.
Instead, paint drops with varying sizes and opacity. Real raindrops on glass aren’t uniform. Some are large and prominent while others are barely visible.
Use a small, hard brush for individual drops. Then add a slight blur to soften their edges. This mimics how water distorts light on glass.
Moreover, add streaks where gravity pulls drops downward. These vertical trails sell the rainy atmosphere immediately.
Import Natural Elements
Bring in your leaf image now. This adds organic interest to an otherwise geometric composition.
Place the leaf somewhere on your window glass. Then adjust its opacity and add a subtle blur. Remember, it’s viewed through wet glass, so perfect clarity would look wrong.
The leaf also gives viewers a sense of scale. Without it, your window could be any size. But a recognizable natural object anchors the composition in reality.
Add the Indoor Elements
Time to populate your interior scene. Import your vase image and position it on the windowsill.
Then add your flowers. These should look crisp and detailed since they’re inside, not viewed through glass. This contrast between sharp foreground elements and blurry background creates depth.
Use adjustment layers to match the flowers’ lighting to your scene. They should have the same cool, overcast quality as everything else.
Paint Water in the Vase
This step adds another layer of realism. Paint water inside your vase using light blue and white tones.
Add subtle reflections where the glass meets the water surface. Real vases show these refractive effects clearly. So including them makes your composite more convincing.
Use a soft brush with low opacity. Build up the water effect gradually rather than trying to nail it in one pass.
Final Adjustments Complete the Scene
Now bring everything together with adjustment layers. Start with a Curves adjustment to unify your tonal range.
Increase contrast slightly to make the composition pop. Then add a subtle Color Balance adjustment to push everything toward cooler tones.
Finally, consider a slight vignette effect. Darkening the corners draws attention to your central window and flowers.
These global adjustments tie all your separate elements together. They transform a collection of pieces into a cohesive, believable scene.
The Techniques You Just Learned
This tutorial taught you way more than just making a rainy window. You practiced precise selections with the Polygonal Lasso Tool. You learned to build complex compositions from multiple source images.
Plus, you used Clipping Masks to make targeted adjustments. You applied the Clone Tool for seamless retouching. And you combined photo elements with digital painting for atmospheric effects.
These skills transfer directly to countless other Photoshop projects. Portrait compositing, product photography, fantasy scenes—they all use these same core techniques.
So bookmark this tutorial. Come back to it when you need to remember how to blend multiple images seamlessly or create atmospheric effects.
The rainy window scene is just the beginning. Now you’ve got the tools to create whatever moody, atmospheric compositions you can imagine.