Creating fantasy landscapes in Photoshop sounds intimidating. But here’s the truth: you’re just layering images and tweaking colors. That’s it.
This tutorial walks you through building an ethereal scene with floating dolphins and dramatic lighting. We’ll use adjustment layers for color grading, mask brushes for seamless blends, and Camera Raw for the final polish. Plus, the techniques work for any surreal composition you dream up.
Ready? Let’s build something unreal.
Gather Your Source Images First
Before touching Photoshop, collect three key elements. You need a dramatic sky background, dolphin stock photos, and a subject image. The tutorial provides specific resources, but any high-resolution alternatives work fine.
Quality matters here. Low-res images look muddy when scaled up. Aim for at least 3000px on the longest side. That gives you flexibility during composition without visible pixelation.
Also grab light ray brushes if you don’t have them already. These add that signature fantasy glow that sells the impossible scene.

Set Up Your Canvas Properly
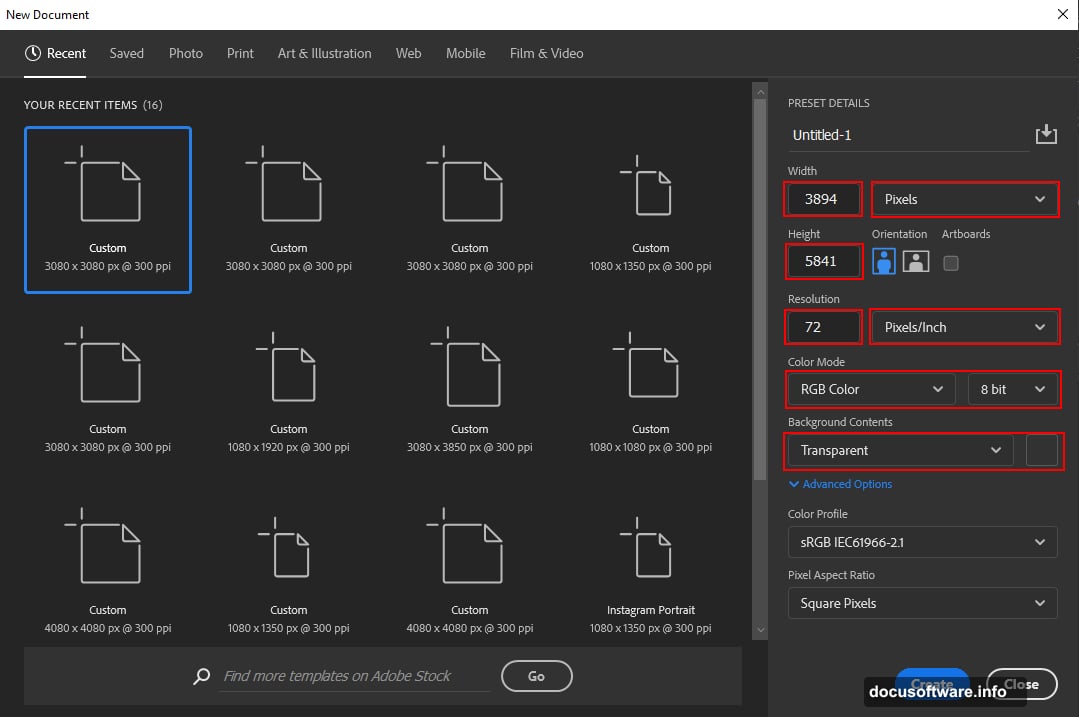
Start with a new document at 3894 x 5841 pixels. Yes, that’s huge. But working large prevents quality loss during edits.
Set resolution to 72 DPI for screen work. Choose RGB color mode at 8-bit depth. For background contents, pick transparent. This gives you a clean slate without white getting in the way of blending.
So your settings should read: Custom preset, 3894px wide, 5841px tall, 72 resolution, RGB 8-bit, transparent background. Got it? Hit create.
Build the Sky Foundation
Place your background image first (File > Place). Don’t just drag it in. Using Place preserves quality and gives you transform handles immediately.
Press Ctrl/Cmd + T to transform. Hold Alt + Shift (just Alt in newer Photoshop versions) while dragging corners. This maintains aspect ratio while resizing from the center. Scale until the sky fills your canvas completely.
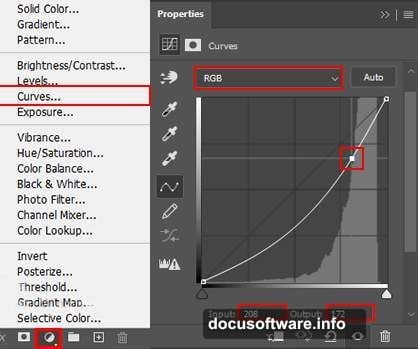
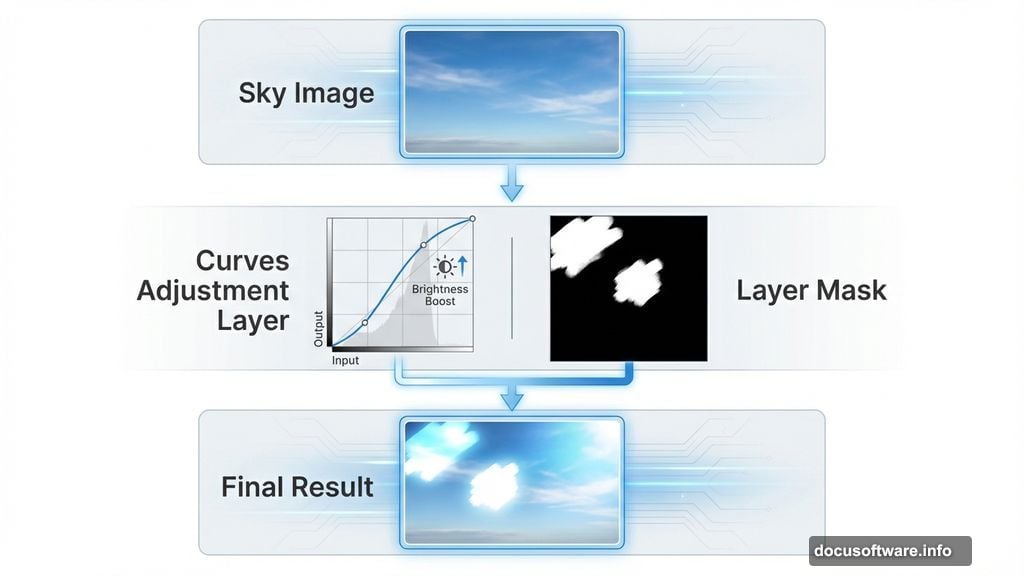
Next comes the crucial step. Add a Curves adjustment layer above the background. Press Ctrl/Cmd + I to invert the layer mask to black. This hides the adjustment initially.
Now grab the Soft Round Brush (B key). Set foreground color to white. Paint on the sky areas you want to brighten. This creates selective lighting without permanently altering pixels. Plus, you can tweak the curve at any time.
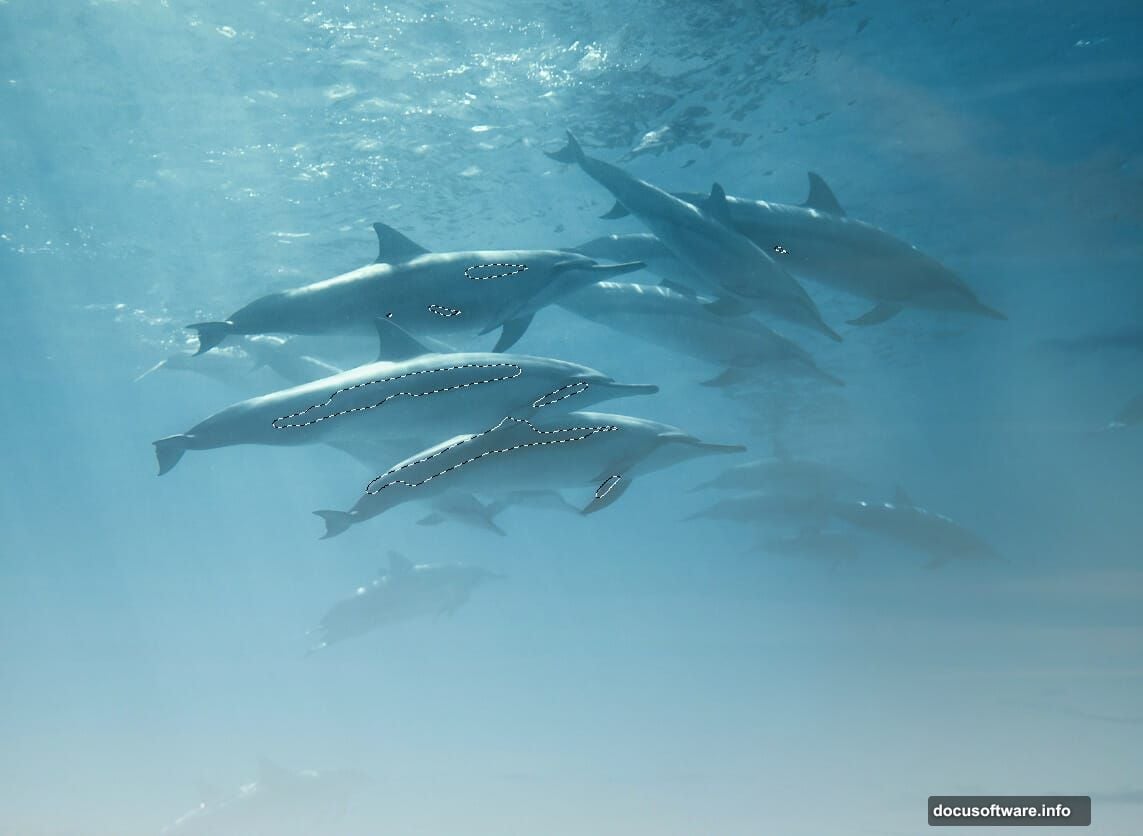
Blend Dolphins Into the Scene
Place your dolphin image the same way. Transform it to match your composition vision. Maybe scale them larger for drama or smaller for subtlety.
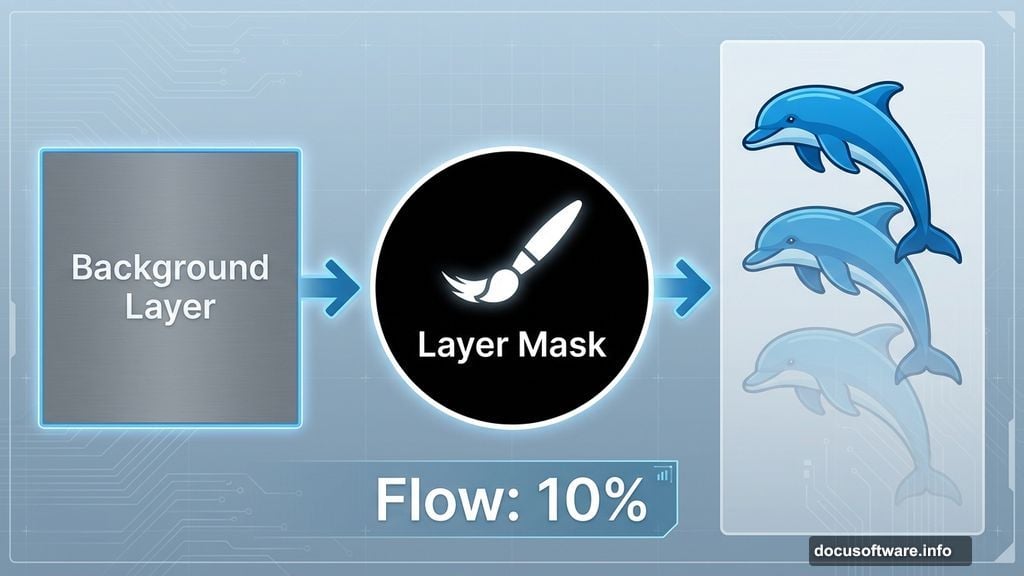
Here’s where masking saves you. Create a layer mask on the dolphin layer. Switch to a Soft Round Brush with black foreground color. Lower the brush flow to 10%. Yes, really that low.
Paint from bottom to top on the mask. This gradual fade makes dolphins emerge from nowhere instead of looking pasted on. The low flow gives you control. Build up opacity slowly by painting over areas multiple times.
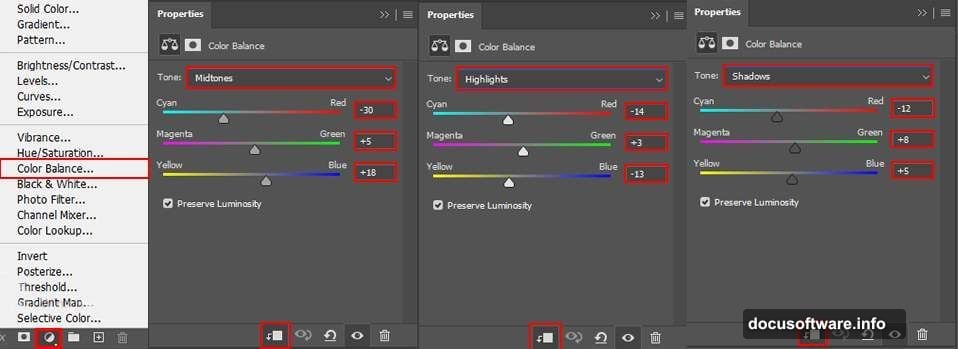
Still looks off? Add a Color Balance adjustment layer clipped to the dolphins. Match their color temperature to the sky. Cooler blues for twilight scenes, warmer tones for sunset vibes.
Add Dramatic Curves to Dolphins
Another Curves layer does wonders here. Clip it to the dolphin layer so it only affects them. Again, invert the mask to black with Ctrl/Cmd + I.
Paint white on the mask where you want extra depth. Focus on shadowed areas or spots that should catch light. This technique mimics how light naturally interacts with forms.
The beauty? You’re not destroying original pixels. Everything stays editable. Change your mind later? Just erase parts of the mask or adjust the curve differently.
Position Your Subject With Purpose
Open your subject image (the woman in this tutorial). Use Quick Selection Tool (W key) to select her. Click and drag across the subject. Photoshop’s AI does decent work here.
Got the selection? Copy it (Ctrl/Cmd + C) and paste into your main document (Ctrl/Cmd + V). Transform to position and scale appropriately. She should feel grounded in the scene, not floating randomly.
Consider composition rules. Place her off-center using the rule of thirds. Have her gaze direct viewer attention toward dolphins or interesting sky elements. Small positioning choices make huge differences.
Light Ray Magic Transforms Everything
Load those light ray brushes you downloaded. Create a new layer above everything else. Set blend mode to Screen. This makes black brush areas invisible while light areas glow.
Pick a large, soft ray brush. Use white or pale yellow. Click once where light should stream from. Maybe top corner if you want dramatic god rays. Or behind the subject for rim lighting.
Lower layer opacity if rays feel too intense. Around 40-60% usually works. You want atmosphere, not distraction. The rays should enhance mood without overwhelming your carefully composed elements.
More adjustment layers help here too. Add Curves or Color Balance to shift ray colors. Make them match your overall color grade for cohesion.
Camera Raw Filter Unifies Everything
Flatten a copy of all visible layers (Ctrl/Cmd + Alt/Opt + Shift + E). This creates a new merged layer on top while preserving originals below. Smart workflow keeps options open.
Go to Filter > Camera Raw Filter. This opens the powerhouse tool. Start with Basic adjustments. Bump Clarity for sharpness. Add Vibrance for color pop. Adjust Highlights and Shadows to taste.
Then hit the Color Grading tab. Push teal into shadows, orange into highlights. This cinema-grade color split looks professional instantly. Even subtle shifts (saturation around 10-15) make impact.
Don’t forget the Vignette. Darken edges slightly to draw eyes inward. Amount around -20 usually works. This finishing touch polishes the whole composition.
Common Mistakes to Avoid
Matching perspective kills believability fast. Your dolphins floating at impossible angles? Viewer’s brain rejects it immediately. Always consider where the horizon line sits and match all elements to it.
Color temperature mismatches stand out too. Warm subject on cool background looks wrong. Use Color Balance adjustment layers to harmonize everything. Sample colors from one element and introduce them subtly into others.
Over-sharpening ruins fantasy scenes. These compositions need dreamlike softness. Skip excessive Clarity or Sharpening. Let slight blur sell the surreal mood. Reality is sharp. Fantasy can be soft.
Finally, weak masking shows amateur work. Those hard edges around cutouts? Dead giveaway. Always feather mask edges. Paint with low flow brushes. Build transitions gradually. Seamless blending takes patience but defines professional results.
The Power of Nondestructive Editing
Notice how this entire workflow uses adjustment layers, masks, and Smart Objects? That’s intentional. Nondestructive editing means you can revisit decisions later.
Changed your mind about color grading? Just double-click the adjustment layer. Want different dolphin positioning? Transform the Smart Object without quality loss. Every choice stays flexible.
This approach saves hours during revisions. Clients change minds. You have new ideas. Nondestructive workflows accommodate both. So build this habit now. Your future self will thank you.
Plus, keeping originals intact means you can create multiple variations from one master file. Same composition, different moods. Just swap adjustment layers and export. Efficient and professional.
Push Further With These Techniques
Master this tutorial, then experiment wildly. Swap dolphins for whales, birds, or floating islands. Change the subject from woman to warrior, dancer, or wizard. The techniques transfer completely.
Try different blend modes on layers. Screen, Overlay, and Soft Light create unique effects. Duplicate layers and experiment. Can’t hurt when you work nondestructively.
Add fog or mist with cloud brushes on low opacity. Introduce particle effects with scatter brushes. Layer textures at low blend to add depth. Small additions compound into rich, complex scenes.
Fantasy composites reward experimentation. So save iterations as you work. File > Save As with version numbers. This lets you backtrack if experiments fail. But often, happy accidents produce the best results.
This workflow unlocks limitless creative possibilities. The technical foundation stays consistent. But your imagination determines where it goes. So start building. Your unreal landscape awaits.