
Want to create a dramatic space disaster scene? This tutorial shows you how to blend Earth, galaxies, and black holes into one epic cosmic catastrophe.
You’ll learn practical photo manipulation techniques that work for any space-themed project. Plus, these same blending methods apply to other dramatic composite images. The whole process takes about 45 minutes once you gather your resources.
Let’s build something apocalyptic.
What You’ll Need Before Starting
First, grab your source images. You need high-resolution photos of Earth, celestial objects, and space textures. Stock photo sites like Unsplash or NASA’s image library work great for these.
Here’s your shopping list:
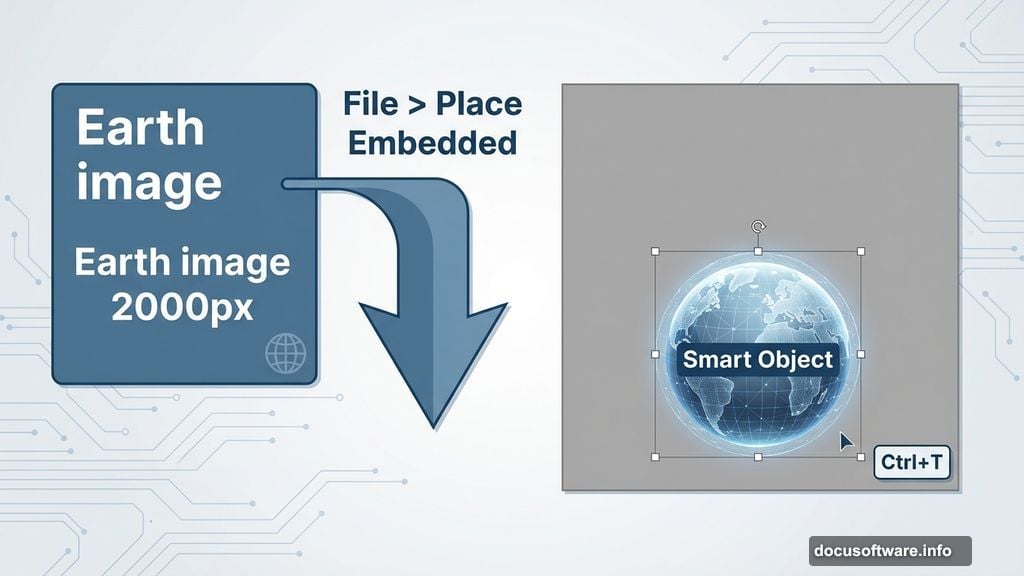
- Earth image (preferably showing atmosphere)
- Moon or planet textures
- Star field photos
- Galaxy spiral images
- Black hole or void texture
- Milky Way background
Make sure all images are at least 2000 pixels wide. Low-resolution sources create fuzzy final results. Trust me, I’ve tried cutting corners. It never looks good.
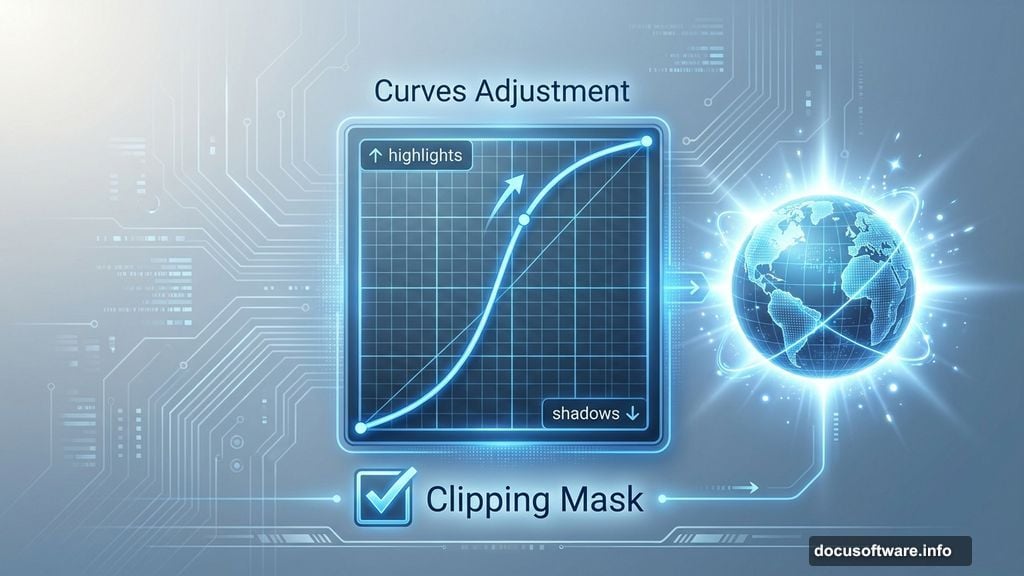
Also, you’ll use Curves adjustments heavily in this tutorial. So brush up on how Curves affect highlights and shadows if you’re rusty. That knowledge makes the blending steps much faster.
Setting Up Your Canvas
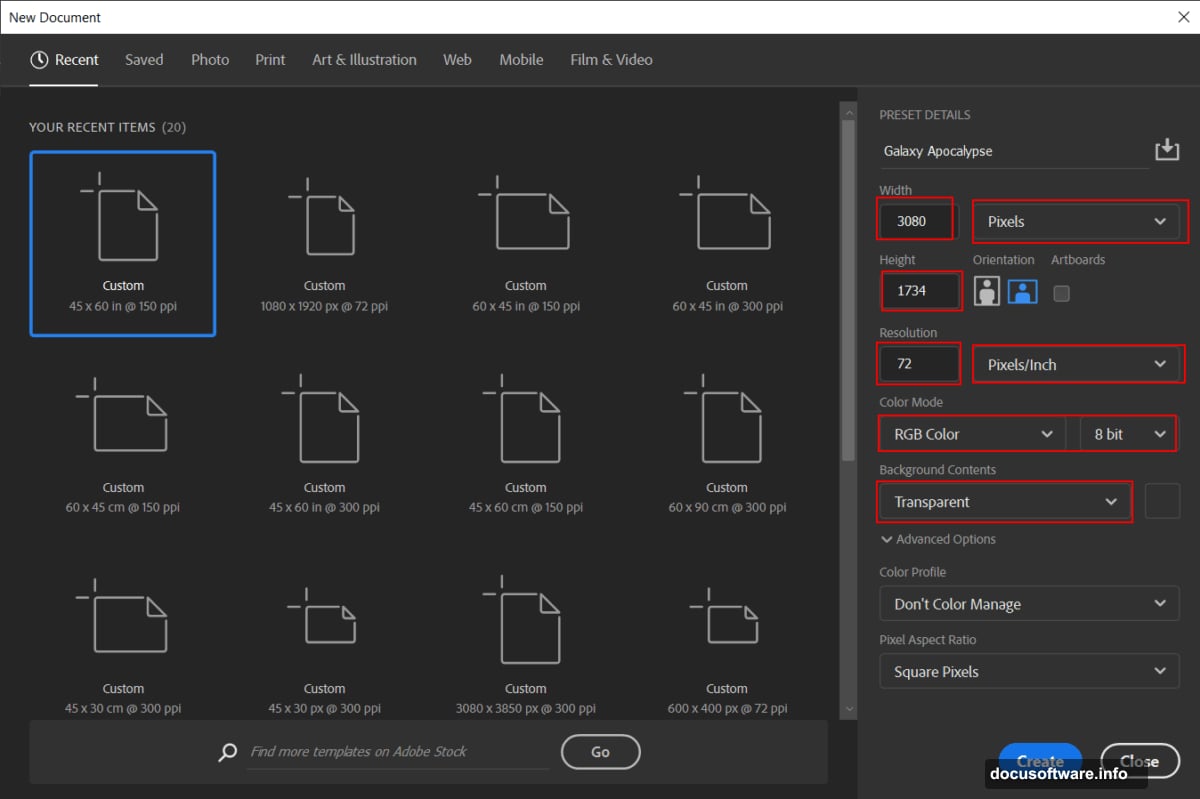
Create a new document in Photoshop. Go to File > New and punch in these settings:
Width: 3080 pixels
Height: 1734 pixels
Resolution: 72 DPI
Color Mode: RGB 8-bit
Background: Transparent
Why these dimensions? They give you a standard HD aspect ratio with room to crop. Plus, 72 DPI keeps file sizes manageable while you work. You can always increase resolution later for printing.
Now save this file immediately. Name it something you’ll remember. I use “galaxy-apocalypse-v1” so I can save multiple versions as I experiment.
Placing Your Earth Image
Time to add the star of our apocalypse scene. Go to File > Place Embedded and select your Earth photo. Photoshop drops it onto your canvas as a Smart Object.
Hit Ctrl/Cmd + T to transform. Hold Alt + Shift (just Alt in newer Photoshop versions) and drag a corner handle. This scales from the center while maintaining proportions. Position Earth roughly in the lower third of your canvas.
Why Smart Objects matter here? You can resize them later without quality loss. Regular layers get blurry when you scale up. So keep this as a Smart Object until you’re certain about the size.
Right-click the layer and choose Rasterize if you need to paint on it directly. But hold off on that for now.
First Light: Adding Curves
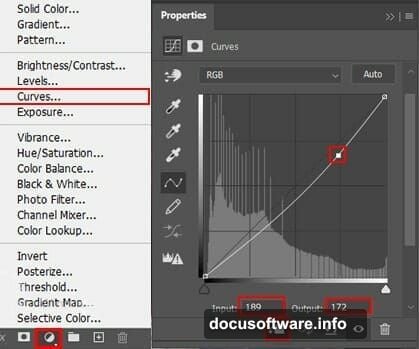
Select your Earth layer. Then click the Adjustment Layer icon at the bottom of the Layers panel. Choose Curves from the menu.
In the Curves dialog, create a slight S-curve. Click the center of the diagonal line and drag up slightly. This brightens your midtones without blowing out highlights.
But here’s the trick. We want this Curves adjustment to only affect Earth, not future layers. So right-click the Curves layer and choose “Create Clipping Mask.” Now it only adjusts the layer directly beneath it.
See how Earth pops more now? That’s the power of subtle Curves adjustments. Many beginners crank Curves too hard and destroy detail. Keep it gentle.
Selective Highlighting with Inverted Curves
Add another Curves adjustment layer. This time, we’re getting fancy with layer masks.
Create the Curves layer, then invert its mask. Press Ctrl/Cmd + I with the mask selected. The mask turns black, hiding the entire adjustment. Now grab your Brush Tool (B).
Set your brush to Soft Round, white foreground color, and about 30% opacity. Paint over the areas where sunlight would hit Earth’s atmosphere. Think about light direction. Where would the sun be in your scene?
As you paint on the black mask, you reveal the Curves adjustment only where you paint. This creates realistic rim lighting on Earth’s edge. It’s the same technique Hollywood uses for dramatic planet shots.
Keep building up the light gradually. Multiple soft strokes beat one hard stroke every time. You can always paint more. But removing excess light means switching to black and painting it away.
Edge Glow Effect
Create a new layer above your Earth. Name it “Edge Glow” so you remember what it does later. Trust me, unnamed layers become a nightmare in complex projects.
Grab your Brush Tool again. Use a larger Soft Round brush this time, maybe 300-400 pixels depending on your Earth’s size. Set foreground color to pure white.
Now paint along Earth’s sunlit edge. You’re creating an atmospheric glow effect. Real planets have this when light scatters through their atmosphere. So it adds realism even though we’re building something fantastical.
Set this layer’s blend mode to Screen. Suddenly that white glow looks luminous instead of flat. Screen mode is magic for light effects. Then reduce opacity to about 60-70% until it looks natural.
Too much glow looks fake. Too little disappears. You’ll know it’s right when it adds drama without screaming “Photoshop effect!”
Adding Texture Variety
Here’s where things get interesting. Open your second planet or moon texture. Use the Rectangular Marquee Tool (M) to select a section. Hold Shift while dragging to constrain the selection to a perfect square.
Copy this selection (Ctrl/Cmd + C) and paste it into your main document. Position it somewhere that makes visual sense. Maybe it’s another planet in the distance. Or a massive moon looming behind Earth.
Now change this layer’s blend mode to Color Dodge. Drop the opacity to 88%. Color Dodge creates intense, luminous blending. It burns through darker areas and makes lights explode. Perfect for space scenes where everything glows.
But Color Dodge can look radioactive if you’re not careful. That’s why we’re using 88% opacity instead of 100%. It keeps things dramatic without crossing into cartoonish territory.
Building the Galaxy Background
Time to add those swirling galaxies. Place your galaxy image (File > Place Embedded) and scale it to fill most of your canvas. Position it behind your Earth layer in the layer stack.
This galaxy probably looks too prominent right now. That’s fine. We’ll blend it down. Add a layer mask to the galaxy layer (click the mask icon at the bottom of Layers panel).
With a large Soft Round brush and black foreground color, paint away the galaxy where it overlaps Earth. You’re creating depth. Earth should feel like it’s in front of the galaxy, not pasted on top of it.
Also, reduce the galaxy layer’s opacity to about 60-70%. Full opacity galaxies overpower everything else. We want atmosphere, not distraction. The galaxy should enhance the mood, not dominate the composition.
Introducing the Black Hole
Now for the apocalypse part. Place your black hole or void texture. Position it near Earth, like it’s pulling the planet toward oblivion. This creates narrative tension. Viewers instantly understand something bad is happening.
The black hole needs to feel massive and threatening. So scale it larger than Earth. But not so large that it fills the entire frame. You want room for stars and atmosphere around it.
Set the black hole layer’s blend mode to Multiply. This makes the dark areas even darker while allowing some detail to show through. It creates that reality-bending gravity well effect that makes black holes so visually striking.
Add a layer mask. Paint away any hard edges where the black hole meets space. Real black holes don’t have sharp boundaries. They have accretion disks and gravitational lensing effects. We’re faking that with soft mask edges.
Star Field Layers
Your scene needs stars. Lots of them. Place your star field image and scale it to cover your canvas. Position this layer near the bottom of your layer stack, behind most other elements.
But a single star layer looks flat. So duplicate it (Ctrl/Cmd + J). Move the duplicate slightly using your arrow keys. Set it to Screen blend mode with reduced opacity. This creates star depth and twinkle.
Want more dimension? Add another duplicate. Rotate it slightly (Ctrl/Cmd + T, then drag outside the bounding box). Now your stars feel random and scattered instead of obviously duplicated.
Some stars should be brighter than others. Add a Curves adjustment to one star layer. Boost the upper right portion of the curve. This makes bright stars even brighter while keeping dim stars subtle.
Milky Way Atmosphere
Place your Milky Way texture across the scene. This adds those beautiful nebula clouds that make space scenes feel expansive. Scale it to fill the canvas, then set blend mode to Screen or Lighten.
Drop the opacity way down. Maybe 30-40%. The Milky Way should be a subtle texture, not a dominant element. It’s the difference between “beautiful atmosphere” and “muddy mess.”
Add a layer mask. Paint away the Milky Way where it covers Earth or your black hole. These main elements need clarity. The Milky Way fills empty space and adds interest without competing for attention.
Experiment with different Milky Way positions. Sometimes rotating it 45 degrees creates better flow. The nebula clouds should guide the viewer’s eye toward your focal point, which is Earth meeting the black hole.
Color Grading with Curves
Almost there. Now we unify everything with color grading. Add a Curves adjustment layer at the top of your layer stack. This one affects everything beneath it, so don’t clip it to anything.
In the Curves dialog, switch from RGB to individual color channels. Click where it says “RGB” and choose Red. Create a gentle S-curve in the Red channel. This adds warmth to highlights and cools shadows.
Switch to Blue channel. Do the opposite. Dip the highlights slightly and raise the shadows a bit. This creates that teal-and-orange look you see in blockbuster movies. It’s become a bit cliché, but it works for space scenes.
Keep these adjustments subtle. You’re creating mood, not destroying your colors. If the whole image looks like you poured orange juice on it, you’ve gone too far. Dial it back until it feels cinematic but not cartoony.
Camera Raw Final Pass
Here’s the secret weapon. Flatten your image first (Layer > Flatten Image). Then go to Filter > Camera Raw Filter. This opens Adobe Camera Raw inside Photoshop. It’s like Lightroom but for individual images.
In Camera Raw, make these adjustments:
Increase Clarity to about +15. This enhances edge detail and makes everything crisp. But don’t push past +25 or you’ll get halos around high-contrast edges. Those look terrible.
Boost Vibrance to +10 or +15. Vibrance is smarter than Saturation. It boosts dull colors while protecting skin tones and already-saturated areas. Perfect for space scenes where you want rich colors without clipping.
Add a subtle vignette. Set the Vignetting amount to about -15. This darkens the corners and edges, drawing attention to the center of your composition. It’s an old photography trick that still works beautifully.
Finally, add some grain. Set the Grain slider to 10-15. This introduces texture that makes the image feel less digital and more photographic. Space photos often have grain from sensor noise, so this adds authenticity.
Click OK when you’re happy with the preview. Camera Raw applies all these adjustments at once, maintaining image quality better than multiple separate filters.
Export and Final Touches
Save your master file as a PSD. Always keep your layered version. You’ll want to tweak things later. Trust me on this one. I’ve lost count of flattened files I wish I could edit again.
For sharing online, go to File > Export > Export As. Choose JPEG format. Set quality to 80-90%. Higher quality creates massive files without visible improvement. Lower quality introduces ugly compression artifacts.
If you’re printing this, export as TIFF instead. Set color space to Adobe RGB. This preserves more color information for professional printing. But for web use, stick with JPEG and sRGB color space.
Why This Technique Works Everywhere
These same blending methods work for any dramatic composite. Replace Earth with a person. Replace the black hole with storm clouds. Same techniques, different subject.
The key principles stay consistent:
- Build depth with layer stacking
- Use blend modes for luminosity
- Master Curves for selective adjustments
- Add texture layers for atmosphere
- Color grade for unified mood
Once you understand these concepts, you can create any composite scene you imagine. The apocalypse theme just makes the tutorial more fun than “how to blend two photos together.”
So experiment. Break the rules. Make Earth purple if you want. The worst thing that happens? You learn what doesn’t work. Then you try something else.