Creating surreal artwork in Photoshop doesn’t require years of experience. You just need the right techniques and patience.
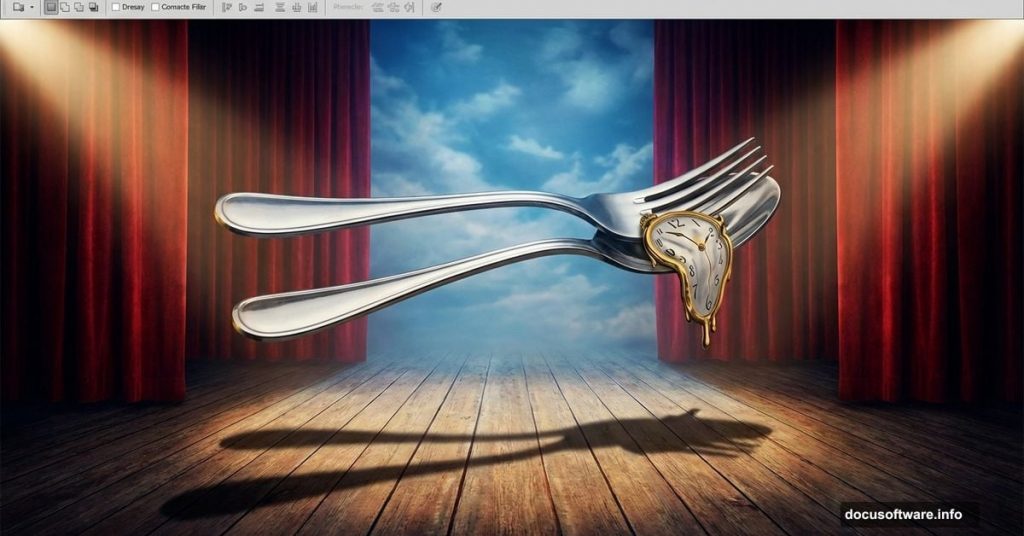
This tutorial walks you through building a theatrical composition featuring cutlery, velvet curtains, and hardwood floors. The end result channels Salvador Dali’s dreamlike aesthetic. Plus, you’ll learn practical skills that apply to any photo manipulation project.
Let’s build something memorable.
What You’ll Learn
This project covers essential Photoshop skills that work across different compositions. You’ll practice perspective correction, shadow enhancement, and blending multiple stock images seamlessly.
The techniques here apply beyond this specific artwork. Master these fundamentals and you’ll tackle complex manipulations with confidence. So grab your source images and follow along step by step.
Gathering Your Resources
Before starting, download these stock images:
- Old wood texture for the floor
- Blue sky landscape for the backdrop
- Red velvet curtain photos
- Theater bench reference
- Cutlery photographs (fork and spoon)
Most photo stock sites offer similar images if these exact files aren’t available. Just look for high-resolution options with good lighting.
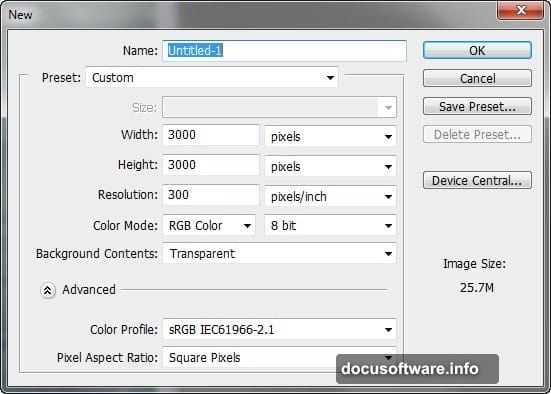
Setting Up Your Canvas
Start with a new Photoshop document. Go to File > New and input these specifications:
- Width: 3000 pixels
- Height: 3000 pixels
- Resolution: 300 pixels per inch
- Color Mode: RGB Color, 8-bit
- Background: Transparent
This gives you plenty of room to work. The high resolution ensures your final image stays crisp even when zoomed in.
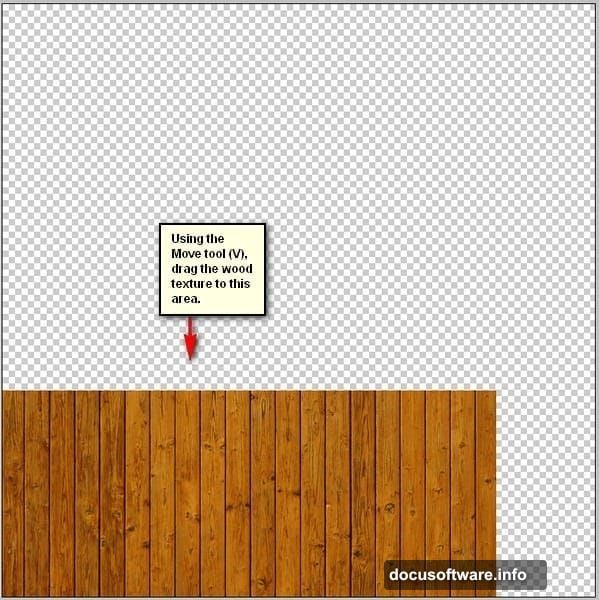
Building the Hardwood Floor
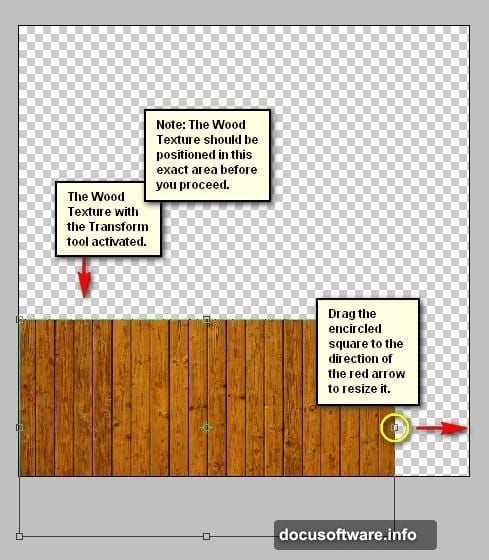
First, open your wood texture file. Activate the Move tool by pressing V on your keyboard. Then drag the texture onto your blank canvas.
Position it across the bottom half of the composition. Don’t worry about perfect placement yet. We’ll adjust that next.
Resizing and Positioning
Press Ctrl/Cmd + T to activate the Transform tool. You’ll see small squares appear around your wood texture. These are your resize handles.
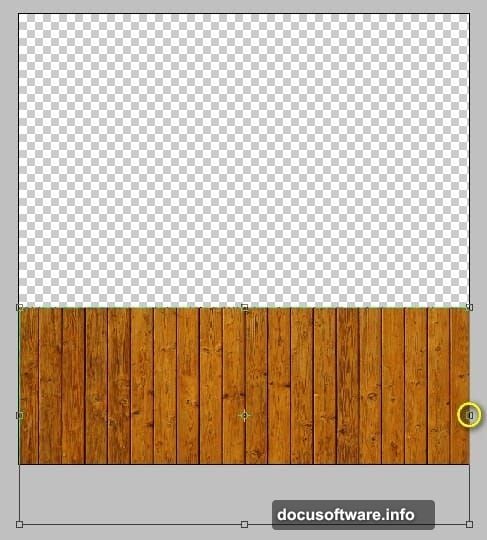
Drag the corners to scale up the texture. Make it large enough to cover the floor area completely. Hold Shift while dragging to maintain the original proportions.
The texture should stretch across the bottom third of your canvas. This creates the stage floor for your surreal scene.
Applying Perspective Correction
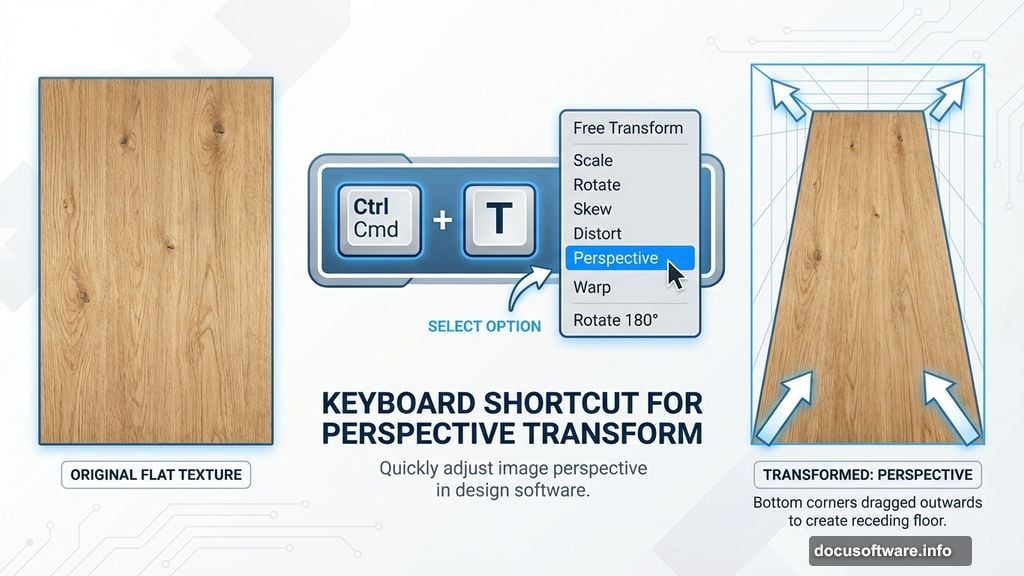
Now comes the crucial part. Real floors recede toward the horizon. So we need to add that perspective.
Press Ctrl/Cmd + T again for Transform. Right-click on the canvas to bring up the contextual menu. Select “Perspective” from the options.
Grab the bottom corners of your transform box. Drag them outward while the top stays anchored. This creates that receding floor effect. The back edge should be narrower than the front.
Play with the adjustment until it looks natural. Trust your eye here. If it looks right, it probably is.
Enhancing Floor Shadows
Flat textures look fake in composites. So let’s add depth with shadows.
Create a new layer above your wood texture by pressing Ctrl/Cmd + Shift + N. Name this layer “Floor Shadows” to stay organized.
Activate the Brush tool by pressing B. Make sure you’re using Photoshop’s default brush set. If not, right-click the canvas with the Brush tool active. Click the gear icon and reset to default brushes.
Painting Natural Shadows
Select a soft round brush. Set the opacity to 20-30% for subtle shadow building. Choose a dark brown or black color.
Paint shadows where objects will eventually sit. Focus on the areas beneath where your cutlery and bench will be placed. Build up the darkness gradually with multiple strokes.
Remember, shadows are rarely pure black. They pick up ambient light colors. So mix in slight blues or reds to match your overall color scheme.
Creating the Sky Backdrop
Open your blue sky landscape image. Use the Move tool (V) to drag it onto your main canvas.
Position this sky layer behind your floor layer in the layers panel. This creates the background for your theatrical stage.
Scale the sky image to fill the upper two-thirds of your canvas. Use the Transform tool (Ctrl/Cmd + T) to resize as needed.
The horizon line of your sky should roughly align with where your floor ends. This creates a natural meeting point between floor and backdrop.
Adding the Velvet Curtains
Theater curtains frame your composition beautifully. They add that Dali-esque drama we’re aiming for.
Open your curtain stock photos. You’ll likely need to use the curtains multiple times to create full coverage on both sides.
Drag the first curtain onto your canvas. Position it along the left edge. Then duplicate this layer (Ctrl/Cmd + J) and flip it horizontally for the right side.
Blending Curtain Edges
Curtains rarely look perfect straight from stock photos. So we’ll blend them naturally.
Add layer masks to each curtain layer. Use a soft brush at low opacity to paint away harsh edges. Focus on the top and bottom where curtains meet the background.
This soft blending makes the curtains feel integrated rather than pasted on.
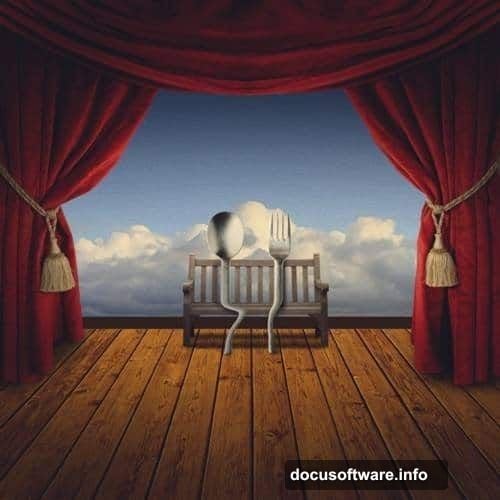
Positioning the Theater Bench
Open your bench reference image. Extract it from its background using your preferred selection method. The Pen tool works great for clean edges.
Drag the bench onto your main composition. Scale it down to fit naturally on your floor. Remember, perspective matters here too.
Objects closer to the viewer should appear larger. So if your bench sits in the foreground, make it bigger than background elements.
Placing Your Hero Cutlery
Now for the stars of the show. Your fork and spoon become larger-than-life characters in this surreal scene.
Open both cutlery images. Extract them carefully from their backgrounds. The Pen tool again works perfectly for these smooth, metallic objects.
Scale them up significantly. These aren’t normal-sized utensils. They’re theatrical props that dominate the composition.
Position the fork and spoon as if they’re performers on your stage. Maybe they’re standing upright or leaning against each other romantically.
Refining Cutlery Lighting
Extracted objects often lose their lighting context. So we need to reintegrate them.
Create new layers above each cutlery piece. Set these layers to Overlay or Soft Light blend mode. Paint highlights where light from your sky backdrop would hit the metal.
Similarly, paint subtle shadows on the sides away from the light. This grounds the cutlery in your scene’s lighting environment.
Adding Dramatic Shadows
Large objects cast large shadows. Your oversized cutlery should create dramatic shadows across the floor.
Create a new layer beneath your cutlery. Use a large soft brush with black at 40-50% opacity. Paint shadow shapes that match your cutlery’s position and your light source direction.
Transform these shadow shapes (Ctrl/Cmd + T) to stretch them along the floor’s perspective. Shadows flatten and elongate as they move away from their source.
Lower the shadow layer opacity until it looks natural. Around 60-70% usually works well.
Unifying Colors with Gradient Maps
Different stock photos have different color tones. Gradient Maps help unify everything.
Add a Gradient Map adjustment layer at the top of your layer stack. Choose a gradient that matches your desired mood. Warm oranges and reds work great for romantic, theatrical scenes.
Set the Gradient Map’s blend mode to Luminosity. Reduce opacity to 40-50%. This tints everything subtly without overwhelming individual colors.
The result ties all your disparate elements together into one cohesive color scheme.
Final Touches and Polish
Step back and review your composition. Look for any elements that still feel disconnected.

Add subtle color correction layers. Curves adjustments can lift shadows or deepen darks. Hue/Saturation tweaks can make colors pop or soften them.
Consider adding a slight vignette. Create a new layer, fill it with black, and add a large circular mask. Feather the mask heavily. This draws the eye toward your central composition.
Common Mistakes to Avoid
Don’t rush the perspective corrections. Floors and walls that don’t align properly immediately break the illusion.
Also, watch your lighting consistency. If your sky shows sunlight from the left, shadows must fall to the right. Mixed lighting directions look amateur.
Finally, avoid over-sharpening extracted objects. This creates halos and makes them look pasted. When in doubt, slightly blur rather than sharpen.
Taking This Further
Once you’ve completed this composition, experiment with variations. Try different color schemes. Swap the cutlery for other objects. Change the backdrop from sky to brick wall.
The techniques here work for any surreal photo manipulation. You’ve learned perspective, lighting, blending, and color unification. These skills translate directly to professional composite work.
So save this project file. Reference it when starting new manipulations. The methods remain consistent even as your subjects change.
Your surreal artwork awaits. Now go create something that makes viewers look twice.