Most flyer designs scream amateur hour. Clashing colors, awkward compositions, and text that looks like it was added as an afterthought.
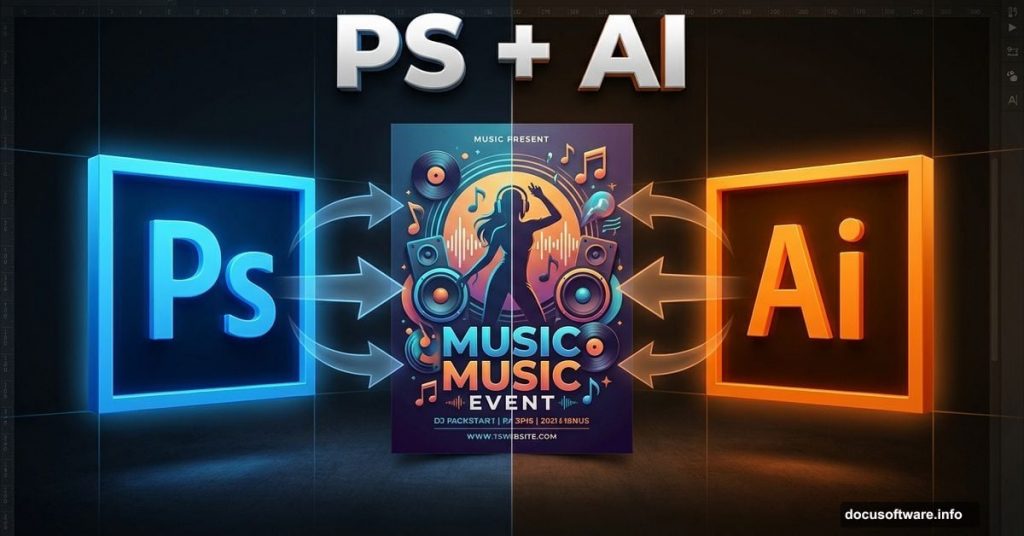
But creating a professional music flyer doesn’t require years of design school. You just need to understand how Photoshop and Illustrator work together. Plus, the right techniques for compositing images and creating visual impact.
This guide walks you through building a complete music flyer from scratch. You’ll learn object selection, smart object workflows, color correction, and how to integrate vector elements with 3D text. By the end, you’ll have skills that transfer to any design project.
Gather Your Creative Assets First
Before opening Photoshop, collect all the visual elements you’ll need. This flyer design requires specific images that work together thematically.
You’ll need a dancing model photo, musical instruments like guitars and microphones, audio equipment including speakers and headphones, and atmospheric elements such as vinyl records and abstract fractals. Sky backgrounds and lens flare effects complete the visual toolkit.
Finding high-quality stock images matters more than you think. Low-resolution or poorly lit photos will sabotage your design before you even start compositing.

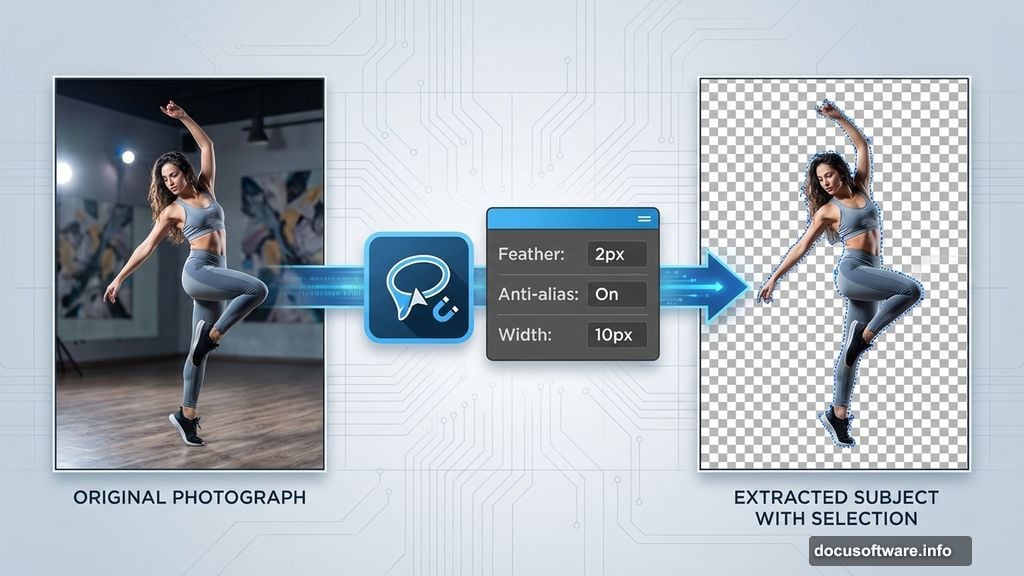
Extract Your Model Cleanly
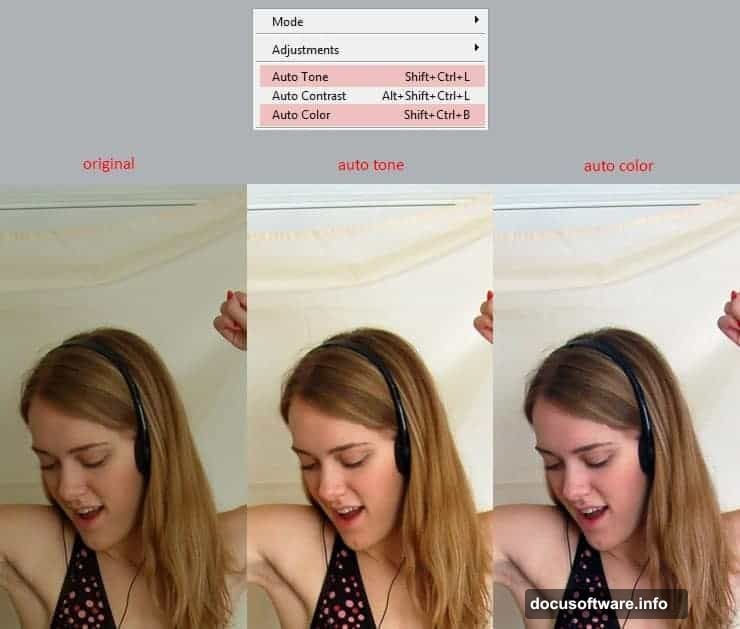
Open your dancing model photo in Photoshop first. The image probably needs color correction right away. Hit Shift+Ctrl+L for auto tone adjustment, then Shift+Ctrl+B for auto color correction.
These automatic adjustments save time. But they work best on images that are already decent quality. If your photo looks terrible after auto correction, you’ll need manual adjustments instead.
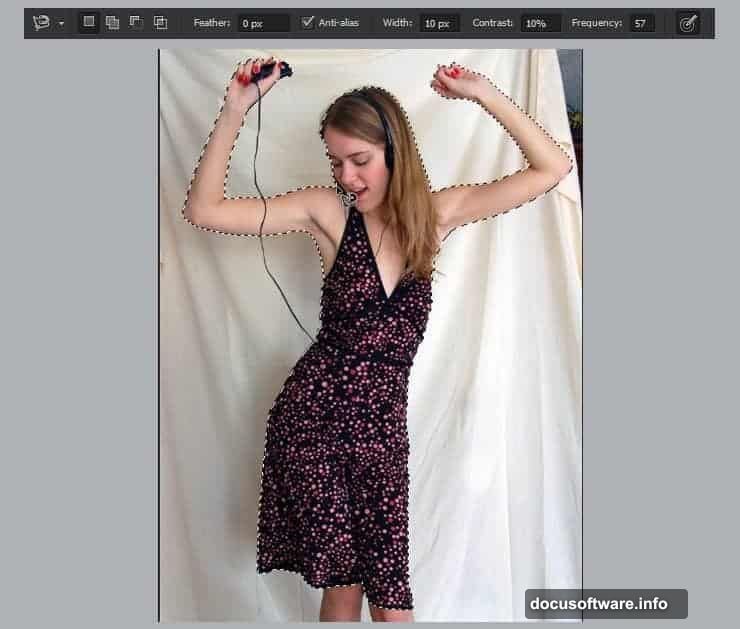
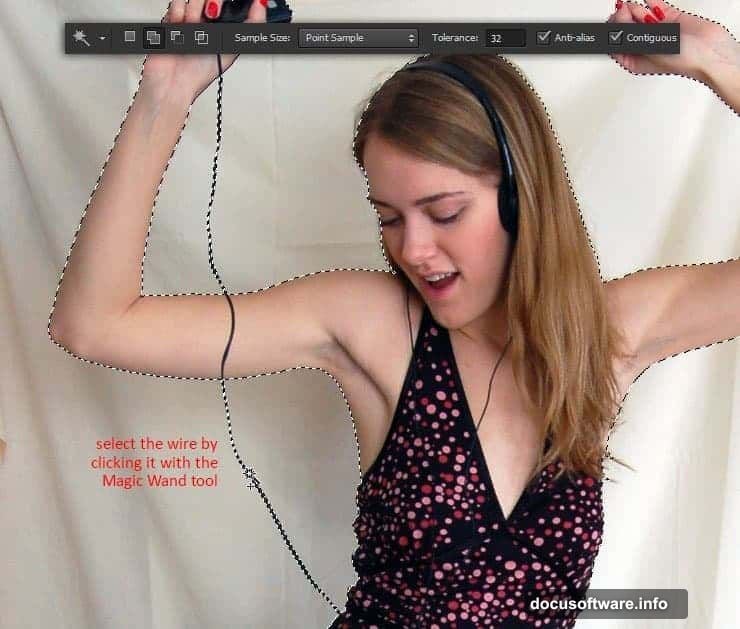
Now comes the crucial part: extracting the model from the background. The Magnetic Lasso Tool works well for this task. Set the feather to 2px, anti-alias on, and width around 10px. These settings help the tool follow edges more accurately.
Click around the model’s outline carefully. Take your time with hair and clothing edges where backgrounds often bleed through. For thin objects like headphone wires, switch to the Magic Wand Tool. One click usually selects the wire cleanly.
Copy your selection with Ctrl+C once you’ve captured everything.
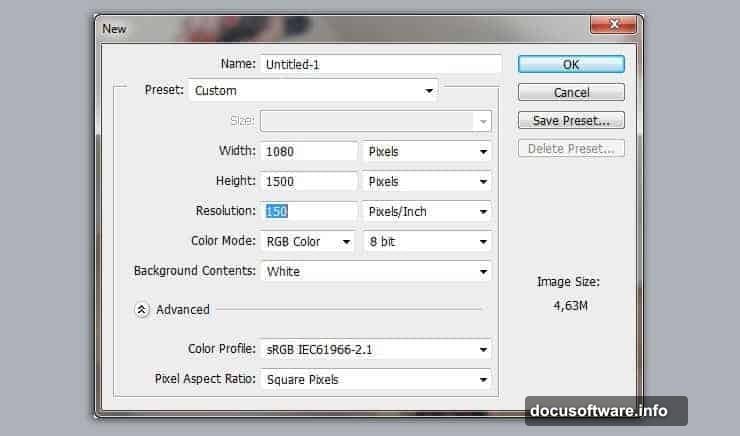
Set Up Your Flyer Canvas
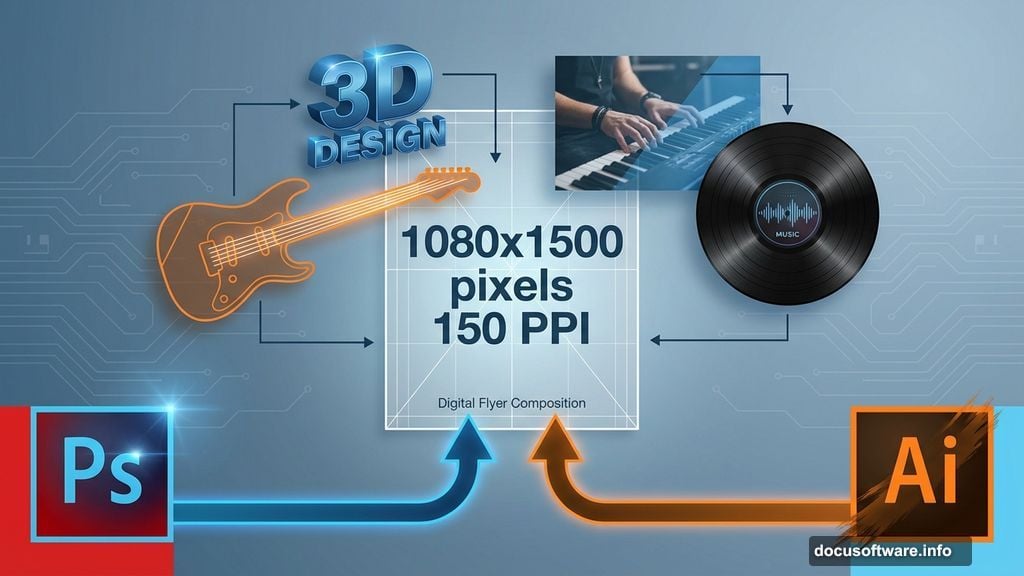
Create a new document at 1080×1500 pixels with 150 PPI resolution. This size works perfectly for both digital display and physical printing.
Paste your model using Ctrl+V. Here’s where smart objects become essential. Right-click the layer and choose “Convert to Smart Object.” This lets you make non-destructive edits later.
Smart objects preserve image quality no matter how many times you resize or transform them. They also allow you to edit the original content without affecting your main composition.
Add Visual Depth Through Layering
Double-click your smart object thumbnail to open its editing window. Duplicate the model layer inside this window, then desaturate the copy using Image > Adjustments > Desaturate.
Change the desaturated layer’s blend mode to Overlay and drop opacity to 30%. This creates subtle contrast that makes the model pop against backgrounds.
The beauty of working inside smart objects shows here. Every adjustment you make updates automatically in your main document. No need to redo work or maintain multiple versions.
Build Background Atmosphere
Music flyers need energy. Start with a dramatic sky image as your base background layer. Place it behind your model layer and resize to cover the entire canvas.
Add abstract fractal elements next. These provide visual complexity without overwhelming the composition. Place them strategically around your model, using blend modes like Screen or Lighten to integrate them smoothly.
Layer multiple fractals at different opacities. This creates depth that flat backgrounds can’t achieve. Your eye should move through the design naturally, not get stuck on any single element.
Integrate Musical Elements
Now add your instruments and audio equipment. Each element needs careful placement to maintain balance.
Position a large speaker on one side, maybe at the bottom corner. Place the guitar at an angle that leads the viewer’s eye toward your model. Headphones, microphones, and audio jacks scatter throughout the composition.
Use Free Transform (Ctrl+T) to resize and rotate each element. Hold Shift while dragging corners to maintain proportions. This prevents stretched or distorted-looking objects.
Apply subtle drop shadows to ground each element in the scene. Go easy though. Harsh shadows look cheap and dated.
Create Vector Typography in Illustrator
Switch to Illustrator for your text elements. Vector text scales infinitely without losing quality, which matters for flyers that might get printed at various sizes.
Type your event name using a bold, attention-grabbing font. Something with personality that matches the music genre you’re promoting. For electronic music, try futuristic sans-serif fonts. For rock or indie events, rougher display fonts work better.
Apply 3D effects through Effect > 3D > Extrude & Bevel. Adjust the extrusion depth and lighting angle until your text feels dimensional without looking overdone. Too much 3D effect makes text hard to read.
Add a gradient overlay for extra polish. Metallic gradients work especially well on 3D text, creating a premium look.
Transfer Typography to Photoshop
Copy your finished text from Illustrator and paste it into Photoshop as a Smart Object. This maintains the vector properties while letting you apply Photoshop effects.
Position the text prominently, usually in the upper third of your flyer. The eye naturally starts at the top, so that’s where your main message goes.
Apply layer styles to help the text stand out. A subtle outer glow or stroke can separate text from busy backgrounds. Keep effects minimal though. The goal is readability, not decoration.
Fine-Tune Color Harmony
Music flyers typically use bold, saturated colors. But everything needs to work together cohesively.
Add a Color Lookup adjustment layer at the top of your layer stack. These apply cinematic color grades with one click. Try different presets until you find one that enhances your design’s mood.
Alternatively, use a Gradient Map adjustment layer for more control. Map shadows to deep purples or blues and highlights to warm oranges or yellows. This creates that sought-after complementary color scheme.
Lower the adjustment layer opacity if the effect feels too strong. Aim for enhancement, not transformation.
Add Finishing Touches
Small details separate amateur flyers from professional ones. Add lens flares near light sources like stage lights or speaker glow. Position them strategically to guide the viewer’s eye.
Scatter musical notes or vinyl records in negative space. These reinforce the music theme without cluttering the design.
Consider adding a subtle vignette around the edges. This draws attention toward the center where your model and text live.
Polish the Final Design
Zoom out to view your flyer at actual size. Does the hierarchy work? Can you read the event name instantly? Does your eye move through the composition smoothly?
Make final adjustments to element positions and sizes. Sometimes moving something just 10 pixels makes a huge difference in overall balance.
Flatten your image for final export, but save a layered version first. You’ll want that flexibility later for changes or variations.
Export at full resolution for print or optimize for web if distributing digitally. JPG at 90% quality works for most uses, though PNG preserves more detail for digital displays.
The Real Skill Behind Great Flyers
Creating professional flyers isn’t about knowing every Photoshop feature. It’s about understanding visual hierarchy, color theory, and composition principles.
The software just helps you execute your vision. Photoshop handles photo manipulation and compositing. Illustrator creates scalable vector elements. Together, they give you complete creative control.
Practice these techniques on multiple projects. Each flyer you create will look better than the last as you internalize what works and what doesn’t.
Start with this tutorial’s approach, then develop your own style. The best flyer designers have recognizable aesthetics that make their work stand out. That comes from experimentation and pushing beyond safe choices.
Your next music event deserves a flyer that captures attention and communicates professionalism. Now you know exactly how to create one.