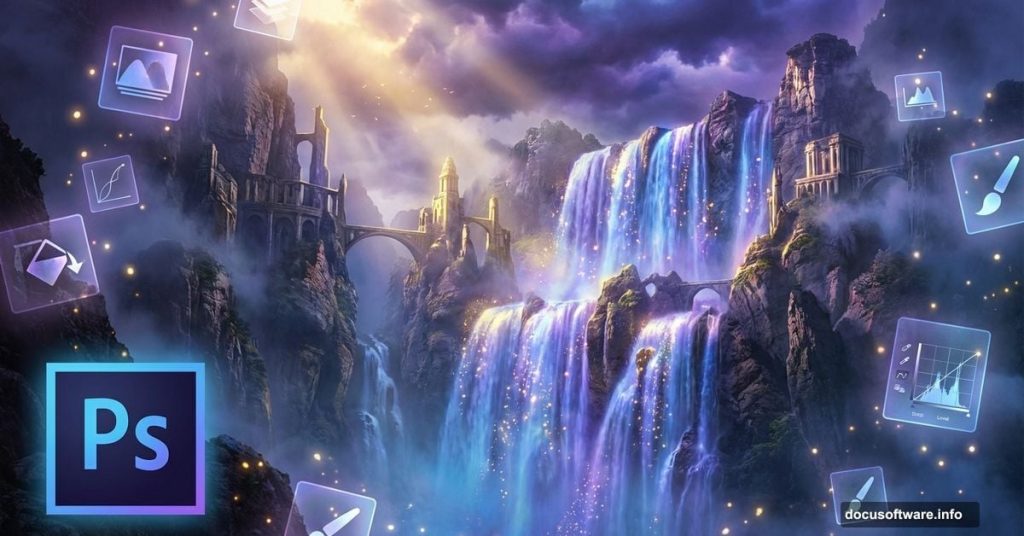
Surreal photo manipulation sounds complicated. But breaking it into steps makes everything manageable.
This tutorial shows you how to blend multiple stock images into one cohesive waterfall mountain scene. You’ll learn professional blending techniques, light effects, and how to make disparate elements look like they belong together. Plus, I’m throwing in some quick tips that’ll save you hours of frustration.
Let’s dive into creating something beautiful.
What You’ll Actually Build
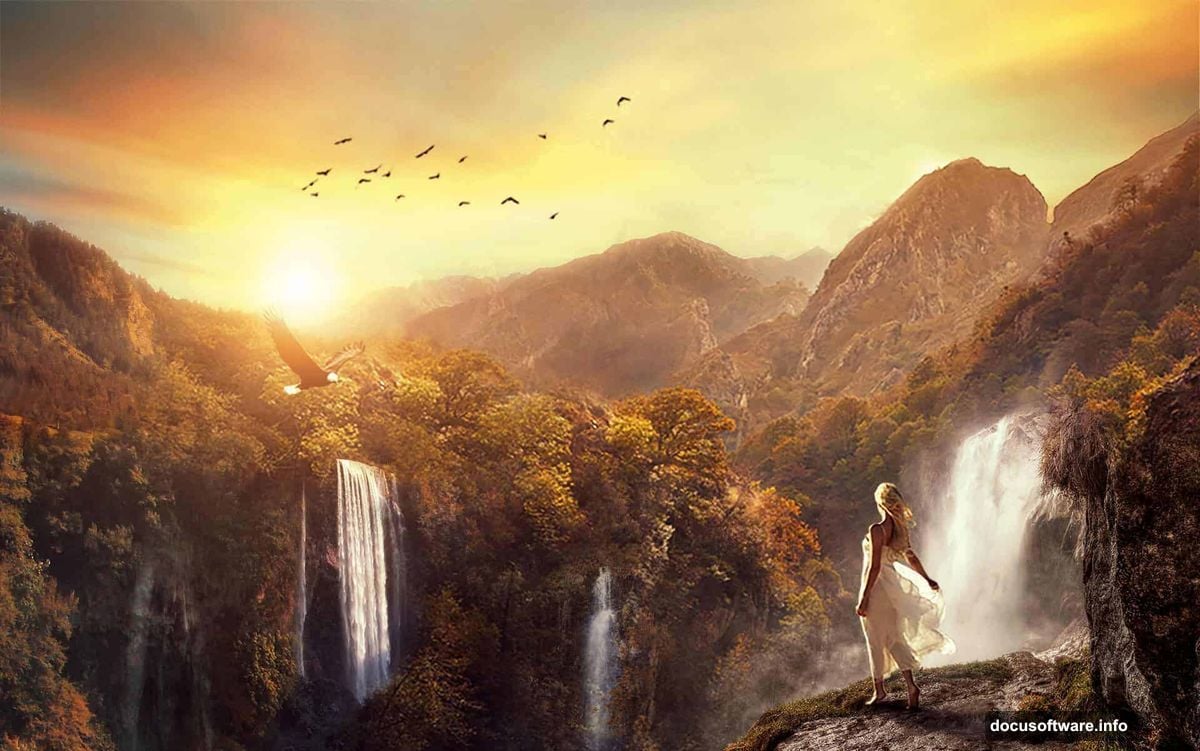
We’re creating a fantasy landscape where waterfalls cascade down impossible cliffs. Think epic movie poster vibes.
Here’s the workflow breakdown. First, we establish the base environment with mountains and sky. Then we layer in waterfalls using masks and adjustment layers. After that, we add smaller details like eagles and atmospheric effects. Finally, we polish everything with lighting and color grading.
The whole project takes about 2-3 hours once you know the steps. So grab your coffee and let’s get started.
Setting Up Your Canvas
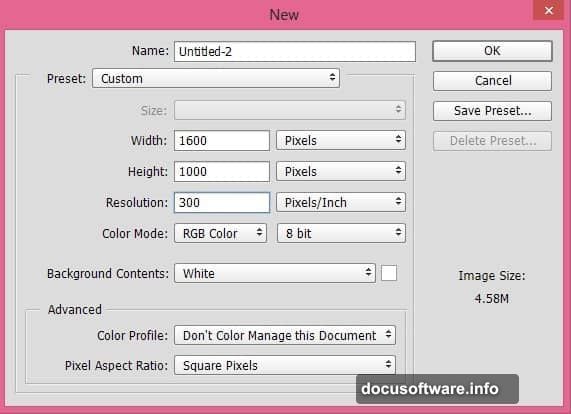
Start by creating a new document in Photoshop. Go to File > New and set your dimensions to 3000×2000 pixels at 300 DPI. However, feel free to adjust based on your needs.
This resolution gives you plenty of room to work while keeping file sizes reasonable. Plus, you can always scale down later without losing quality.
Building the Base Scene
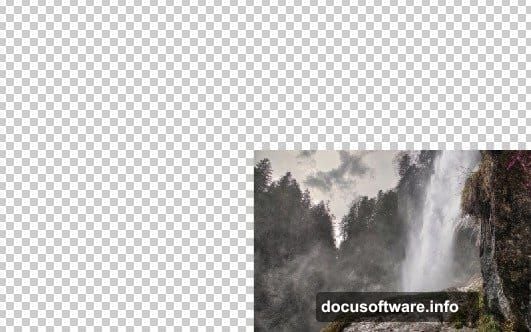
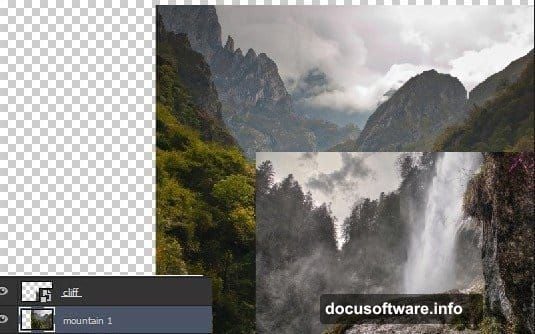
Place your cliff image first by selecting File > Place Embedded. Position it on the right side of your canvas. This becomes your anchor point for everything else.
Next, add your first mountain layer underneath the cliff. This creates depth and gives you something to blend into. The key here is layering order. Always think about what appears in front versus what’s behind.
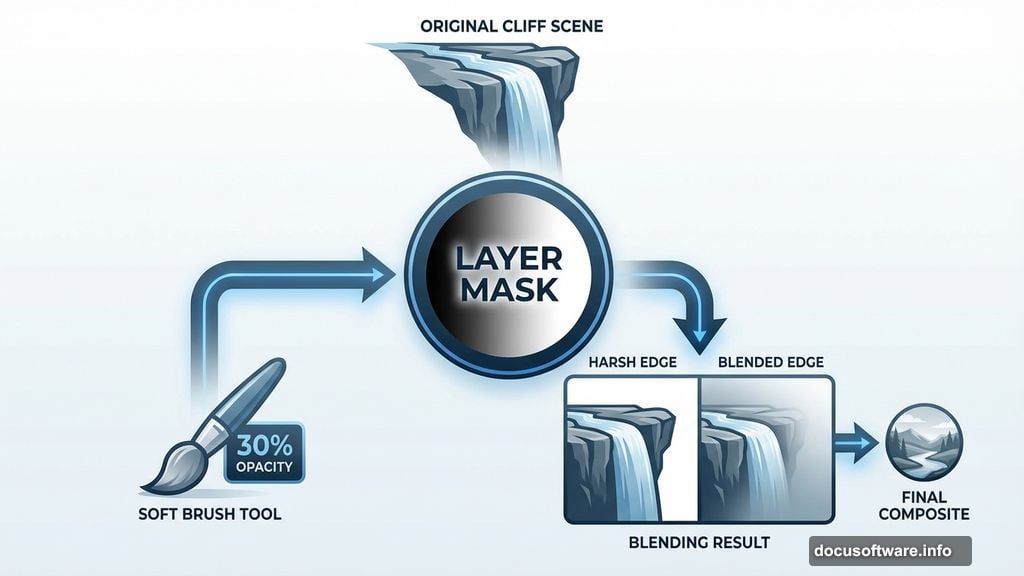
Now comes the fun part. Add a layer mask to your cliff layer by selecting Layer > Layer Mask > Reveal All. Grab your Brush tool (B) and set opacity to 30%. Using a soft black brush, gently hide the edges where cliff meets mountain.
The goal is seamless blending. So work slowly. Build up the effect gradually rather than making harsh changes. Your eye will tell you when it looks natural.
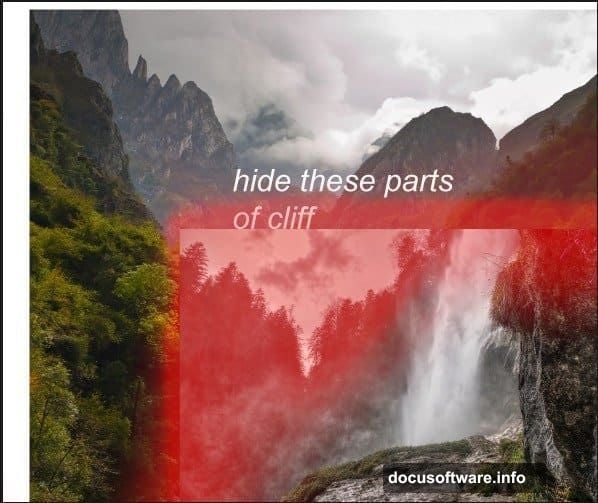
Creating the Waterfall Platform
Here’s where many beginners get stuck. When you mask the cliff edges, you might accidentally hide the waterfall platform. That creates a weird floating effect.
The fix is simple. Place a second waterfall image under your cliff layer. Choose one with a similar cascade pattern to your main waterfall. This gives you a new platform that looks intentional.
Position it carefully so the water appears to flow from your cliff naturally. You might need to resize or rotate slightly. Take your time here because this detail makes or breaks the realism.
Blending Multiple Mountains
Adding more mountain layers creates depth. But each new layer needs careful attention to lighting and perspective.
Place your second mountain image behind everything else. This becomes your background element. Then use layer masks to blend where mountains overlap. Focus on matching the light direction across all elements.
Watch your edge work. Hard edges look cut-and-paste. Soft, feathered edges create the illusion that everything exists in the same space. So keep that brush opacity low and build up slowly.
Perfecting Your Waterfalls
Waterfalls need special attention because they’re dynamic elements. They draw the eye immediately.
Layer multiple waterfall images to create variety. Some should be prominent cascades while others are distant streams. This variation makes the scene feel vast and alive.
Use layer masks to control flow direction. Make sure water appears to follow gravity naturally. Nothing breaks immersion faster than water flowing uphill.
Moreover, adjust opacity on distant waterfalls. Things farther away should be less distinct due to atmospheric perspective. Dropping opacity to 60-70% on background waterfalls creates that effect instantly.
Adding Atmospheric Elements
Sky selection matters more than you’d think. Your sky sets the entire mood and lighting direction for the scene.
Place your sky image and blend it with your mountains using gradient masks. This creates a natural horizon transition. Hard cutoffs between sky and land look amateur.
Consider adding birds or an eagle for scale. These small elements help viewers understand the massive scope of your landscape. Just keep them subtle. You want supporting details, not distractions.
Creating Realistic Shadows
Shadows sell the illusion. Every element needs a shadow that matches your light source direction.
Create a new layer set to Multiply blend mode. Paint shadows under waterfalls, around cliff bases, and anywhere objects would block light. Use a soft black brush at 20-30% opacity.
Build shadows gradually. Real shadows have variation in density based on distance from the casting object. So start dark near the object and fade as you move away.
Light Effects That Pop
Lighting transforms good composites into great ones. Start by establishing a clear light direction. Stick with it consistently across all elements.
Add highlights on cliff edges and mountain peaks where light would catch. Use a soft white brush on a layer set to Screen or Overlay at 30-40% opacity. This creates subtle rim lighting that adds dimension.
Consider adding lens flares for dramatic effect. Place them strategically where sun would peek through valleys or around waterfalls. Just don’t overdo it. One or two well-placed flares work better than five mediocre ones.
Color Grading for Cohesion
Even perfectly blended elements can look disconnected if colors don’t match. Color grading ties everything together.
Add a Curves adjustment layer affecting all layers. Shift the curve slightly to match your desired mood. Cooler tones create mystery while warmer tones feel inviting.

Use Selective Color adjustments to harmonize specific color ranges. If your waterfalls look too blue compared to your mountains, adjust the cyan channel until they match.
Finally, add a subtle Color Lookup table if you want that professional film look. The Teal and Orange LUTs work great for landscape scenes.
Final Polish
Zoom out and evaluate your composition as a whole. Look for areas that feel flat or disconnected.
Add a Levels adjustment layer to boost overall contrast. This makes everything pop. Then apply subtle sharpening using a High Pass filter set to Overlay at 50% opacity.
Consider adding subtle texture overlays on a low opacity to create atmosphere. Dust particles or mist can enhance the mystical quality of your scene.
Common Mistakes to Avoid
The biggest error beginners make is not matching perspective across elements. If your cliff has a low viewpoint but your mountains show an aerial view, it looks wrong immediately.
Also, watch your resolution. Don’t mix high-res images with low-res ones. The quality difference becomes obvious in the final composite.
Finally, don’t overdo adjustment layers. Three or four targeted adjustments work better than fifteen vague ones. Keep your layer stack organized and purposeful.
Why This Technique Matters
Surreal landscape composition isn’t just about making pretty pictures. It teaches fundamental Photoshop skills you’ll use constantly.
Masking, blending modes, adjustment layers, and light effects form the foundation of professional photo manipulation. Master these techniques and you can create anything you imagine. From fantasy landscapes to commercial advertising composites.
The principles stay the same. Only your source images change.
This tutorial gave you a framework. Now experiment with your own stock images. Try different combinations. Make mistakes. That’s how you develop your unique style and really internalize these techniques.