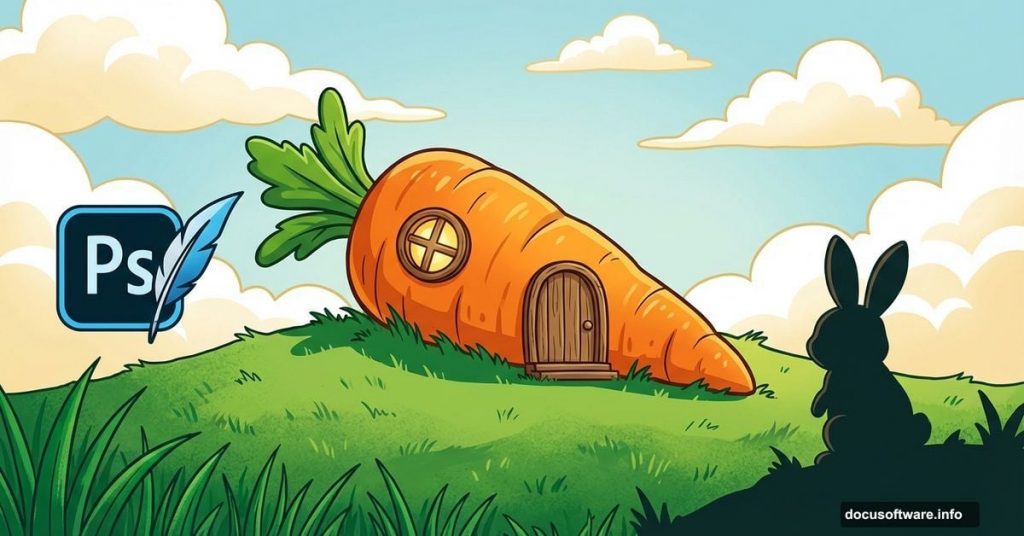
Want to create magical photo manipulations that look straight out of a storybook? This tutorial walks you through building an adorable bunny house scene from scratch.
You’ll learn essential compositing techniques, blending methods, and lighting tricks that work for any fantasy illustration project. Plus, the step-by-step approach makes complex manipulation feel manageable, even if you’re still learning Photoshop‘s tools.
Let’s dive into creating this charming woodland scene.
Gather Your Source Images First
Before opening Photoshop, collect all the assets you’ll need. This tutorial uses free stock photos from Morguefile, sxc.hu, and similar sites.
You’ll need grass textures, sky backgrounds, carrot photos, bunny images, and architectural elements like doors and windows. Having everything ready saves time later when you’re deep in the creative process.
Pro tip: Download multiple variations of each element. You might want options for different angles or lighting conditions.
Build Your Canvas and Background
Start with a new document sized 1000×1300 pixels. The vertical orientation works perfectly for this composition style.
Fill the background with white or any bright color you prefer. This creates a cheerful foundation for your scene.
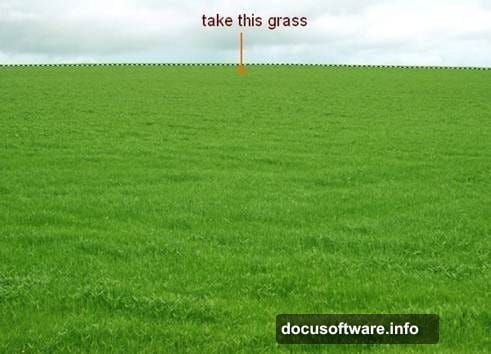
Next, bring in your grass texture. Extract just the grass portion using your preferred selection tool, then drag it onto your canvas. Use Cmd/Ctrl+T to resize it appropriately.
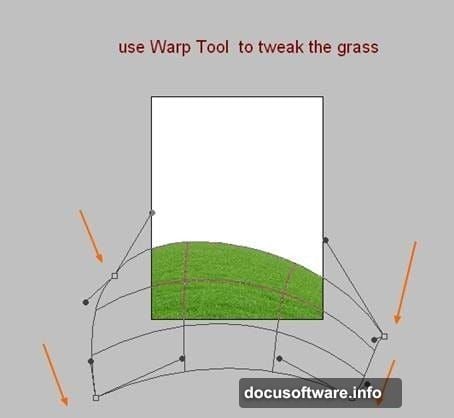
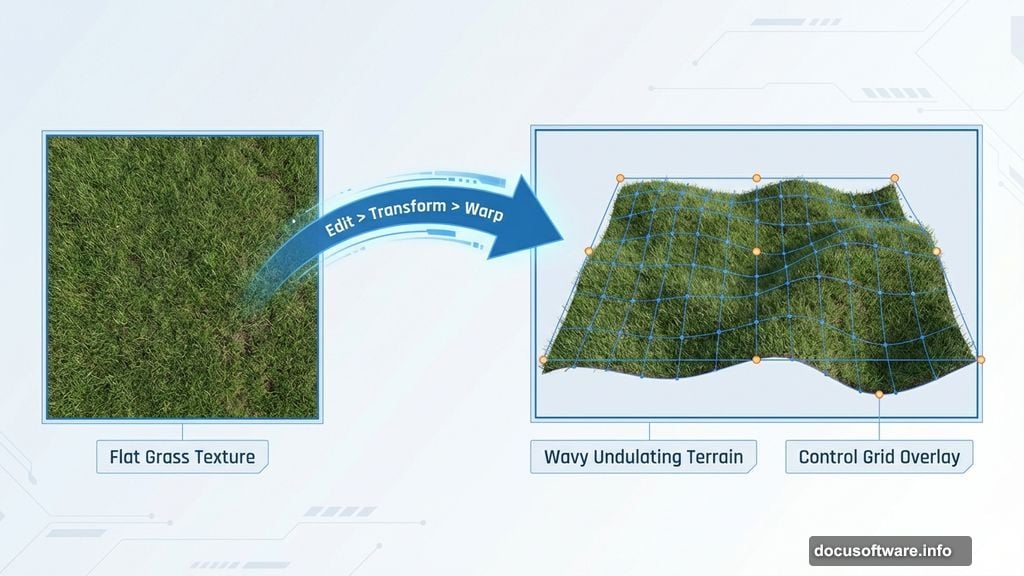
Shape the Landscape with Warp
Here’s where things get interesting. Go to Edit > Transform > Warp to mold your grass into rolling hills.
Pull and push the control points until you create a natural-looking slope. Think about how real hills curve and undulate. The warp tool gives you complete control over the shape.
This technique beats trying to find the perfect pre-made hill image. You can customize the exact contours you want.
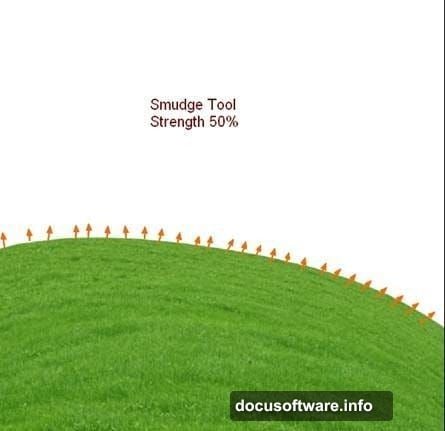
Add Organic Detail with Smudge
Create a new layer above your grass. Grab the Smudge Tool by pressing R.
Set the strength around 50% and make sure “Sample All Layers” is checked in the properties bar. Turn off your white background layer temporarily so you don’t accidentally smudge it.
Now use a tiny brush size, around 6-8 pixels. Gently stretch individual grass blades outward from the hill edges. Follow the natural direction of the slope.
This step takes patience but transforms flat grass into believable terrain. The small details make huge differences in photo manipulation work.
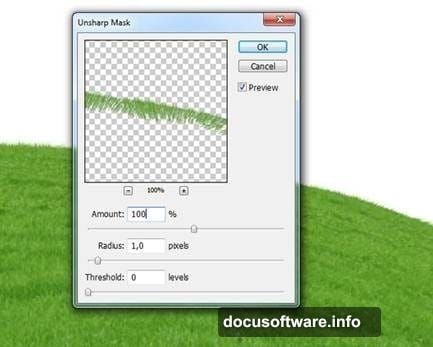
Want sharper grass? Apply Filter > Sharpen > Unsharp Mask to crisp up those details.
Layer in Sky and Depth
Drag your sky image into the document and position it beneath your hill layer. Choose whatever section of the sky appeals to you.
Next comes the distant background. Import your road and hill stock photo, extract the portion you need, and place it between the sky and foreground hill layers.
Flip it horizontally if needed using Edit > Transform > Flip Horizontal. This ensures the lighting direction matches your intended light source.
Apply a slight Gaussian Blur (Filter > Blur > Gaussian Blur with radius 2) to push this background layer into the distance. Blur creates atmospheric depth in compositions.
Balance the Background Tones
The road probably looks too dark against your bright scene. Fix this with adjustment layers.
Add a Curves adjustment layer with a clipping mask to the road layer. Lighten the overall tones by lifting the curve slightly.
Then add a Color Balance adjustment layer, also clipped to the road. Warm up the tones to match your foreground grass and sky.
These non-destructive adjustments let you tweak values anytime without permanently altering your base image.
Establish Your Light Source
Decide where light hits your scene. This tutorial uses upper-right lighting, which creates natural shadows and highlights.
Create a new layer clipped to your road. Paint with a soft white brush over areas that should catch more light.
Change the blend mode to Soft Light at 100% opacity. This brightens those sections while maintaining texture and detail underneath.
Consistent lighting across all elements makes or breaks photo manipulation believability. Keep your light source direction in mind throughout the entire project.

Why These Techniques Matter
Photo manipulation isn’t just about cutting and pasting. It’s about understanding light, depth, color harmony, and organic details.
The warp tool lets you reshape any element to fit your vision. Smudging adds realistic texture that selection tools can’t create. Adjustment layers give you flexibility to refine tones without destructive editing.
These fundamentals apply whether you’re building fantasy scenes, product mockups, or surreal portraits. Master them once, use them everywhere.
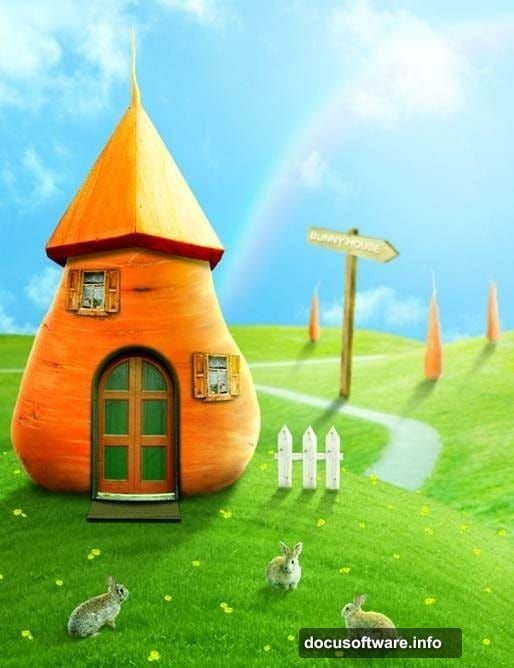
Ready to add the carrot house and bunny characters? The foundation you’ve built makes the rest of the composition flow smoothly. You’ve learned the essential setup that transforms random stock photos into cohesive, believable artwork.