
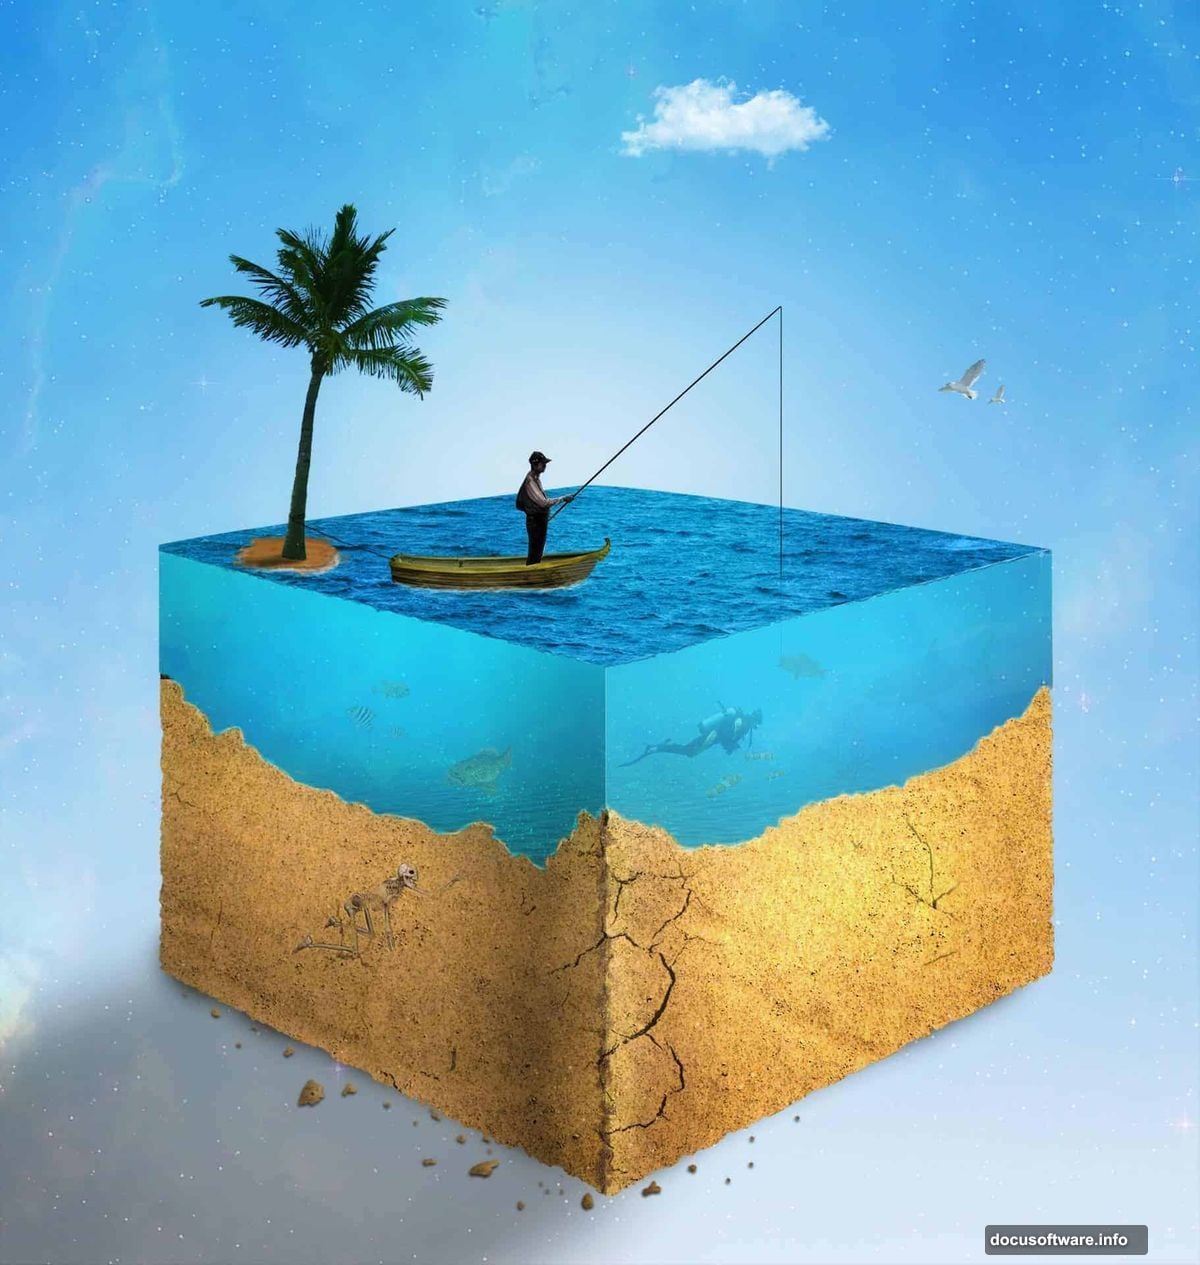
Creating surreal photo manipulations sounds intimidating. But this realistic water cube technique breaks down into manageable steps that intermediate users can nail in an afternoon.
You’ll build a floating island trapped inside a translucent water cube. Think fantasy artwork meets technical precision. Plus, the skills you’ll learn here apply to dozens of other photo manipulation projects.
Let’s get into it.
What You’ll Need Before Starting
First, grab your resources. This project requires specific stock images to work properly.
You’ll need textures for sand and cracked surfaces. Add some underwater photography for atmosphere. Then collect isolated objects like boats, fish, sharks, and divers. Finally, grab cloud brushes and a nebula image for the sky effects.
Most of these come from free stock sites. But make sure you have licensing rights before using them commercially. Nothing kills a portfolio piece faster than a copyright claim.
Software requirements: Photoshop CS3 or newer. Older versions lack some blending features we’ll use later.
Set Up Your Canvas and Background
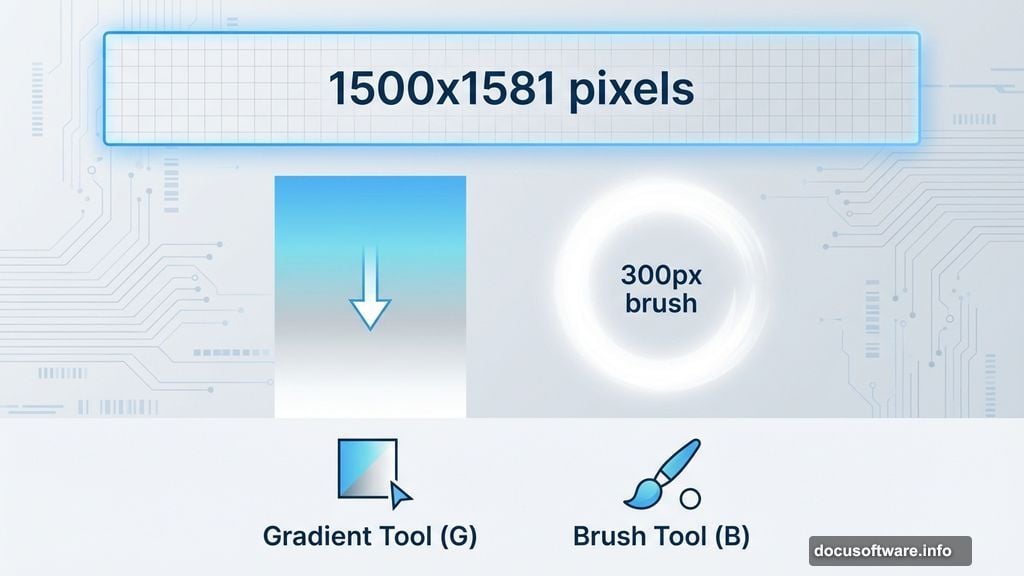
Create a new document at 1500×1581 pixels. That’s slightly taller than square, which gives us room for vertical drama.
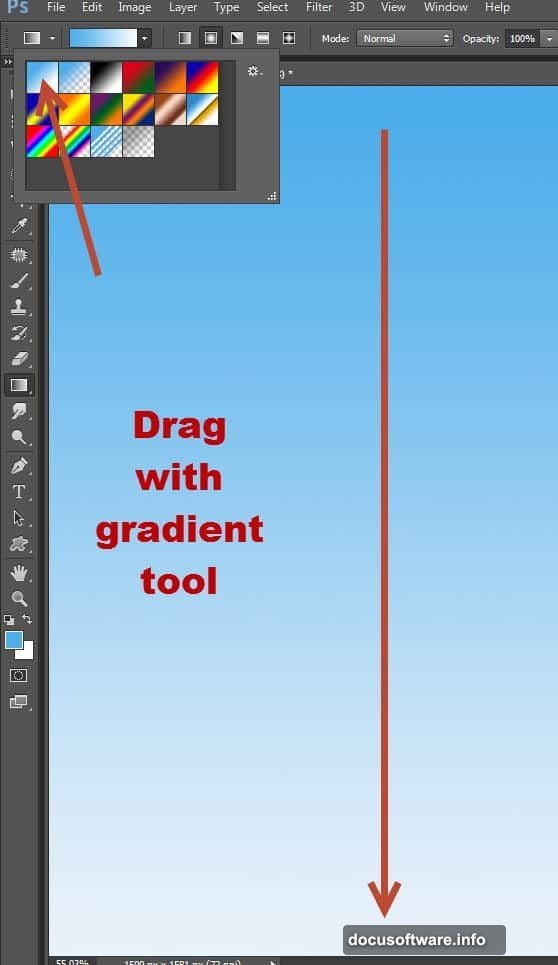
Set your foreground color to light blue (#4eaeeb) and background to pure white. Grab the Gradient Tool (G) and drag from top to bottom while holding Shift. This creates a smooth sky-to-horizon fade that feels natural.
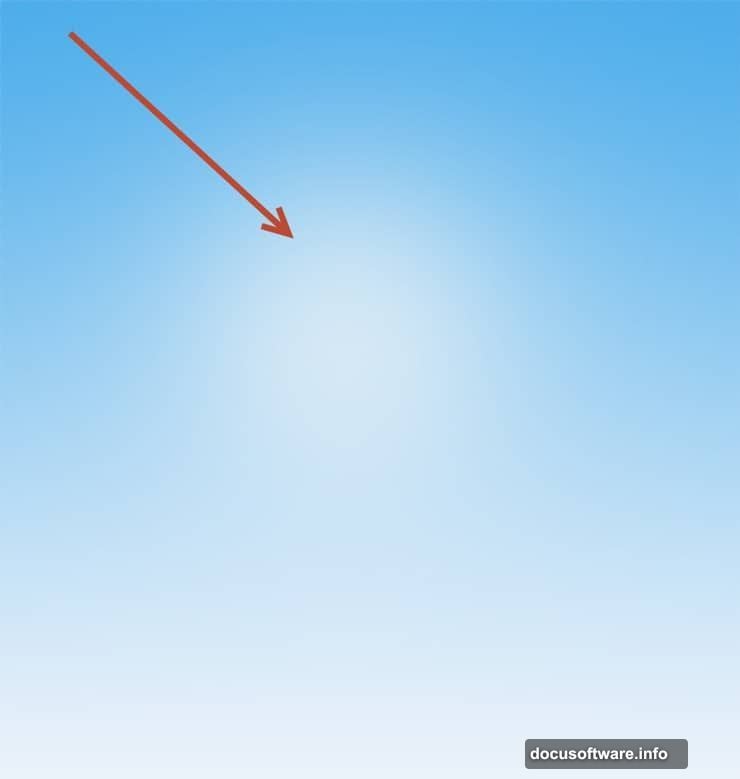
Now add subtle backlighting. Create a new layer and switch to the Brush Tool (B). Bump the size up to 300px and drop opacity to 20%. Click once or twice in the center with white selected. This gives depth without overpowering the scene.
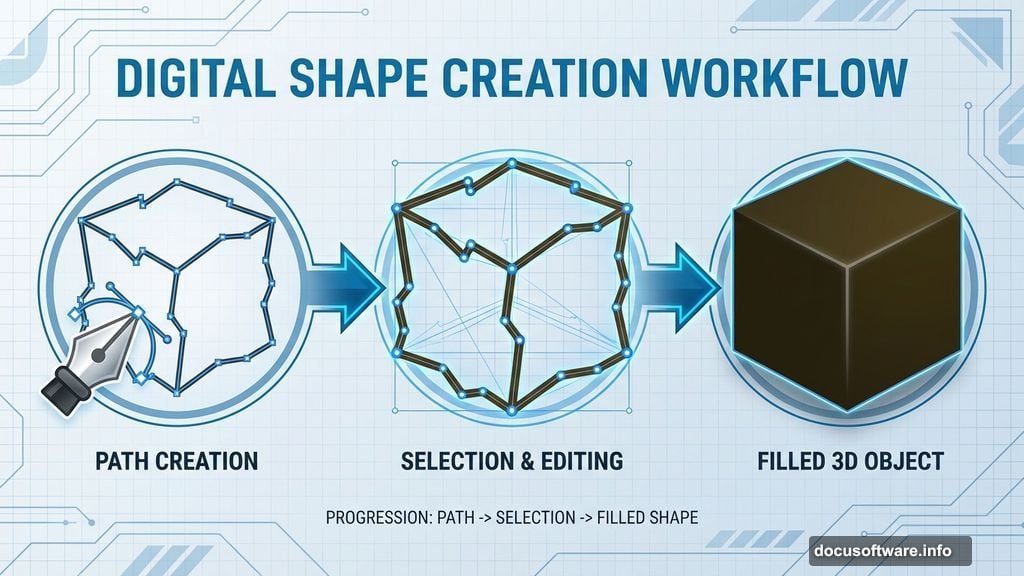
Build the Water Cube Structure
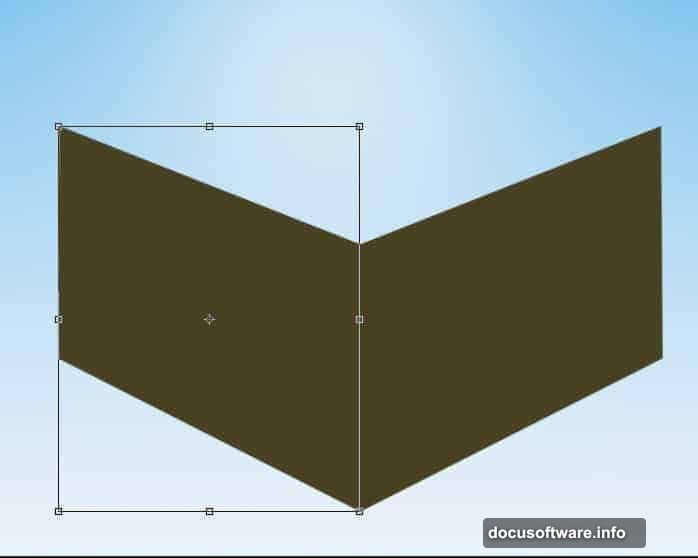
Here’s where the Pen Tool earns its keep. Draw one side of your cube using the Pen Tool. Make it slightly irregular – perfect geometry looks fake in photo manipulation.
Press Ctrl + Enter to convert your path into a selection. Choose a dark brown (#484222) as your foreground color. Create a fresh layer and fill the selection with Alt + Backspace.
For the opposite side: Duplicate this layer with Ctrl + J. Hit Ctrl + T for Free Transform, right-click, and choose Flip Horizontally. Drag it to the left until both sides form a convincing cube angle.
Add Realistic Texture Layers
Group both cube sides together (select both layers and press Ctrl + G). Name this group “Texture” because that’s exactly what we’re adding next.
Add a layer mask to the group (Layer > Layer Mask > Hide All). The cube disappears – don’t panic. Hold Ctrl + Shift and click each layer’s thumbnail to select both. Press D for default colors, click the mask, and fill with Alt + Backspace.
Now open your sand texture file. Copy it (Ctrl + A, then Ctrl + C) and paste into your working document. Convert this to a Smart Object by right-clicking the layer and selecting Convert To Smart Object. Drop it inside your Texture group.
Smart Objects let you resize without quality loss. So scale the texture until it covers your cube faces perfectly. The texture should follow the perspective of your cube sides naturally.
Layer Underwater Elements Inside
This step brings the magic. You’ll composite underwater photography, marine life, and floating objects inside your cube boundaries.

Import your underwater photos one at a time. Mask them carefully to stay within the cube edges. Use soft brushes on the masks where water meets cube walls – hard edges destroy the illusion.
Pro tip: Stack your elements with attention to depth. Smaller fish go near the back. Larger objects like sharks and divers sit in the foreground. This creates believable spatial relationships.
Adjust the color temperature of each element slightly. Underwater scenes lean blue-green. So add subtle Color Balance adjustments to match everything to that underwater palette.
Build the Floating Island Top
The island cap makes this effect iconic. Start with your cracked earth texture as the base. Place it above your water cube and mask it to sit on top naturally.
Add scattered elements like palm trees, beach debris, or small structures. Keep the scale consistent – measure objects against each other to maintain realism.
Layer your sand textures with different blend modes. Try Multiply for shadows and Overlay for highlights. This builds depth that flat textures lack.
Don’t forget atmospheric perspective. Elements further from the viewer need less contrast and slightly cooler colors. This subtle trick sells the depth immediately.
Final Touches and Atmosphere
Now we polish everything into a cohesive scene. Add your cloud brush strokes in the sky behind the cube. Keep them light and wispy – heavy clouds compete with your main subject.
Drop in your nebula image at very low opacity (around 20%) behind everything. This adds subtle color variation to the sky without overwhelming the composition.
Color grading matters here. Create a Curves adjustment layer at the top of your layer stack. Slightly lift the shadows and add a touch of blue to the midtones. This ties all your disparate elements together with consistent lighting.
Finally, add a subtle vignette. Create a new layer, fill it with black, and mask out the center with a large soft brush. Set this to Multiply at 15% opacity. This draws the eye to your water cube naturally.
Common Mistakes That Kill the Effect
Watch your light sources. Every element you add should respect the same lighting direction. Inconsistent shadows scream “fake” immediately.
Don’t over-sharpen. Beginners often crank Unsharp Mask way too high. Subtle sharpening on key elements works better than aggressive sharpening everywhere.
Blend modes aren’t magic. Just because Screen or Overlay exists doesn’t mean you should use them by default. Sometimes Normal mode with adjusted opacity works best.
Scale matters desperately. A diver the same size as a boat destroys believability instantly. Measure everything against real-world proportions.
Why This Technique Transfers Everywhere
You just learned way more than how to make a water cube. The skills here – masking, blending, color correction, atmospheric perspective – apply to virtually every photo manipulation project.
Try swapping the cube for a sphere. Or build multiple cubes floating at different heights. The base technique stays the same while the creative possibilities multiply.
These fundamentals separate amateur composites from professional work. Master them once and you’ll use them forever. So practice this project until it feels natural. Then start experimenting with your own variations.
The best photo manipulations come from solid technical skills combined with creative vision. You’ve got the technique now. Time to build something nobody’s seen before.