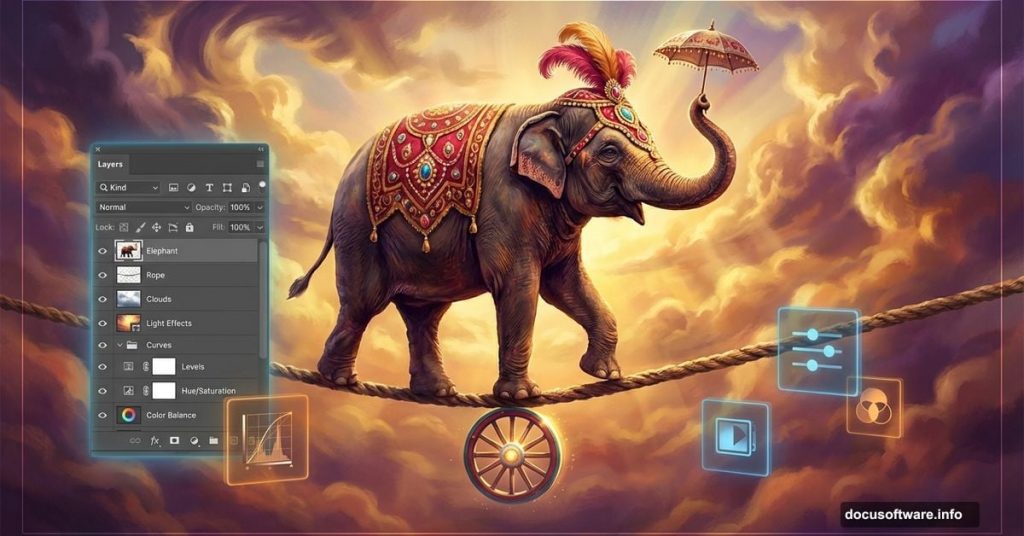
Want to create dreamlike photo manipulations that wow viewers? This tutorial walks you through building a surreal circus scene from scratch.
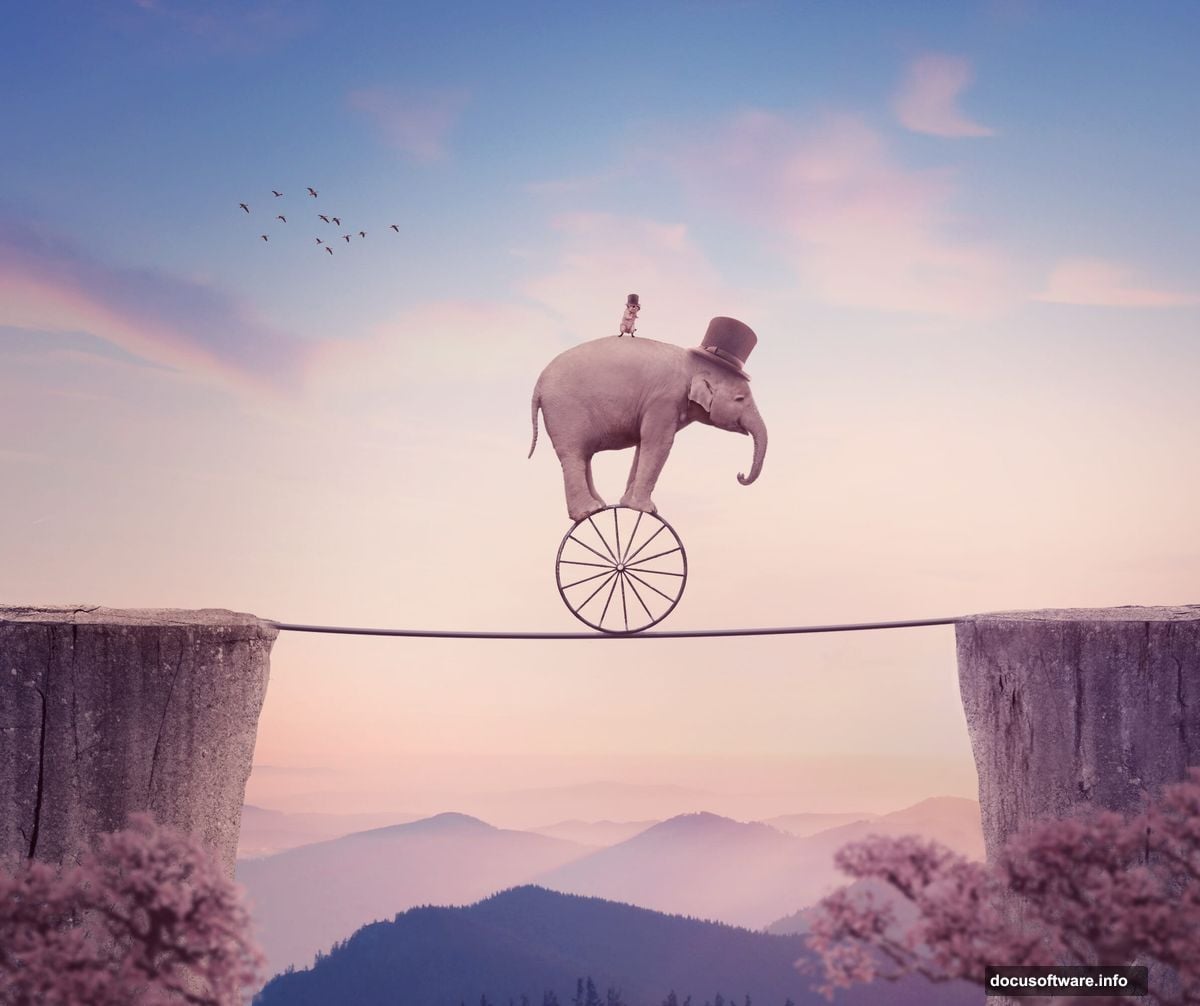
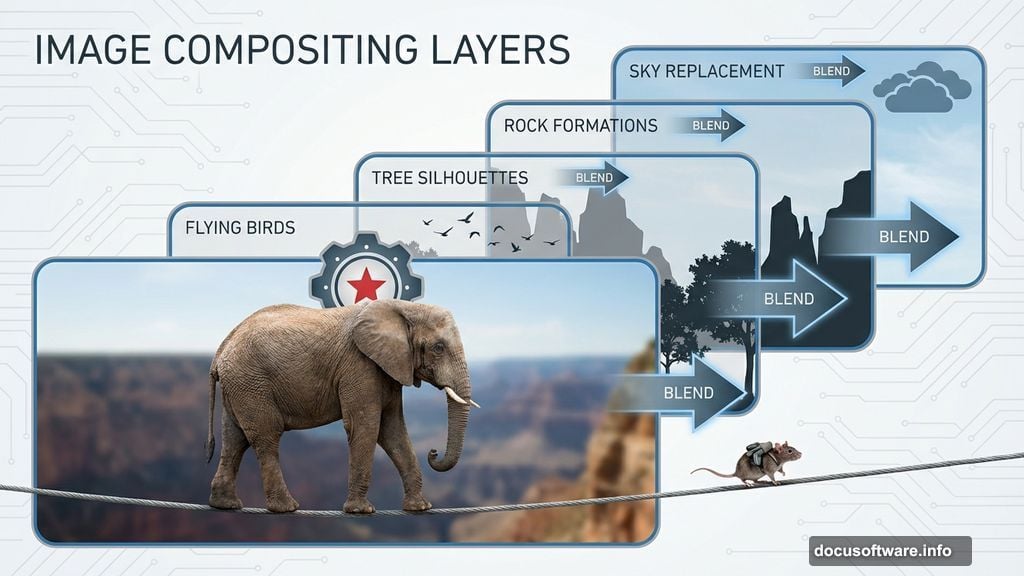
You’ll learn practical techniques for blending multiple images seamlessly. Plus, you’ll discover how adjustment layers transform ordinary photos into magical compositions. By the end, you’ll have a complete surreal scene featuring an elephant balancing on a tightrope with a tiny rat companion.
What You’ll Need Before Starting
Gather these resources first. Having everything ready prevents workflow interruptions.
Required Images:
- Landscape background photo
- Sky replacement image
- Rock formations (for base platforms)
- Circus wheel element
- Elephant stock photo
- Rat image
- Hat props
- Tree silhouettes
- Flying birds
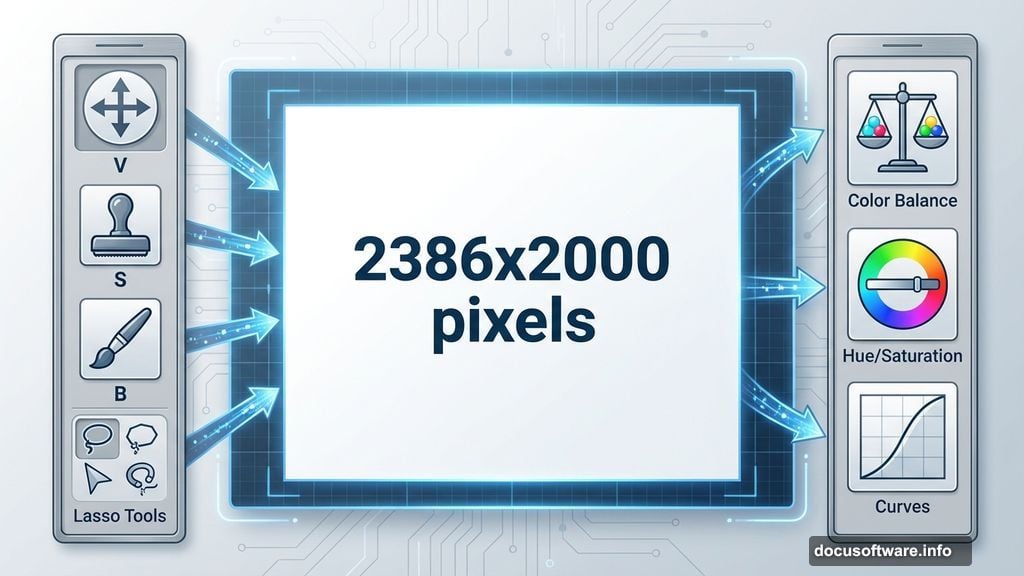
Photoshop Tools You’ll Use:
- Move Tool for positioning elements
- Clone Stamp for cleanup work
- Brush Tool for masking
- Lasso Tools for selections
- Adjustment layers for color grading
Download all resources before opening Photoshop. This saves time and keeps you focused on the creative process.
Building Your Base Scene
Start with a solid foundation. The background sets the mood for your entire composition.
Create Your Canvas:
Open Photoshop and create a new document at 2386×2000 pixels. Fill it with white. This gives you a clean workspace.
Next, open your landscape image. Drag it onto the white canvas using the Move Tool (V). Position it to cover the entire canvas area.
Clean Up Distractions:
Press Ctrl+Shift+N to create a new layer. Select the Clone Stamp Tool (S). Use this to remove unwanted light rays on the left side of the sun.
Why bother? Those rays distract from your final composition. Clone nearby sky areas to blend them naturally. Take your time here. Clean backgrounds make better final images.
Color Grading the Landscape
Now adjust colors to match your creative vision. Adjustment layers let you tweak settings non-destructively.
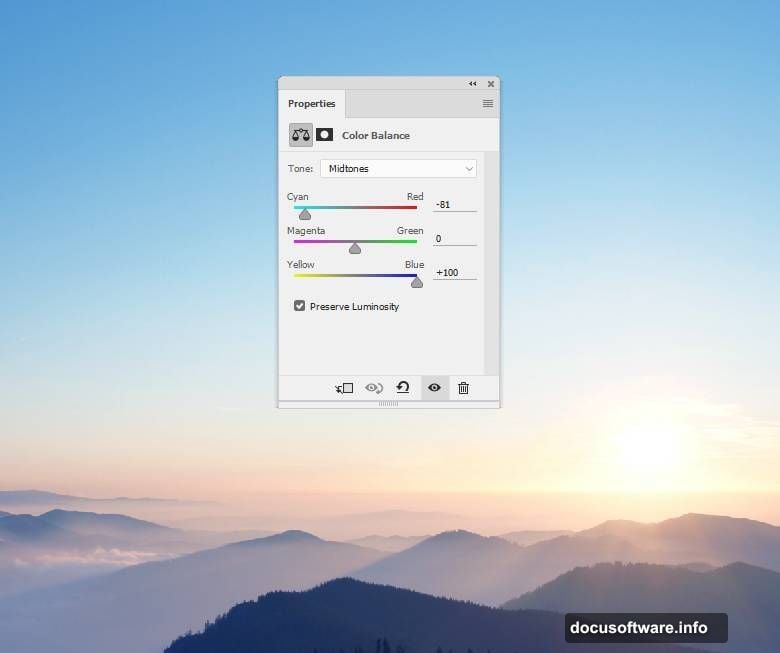
Balance the Midtones:
Go to Layer > New Adjustment Layer > Color Balance. Focus on the Midtones settings. Shift sliders until the landscape feels cohesive with your planned circus theme.
Adjust Sky Blues:
Create a Hue/Saturation adjustment layer. Target only the Blues channel. This prevents color shifts in other areas.
Here’s the trick: On the layer mask, grab a soft black Brush Tool (B). Paint over the landscape to remove the blue adjustment there. This keeps your changes isolated to just the sky.
Enhancing Light and Shadow
Light makes or breaks photo manipulations. Strategic adjustments create depth and drama.
Darken Around the Sun:
Add a Curves adjustment layer. Pull the curve down to reduce lightness around the sun area. This creates dramatic contrast.
But don’t overdo it. Use a soft black brush on the layer mask to remove the effect from the rest of the image. You want the darkening only where it enhances the sun’s glow.
Brighten the Foreground:
Create another Curves adjustment layer. This time, lift the curve to increase light on the landscape.
Again, use masking. Paint with a soft black brush over the sky to prevent it from washing out. The goal is balanced lighting that guides viewers’ eyes through the scene.
Replacing the Sky
A dramatic sky transforms ordinary scenes into extraordinary ones. Sky replacement is a photo manipulation staple.
Open your sky image. Place it directly over the existing sky in your composition. Change the layer blend mode to Soft Light at 100% opacity.
Blend the Edges:
Add a layer mask. Select a soft black brush and paint along the bottom edge where sky meets landscape. This removes hard transitions that scream “fake.”
Soft Light mode preserves landscape details while adding sky texture. It’s more subtle than Normal mode.
Adjust Sky Brightness:
Create a Curves adjustment layer directly above the sky layer. Right-click and set it as a Clipping Mask. This constrains adjustments to just the sky.
Pull the curve down slightly to reduce brightness. The sky shouldn’t overpower your main subjects. It’s a supporting element, not the star.
Adding Rock Platforms
Rocks create stable ground for your elephant tightrope act. They anchor the surreal elements in pseudo-reality.
Open your rock image. Select the Magnetic Lasso Tool (L). Carefully trace around one rock formation to isolate it from its background.
Drag the selected rock into your main document using the Move Tool. Position it in the bottom left corner.
Create the Right Platform:
Duplicate the rock layer. Go to Edit > Transform > Flip Horizontal. This mirrors the rock. Move it to the bottom right corner.
Now both sides match, but that looks boring. So add variety.
Make It Unique:
Add a layer mask to the right rock. Use the Lasso Tool to select random portions of the rock’s outline. Paint these selected areas with a hard black brush to erase them.
This technique breaks up the silhouette. The rocks look related but not identical. That’s more natural and interesting than perfect symmetry.
Creating the Tightrope
Your elephant needs something to balance on. A simple rope connects both rock platforms.
Create a new layer between the rocks and landscape. Select the Line Tool. Set it to 2-3 pixels wide with black color.
Draw a straight line from the top of the left rock to the right rock. Hold Shift while dragging to keep it perfectly horizontal.
Add Rope Texture:
The flat line looks too perfect. So add some subtle imperfections. Duplicate the rope layer.

Apply a slight Gaussian Blur (about 0.5 pixels). Then use the Warp Tool (Edit > Transform > Warp) to add tiny bends and curves. Real ropes sag slightly under weight.
Keep adjustments subtle. You want a tightrope, not a hanging clothesline.
Importing the Circus Elephant
The star of your show arrives. Elephants in circus scenes evoke whimsy and nostalgia.
Open your elephant stock photo. Use the Quick Selection Tool (W) or Pen Tool (P) to isolate the elephant from its background. Take care around the ears and trunk—these areas require precision.
Drag the elephant onto your main canvas. Position it on the tightrope between the two rocks.
Scale Appropriately:
Press Ctrl+T to enter Free Transform mode. Scale the elephant down until it looks balanced on the rope. Too large feels overwhelming. Too small loses impact.
Consider perspective. Objects further away appear smaller. If your elephant is in the distance, shrink it accordingly.
Adjust Elephant Lighting:
The elephant probably doesn’t match your scene’s lighting yet. Create a Curves adjustment layer (set as Clipping Mask). Adjust until the elephant’s shadows and highlights align with your landscape.
Add a second Curves layer if needed. One for overall brightness, another for contrast. Layer adjustments give you fine control.
Adding the Rat Rider
A tiny rat riding on the elephant’s back adds unexpected charm. Surreal scenes thrive on surprising details.
Open your rat image. Select and isolate the rat using your preferred selection method. Drag it onto the elephant’s back.
Scale it down significantly. The size contrast between massive elephant and tiny rat creates visual humor.
Position Carefully:
Place the rat where it looks naturally balanced. On the elephant’s head or upper back works well. Avoid positions where it might slide off.
Match the Lighting:
Create Curves adjustment layers (as Clipping Masks) for the rat. Match its lighting to the elephant’s. They share the same light source, so their shadows should align.
Add a subtle shadow beneath the rat on the elephant’s skin. This grounds the rat in the scene. Use a soft black brush at low opacity on a new layer.
Placing Circus Props
Hats scattered in the scene suggest a circus performance. Small details build believable surreal worlds.
Open your hat images. Select and isolate individual hats. Drag them into your composition at various positions—floating in air, resting on rocks, or near the elephant.
Vary Sizes and Angles:
Rotate and scale each hat differently. Press Ctrl+T and drag corner handles while holding Shift to maintain proportions. Random positioning looks more natural than neat arrangements.
Add Depth with Blur:
Hats in the distance should appear slightly blurred. Select distant hat layers and apply a mild Gaussian Blur (0.5-1 pixel). This simulates depth of field.
Foreground hats stay sharp. Background elements soften. This technique guides viewers’ focus toward your main subjects.
Including Birds for Movement
Flying birds add motion and life. Static scenes feel frozen. Movement creates energy.
Open your birds image pack. Select individual birds or small flocks. Place them at different positions in your sky.
Create Flight Paths:
Don’t line birds up in rows. Nature doesn’t work that way. Scatter them at varying heights and distances.
Birds closer to the viewer appear larger and sharper. Distant birds shrink and blur slightly. Apply the same depth-of-field principle used with the hats.
Adjust Bird Exposure:
Birds often need darkening to match sky luminosity. Create Curves adjustment layers set as Clipping Masks. Reduce brightness until birds blend naturally with the sky.
Final Color Grading
Your scene is assembled. Now unify everything with cohesive color grading.
Create Overall Color Balance:
Add a Color Balance adjustment layer at the top of your layer stack. Don’t clip it to anything. This affects the entire composition.
Shift midtones toward warm or cool tones depending on your desired mood. Circus scenes often benefit from warm, nostalgic colors.
Boost Saturation Selectively:
Create a Hue/Saturation adjustment layer. Increase Master saturation by 10-15%. This makes colors pop without looking oversaturated.
On the layer mask, paint with a soft black brush over areas that shouldn’t be more saturated (like skin tones or sky highlights).
Add Atmospheric Haze:
Create a new layer. Fill it with white. Change blend mode to Soft Light at 15-20% opacity.
This adds subtle atmospheric haze that makes the scene feel dreamy. Adjust opacity to taste. Too much washes out your image.
Enhancing Contrast and Depth
Contrast separates good manipulations from great ones. Strategic adjustments add professional polish.
Add Master Curves Layer:
Create a final Curves adjustment layer above everything else. Add a subtle S-curve by pulling shadows down slightly and highlights up.
This increases overall contrast without crushing blacks or blowing out highlights. The S-curve is a photography staple for good reason.
Sharpen Selectively:
Merge a copy of all visible layers (Ctrl+Alt+Shift+E). Apply Smart Sharpen filter at 100-120%. Set Radius to 0.5-1 pixel.
Add a layer mask. Paint with black over areas that shouldn’t be sharp (like blurred background elements). This focuses attention on key subjects.
Your Surreal Scene is Complete
You’ve built a complete surreal photo manipulation from scratch. Each technique builds on the last, creating a cohesive dreamlike image.
The process might seem complex at first. But break it into stages: build base, add elements, blend with adjustments, finalize with color grading. That workflow applies to any photo manipulation project.
Practice these techniques on different themes. Try underwater scenes, fantasy landscapes, or impossible architecture. The same principles work everywhere. Blend modes, adjustment layers, and masking form the foundation of all advanced Photoshop work.
Your elephant circus scene proves you can combine disparate elements into unified compositions. That’s the essence of photo manipulation. Now go create something impossible.