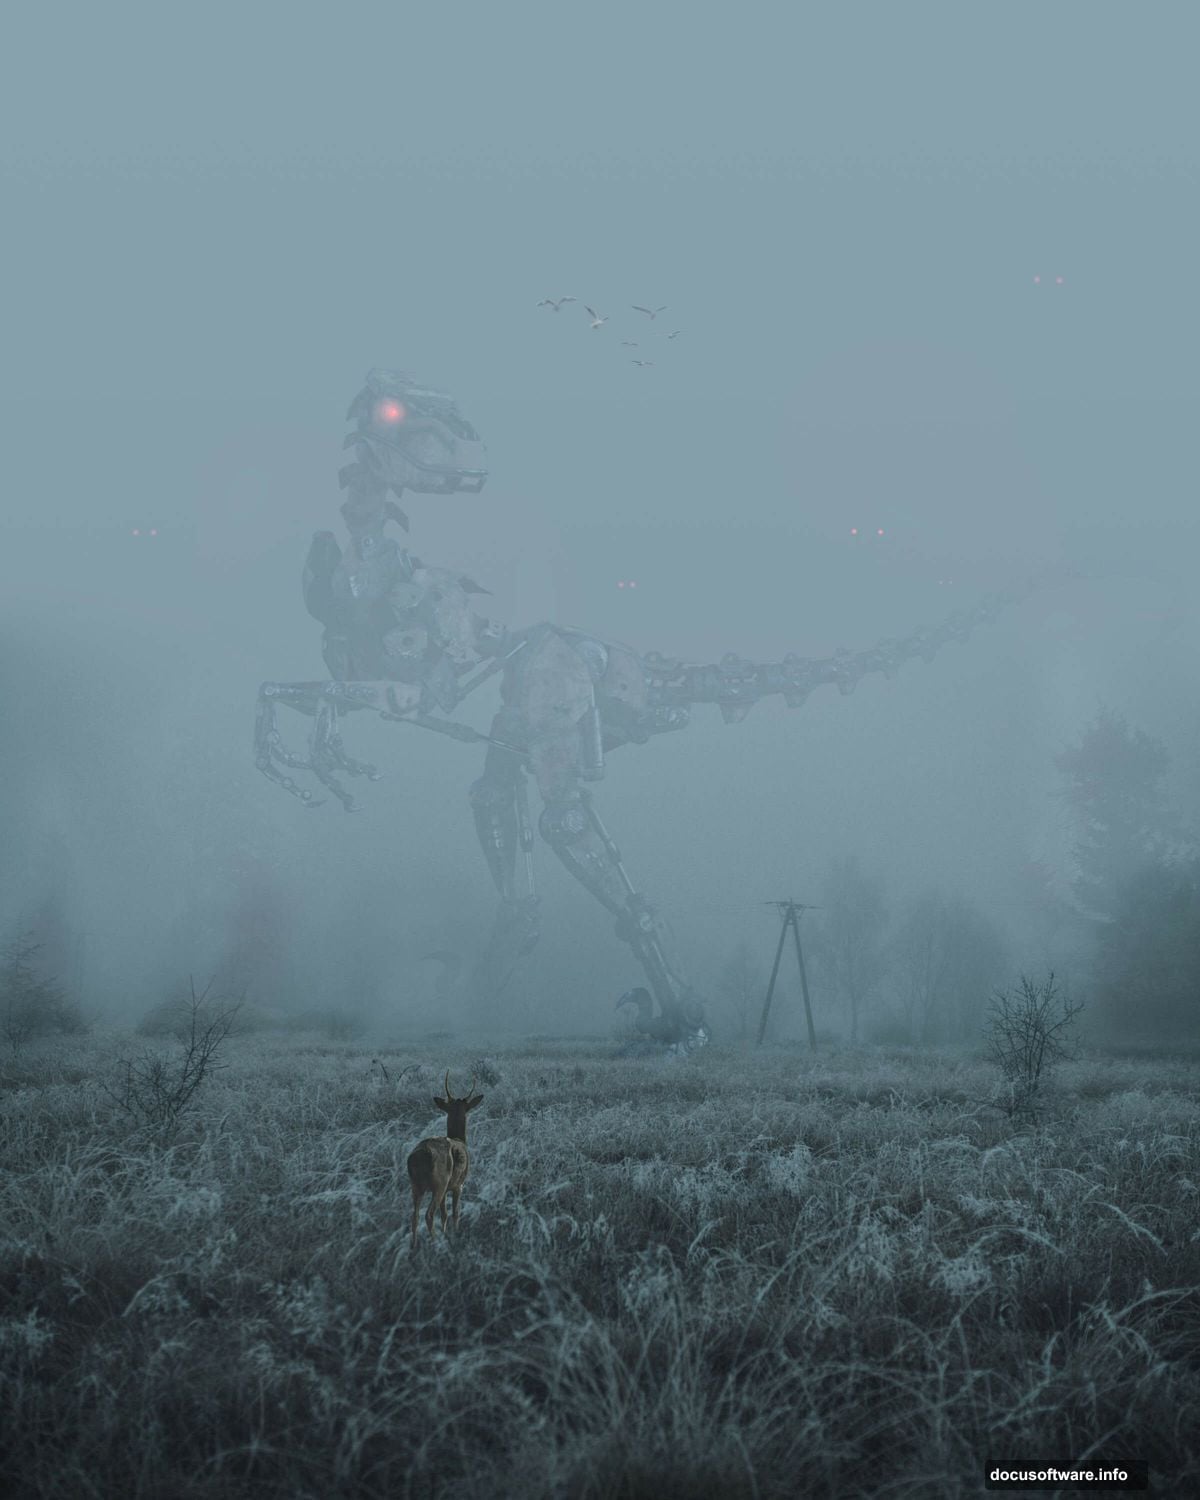
Ever tried blending a prehistoric predator with modern wildlife? Sounds wild. But that’s exactly what this Photoshop technique lets you create.
This tutorial walks you through building an atmospheric scene where a deer encounters a raptor. We’re talking misty forests, careful lighting adjustments, and seamless blending that makes the impossible look real. Plus, you’ll learn Clone Stamp tricks that save hours of cleanup work.
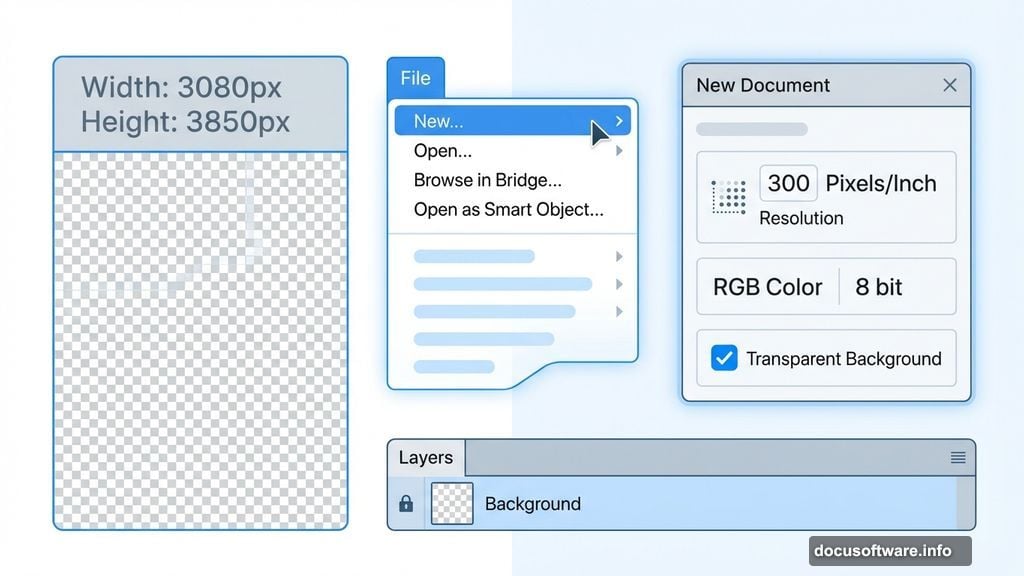
Set Up Your Canvas Right
First things first. Get your document settings correct from the start. Otherwise, you’ll battle resolution issues later.
Create a new file with these exact specs. Go to File > New and punch in these numbers:
- Width: 3080px
- Height: 3850px
- Resolution: 300px
- Color Mode: RGB Color 8 bit
- Background: Transparent
Why transparent? Because it gives you flexibility when layering elements. You can always add backgrounds later. But starting with a white canvas limits your blending options.
Place and Position Your Background
Now grab your background image. Head to File > Place and select your forest background.
Once it appears, hit Ctrl/Cmd + T to activate the transform tool. Here’s the trick most tutorials skip. Hold Alt + Shift while dragging corners to resize proportionally. In newer Photoshop CC versions, just Alt does the job.
Position your background so the focal point sits in the lower third. That creates natural eye flow when you add the deer later.
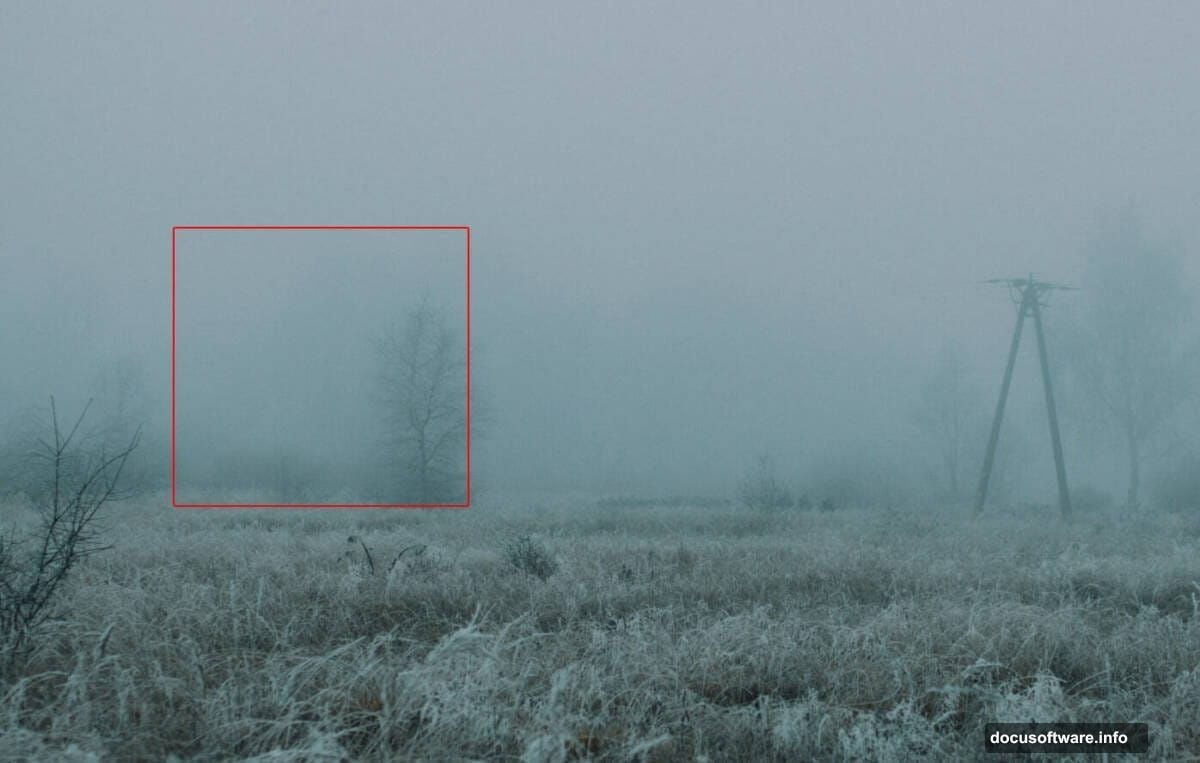
Remove Unwanted Elements With Clone Stamp
See that distracting tree in your background? Time to make it disappear.
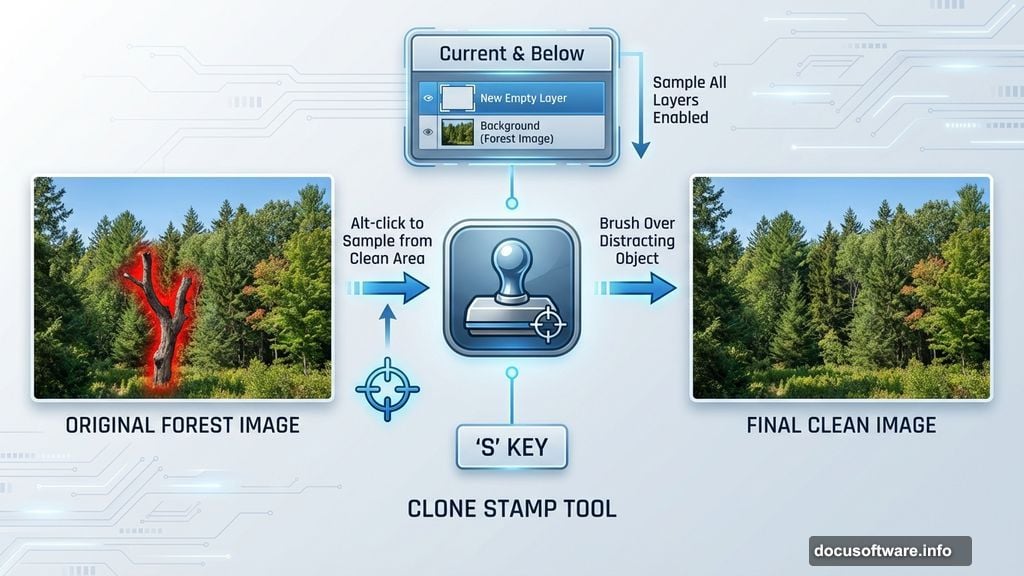
Select the Clone Stamp Tool by hitting S. But don’t paint directly on your background layer. Instead, create a new empty layer first. This keeps your edits non-destructive.
Here’s how to set it up correctly:

Click the New Layer button at the bottom of your Layers panel. Then lock its position using the lock button at the top. This keeps everything aligned perfectly.
In the Clone Stamp options bar, set Sample to “Current & Below.” This tells Photoshop to copy detail from your background while placing edits on the new layer.
Now for the actual cloning. Alt-click (Windows) or Option-click (Mac) on a clean area near the tree. You’ll see a preview inside your brush cursor showing what you’re sampling. That preview is crucial for matching textures and patterns.
Brush over the tree you want to remove. A crosshair shows where Photoshop copies detail from. Work in small sections. Don’t try removing everything in one pass.
Watch for repeating patterns. That’s the telltale sign of lazy Clone Stamp work. If you spot duplicated textures, use a smaller brush to blend them out.
Add Atmospheric Depth With Manual Painting
Create another new layer. This time, grab a Soft Round Brush.
Set your foreground color to gray #a0acb8. Paint soft clouds of gray across your canvas. Focus on the middle and background areas. This creates depth and atmosphere.
Keep your brush opacity around 20-30%. Build up the effect gradually. Too much gray in one pass looks artificial. Multiple light layers feel natural.
Position Your Tree Element
Time to add that foreground tree. Go back to File > Place and select your tree image.
Transform it to fit your composition. But here’s where beginners mess up. They scale trees too large or position them dead center.
Instead, place your tree slightly off-center. Let it frame your scene from the side. Scale it so it’s prominent but not overwhelming.
Create a layer mask by clicking the mask icon at the bottom of your Layers panel. Now select a Soft Round Brush with black as your foreground color.
Set brush flow to just 10%. This is critical. High flow creates harsh edges. Low flow lets you gradually fade the tree into your scene.
Paint away the bottom and edges of your tree. Blend it into the misty atmosphere you created earlier. The goal is making it look like the tree emerged from fog.
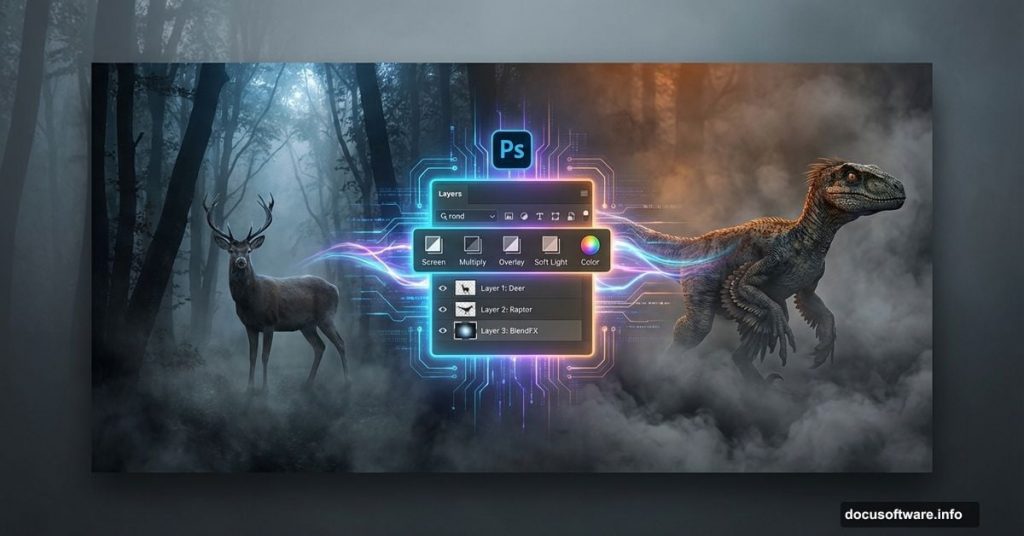
Blend the Raptor Into Your Scene
Here’s where things get interesting. Place your raptor image using the same File > Place method.
Position it in the midground. Not too close to the viewer. Not lost in the background. You want that “holy crap, is that real?” reaction.
The raptor probably looks too bright or has the wrong color temperature. That’s normal. We’ll fix it with adjustment layers.
Create a Curves adjustment layer. Clip it to your raptor layer by Alt-clicking between the layers in your Layers panel. Now your adjustments only affect the raptor.
Drag the curve down slightly to darken the raptor. Match it to your scene’s lighting. If your forest is cool-toned, push the curve slightly toward blue in the highlights.
Add a Hue/Saturation adjustment layer. Again, clip it to just the raptor. Reduce saturation by 10-15%. This makes the raptor feel part of your scene instead of a cutout.
Position Your Deer
Place the deer image. This is your hero element. Everything else supports it.
Position the deer in the lower third of your frame. Have it facing the raptor. That creates natural tension and tells a story.
Use the same masking and adjustment layer techniques you used on the raptor. Match the deer’s lighting and color temperature to your scene.
Create shadows under the deer’s feet using a Soft Round Brush on a new layer. Set the layer blend mode to Multiply. Use a dark gray or black color. Paint subtle shadows that connect the deer to the ground.
Add the Mist Effect
Mist sells the whole composition. It adds mystery and depth while helping blend all your elements together.
Create a new layer above all your other elements. Fill it with 50% gray by going to Edit > Fill and selecting 50% Gray.
Change the layer blend mode to Overlay or Soft Light. Experiment to see which looks better with your specific images.
Now go to Filter > Render > Clouds. This creates random cloud patterns. If the first result doesn’t look good, hit Ctrl/Cmd + F to run the filter again.
Reduce layer opacity to around 20-30%. Too much mist obscures your carefully placed elements. Just enough creates atmosphere.
Use a layer mask to remove mist from critical areas. You want clear focus on your deer and raptor. Let mist dominate the edges and background.
Final Adjustments With Camera Raw Filter
Almost done. But the image probably needs cohesive color grading.
Flatten your image or create a merged layer on top by pressing Ctrl/Cmd + Alt + Shift + E. This creates a new layer containing all visible layers.
Go to Filter > Camera Raw Filter. This opens Photoshop’s powerful color grading tool.
Start with basic adjustments. Increase contrast slightly. Add a touch of clarity to make details pop. Don’t go overboard. Subtle adjustments look professional.
Move to the color grading section. Push your shadows toward blue or teal. This creates that cinematic forest look. Add warmth to your highlights to create separation.
Adjust white balance if your scene feels too warm or cool. Small temperature shifts make big differences.
Finally, add a subtle vignette. Darken the corners to draw attention to your center composition. Set the vignette amount to -10 or -15. Nothing heavier.
Polish and Export
Step back and look at your composition. Does the lighting feel consistent? Do all elements seem like they belong in the same scene? Are there any repeating patterns from your Clone Stamp work?
Make final tweaks. A little dodge and burn can add drama. Subtly lighten your main subjects. Darken competing elements in the background.
When you’re satisfied, save your PSD file first. Always keep your layers intact. Then export a flattened JPEG at maximum quality for sharing.
This technique works for any creature mashup. Swap the raptor for a dragon. Replace the deer with a wolf. The process stays the same. Master these fundamentals and your fantasy composites will look believable every time.
The secret isn’t complex techniques. It’s attention to lighting consistency, careful blending, and subtle atmospheric effects. Those three elements transform obvious Photoshop composites into scenes people actually believe could exist.