Want to create jaw-dropping fantasy scenes in Photoshop? This epic pirate battle tutorial teaches essential photo manipulation techniques through a complete project.
You’ll learn layer masking, smart objects, adjustment layers, and blending modes while building a dramatic underwater battle scene. Plus, I’ll share workflow tips that work for any composite project.
This tutorial works best with Photoshop CS3 or newer. Grab the resource files and let’s dive in.
What You’ll Need
Before starting, download these free resources:
Brushes:
- Bubble brush by frostbo
- Splash brush by frostbo
- Blood brush by Project-GimpBC
- Palms brush by Rawox
- Light brush by redheadstock
- Lightning brush by redheadstock
Stock Images:
- Sky by Rin-Shiba
- Underwater scene by frostbo
- Windmill from freeimages
- Sea by eddyhaze
- Fish assets from multiple sources
- Pirate girl by mjranum-stock
- Boat by JinxMim
- Nebula textures
Import all brushes now. You’ll thank yourself later when you need them mid-workflow.
Build Your Canvas Foundation
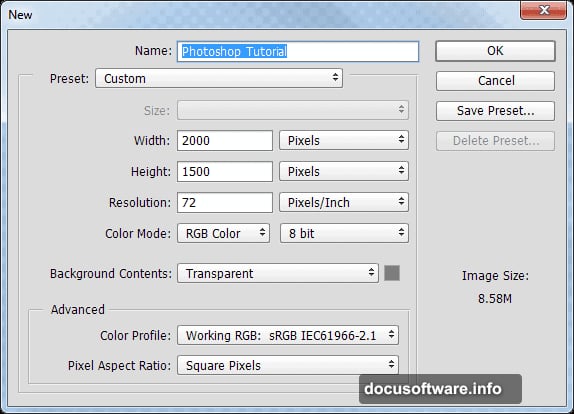
Create a new document at 2000 x 1500 pixels. This size gives you enough resolution for detail work without slowing down your computer.
Open the sky image. Select all (Ctrl + A), copy (Ctrl + C), then paste into your main document (Ctrl + V).
Here’s a crucial step most tutorials skip: Convert this layer to a smart object immediately. Right-click the layer and choose “Convert To Smart Object.” Do this for every pasted image going forward.
Why? Smart objects preserve your original image quality no matter how many times you transform or edit. You can always go back and adjust without destroying pixels.
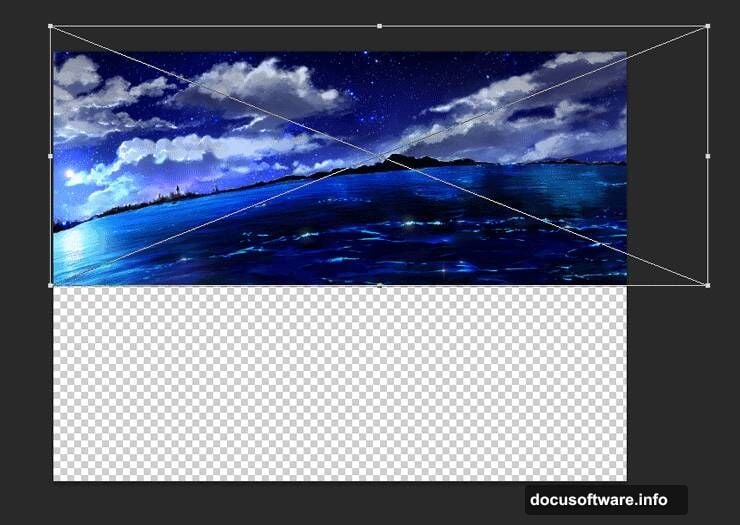
Use Free Transform (Ctrl + T) to position the sky across the top portion of your canvas.
Layer the Underwater Base
Open the underwater stock image. Copy and paste it into your document below the sky layer.
Position this layer to cover roughly the bottom two-thirds of your canvas. The overlap with the sky creates our water surface line.
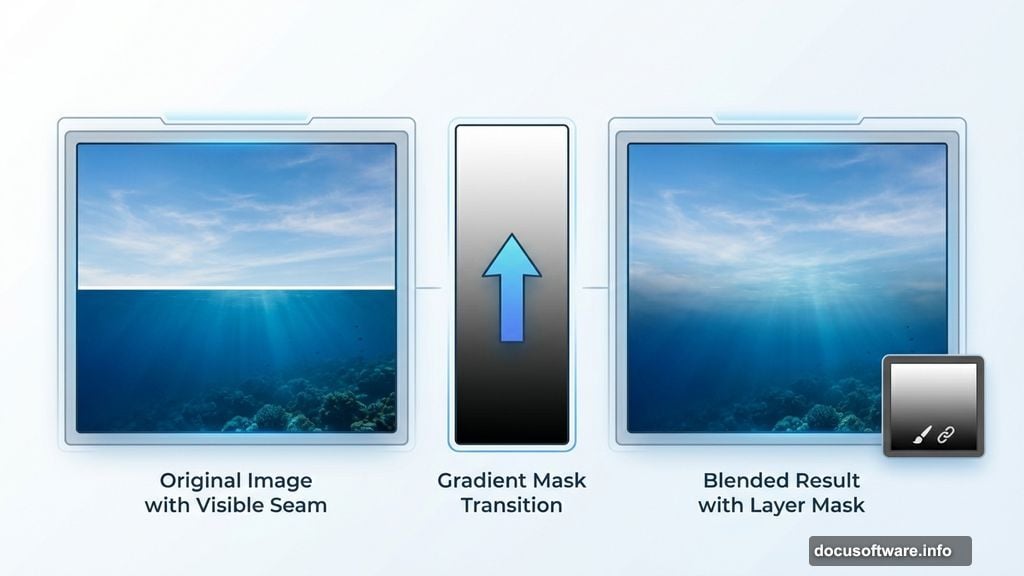
Now comes the magic trick. Create a layer mask (Layer > Layer Mask > Reveal All). Select the Gradient Tool (G) and drag from the middle of the underwater layer upward. This gradually fades the top of the underwater layer into transparency.
The gradient mask creates a smooth transition between above and below water. No harsh edges or obvious seams.
Add Environmental Elements
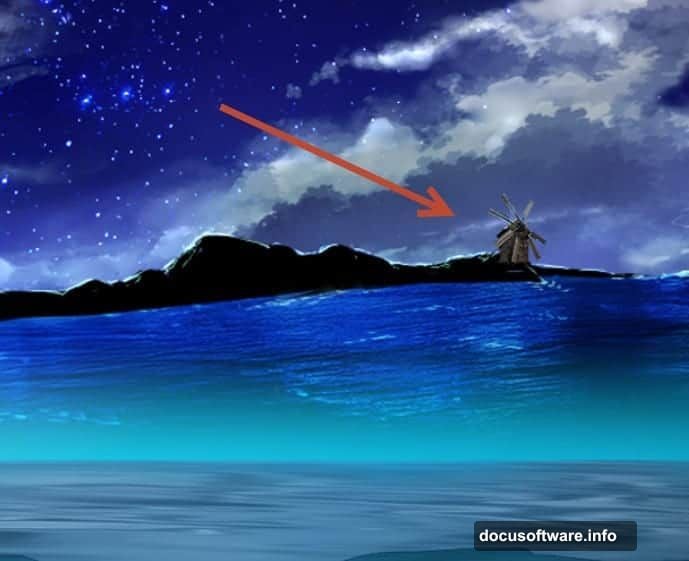
Open the windmill stock image. Use the Pen Tool (P) to carefully trace around the windmill structure. This gives you clean edges without fringe or background artifacts.
Copy and paste the windmill into your scene. Place it in the background, slightly left of center. Scale it down so it feels distant.
Here’s where adjustment layers become essential. Create a Curves adjustment layer (Layer > New Adjustment Layer > Curves). Drag the curve downward to darken the overall image.
But wait. That darkens everything, not just the windmill. Fix this by clipping the adjustment layer. Alt-click between the Curves layer and the windmill layer. The adjustment now affects only the windmill.
This clipping technique works with any adjustment layer. It restricts color corrections, brightness changes, and effects to specific elements without masking.
Build the Underwater Danger
Time to add threatening sea creatures. Open your scary fish stock image and use the Pen Tool to extract it cleanly.
Paste the creature into your underwater section. Scale it large enough to feel menacing. Position it rising toward the surface.
Create a Hue/Saturation adjustment layer clipped to the creature. Shift the hue slightly toward blue-green. This matches the underwater color cast and makes the creature feel integrated rather than pasted in.
Add a subtle motion blur (Filter > Blur > Motion Blur) at about 5-10 pixels. Set the angle to match the creature’s movement direction. This adds energy and aggression to the pose.
Composite the Pirate Heroine
Extract the pirate girl from her background using your preferred selection method. The Pen Tool works great for clean edges around fabric and hair.
Paste her into the scene above water, positioned as if she’s on a boat deck. She’ll interact with the creature below.
Create multiple adjustment layers clipped to the girl:
- Curves to darken her overall to match the stormy lighting
- Color Balance to add cool tones matching the environment
- Selective Color to fine-tune skin tones
The key to believable composites is matching light direction and color temperature. Your adjustments should make the girl look like she belongs in this specific environment, not just any scene.
Add the Boat Element
Extract and paste the boat stock image. Position it beneath the pirate girl so she appears to stand on the deck.
Use the same adjustment layer workflow: Curves for brightness, Color Balance for atmospheric color, Hue/Saturation for fine-tuning.
Create a reflection of the boat in the water. Duplicate the boat layer and flip it vertically (Edit > Transform > Flip Vertical). Position the flipped copy below the water line.
Lower the reflection’s opacity to about 30-40%. Add a slight motion blur to simulate water movement. Use a layer mask with a gradient to fade the reflection as it goes deeper.
Build Dramatic Lighting
This step transforms your composite from decent to dramatic. Create a new layer set to Screen blending mode. Use a large soft white brush at low opacity (20-30%) to paint light sources.
Paint bright areas on the water surface where light breaks through clouds. Add rim lighting on the pirate girl’s hair and clothing edges. Create god rays by painting diagonal streaks through the water.
Keep building up light gradually. Multiple subtle passes look more realistic than strong single strokes.
Create another new layer set to Multiply mode. Use a dark blue-gray to paint shadows in the water depths and under the boat.
Add Water Interaction Effects
Load your splash and bubble brushes. Create a new layer and use the splash brush around where the boat meets water. Vary the size and opacity of your brush strokes for natural variation.
Use the bubble brush to add small air pockets rising from the underwater creature. This creates movement and scale indicators.
For bloody water around potential wounds, use the blood brush at low opacity. Layer multiple colors from dark red to lighter pink. The variation makes blood in water look realistic rather than flat.
Create Atmospheric Effects
Add fog and atmosphere with gradient overlays. Create a new layer set to Soft Light mode. Use the Gradient Tool with white to transparent, dragging from the horizon line upward.
This creates atmospheric haze that pushes background elements back and adds depth.
For underwater atmosphere, create a similar gradient layer pulling blue-green from deeper water upward. This simulates light absorption in water.
Integrate With Color Grading
Now that all elements are placed, unify the scene with color grading. Create a Gradient Map adjustment layer at the top of your layer stack.
Choose a gradient that goes from dark blue-gray in shadows to warm yellow-white in highlights. This mimics stormy ocean lighting.
Set this layer to 30-40% opacity. You want to suggest the color grade without overpowering your careful color work.
Add a final Curves adjustment layer. Create a slight S-curve to increase contrast. Pull the bottom left anchor point right to crush blacks slightly. This adds punch to the overall image.
Polish With Final Details
Create a new merged layer at the top (Ctrl + Alt + Shift + E). This combines everything visible into one layer while preserving your layer stack below.
Apply a subtle High Pass sharpening:
- Duplicate the merged layer
- Go to Filter > Other > High Pass
- Set radius to 2-3 pixels
- Change blend mode to Overlay or Soft Light
- Reduce opacity to taste
Add a slight vignette. Create a new layer filled with black. Use a large soft eraser at low opacity to remove black from the center, leaving darker edges. Set this layer to Soft Light at 20-30% opacity.
Save Your Masterpiece
Flatten your image when you’re completely satisfied. Save a master PSD file first with all layers intact. You’ll want this if you need to make changes later.
Then save your final JPEG at maximum quality for sharing.
What Makes This Technique Work
The secret to convincing photo manipulation isn’t technical perfection. It’s about matching light, color, and atmosphere across all elements.
Every object you add should receive the same lighting treatment. Consistent light direction makes or breaks believability. So does color temperature matching.
Smart objects preserve your flexibility. Adjustment layers let you iterate without destroying pixels. Layer masks grant infinite control over blending and visibility.
These fundamental techniques scale to any composite project. Master them here and you’ll apply them everywhere.
The real skill develops through practice. Build multiple scenes. Try different genres. You’ll develop instincts for what works and what doesn’t.
Your first attempts won’t look professional. That’s normal. But each project teaches you something. Keep building and your composites will improve dramatically.