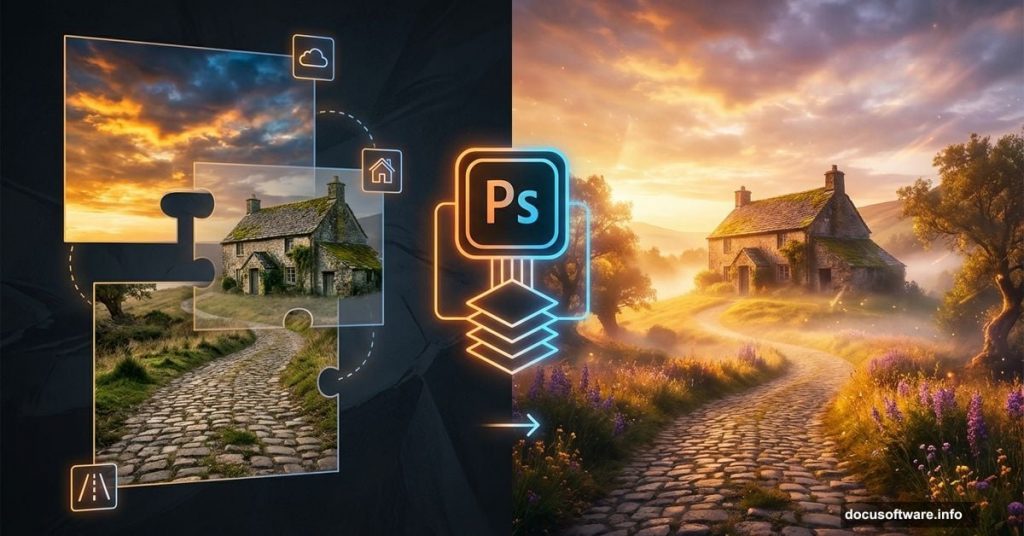
If you’ve ever looked at a moody, atmospheric photo manipulation and thought “how did they do that?” — this tutorial is exactly what you need. Jenny Le’s step-by-step guide walks you through building a stunning sunrise landscape from scratch, combining multiple stock photos into one cohesive, painterly scene.
And the best part? You don’t need to be a Photoshop wizard to follow along.
What This Tutorial Actually Covers
This isn’t a basic filter-and-call-it-done kind of project. Instead, Jenny covers some genuinely useful Photoshop techniques that transfer to all kinds of creative work.
Here’s what you’ll practice:
- Layer blending and Soft Light mode
- Color adjustments using Selective Color and Curves
- Masking to seamlessly merge multiple images
- Warping and transforming stock elements
- Clone Tool retouching to clean up light artifacts
- Custom shading using brushwork
So whether you want to recreate this exact scene or just sharpen your compositing skills, every technique here has real value beyond this single project.
What You’ll Need Before You Start
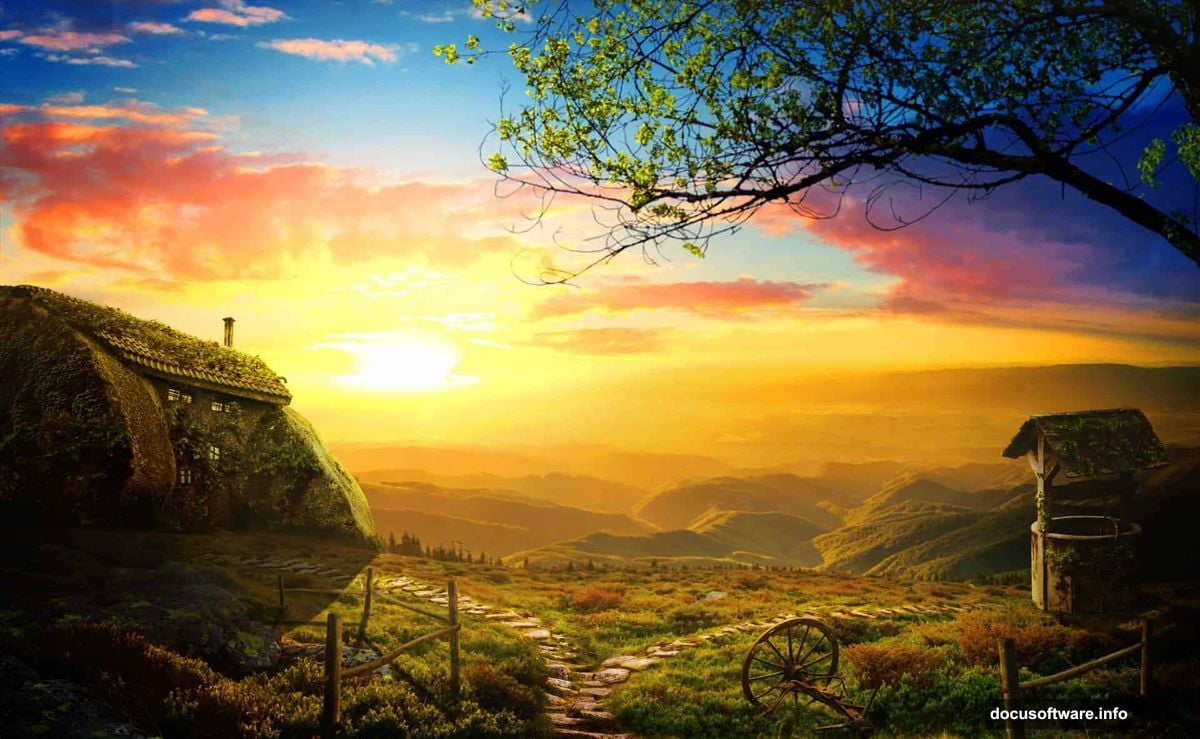
The tutorial uses several stock resources to build the final image. You’ll need a landscape photo, a dramatic sky, an old house, a stone path, trees, a well, vines, a fence, a wheel, and grass brushes.
Fair warning from the community: some of the original stock links have gone dead or moved to paid sites over the years. Several commenters found success by searching Google Images for alternatives — terms like “stone path landscape” or “stone house Portugal” turn up solid replacements. The creative process stays the same regardless of which specific photos you source.
Setting Up Your Canvas
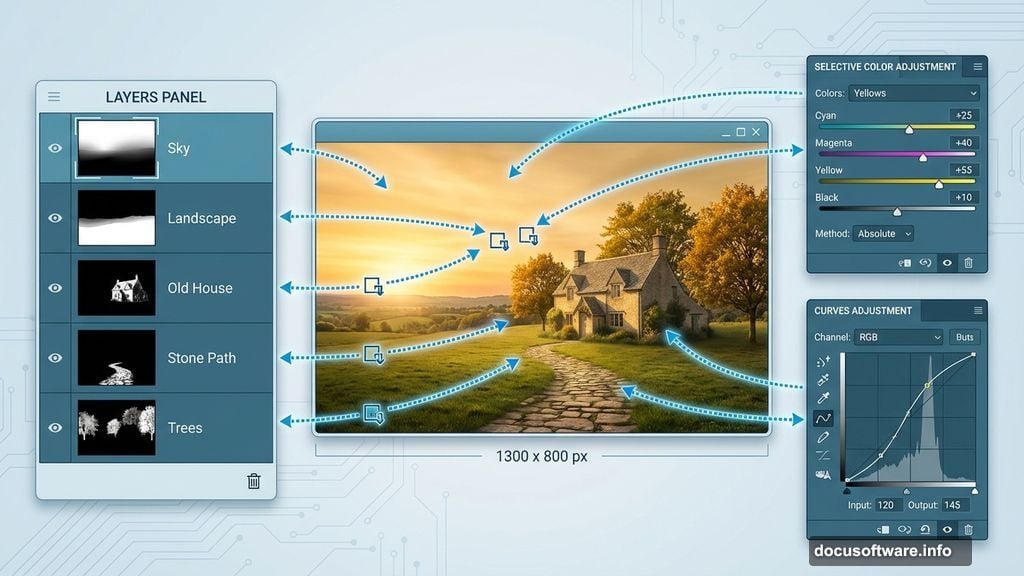
Start with a 1300×800 px document filled white. Then drag your sky stock into the top portion of the canvas using the Rectangular Marquee and Move tools. Simple, clean foundation.
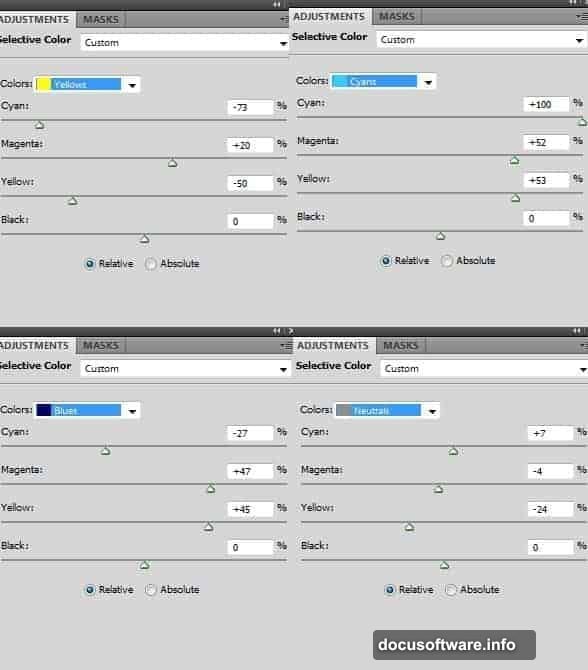
From there, Jenny immediately jumps into color work. She adds an adjustment layer with a Clipping Mask on the sky layer and uses Selective Color to punch up the vibrancy. This is a great habit to build early — adjusting colors per layer rather than flattening everything keeps your workflow flexible and non-destructive.
Blending the Landscape Into the Sky
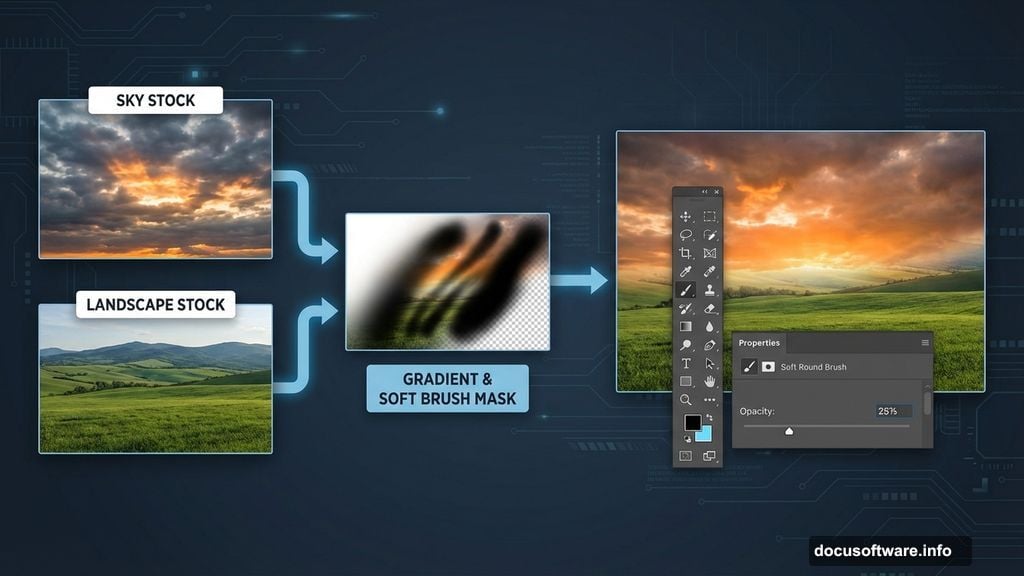
Next comes one of the most satisfying parts of any composite: making two separate photos look like they belong together.
Drop the landscape stock into the canvas, convert it to a Smart Object, and resize with Cmd/Ctrl+T. Then add a layer mask and use a soft black brush to gently erase the sky from the landscape image. The goal is a smooth, natural transition between the two photos.
This masking technique is genuinely one of the most transferable skills in all of Photoshop compositing. Get comfortable with it here and you’ll use it everywhere.
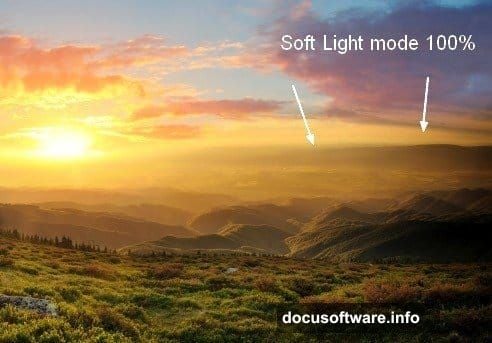
Painting Warm Light and Shadow
Once the base scene is together, Jenny adds warmth to the mountains. She creates a new layer, paints with a soft brush in the color #a97c3c on the right side of the mountains, then sets the blend mode to Soft Light at 100%.
This is a beautifully low-tech trick. Rather than using complex lighting filters, a single painted layer in Soft Light mode convincingly mimics the warm glow of early morning sun. It takes about thirty seconds and makes an enormous difference to the mood.
She also uses a Clone Tool layer to remove distracting light rays from the original landscape stock — keeping the scene looking natural and controlled.
Building the Path
Here’s where the project gets a little more technical. Jenny brings in the path stock, places it in the middle of the image, and uses the Warp Tool (Edit > Transform > Warp) to stretch and bend it naturally.
She then duplicates this layer four times, warping each piece slightly differently to extend the path into the distance. All five path layers go into a group, which she switches from Pass Through to Normal 100% blending mode. Two adjustment layers inside the group handle color and brightness matching.
The final touch inside this group? A new painting layer using the color #291605 to manually brush in shadows under the path steps. After warping, the stone path can look a little flat and two-dimensional. These painted shadows restore depth and make the whole thing feel grounded.
Why This Tutorial Is Worth Your Time
There are hundreds of Photoshop tutorials floating around online. Many of them teach you one specific trick for one specific outcome. This one is different because almost every technique Jenny uses — soft brush painting for lighting, Clipping Mask adjustment layers, group-based color correction, manual shadow painting — applies to completely different projects too.
You’re not just learning how to make this sunrise scene. You’re learning how professional compositors think about building layered, believable images from mismatched source material.
Even if the final aesthetic isn’t your style, the workflow here is genuinely worth understanding. Work through it once and you’ll have a toolkit that carries into everything from fantasy landscapes to product photography retouching.