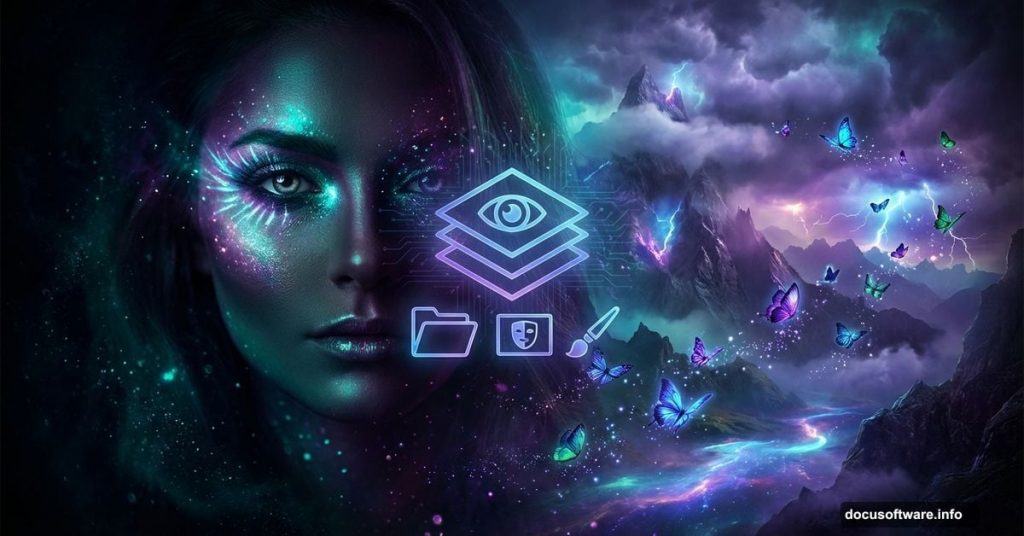
Ever look at those stunning fantasy portraits online and wonder how they’re made? The ones with mysterious women standing in desolate landscapes, glowing butterflies nearby, and dramatic stormy skies overhead? They’re built in Photoshop, layer by layer, and the process is way more approachable than you might think.
This tutorial walks you through creating a mystical scene featuring a model placed into a moody environment, complete with makeup effects and atmospheric lighting. Whether you’re just getting started with photo manipulation or looking to sharpen your compositing skills, this breakdown covers every step from opening a blank canvas to adding those final magical touches.
![A dramatic Photoshop fantasy portrait showing a mysterious woman composited into a moody landscape with mountains, stormy sky, and mystical lighting effects]
Setting Up Your Canvas and Cutting Out the Model
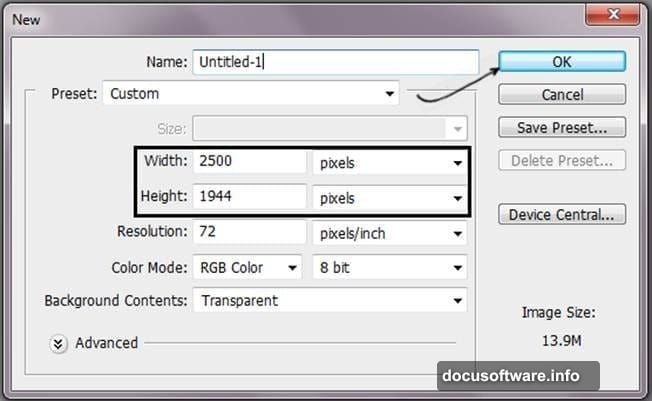
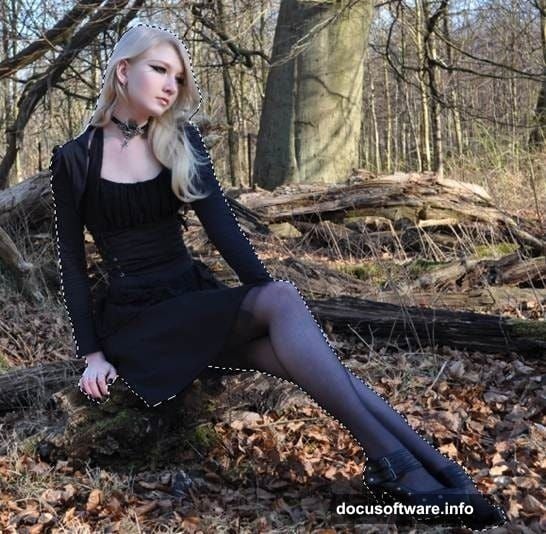
First things first. Open Photoshop and go to File then New (or press Ctrl+N). Set your canvas to 2500 pixels wide by 1944 pixels tall. This gives you plenty of room to work without things feeling cramped.
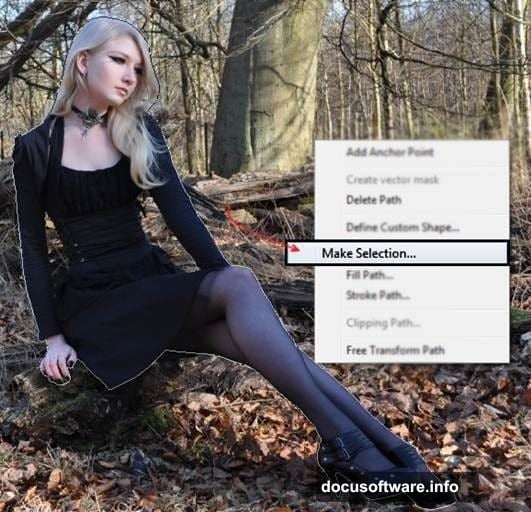
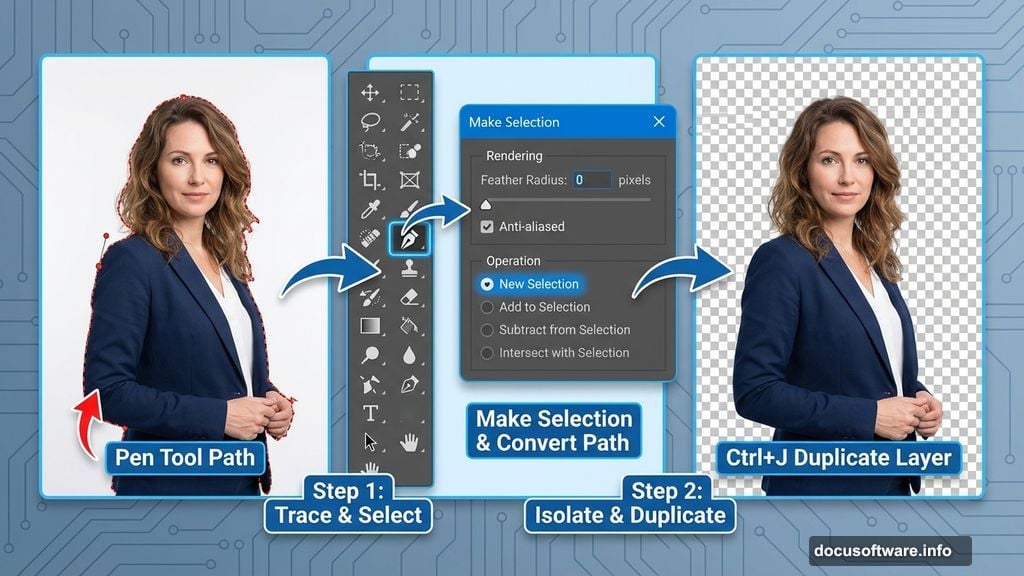
Next, open your model photo. Here’s where the Pen tool becomes your best friend. Trace carefully around the edges of the model, making sure you close the path by ending exactly where you started. Once the path is closed, right-click and choose Make Selection, then select New Selection and hit OK. You’ll see the selection appear around your model.
Now press Ctrl+J to duplicate just the selected area onto its own layer. This is how you isolate the model from her original background. It’s a clean, non-destructive approach that keeps your workflow flexible.
Building the Background Environment
With your model isolated, it’s time to build the world around her.
Start with a base background layer using a blue-toned image with low saturation. Pull the opacity down to about 90% so it blends softly rather than sitting flat and harsh on the canvas.
Then bring in your stones layer. Use Free Transform (Ctrl+T) to resize it so it fits the scene. Here’s an important habit to build: hold Shift while dragging a corner handle. That locks the proportions so your image scales uniformly without getting stretched or squished.
Once the stones are positioned, go to Image, then Adjustments, then Hue/Saturation (Ctrl+U). Drop the Saturation value to -40. This desaturates the rocks just enough to give them that cold, desolate feel perfect for a mystical landscape.
Refining the Rocks and Sky

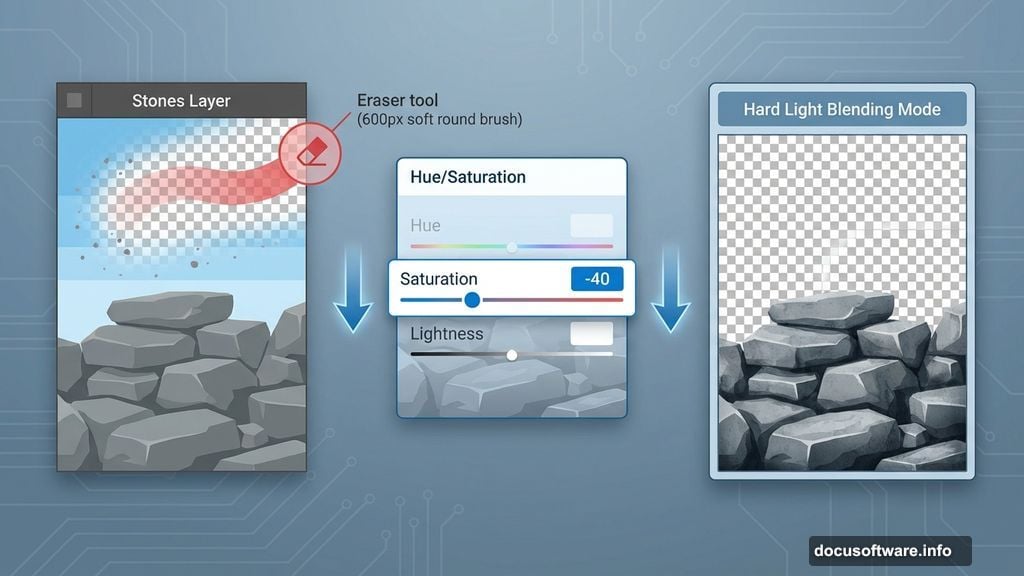
Grab the Eraser tool (press E on your keyboard) and use a soft round brush set to around 600 pixels. Erase over the sky area of the stones layer, leaving only the rocks themselves visible. Soft brushes make edges blend naturally instead of looking like you cut things out with scissors.
After erasing, change the rocks layer mode to Hard Light. This blending mode creates depth and intensity, making the stones feel grounded in the scene rather than just sitting on top of it.
Now add your mountains layer. Reduce its opacity to around 80% and erase any areas that overlap the rocks awkwardly. Then bring in a sky layer to add dramatic cloud coverage. Change that sky layer’s blending mode to Soft Light. This integrates the sky tones beautifully with everything beneath it.
Feel free to add a second mountains layer for extra depth. Erase any unwanted sections with the Eraser tool, using the same soft brush technique.
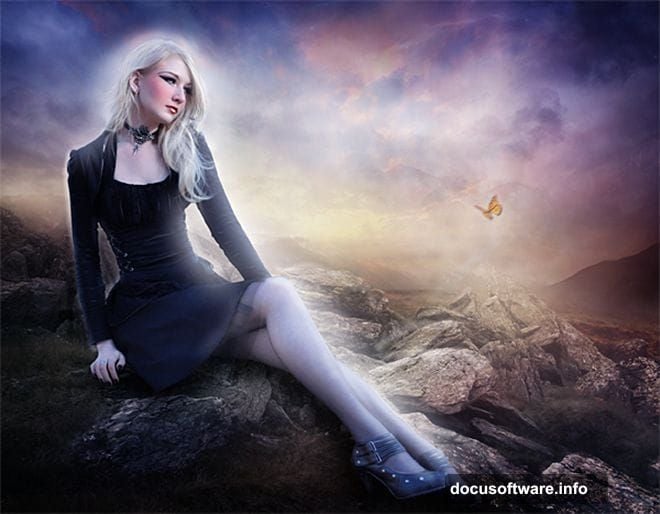
![Step-by-step breakdown of Photoshop layer stack showing model cutout, mountains, sky, and stone texture layers composited into a mystical fantasy scene]
Compositing the Model into the Scene
With the background built, it’s time to bring your model into this world.
Place the model layer above the background elements. You’ll likely need to adjust her size using Free Transform (Ctrl+T) so she feels proportional to the environment around her. Remember to hold Shift to maintain those proportions.
At this stage, pay attention to lighting direction. Where does the light appear to come from in your landscape? The model should look like she belongs in that same light. If needed, use adjustment layers clipped to the model layer to shift her tones toward matching the scene.
Adding Makeup Effects in Photoshop
This is where things get genuinely fun. Photoshop lets you paint makeup directly onto the model’s face using blending modes and careful brushwork.
Create a new layer above the model. Set its blending mode to Soft Light or Multiply, depending on the look you want. Choose a soft brush, pick a deep color for eye shadow or liner, and paint gently over the facial areas. Because the layer is in Soft Light mode, the color blends into the skin tones instead of painting over them flatly.
For lips, a similar approach works well. Create a separate layer in Multiply mode and brush on your color. Reduce opacity until it looks natural rather than painted. Building makeup through multiple low-opacity layers gives you far more control than trying to get it perfect in one stroke.
Lighting Effects and Final Atmosphere
Mystical scenes need atmospheric lighting to feel complete. This is where you can add glowing effects around the model, subtle lens flares, and color grading across the whole image.
For a glow effect, create a new layer above the model. Use a large, soft brush loaded with a warm or cool color depending on your scene’s mood. Paint around the edges of the model and reduce opacity until the glow feels like it’s coming from a light source rather than looking like a halo pasted around her outline.
One useful tip from the community around this tutorial: focus the glow on skin areas rather than hair and clothing. That makes the light feel like it’s interacting with her skin specifically, which reads as far more natural.
Finally, add butterflies and any other finishing elements. Position them with attention to depth, placing some slightly behind layers to reinforce the sense of space. A fractal texture layer on top of everything in a low-opacity blending mode can add that final layer of mystical atmosphere.
Bringing It All Together
Photo manipulation like this is really just a series of small, manageable decisions. You’re not trying to do everything at once. You’re building one layer at a time, adjusting one element at a time, and gradually watching a completely new world take shape.
The resource list for this tutorial includes a model from Mariaamanda, stones from Compot-stock, mountains from Resurgere and Kuoma-stock, forest from Riktorsashen, sky from Frozenstarro, butterfly from Madetounique, and hair brushes from Trisste-brushes. Having quality source materials makes compositing significantly easier, so always hunt for high-resolution stock photos with consistent lighting.
Start with a practice run using whatever images you have on hand. The skills transfer regardless of the specific resources you’re using. Once you nail the fundamentals of selection, layer blending, and color matching, the mystical portraits practically build themselves.