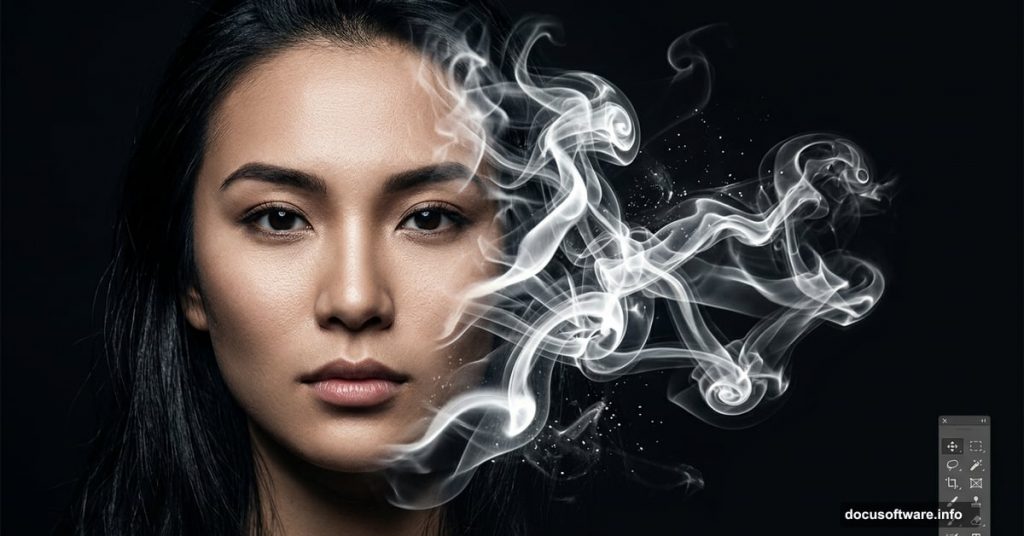
The first time I saw smoke art photography, I was completely hooked. That swirling, ethereal look where a human face dissolves into wisps of smoke feels almost magical. But here’s the thing — you don’t need a fancy studio or special camera equipment to pull it off. You can build this effect entirely inside Photoshop, and it’s way more accessible than you’d expect.
This tutorial walks you through creating a smoke portrait from scratch. All you need is Adobe Photoshop CS or newer, a model stock photo, and a set of Real Smoke Photoshop Brushes. Plan for about one to two hours of work, and you’ll end up with something seriously impressive.
One quick note before we dive in: these steps are written for Windows. If you’re on a Mac, just swap Ctrl for CMD and Alt for Opt throughout.

Step 1: Extract Your Model From the Background
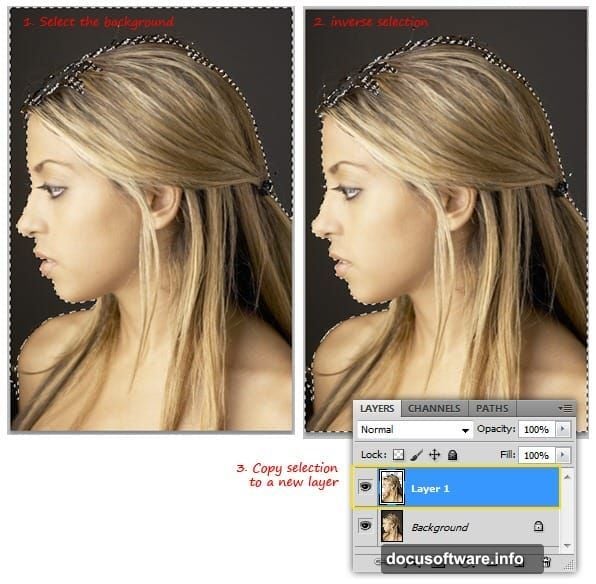
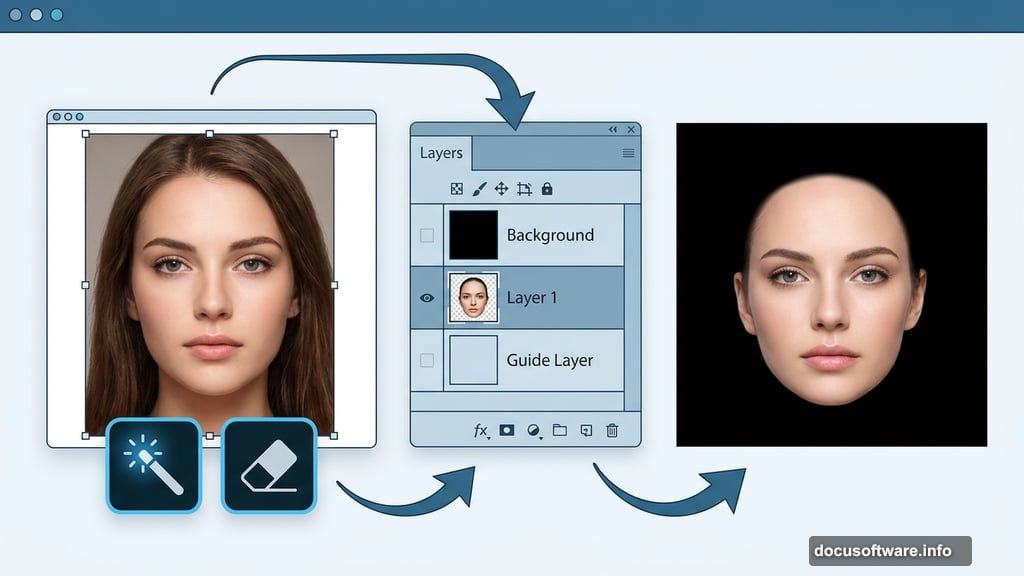
Start by opening your stock model image in Photoshop. Grab the Magic Wand tool from the toolbar and click on the background to select it. Then go to Select > Inverse (Ctrl+I) to flip the selection so your model is selected instead.
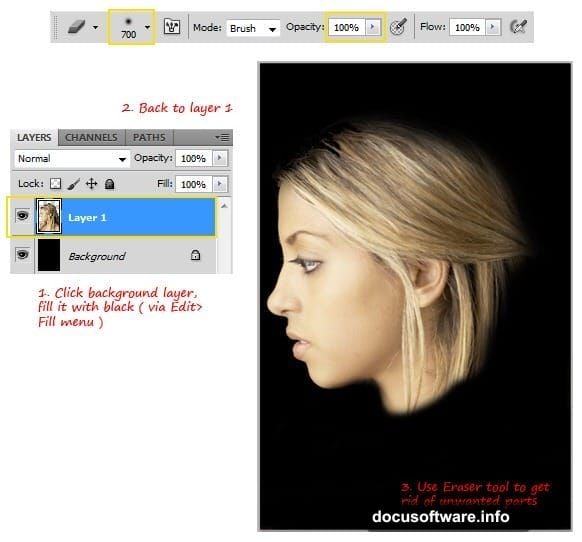
Press Ctrl+J to duplicate just the selected model onto a new layer. You’ll see this new layer appear in your Layers panel. Now click on your original Background layer and fill it with solid black — this dark backdrop is essential for making smoke effects pop later.
Switch back to Layer 1 and use the Eraser tool to clean up any leftover bits you don’t need. Keep just the head area. Make sure you’re using a soft round brush at 100% opacity for smooth, clean edges.
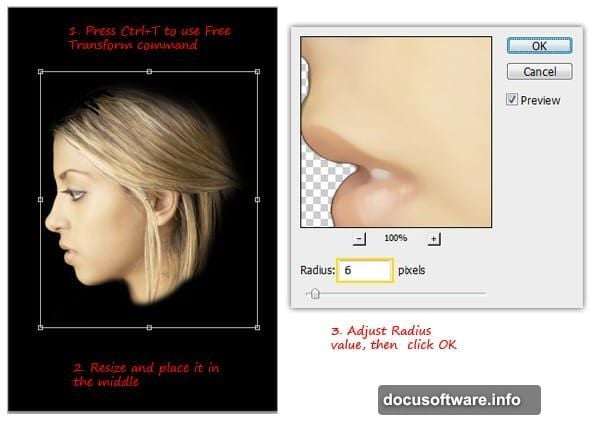
Resize the head to make it a bit smaller, then center it on the canvas. Next, apply a quick smoothing pass: go to Filter > Noise > Median and set the Radius to somewhere between 5 and 7px. This softens fine details and gives the image a cleaner base for the smoke effect.
Step 2: Build Your Smoke Guide Lines
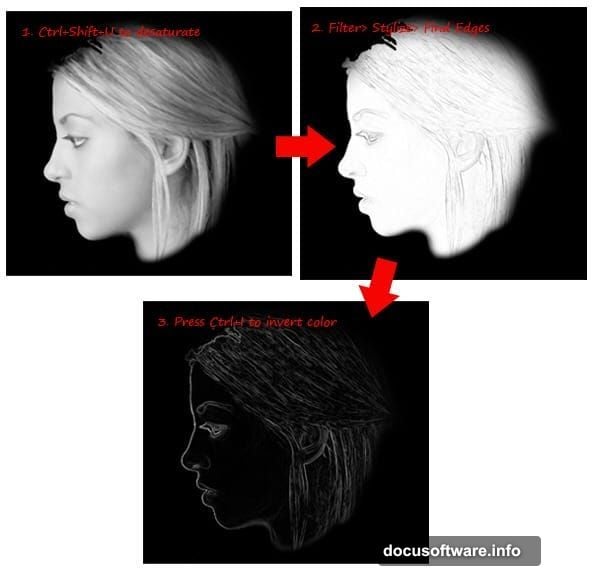
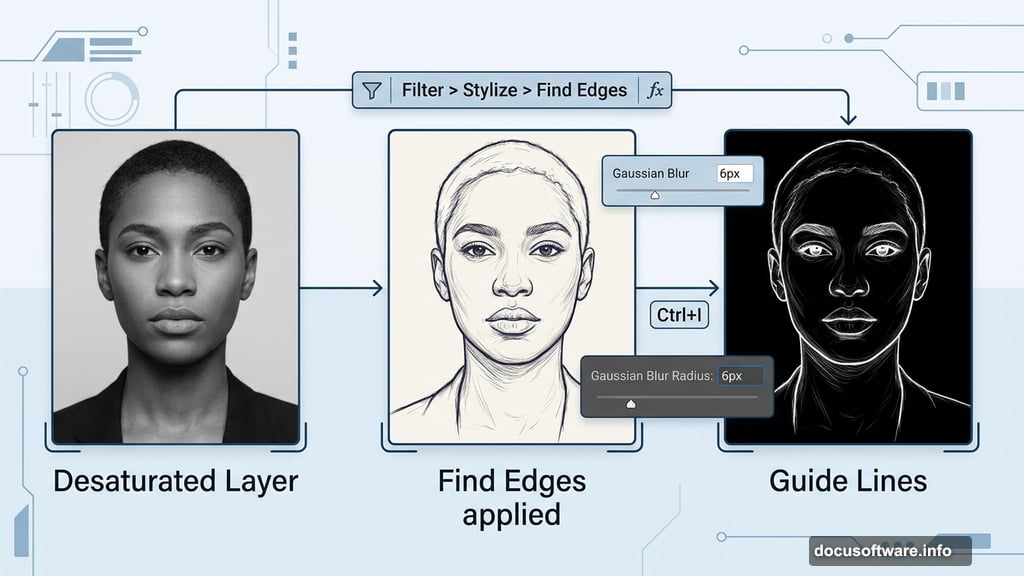
Here’s where things start to get interesting. With your model layer selected, go to Image > Adjustment > Desaturate (or press Ctrl+Shift+U) to strip out all the color. Now go to Filter > Stylize > Find Edges — this turns your photo into something resembling a pencil sketch.
The lines show up dark on a light background by default, but that’s the wrong way around for smoke art. Press Ctrl+I to invert the colors, and those lines flip to white against black. That’s your guide layer done.
Now add a little blur to soften those guide lines. Go to Filter > Blur > Gaussian Blur and set the Radius to about 6px, then click OK.
Use the Eraser tool to remove any unwanted areas around the neck and hair — these can muddy the final effect if left in. Then press Ctrl+L to open the Levels dialog. Drag the shadow and highlight sliders inward to boost contrast. You want the black areas truly dark and the white areas crisp and bright. When it looks right, click OK.
What You’ve Built So Far
At this point you have two things working together: a clean model extraction on a black background, and a high-contrast guide layer showing the edges and contours of the face. These two layers form the foundation everything else builds on.
The guide lines tell you where to paint your smoke. Think of them like a map — the edges of the nose, eyes, and jawline all become paths for the smoke brushes to follow. The more carefully you built this guide layer, the more natural your final smoke portrait will look.
Continuing the Effect
From here, the real creative work begins. You’ll load the Real Smoke Photoshop Brushes and start painting smoke strokes that trace those guide lines. The trick is varying brush size, opacity, and angle to mimic how actual smoke moves — curling slightly at the edges, thicker in the middle, wispy at the tips.
Work in short strokes rather than long sweeping passes. Rotate your brush frequently using the bracket keys to avoid repetitive patterns. Real smoke never looks uniform, so randomness is your friend here.
Build up layers of smoke gradually. Start with lighter passes at lower opacity, then add denser strokes where the facial features are strongest. The eyes, nose bridge, and lips usually benefit from the most smoke detail since that’s where viewers naturally focus.
Getting the Final Look Right
Color plays a big role in selling the effect. Pure white smoke on pure black background is the classic look, but you can shift the smoke color toward cool blues or warm golds for a different mood. Use Image > Adjustments > Hue/Saturation with Colorize checked to experiment.
The background doesn’t have to stay plain black either. A subtle gradient or faint texture adds depth without distracting from the smoke. Just keep it dark enough that the bright smoke remains the clear focal point.
When you’re happy with the overall composition, flatten the image and run a final Filter > Sharpen > Unsharp Mask pass at low settings. This tightens up the smoke edges slightly and adds a professional crispness to the finished piece.
Smoke portrait effects reward patience and experimentation. Don’t stress about getting every brush stroke perfect on the first try. The beauty of working non-destructively in Photoshop is that you can always adjust, undo, or repaint any section. The more portraits you create using this technique, the more intuitive the brush work becomes.
Try the same technique with different subjects — hands, profiles, and full figures all work beautifully with smoke effects. Each new image teaches you something about how smoke behavior and facial structure interact.