Dark, moody photo manipulations are some of the most satisfying projects you can tackle in Photoshop. There’s something deeply rewarding about assembling a haunting scene from a handful of stock images and watching it come alive.
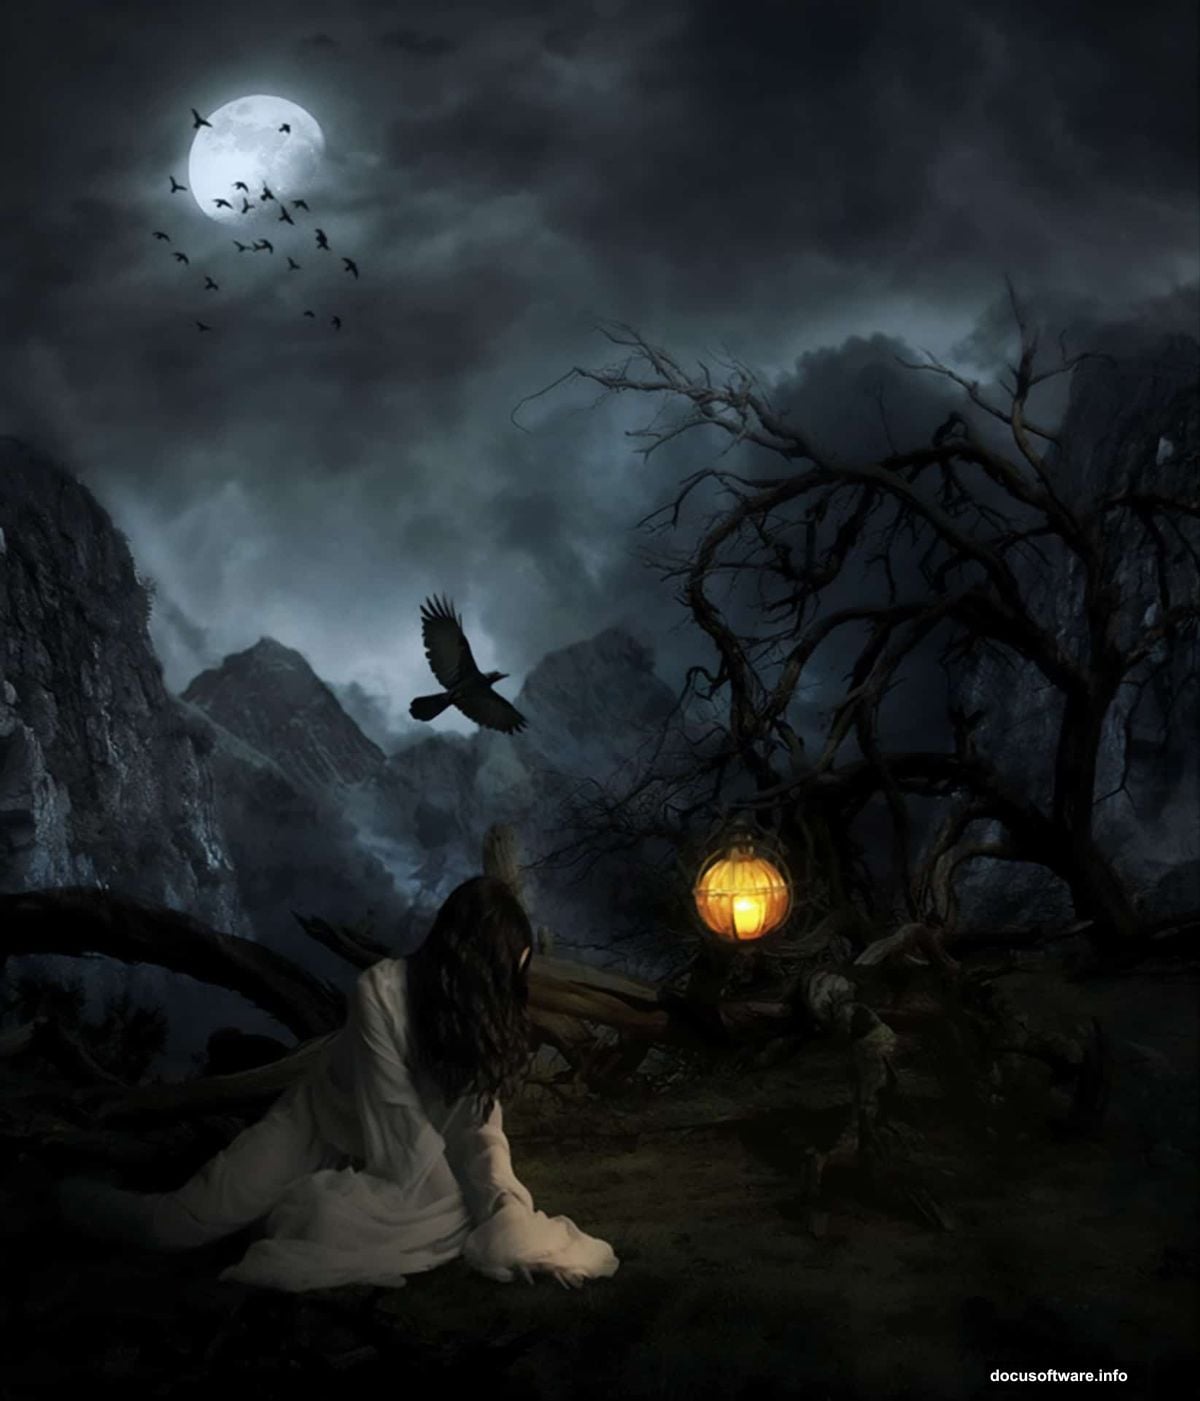
This tutorial walks you through creating a surreal mountain landscape featuring a creepy lady, twisted trees, glowing lamps, and an atmospheric crow. And the best part? You don’t need to make any complex selections to pull it off.
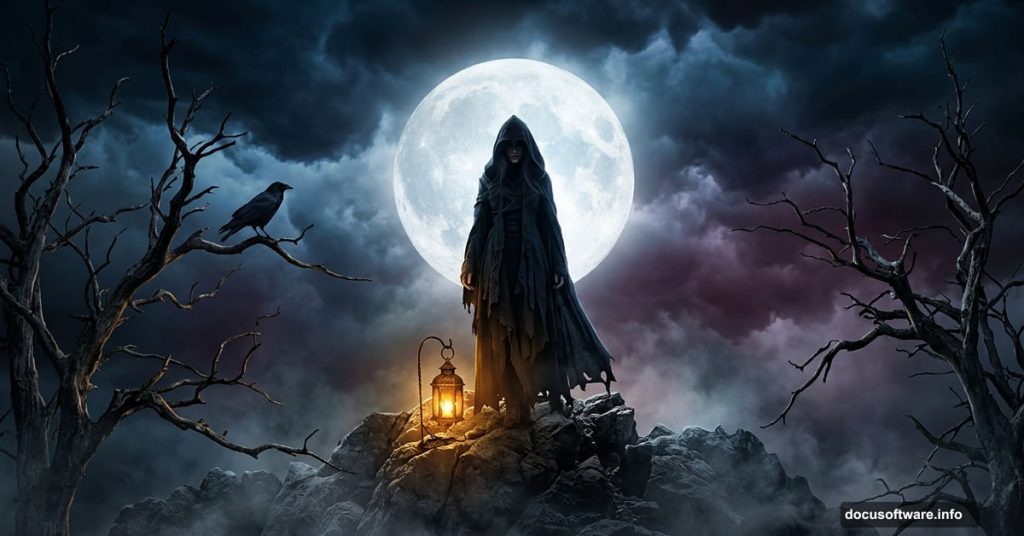
What You’ll Build
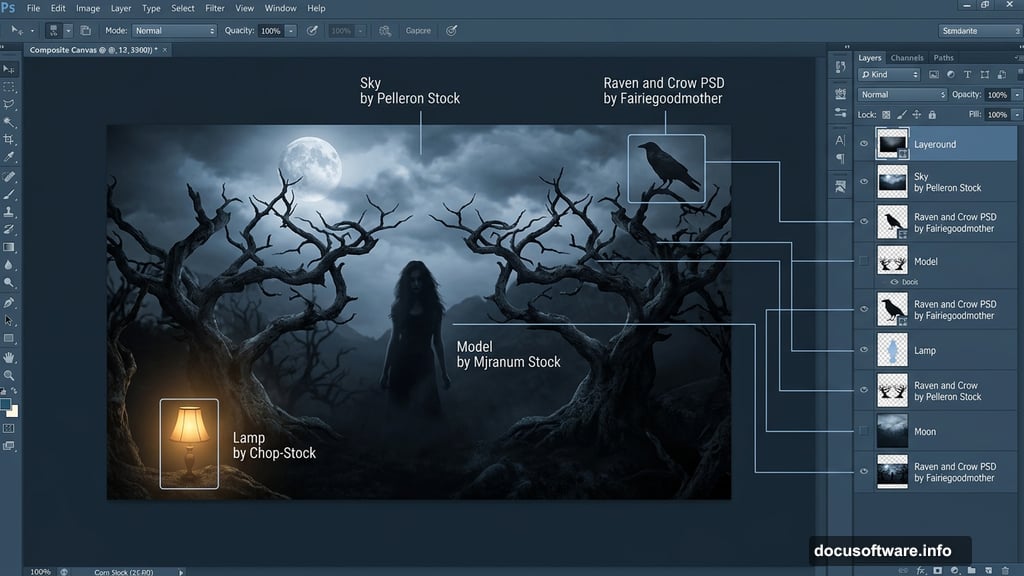
The final composite tells a story through mood and atmosphere. Picture a shadowy mountain scene wrapped in dark clouds, a cold moon hanging overhead, and gnarled trees framing a mysterious figure. A crow perches nearby. Lamps cast small pools of warm light against the darkness.
To follow along, you’ll need Photoshop CS5 or newer. Grab all the resources listed at the end of this section before you start. Keeping everything in one dedicated folder makes the whole process much smoother.
Stock Resources You’ll Need
Here’s everything that goes into building this scene:
- Rainy Landscape by Wyldraven Stock
- Sky by Pelleron Stock
- Moon from Pixabay
- Mountains 1-4 from LucieG Stock and Pixabay
- Smoke brush from Brusheezy
- Death Valley from Pixabay
- Lamp by Chop-Stock
- Model by Mjranum Stock
- Raven and Crow PSD by Fairiegoodmother
- Birds brushes by Candymax Stock
Setting Up Your Document
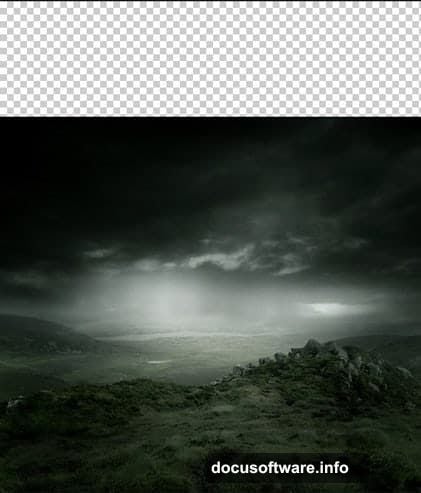
Start by creating a new Photoshop document. Go to File > New and set your canvas dimensions. A larger canvas gives you more room to work, so don’t be afraid to go bigger than the tutorial’s default settings if your machine can handle it.
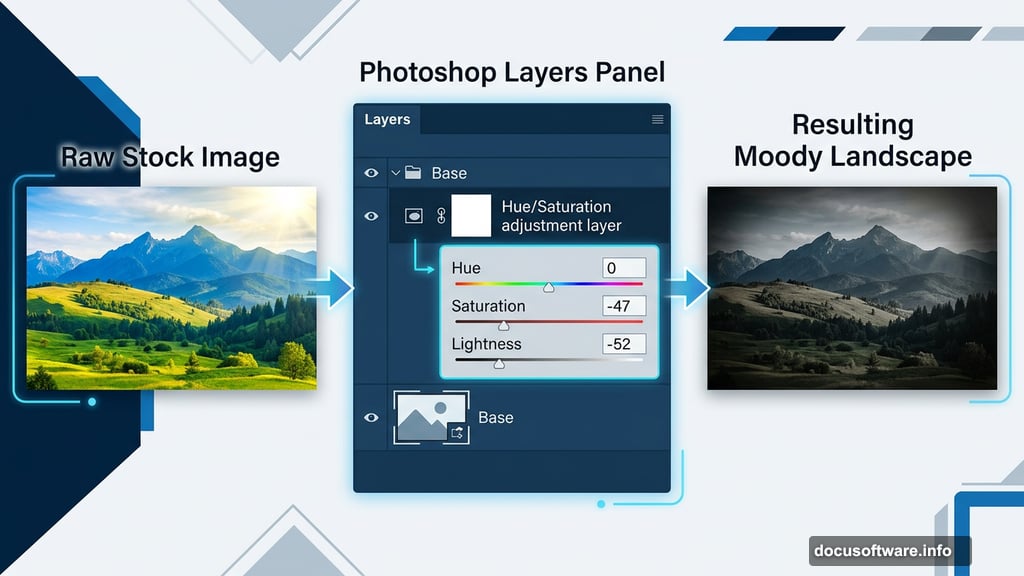
Next, place your landscape image using File > Place rather than the standard open command. This matters because Place automatically converts your image into a Smart Object. Smart Objects let you scale and transform images without permanently losing quality, which is a huge advantage when you’re building complex composites.
Building the Base Landscape
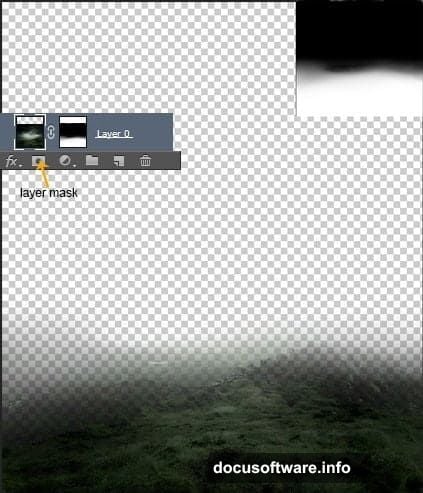
With your landscape placed, it’s time to start shaping the mood. Add a layer mask to the landscape layer by clicking the Add Layer Mask button at the bottom of the Layers panel. Grab a soft round black brush and paint along the edges you want to fade out. This creates seamless blending rather than hard, obvious cuts.
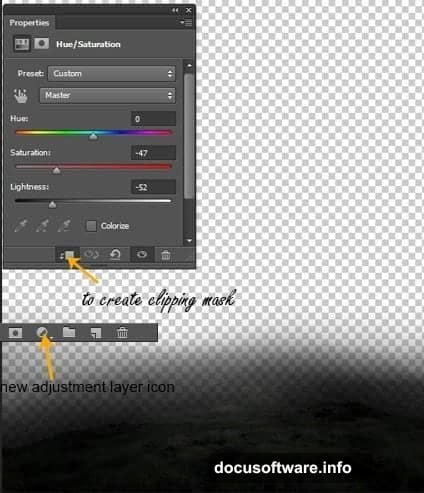
Now add a Hue/Saturation adjustment layer. Go to Layer > New Adjustment Layer > Hue/Saturation. Click the clipping mask button so the adjustment only affects the landscape below it. Set Hue to 0, Saturation to -47, and Lightness to -52. This pulls the color and brightness down, pushing the whole scene toward that dark, moody feel.
Select both the landscape layer and the adjustment layer while holding Shift, then group them with CMD/CTRL+G. Name this group “Base” to keep your layers panel organized. Good organization now saves a lot of frustration later.
Adding the Sky and Mountains
Place the sky image below your landscape group. Then add a Curves adjustment layer clipped to the sky. Pull the curve down to darken it and match the brooding atmosphere you’re building in the base layer.
The mountains come next, and this is where the scene really starts taking shape. Each mountain layer gets its own layer mask treatment. Paint with a soft black brush to blend the mountain edges into the sky and each other. The goal is to create natural-looking depth, as if the peaks are receding into the distance through haze and cloud.
Creepy Trees Without Complex Selections
Here’s one of the best tricks in this whole tutorial. Adding realistic-looking dead trees to a scene usually sounds like a painstaking selection job. But there’s a much faster approach using brush work and blending modes.
Instead of cutting trees from photos, you can paint them directly using textured brushes, or blend tree images using layer blending modes that naturally drop out bright backgrounds. Dark, twisted branches against a bright sky blend surprisingly well with the right technique. You’ll have convincing creepy trees added to your scene in minutes rather than hours.
Lights, Shadows, and the Figure
Place the lamp images into the scene and position them where they make narrative sense. Lamps in a dark mountain composite do double duty. They add visual interest and give you an excuse to paint believable pools of warm light.
Create a new layer above the lamp and use a soft brush with a warm yellow or orange color to paint a gentle glow. Set this layer to Screen or Overlay blending mode. Then add a subtle drop shadow beneath each lamp to ground it in the scene.
The model comes next. Place her using File > Place, then use a layer mask to blend her into the environment. Add a shadow beneath her feet on a separate layer set to Multiply. This single step dramatically increases how “real” she feels in the scene. Without it, she’ll look like she’s floating.
For the crow, the included PSD file gives you a ready-made bird you can position wherever it feels most dramatic. A crow perched near the model or silhouetted against the moon both work beautifully.
Final Adjustments That Tie Everything Together
This is where many tutorials rush, but it’s honestly where the magic happens. Global adjustment layers placed at the very top of your layer stack unify everything beneath them.
Add a Color Lookup adjustment layer and experiment with the built-in LUTs to push the overall color grade toward something cold and cinematic. A slight blue or teal cast in the shadows reads as deeply unsettling, which is exactly what you want here.
Follow that with a Curves layer to boost contrast globally. Pull the shadows down slightly and bring the highlights up just a touch. High contrast makes the scene feel dramatic and intentional rather than flat.
Finally, add a Photo Filter adjustment layer set to a cool blue tone. Keep the opacity subtle, around 20-30 percent. This last step is what makes all the separate elements feel like they exist in the same light, the same world.
The difference between a composite that looks assembled and one that looks painted is almost always in these final global adjustments. Take your time here and trust the process.
Photo manipulation like this is genuinely one of the most creative workflows Photoshop offers. You’re not just editing a photo. You’re building something that never existed anywhere except in your imagination.