Ever look at a piece of digital art and wonder how the creator pulled off that eerie, glowing underwater vibe? This tutorial walks you through exactly that. We’re building a surreal radioactive water scene in Photoshop, complete with skeletons, fish, swaying grass, and a sickly green color grade that makes the whole thing feel genuinely unsettling.
Think of it like assembling a collage, but with light, shadow, and color doing the heavy lifting. Even if you’re relatively new to photo manipulation, these steps are designed to be approachable. So let’s get into it.
What You’ll Need Before Starting
Grab these resources before opening Photoshop. Having everything ready saves a lot of back-and-forth later.
- Skeleton Woman
- Skeleton Arm
- Fish
- Grass
- Bermuda Underwater
- Underwater images (x3)
- Bubbles
Once you’ve got those downloaded and organized in a folder, you’re ready to build.
Setting Up Your Canvas
First things first. Go to File > New and create a fresh document with these exact settings:
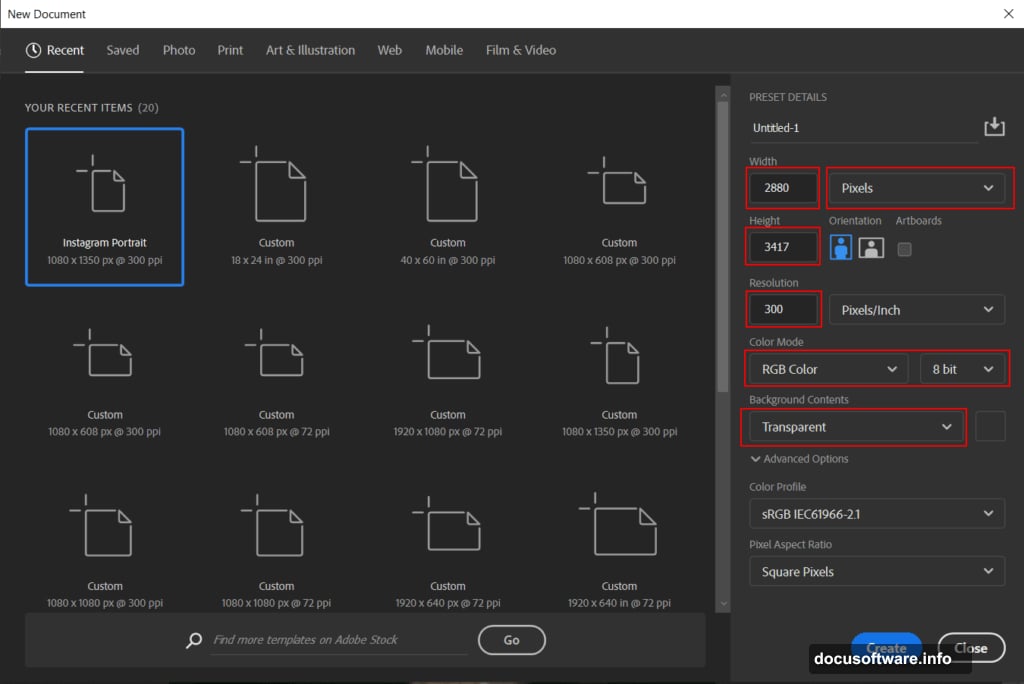
- Preset: Custom
- Width: 2880px
- Height: 3417px
- Resolution: 300px
- Color Mode: RGB Color, 8-bit
- Background: Transparent
The large canvas size gives you plenty of room to work without losing quality. Plus, 300 DPI means it’ll look sharp if you ever decide to print it.
Placing and Masking the Main Model
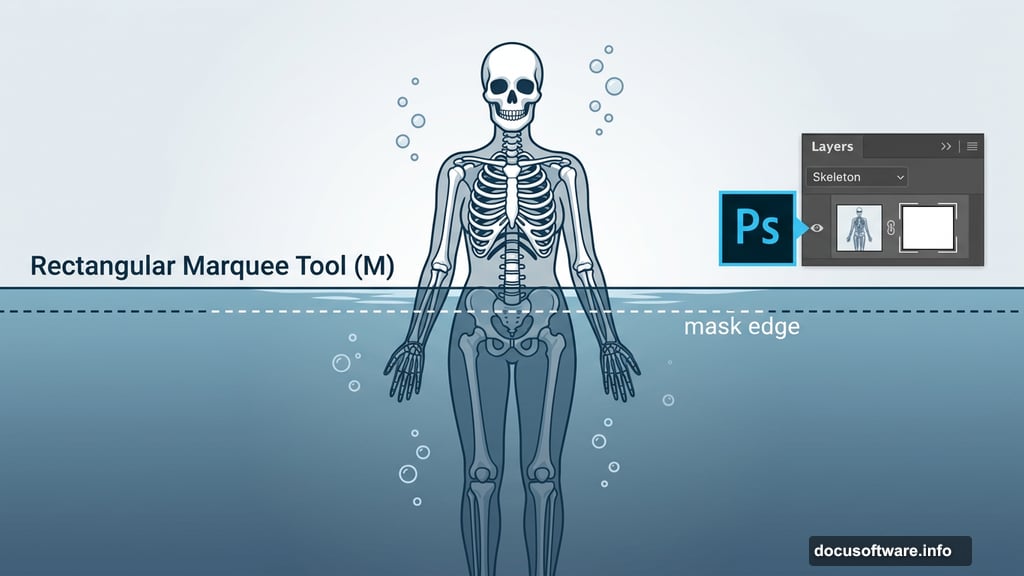
Go to File > Place and bring in your skeleton model. Once it’s on the canvas, grab the Rectangular Marquee Tool (M) and select just the lower half of the image. Then click the layer mask icon at the bottom of the Layers panel.
This hides the bottom portion cleanly, which sets up the illusion that your figure is submerged in water. It’s a simple trick, but it’s one of the most effective techniques in photo manipulation.
Sculpting Light and Shadow With Adjustment Layers
Here’s where the scene starts to breathe. You’ll run through three adjustment layers in sequence, each one adding depth to the figure.
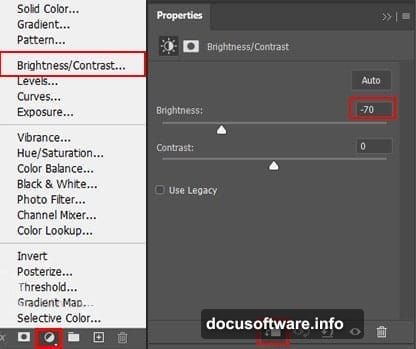
Brightness/Contrast adjustment: Add the layer, then press Ctrl/Cmd + I to invert the mask (this hides the effect by default). Switch to the Brush Tool (B) with a soft round tip, set your foreground color to white, and paint over the highlighted areas of the figure. This selectively brings back brightness only where you paint.
First Curves adjustment: Same process. Add the layer, invert the mask, and paint with a white brush on the highlighted areas. Curves give you more precise control over tonal range than Brightness/Contrast alone, so this adds nuance on top of what you just did.
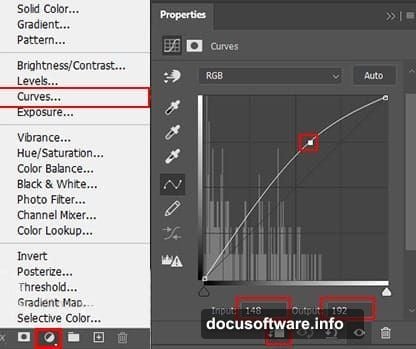
Second Curves adjustment: Add another Curves layer, invert again, and this time paint over the darker areas of the figure. This deepens the shadows, creating more contrast and dimension. The result makes the skeleton look like it’s actually lit by whatever ambient glow exists underwater.
Adding That Atmospheric Glow
Create a new layer above your adjustment layers. Change its blend mode to Soft Light and drop the opacity to 70%. Set your foreground color to white, grab a large soft brush (around 3000px), and paint a gentle sweep in the upper right corner of the canvas.
This creates a subtle, directional light source. It’s the kind of touch that separates flat compositions from ones that feel like they exist in a real space. Even though the “space” here is a radioactive underwater nightmare.
Building the Underwater Environment
Now for the background. Go to File > Open and bring in your sea or underwater image. Use the Rectangular Marquee Tool (M) to select the area you want, then copy (Ctrl/Cmd + C) and paste (Ctrl/Cmd + V) it into your working canvas.
Use the Transform Tool (Ctrl/Cmd + T) to resize and reposition it. In older Photoshop versions, hold Alt + Shift while dragging a corner to scale proportionally. In Photoshop CC, just hold Alt and drag any corner handle.
Once it’s positioned, add a layer mask and paint with a black soft brush to blend the edges. This prevents hard, obvious seams between your background and the rest of the scene.
Layering In the Creepy Details
This is the fun part. Add your additional elements one by one. Skeleton arms work best placed near the figure, as if reaching through the murk. Fish scattered at different scales sell the depth of the water. Grass at the bottom of the frame anchors everything and suggests an overgrown, long-abandoned place.
For each element, use the same masking and blending approach as above. Adjust the scale with the Transform Tool so nothing looks pasted in at an awkward size. And vary the opacity on some layers slightly. Objects further back in the scene should feel slightly hazier.
The Green Color Grade That Ties It All Together
The radioactive look comes from the color grading step. Add a Color Lookup or Hue/Saturation adjustment layer at the top of your layer stack. Push the greens up and cool down the highlights. You want that sickly, bioluminescent tint that screams contaminated water.
This step is where the whole scene unifies. Everything that felt slightly disconnected before suddenly belongs in the same world once a cohesive color cast sits over the top.
Finishing With Camera Raw Filter
For the final pass, flatten or merge your layers into a smart object. Then go to Filter > Camera Raw Filter. This is where you dial in the last details.
Bump the clarity slightly to sharpen midtone contrast. Add a touch of vignette to draw the eye toward the center. Pull the highlights down and lift the shadows a bit to get that murky, compressed underwater look. Finally, add a hint of green in the HSL panel if the color grade needs a nudge.
Camera Raw is powerful precisely because it gives you precise, non-destructive control at the very end of the process. Think of it as the color correction suite that lives right inside Photoshop.
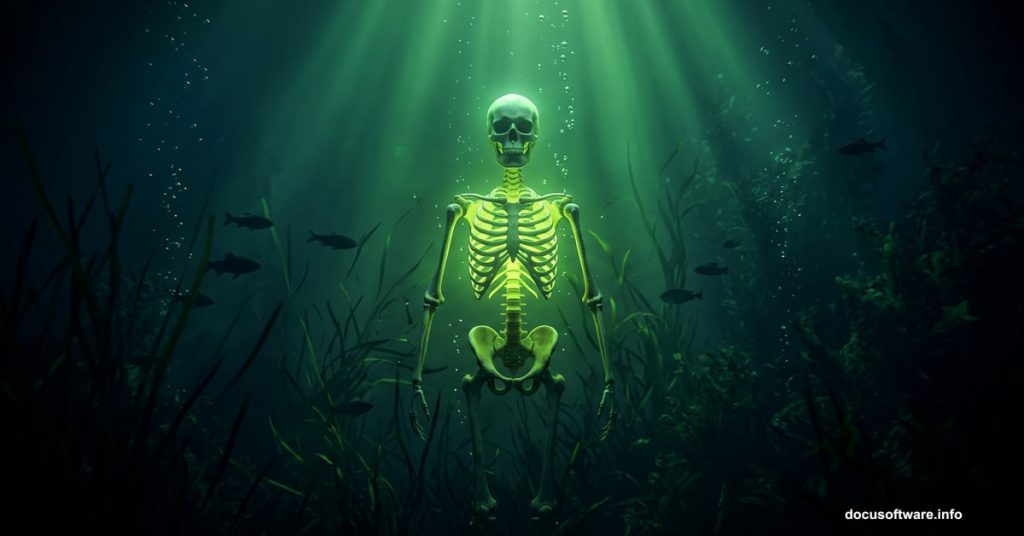
The final image should feel genuinely atmospheric. The skeleton figure half-submerged in glowing green water, surrounded by bubbles and drifting fish, with just enough darkness in the corners to make it feel like something you wouldn’t want to swim into. That’s the goal, and honestly, it’s a satisfying one to hit.
Experiment freely as you work through these steps. The exact opacity values and brush sizes shown here are starting points, not rules. Your version of this scene should feel like yours.