Dark, symmetrical, and just a little unsettling — gothic surrealism is one of the most satisfying styles to create in Photoshop. This tutorial walks you through building a complete gothic artwork featuring a warped face, moody backgrounds, and atmospheric lighting.
The result looks complex. But the process breaks down into simple, manageable steps. So whether you’re a casual hobbyist or a working designer, you can pull this off with patience and the right resources.
Stock Resources You’ll Need First
Before touching Photoshop, gather your source images. Here’s what this project uses:
- Gothic Lolita — Kechake-stock
- Floor texture — SkyesStock
- Dress form — JinxMim
- Clocks — JinxMim (alternative link available)
- White Rabbit — Tilt-Stock
- Stormy Sky — EvanescentStock (alternative link available)
- Wall Crest — AshenSorrow
- Texture — SXC.hu
Note: Some original DeviantArt links may be inactive. Search for alternatives using the item names on Unsplash, Pexels, or a quick Google image search. For the dress form, “coat rack” works as a solid substitute.
Setting Up Your Canvas
Start fresh. Create a new file at 2000x2000px with 300dpi resolution. That size gives you plenty of room to work without losing detail when you zoom in tight.
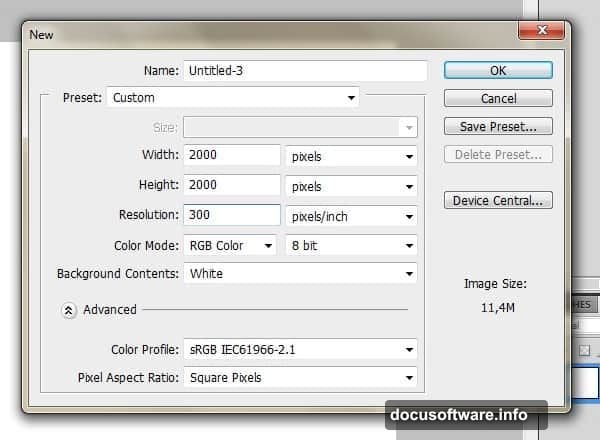
High resolution matters here. Gothic artwork lives and dies on fine details — the texture of wallpaper tiles, the edge of a clock face, the wisp of a cloud. Starting big means you can scale down later without any quality loss.
Building the Floor and Background Wall
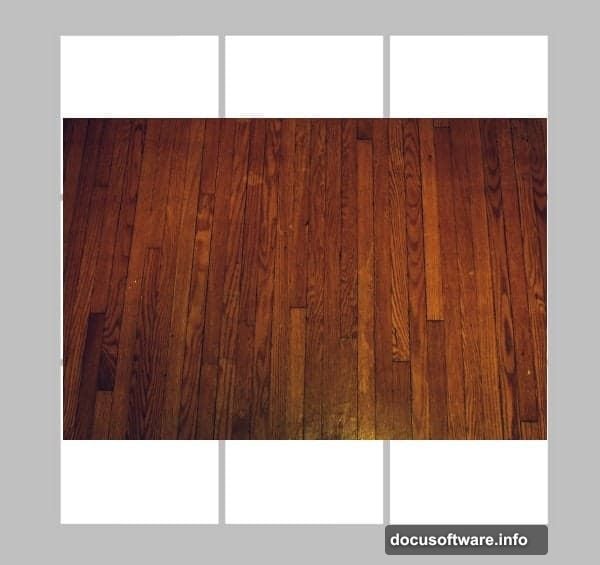
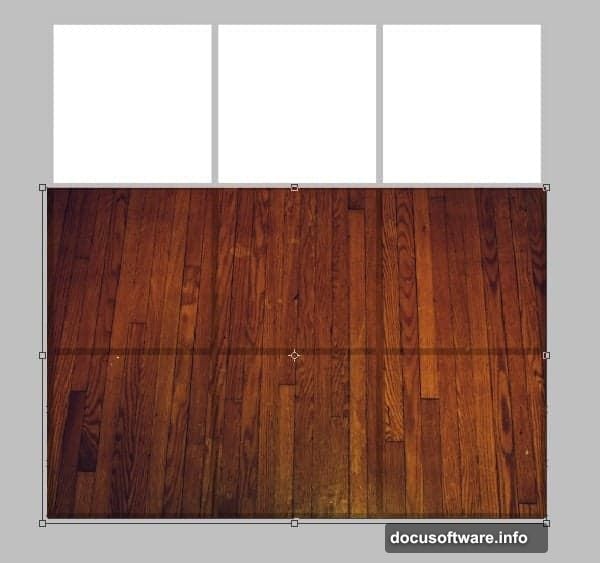
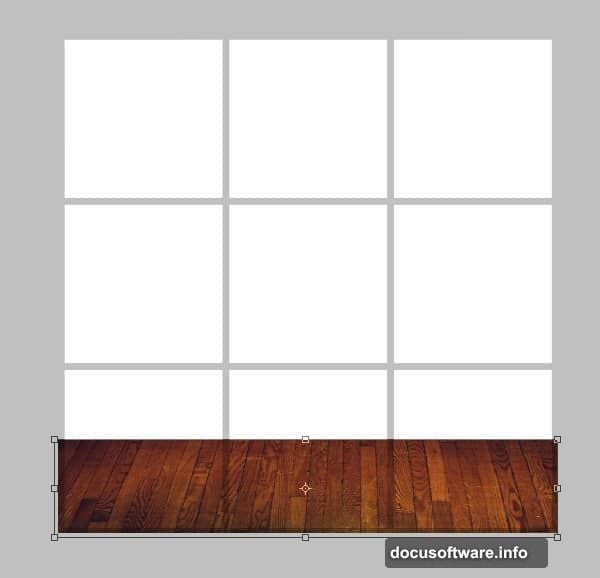
Paste your floor stock onto the canvas. Hit Ctrl+T to enter Free Transform, then stretch it from the corners until it covers the full canvas. Pull the upper edge downward slightly — this creates a more realistic perspective, like you’re actually looking across a floor rather than staring at a flat image.
Press Enter to exit Transform when it looks right.
Next, place your wall crest in the center of the canvas on its own separate layer. Resize as needed. Keeping it isolated on its own layer is important — you’ll need to manipulate it independently later.
Tiling the Wallpaper Pattern
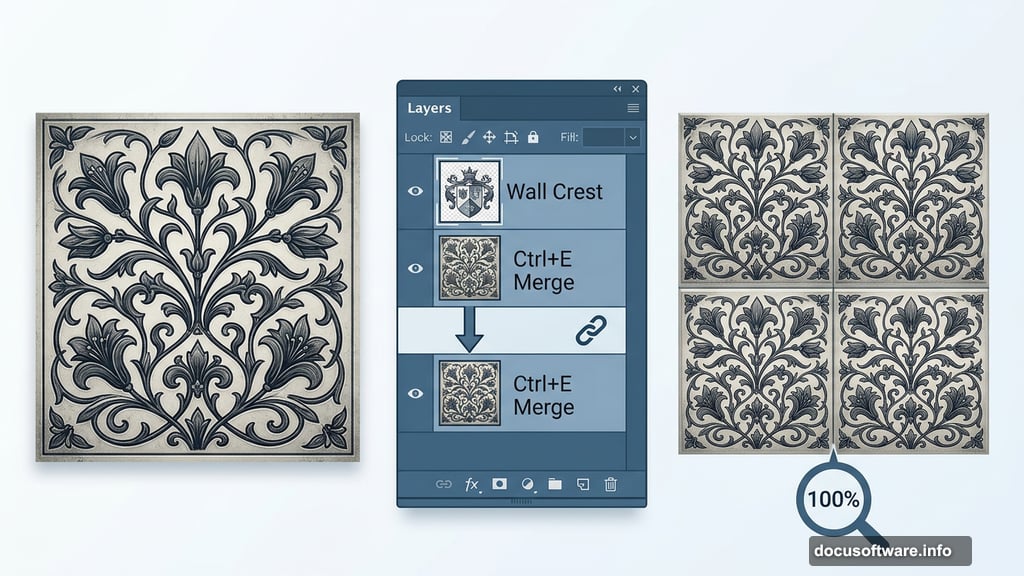
This is where the background really comes together. Take your wallpaper tile and enlarge it until the pattern is clearly visible. Position the wallpaper layer beneath the wall crest layer in your layer stack.
Then duplicate the tile using Layer > Duplicate Layer and slide the copy right beside the original. Watch for gaps — any visible background peeking through will look sloppy. Once the two tiles sit perfectly side by side, select both layers in the panel and press Ctrl+E to merge them.
Duplicate the merged pair and place the copy beneath the original row. Keep building this way — duplicate, merge, reposition — until the entire wall area is covered. After each pass, zoom in to 100% to check for gaps between tiles.
When you’re satisfied, merge all tile layers into one single wallpaper layer. Every tile must be on the same layer before moving forward.
Cutting the Crest Shape Into the Wallpaper
Switch to the Magic Wand Tool (W). Make sure Contiguous is checked in the toolbar. Click on the area surrounding the wall crest on the crest layer — this selects everything outside the crest shape.
Now switch to your wallpaper layer. Hit Ctrl+Shift+I to invert the selection. This flips your selection so it targets the wallpaper area inside the crest boundary. Press Delete to clear that section, then Ctrl+D to deselect.
The result? Your wallpaper now surrounds the crest cleanly, with the crest shape cut out like a frame.
Adding the Stormy Sky
Create a new layer beneath the crest layer. Paste your stormy sky image here. Resize it until the cloud composition looks dramatic but balanced — you want brooding atmosphere, not a weather report.
This stormy sky will show through the crest cutout you just created, giving the impression of a gothic window looking out into a turbulent night.
Color Correcting the Mood
Raw stock photos always look too bright and cheerful for gothic work. Fix that through Image > Adjustments > Brightness/Contrast. Drop brightness to -150 and contrast to -35.
Also pull the Vibrance slider down to -60. This drains the warmth from the image without making it look grey and flat. The result is that cold, desaturated tone that defines the gothic aesthetic — like the color has been slowly leaving the room for years.
Warping the Face for That Unsettling Child-Like Look
This is the step that gives the artwork its signature creepiness. Using Photoshop’s warp and liquify tools on the portrait stock, you’ll reshape the face so it looks younger and slightly wrong — the kind of face that belongs in a dream you’d rather forget.
Use Filter > Liquify to push and pull facial features. Enlarge the eyes slightly. Narrow the chin. These small adjustments shift the face just enough to feel off without looking obviously manipulated.
For the symmetrical background effect, duplicate your composition layer, flip it horizontally using Edit > Transform > Flip Horizontal, and align it perfectly with the original. The mirrored result creates that otherworldly, dreamlike symmetry that defines surrealist artwork.
Finishing With Selective Color
For the final color grade, head to Image > Adjustments > Selective Color. This tool lets you push specific hues in targeted directions. Shifting the blues toward cooler tones while pulling warmth from the neutrals gives the finished piece its signature pale blue cast — haunting, cold, and completely intentional.
If you’re on CS5 and can’t locate this adjustment, it lives under Image > Adjustments > Selective Color. If the option seems grayed out, make sure you’re working on a flattened or rasterized layer.
—
Gothic photo manipulation rewards patience more than raw skill. The techniques here — tiling patterns, layer masking, liquify warping — are all learnable in an afternoon. What separates a good gothic composition from a great one is the care you put into each edge, each color grade, each shadow.
Take your time on the wallpaper tiling. Zoom in obsessively. Fix gaps before moving on. The background sets the mood for everything that sits in front of it, and a sloppy wall ruins an otherwise polished piece.
Once you finish this one, the workflow translates beautifully to other dark styles — steampunk, haunted Victorian, dark fairy tale. The tools stay the same. Only the story changes.