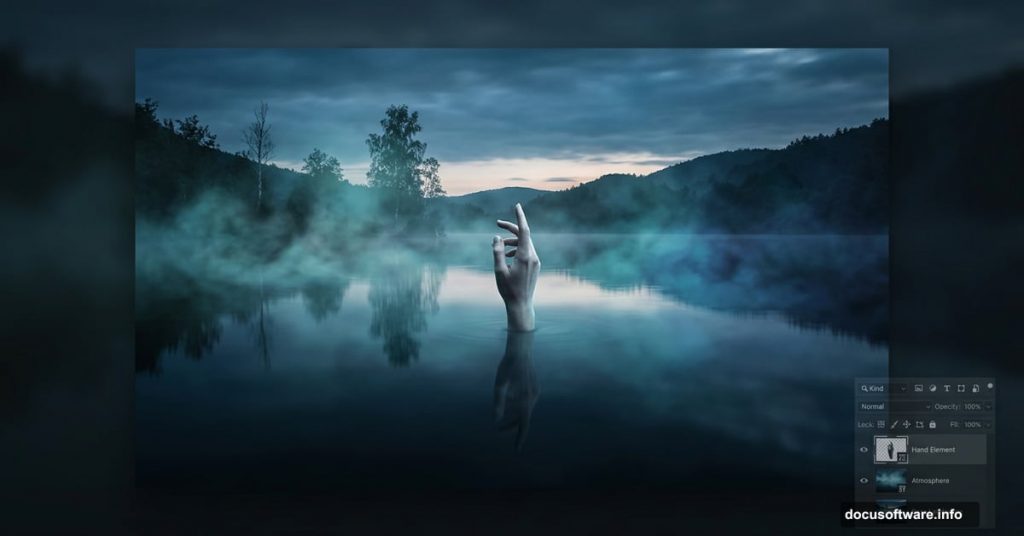
There’s something almost hypnotic about a perfectly blended mystical lake scene. Still water, moody skies, a single hand reaching through the mist. When it all comes together, it feels less like a photo and more like a dream you half-remember.
This tutorial walks you through building exactly that kind of atmospheric composition from scratch. You’ll work with layered images, adjustment layers, and masking techniques to create something genuinely striking. Plus, the skills you pick up here carry over into almost every other photo manipulation project you’ll tackle.
Let’s get into it.
Setting Up Your Canvas
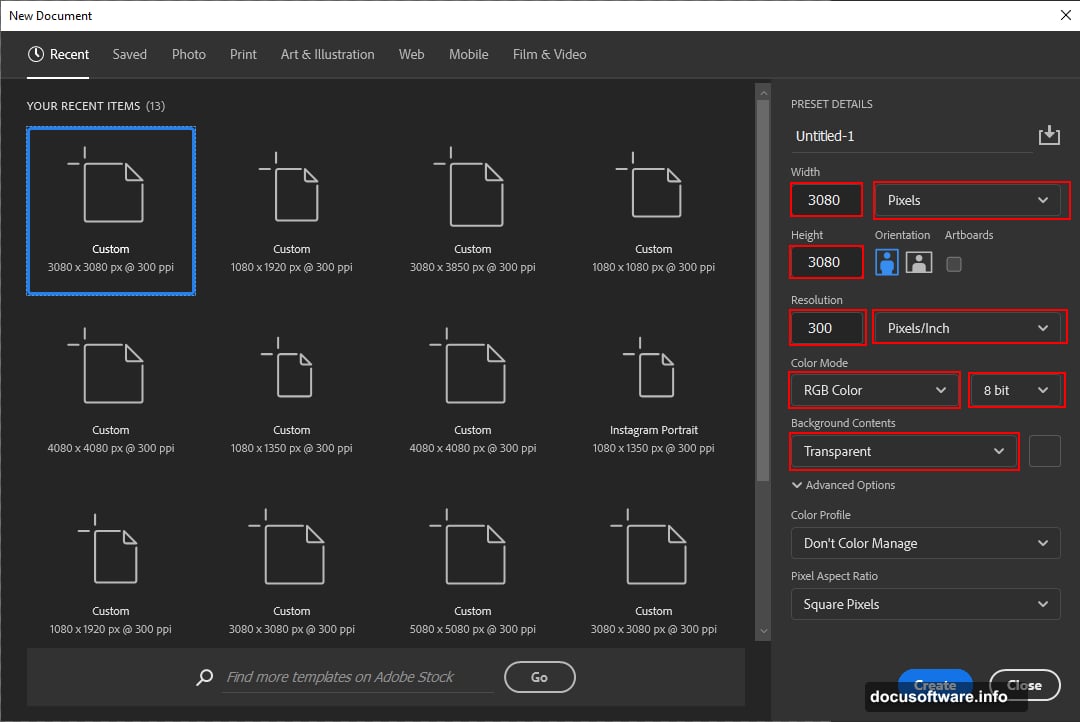
Before anything else, you need the right foundation. Open Photoshop and head to File > New.
Set your canvas to these values:
- Width: 3080px
- Height: 3080px
- Resolution: 300px
- Color Mode: RGB Color, 8-bit
- Background Contents: Transparent
The 300px resolution matters if you ever want to print this or display it at larger sizes. So it’s worth setting correctly from the start rather than upscaling later.
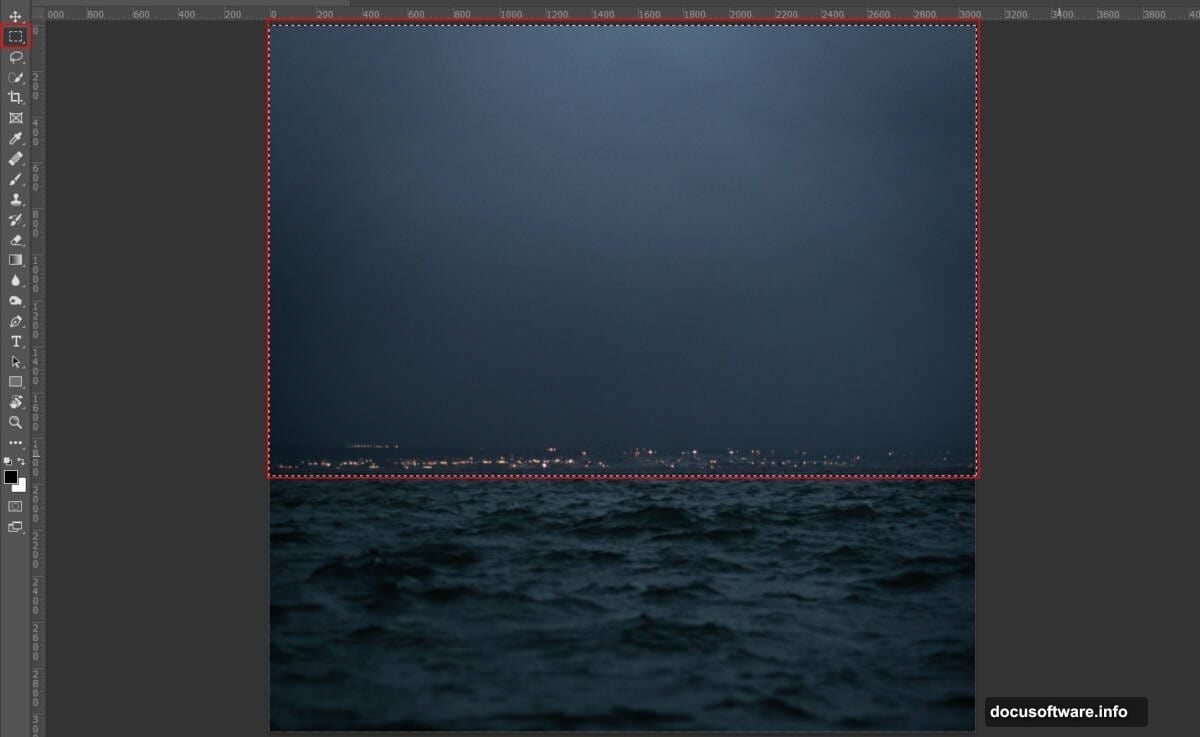
Placing the Ocean Background
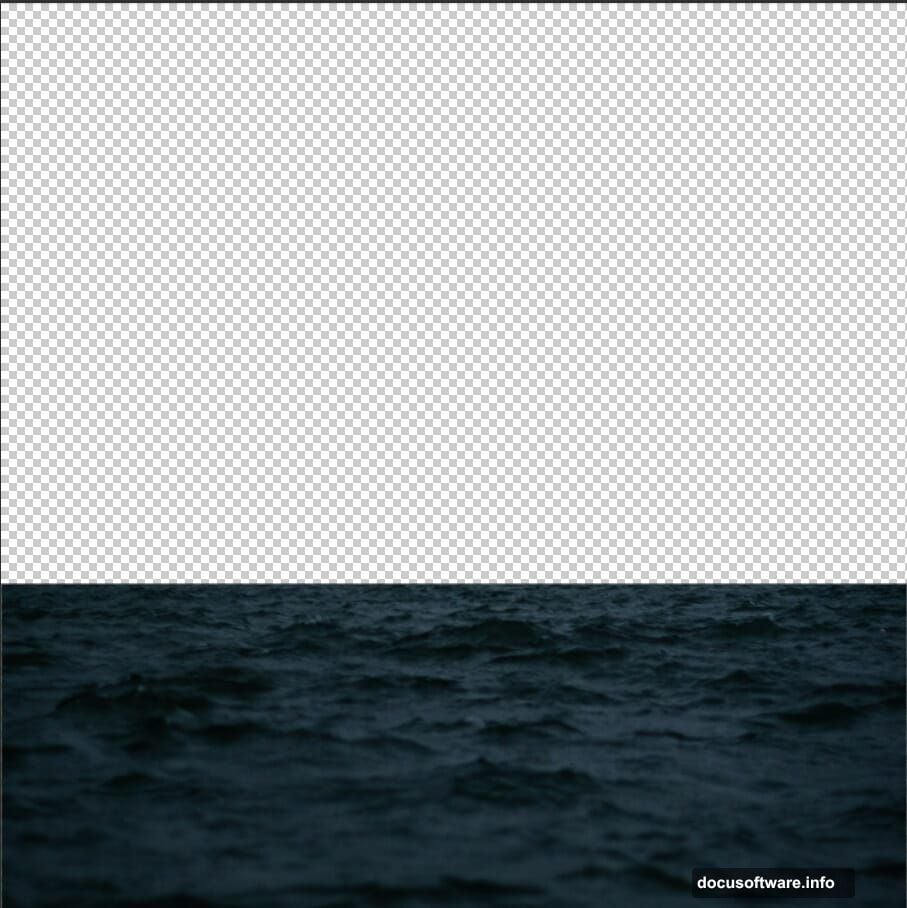
Now comes your first image. Go to File > Place and select your ocean photo. Drop it onto the canvas and use the Transform tool (Ctrl/Cmd + T) to size and position it.
Here’s a quick note on scaling. In older Photoshop versions, hold Alt + Shift to resize all sides together. If you’re on Photoshop CC, just hold Alt and it handles that automatically.
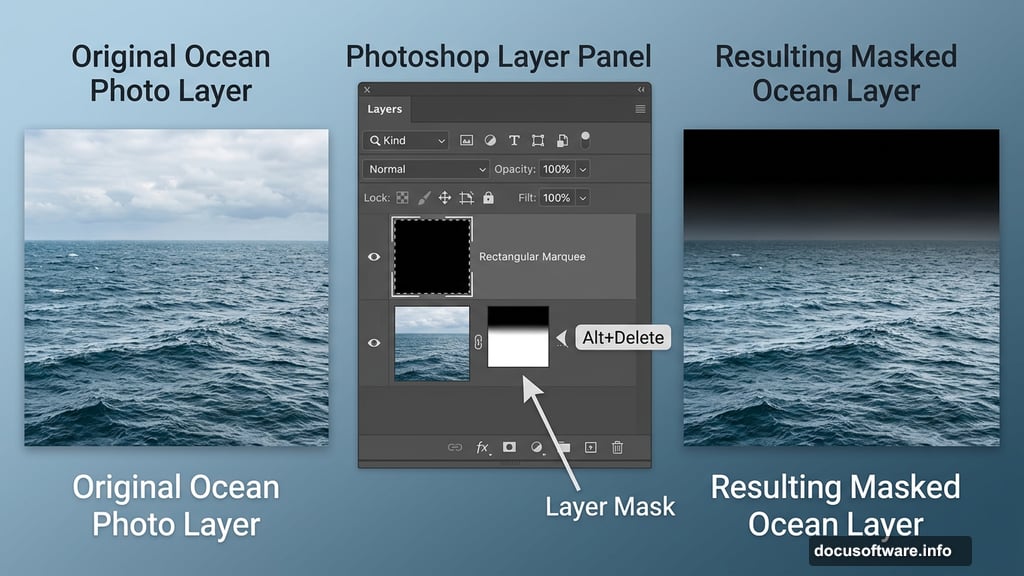
Once positioned, create a layer mask. Select the Rectangular Marquee Tool (M), draw a selection around the sky area, then fill it with black using Alt + Delete. Make sure your layer mask is active and your foreground color is set to black before doing this. The sky disappears, leaving just the water texture you need.
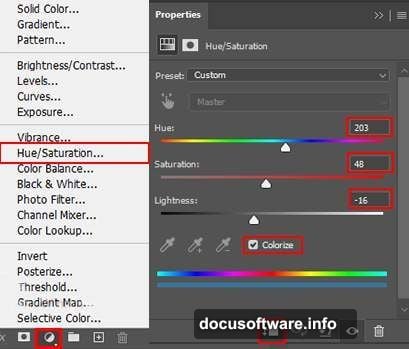
Hue/Saturation Adjustment for the Ocean Layer
Add an Adjustment Layer directly above your ocean layer. Choose Hue/Saturation and clip it to the ocean layer below.
This step lets you start pushing the color toward something moody and otherworldly. Pull the saturation down slightly and shift the hue toward cooler, blue-green tones. You’re not going for realism here. You’re going for atmosphere.
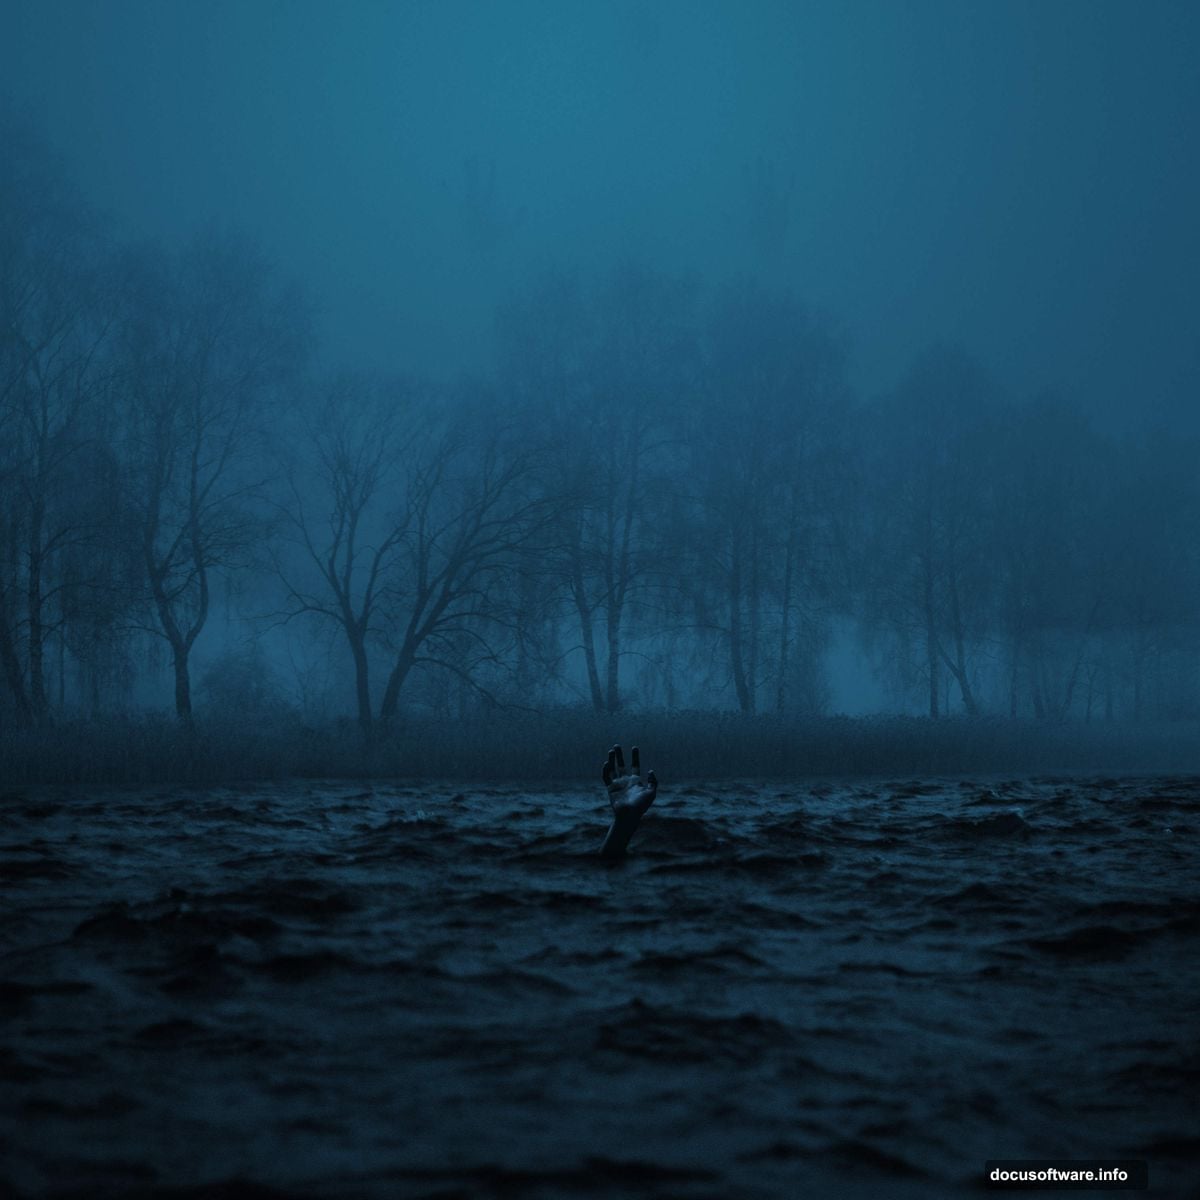
Bringing in the Lake
Repeat the placement process with your lake image. File > Place, position with the Transform tool, and use Alt (or Alt + Shift in older versions) to scale proportionally.
This time, create a layer mask and use the Rectangular Marquee Tool to select the birds and upper water area. Fill that selection with black to crop them out. The goal is a clean water surface that blends naturally with your ocean layer below.
Getting these two water sources to feel like one continuous body of water is the real challenge here. Take your time with the masking edges.
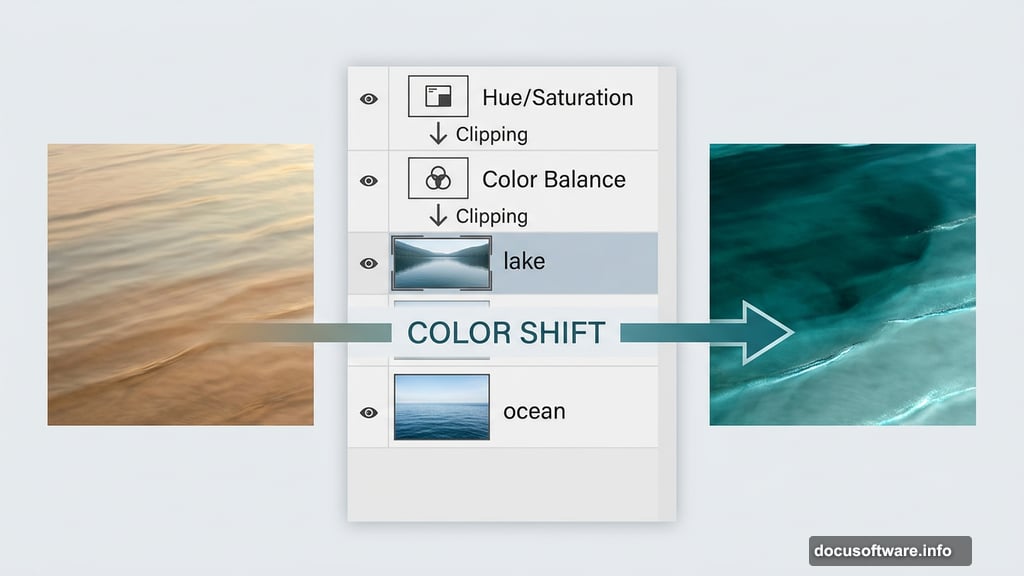
Color Balance and Hue/Saturation for the Lake Layer
Add a Color Balance Adjustment Layer clipped to your lake layer. This is where you push midtones and shadows toward a more eerie, unified palette. Cooler shadows and slightly warmer midtones tend to create that unsettling twilight feeling.
Follow that with another Hue/Saturation layer. At this point you’re fine-tuning. The lake and ocean layers need to feel like they belong together, not like two separate photos stacked on top of each other.
Then add a Curves Adjustment Layer. A subtle S-curve adds contrast and depth without flattening out your shadows.
Cutting Out the Hand
This is where the composition gets interesting. Open your hand image separately using File > Open rather than Place.
Select the Pen Tool (P) and carefully trace around the hand. The Pen Tool creates anchor points as you click. For straight edges, single clicks work fine. For curved areas, click and drag to pull out curve handles that follow the shape of the hand naturally.
When your path is complete, right-click and choose Make Selection. Then create a layer mask from that selection. A clean cutout here makes an enormous difference in how convincing the final image looks. Don’t rush this step.
Adding Mist with Cloud Brushes
Once the hand is placed and positioned in your scene, mist ties everything together. Load your cloud brushes and work on a new layer set to a low opacity, around 20-30%.
Build the mist in layers rather than one heavy stroke. Lighter passes give you more control and a more natural look. Concentrate mist near the water surface and around the hand for maximum eerie effect.
Final Touch with Camera Raw Filter
With all your elements in place, merge or stamp your layers (Ctrl/Cmd + Alt + Shift + E creates a stamped composite). Then go to Filter > Camera Raw Filter.
Here you can push the whole image toward a unified mood. Drop the whites slightly, lift the blacks just a touch to preserve shadow detail, and pull the temperature cooler. The Clarity slider adds that slight gritty texture that makes mystical manipulations feel more tangible and real.
The HSL panel inside Camera Raw also helps. Desaturate the greens and yellows if any sneak through, and boost the blues slightly. You want the viewer’s eye to feel like this world exists somewhere between dusk and deep night.
Bringing It All Together
Photo manipulation like this teaches you something important about Photoshop. The technical steps matter, but the mood you’re chasing matters more. Every adjustment layer decision, every masking edge, every wisp of mist serves the atmosphere you’re building.
This tutorial uses just a handful of core techniques: masking, adjustment layers, the Pen Tool, and Camera Raw. But those same tools appear in nearly every serious Photoshop project. Master them here on something creative, and they’ll feel like second nature when you need them for client work or more complex composites.
The quote that opens this project says something worth sitting with. “You’re stronger than you think you are.” Sometimes that’s the point of art like this. Not just the technique, but the feeling it leaves behind.