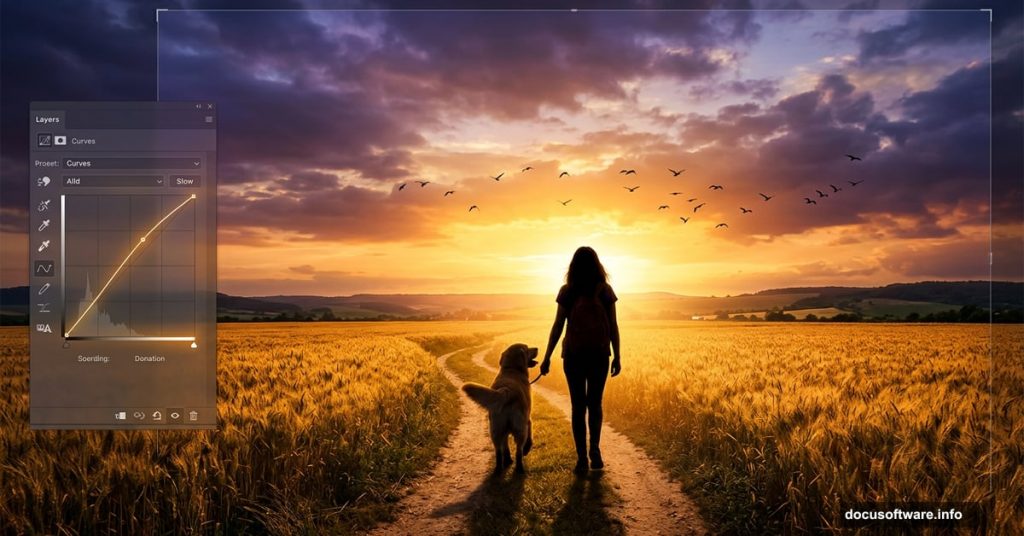
There’s something genuinely moving about a well-crafted sunrise scene. A girl walking home. A dog by her side. Warm golden light spilling across a field. Getting that emotional punch from a photo manipulation takes more than just stacking images together. It takes careful blending, smart light painting, and a few Photoshop tricks that make everything feel like it belongs in the same world.
This tutorial walks you through the full process, from building your base scene to adding the final birds in the sky.
What You’ll Need Before Starting
Gather these resources before opening Photoshop:
- A sky photo
- A field image
- A sign
- A house
- A model photo
- A dog image
- Birds
Once you have everything ready, the whole process flows much more smoothly. So let’s jump in.
Building the Sky and Field Base Scene
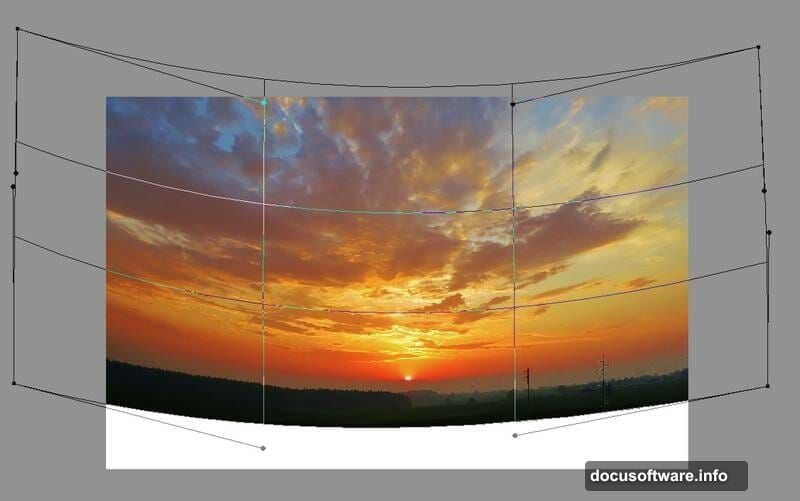
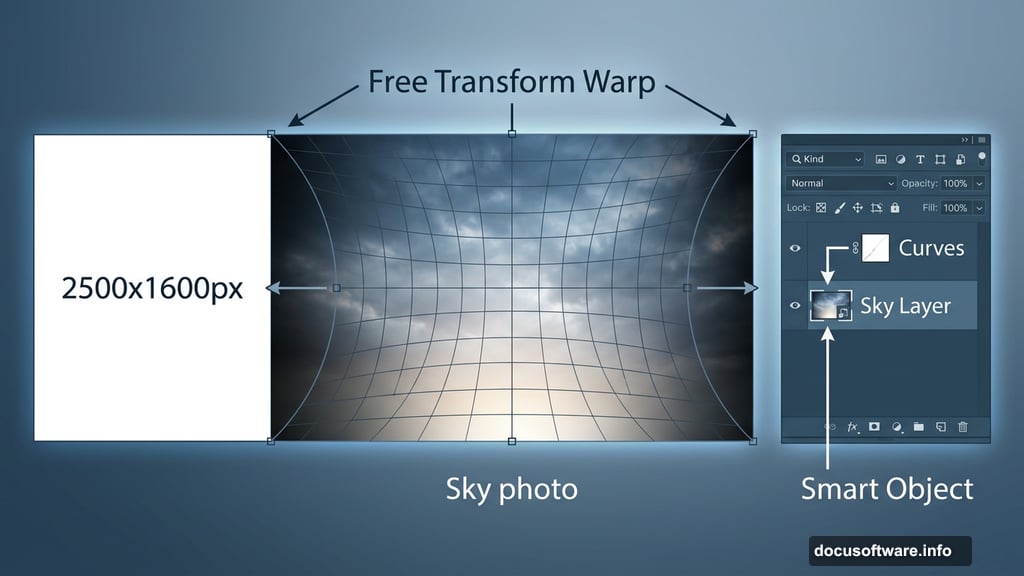
Start by creating a new document in Photoshop. Set it to 2500 x 1600 pixels and fill the canvas with white. This gives you a clean foundation to work on.
Open your sky image and drag it onto the white canvas using the Move Tool (V). Convert this layer to a Smart Object first. Then use the Free Transform Tool (Ctrl+T) and switch to Warp mode. Bend the sky image so it curves naturally across the top of your canvas.
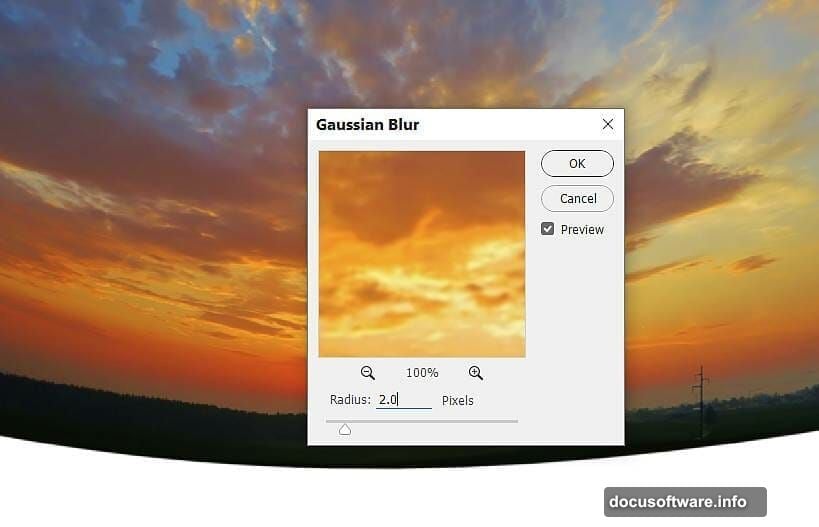
Next, go to Filter > Blur > Gaussian Blur and apply a 2px radius. This softens the sky slightly and helps it blend more convincingly with the elements you’ll add later.
Shaping the Light With Curves Adjustment Layers
Here’s where the emotional atmosphere starts to take shape. Go to Layer > New Adjustment Layer > Curves and set it as a Clipping Mask on your sky layer. Pull the curve down to darken the sky overall.
But you don’t want darkness everywhere. Activate the Brush Tool (B), pick a soft round brush with black paint, and gently erase the darkening effect from the bottom middle of the sky. This keeps the horizon feeling bright and glowing, right where your sunrise light should live.
Add another Curves adjustment layer to deepen the shadows on both sides of the sky. On the layer mask, use a soft black brush to protect the center from getting too dark. The result is a natural vignette that draws the eye inward toward the light.
Placing and Blending the Field
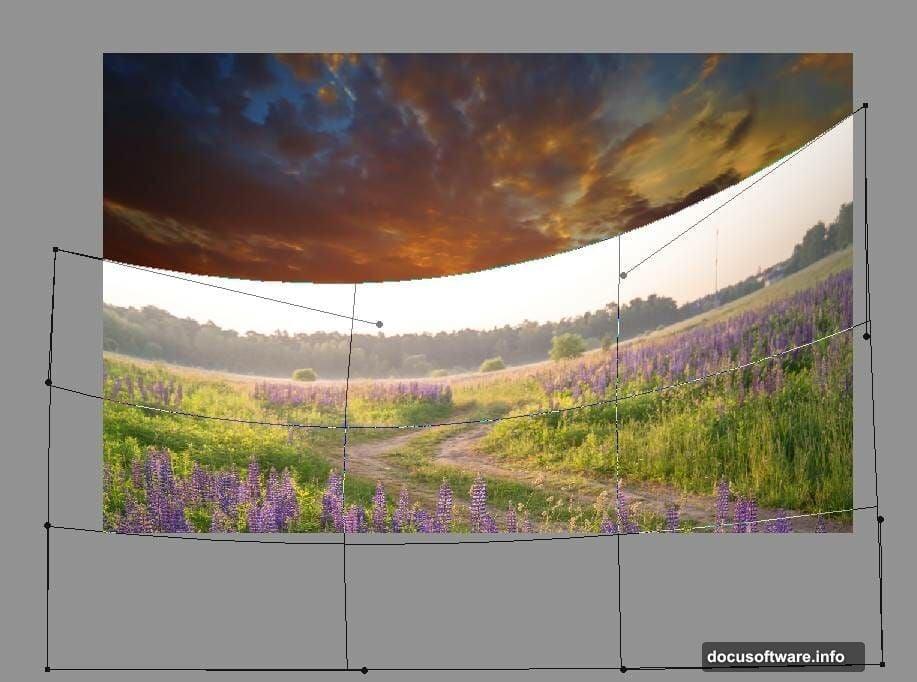
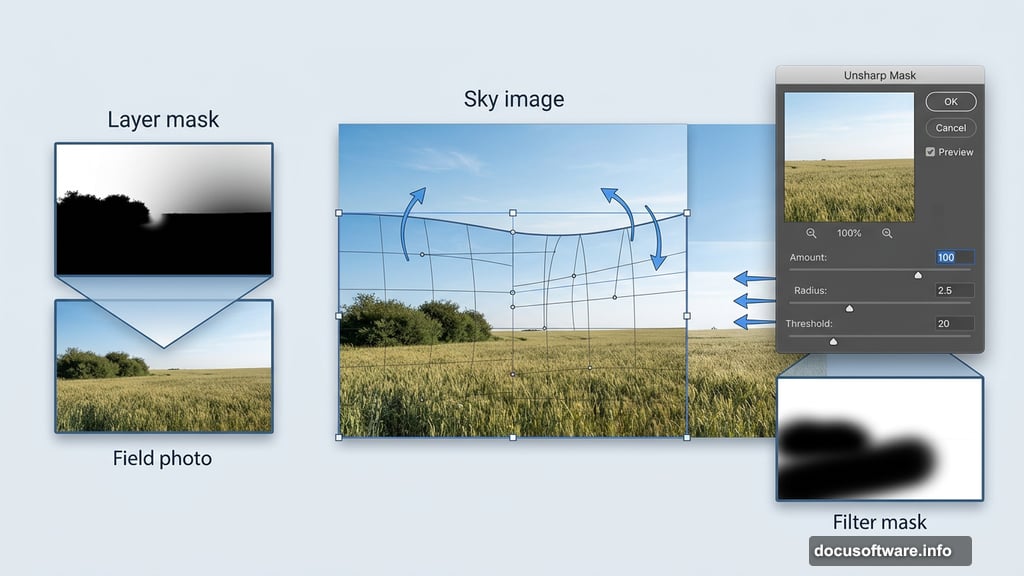
Open your field image and position it on the lower portion of the canvas. Convert it to a Smart Object, then use Ctrl+T in Warp mode to bend the upper edge of the field. This helps it connect seamlessly with the sky.
Click the mask icon at the bottom of the Layers panel to add a layer mask. Use a medium-hard black brush to paint away the sky and bushes from the field image. You only want the ground to show through.
Notice that the background of the field might look softer than the rest of the image. Fix that by going to Filter > Sharpen > Unsharp Mask. Apply the sharpening, then use a soft black brush on the filter mask to protect the foreground and midground areas. You want the sharpening to hit the mid-distance, not the grass closest to the viewer.
Darkening the Field for Mood
A sunrise scene needs contrast between the glowing sky and the cooler, shadowed earth. Add a Curves adjustment layer above the field layer and clip it as a Clipping Mask. Pull the curve down to darken the field overall.
Then create a second Curves adjustment layer specifically targeting the left side. On the layer mask, paint with black on any areas you want to keep at their natural lightness. This asymmetric darkening adds dimension and makes the scene feel less flat.
Adding the Sign, House, Model, and Dog
With your base scene set, bring in each element one by one. Place the sign, house, model, and dog onto separate layers. For each element, take your time matching the lighting direction. Everything in your scene should look like the light is coming from the same point on the horizon.
Use Curves adjustment layers clipped to each element to bring their brightness and contrast in line with the overall scene. Softer edges help objects blend. Sharp edges make them look pasted in.
Pay special attention to the model. Hair is notoriously tricky in photo manipulation. Plan to paint additional hair detail in later steps to integrate her properly with the environment around her.
Painting Light, Hair, and Missing Details
This step separates good photo manipulations from great ones. Create new layers above your elements and paint sunrise light manually using a soft, warm brush set to low opacity. Build up warm oranges and yellows along the tops of objects facing the sky.
For the hair, use a thin brush and short strokes following the natural direction of the hair flow. Pick colors sampled from the surrounding light to make painted strands feel believable.
Fix any missing details you notice. Shadows under feet. Light bouncing off the ground near the house. Small touches like these add up fast.
Adding Birds to Complete the Scene
Birds are the finishing touch that brings the whole composition to life. Place your bird images into the scene and arrange them loosely across the sky. Vary the sizes slightly. Birds farther away should appear smaller and slightly less sharp.
Apply a light Gaussian Blur to the most distant birds. Clip a Curves adjustment layer to the bird group and nudge their brightness to match the bright sky behind them.
Stand back and look at the full scene. If everything reads as a single, emotionally cohesive moment, you’ve nailed it.
Creating sunrise photo manipulations like this gets easier every time you do it. The core skills here, blending layers, painting light, using adjustment layers as Clipping Masks, apply to almost every complex Photoshop scene you’ll ever build. Start with this workflow and you’ll have a solid foundation to take your own compositions somewhere genuinely beautiful.