Adobe Photoshop is packed with AI features right now. And if you’ve ever stared at a long list of AI-powered tools wondering which ones actually do anything useful, you’re not alone.
After spending serious time testing AI image generators across the board, I came into Photoshop’s AI suite with healthy skepticism. “AI-powered” can mean anything from genuinely impressive to borderline comical. So it was a relief to discover that many of Photoshop’s generative AI tools land firmly in the useful category.
This guide focuses on the tools worth your time. Whether you’re a beginner finding your footing or an intermediate user curious about what’s new, these are the features to explore first.
One quick note before you start: you’ll need to agree to Adobe’s AI terms of service, which includes policies prohibiting illegal and abusive uses. Once that’s sorted, you can access these features on the Photoshop desktop app, the web version, and even on mobile.
Firefly Image Generation Inside Photoshop
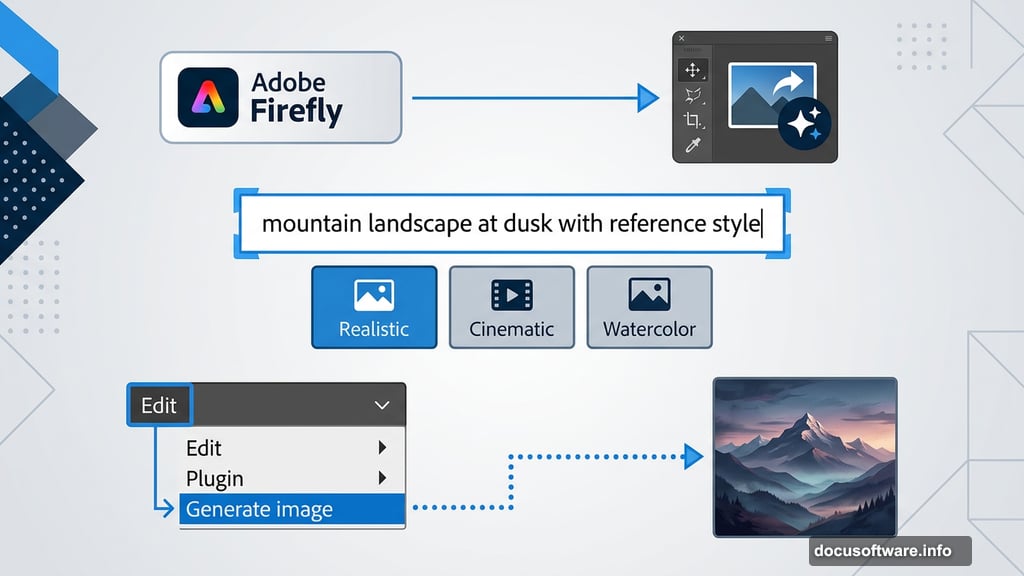
Adobe’s AI image model, Firefly, lives both as a standalone app and directly inside Photoshop. If you’re already working in Photoshop, there’s no reason to switch tabs.

Here’s how to access it. Open your project, then look for the “Generate image” option in the contextual taskbar. You can also find it under Edit, then Generate image. A third option is the toolbar icon that looks like an image with an arrow and sparkle symbol.
From there, type your prompt, choose a style, and upload any reference images you want Firefly to draw from. Then hit Generate. Use the arrows in the taskbar below to flip through different variations.
A few tips that make a real difference: put the most important elements of your prompt first, and don’t shy away from adding detail. If the results miss the mark, resist the urge to endlessly tweak the same prompt. Starting fresh with a new approach almost always works better.
Generative Fill, Expand, and Remove
These three tools are the real stars of Photoshop’s AI toolkit. Each one handles a different editing challenge, and all three are worth knowing.
Generative fill works like a miniaturized AI image generator inside your existing project. Select a region of your image, type a prompt, and Photoshop fills that area with AI-generated content that blends with your surroundings. Find it under Edit, then Generative fill. Use the selection brush to mark your target area, write your prompt, and generate.
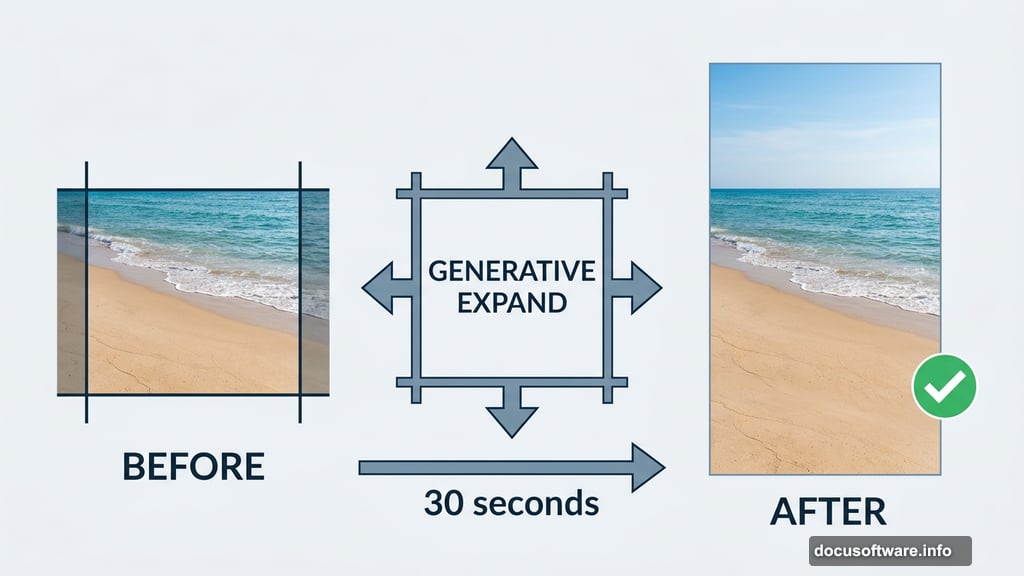
Generative expand solves a problem every photographer knows well: you need more canvas space. Pull out your crop boundaries, enter an optional text prompt for specific scenery, and Photoshop seamlessly extends the image. This tool genuinely shines for resizing photos while keeping the composition intact. For example, adding more sky and sand to a beach shot takes about thirty seconds.
Generative remove is essentially an AI-powered eraser with real intelligence behind it. Select an unwanted object using the object select tool, click generative fill, and type “remove” in the prompt. Alternatively, use the dedicated remove tool found under the spot healing tool menu to manually highlight what you want gone. For removing photobombers or distracting background elements, this tool is excellent.
![A side-by-side comparison showing Photoshop’s generative expand adding sky and sand to a beach photo, then generative fill placing seagulls into the expanded area]
Sky Replacement and Background Generation
Beyond the core generative trio, two other AI tools stand out depending on your project type.
Sky replacement is exactly what it sounds like. Navigate to Edit, then Sky replacement, and choose from preset options ranging from blue skies to dramatic sunsets to options Adobe labels “spectacular.” Once you pick a preset, you can manually fine-tune brightness and other elements. Results vary by photo, but landscape and architectural shots tend to respond well.
Generate background works best for product photography or any shot where your main subject needs a fresh setting. Remove the background using the contextual taskbar, then click generate background. Solid colors and patterned backgrounds come out polished. City scenes can look a bit artificial, so stick to simpler backgrounds for the cleanest results.
A Few More Tools Worth Mentioning
Depending on your workflow, you might also explore neural filters for more detailed portrait and photo editing. Designers working on curved shapes will find the curvature pen tool helpful for creating smooth, consistent arcs.
Adobe is also rolling out more AI features throughout the year, including an AI assistant that can automatically rename all your layers, which sounds small but will genuinely save time on complex projects.
What Works, What Doesn’t
Photoshop’s AI suite performed better than expected overall. But context matters. Each tool has a specific job, and getting good results means understanding what that job is.
Generative expand and generative remove were the consistent standouts. They solve real, frustrating editing problems quickly. Sky replacement worked well on some images and fell flat on others, depending on lighting and composition. The AI image generator via Firefly produced solid results with detailed prompts but needed clear direction to avoid generic output.
None of these tools will replace deep Photoshop expertise. But for beginners navigating a complex program, or experienced users who want to speed up specific tasks, there are genuinely useful options here. You won’t use every one of them on every project. But when you need them, several of these tools are remarkably capable.