Creating a surreal fantasy portrait sounds intimidating. But break it into stages and the whole process becomes surprisingly manageable, even fun.
This walkthrough follows Maria Semelevich’s multi-layered photo manipulation technique, where a dramatic landscape transforms into a full enchantress scene complete with atmospheric lighting, realistic shadows, and a moody color grade. Whether you’re new to matte painting or just looking to sharpen your compositing skills, there’s a lot to pick up here.
Let’s walk through how it all comes together.
What You’re Actually Building
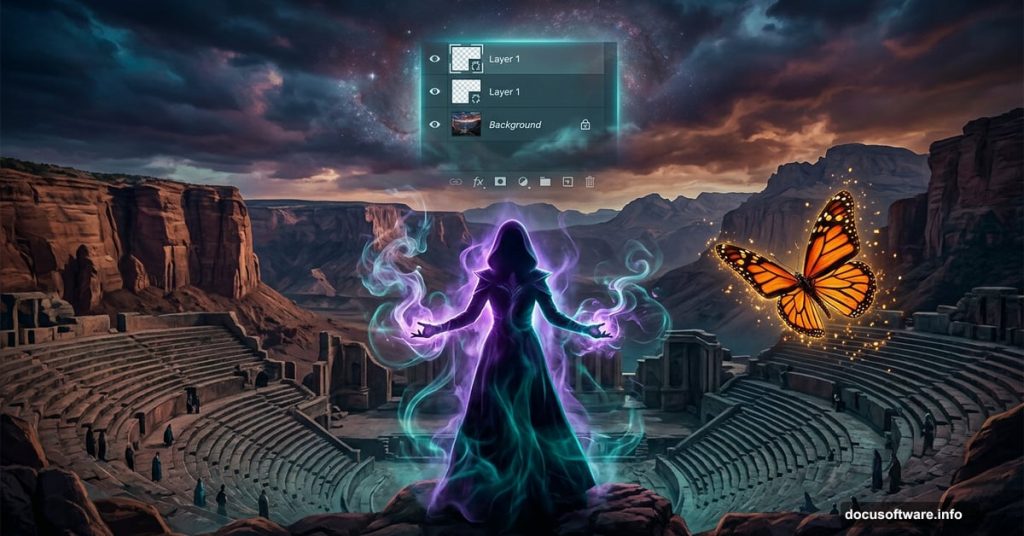
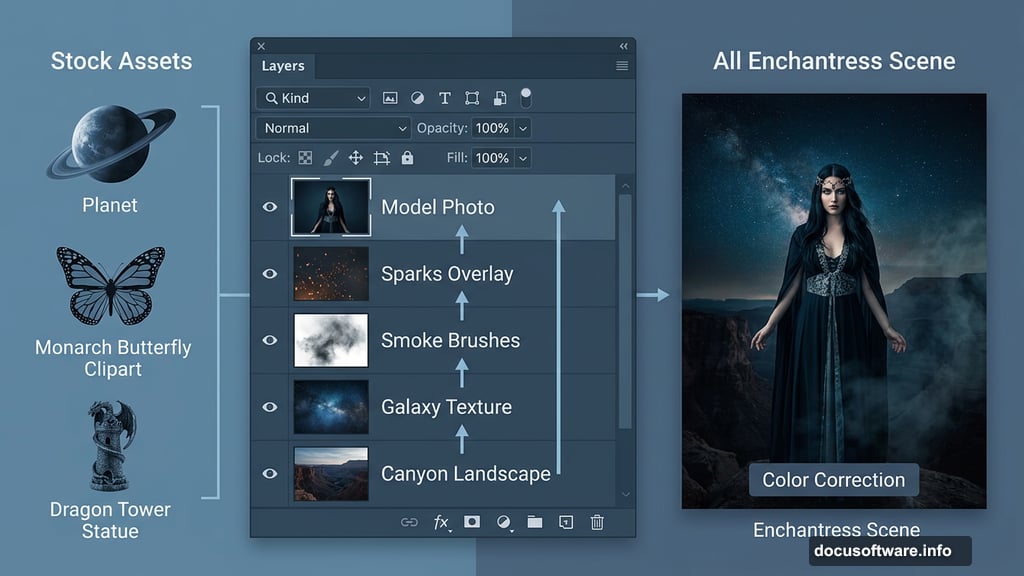
The finished piece tells a story. Think vast amphitheater landscape, a central enchantress figure, mystical creatures, swirling smoke, and a bleak, cinematic color tone tying everything together.
The workflow moves in four clear stages. First, you build the landscape base. Then you layer in magical props and atmospheric elements. Next comes the model and animal companions. Finally, you tackle shadows, lighting, and color correction.
You’ll need any version of Photoshop, the right stock resources, and honestly, a good mood helps too.
Stock Resources to Grab First
Before opening Photoshop, collect everything you need. The tutorial uses these assets:
- Galaxy textures
- Ocean waves and canyon landscape images
- A dragon tower statue
- Monarch butterfly clipart
- Two model photos
- A dark angel image
- Smoke brushes
- Planet and mandala graphics
- Sparks overlays
Having everything downloaded beforehand saves a lot of mid-tutorial scrambling. Trust me on that one.
Setting Up Your Canvas
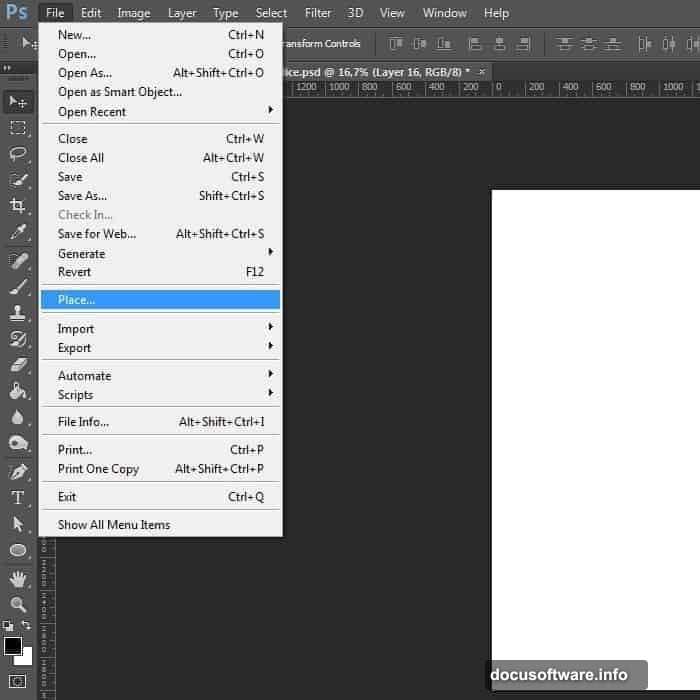
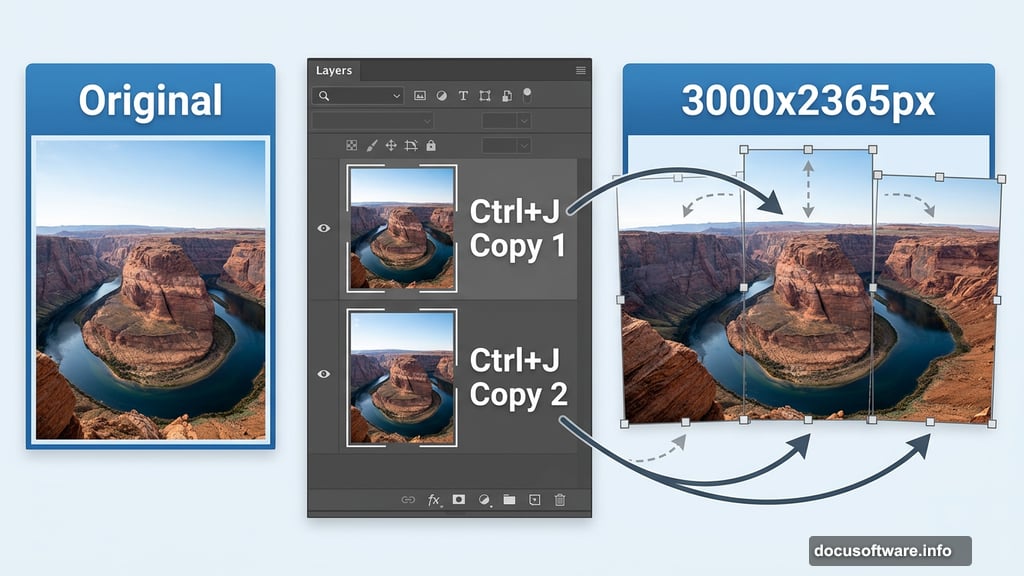
Open Photoshop and create a new document via File > New (or Ctrl+N). Set the dimensions to 3000 pixels wide by 2365 pixels high. Maria named hers “Incantation,” which feels right for this kind of project.
That canvas size gives you plenty of room to work. Photo manipulations at smaller sizes tend to look cramped and lose that epic quality you’re going for.
Building the Landscape Base
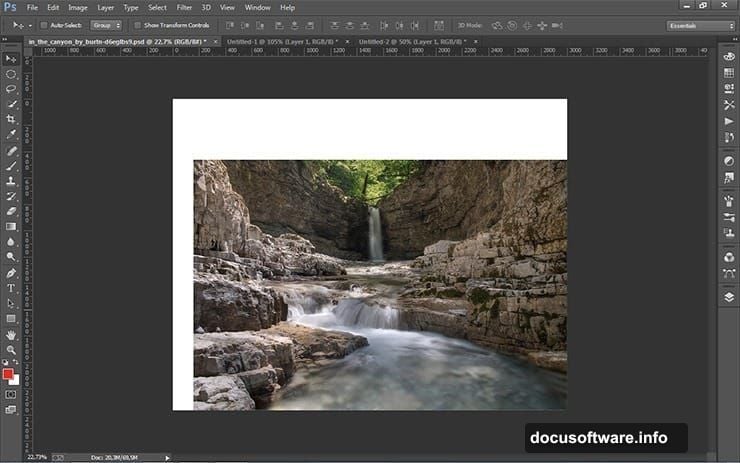
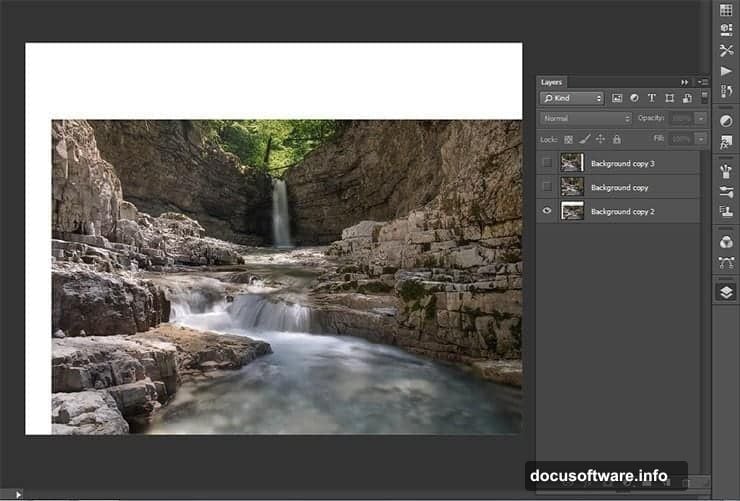
This is where the amphitheater illusion starts taking shape. Go to File > Place and bring in your canyon landscape image. Position it in the lower right corner without resizing it yet.
Now duplicate that landscape layer twice using Ctrl+J. Transform the first copy (Ctrl+T) to slightly larger than your canvas. Then repeat the same step with the second copy, sliding it left to fill the opposite side of the frame.
Why this approach? Stretching one image across the full canvas rarely looks realistic. Instead, using slightly scaled and repositioned duplicates creates depth and natural variation across the scene. The landscape starts feeling more like an actual place.
Adding Layer Masks for Blending
Once your landscape layers are in position, add a layer mask to the first duplicate by clicking the layer mask icon at the bottom of the Layers panel. This lets you paint away harsh edges between the landscape copies, blending them naturally into each other.
Soft brushes at low opacity work best here. Build up the blend gradually rather than making one heavy stroke. This patience pays off massively in the final result.
Compositing Depth and Mystery
The amphitheater feeling comes from how you stack and position elements. Each addition, whether ocean waves, galaxy textures, or the dragon tower statue, needs to respect the established light source and perspective of your base landscape.
This is the part where many composites fall apart. Dropping a dragon tower into a scene with different lighting than everything else immediately breaks the illusion. So pay attention to where shadows fall in your landscape and match every new element accordingly.
The galaxy texture typically works as a sky replacement or glow overlay. Planet and mandala graphics add surreal scale. Stack these on separate layers so you can adjust opacity and blending modes independently.
Working With the Model and Animals
Bringing in your model layers requires careful masking. Use the Pen tool or Select Subject for a clean initial selection, then refine edges around hair and fine details. Sloppy masking here will undermine all the landscape work you built below.
Position the model centrally to establish her as the focal point. The enchantress needs to feel rooted in the scene, not floating on top of it. Matching her lighting to the environment is critical, so plan to add shadows and highlights manually on separate layers once she’s placed.
The butterfly and dark angel elements layer on top to suggest the enchantress has summoned or commands these creatures. Smoke brush overlays help sell the magical atmosphere and also cleverly hide any masking edges that aren’t quite perfect.
Shadows, Lighting, and Atmosphere
This stage separates flat composites from genuinely convincing ones. Create a new layer above each element, set it to Multiply blending mode, and paint shadows using a soft brush loaded with dark brown or black.
For the atmospheric painting layer, create a new layer at the top of your stack and paint in soft color washes using Screen or Overlay modes. Warm light from below, cool light from above, and subtle rim lighting on the model all add cinematic depth.
Also consider adding a subtle vignette. Darken the edges of the canvas to naturally draw the eye toward the enchantress at center. It’s a simple trick but effective every time.
Color Correction and the Final Tone
The bleak, moody color grade ties the whole scene together. A few adjustment layers stacked at the top of your document handle this cleanly.
Start with a Hue/Saturation layer to desaturate slightly. Then add a Color Balance layer to push cooler tones into the shadows and midtones. Finally, a Curves adjustment can deepen the contrast and add that final cinematic punch.
Sparks and glow overlays applied last, above color correction, keep their vibrancy while everything beneath takes on the moody tone. This ordering matters, so add your decorative elements before your color grade for best results.
Why This Tutorial Rewards Patient Work
This is a long process. Brian Jones, one reader who followed the full tutorial, put it perfectly: “Once you get into all the layers, it is amazing what you can pull out of the other end.”
That’s the honest truth about complex Photoshop composites. The first few steps feel slow. Then suddenly everything starts connecting and the image takes on a life of its own. Stick with it through the tedious masking stages and the payoff is real.
The techniques here, layered masking, atmospheric painting, matched lighting, and tonal grading, apply to virtually any photo manipulation project you’ll tackle after this one. Think of this enchantress scene as a crash course in the full compositing workflow rather than just one isolated piece.
Give it a try. The results might genuinely surprise you.