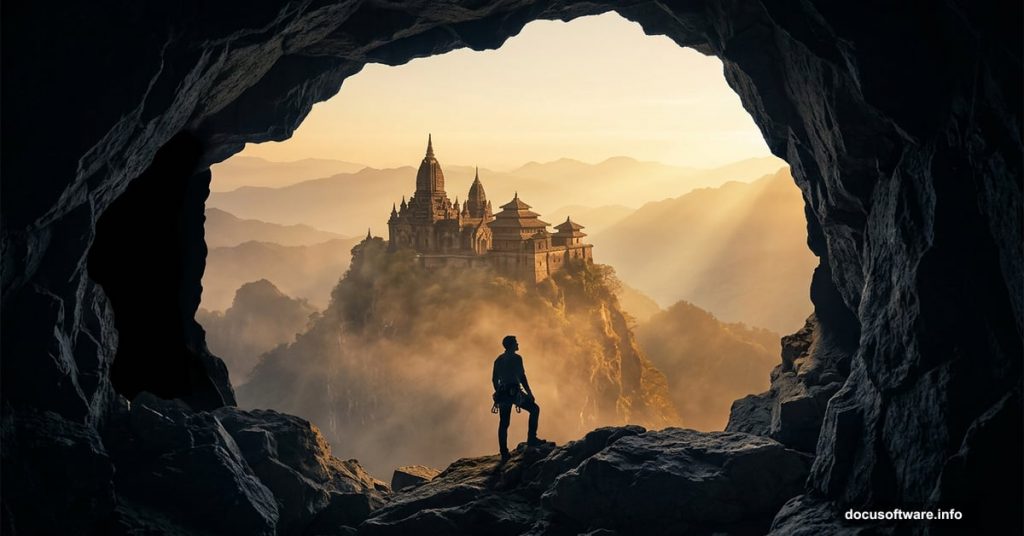
Picture a lone climber perched inside a dramatic cave opening, gazing out at a towering temple rising from a misty mountaintop. That’s the kind of cinematic scene that stops people mid-scroll. And the best part? You can build it yourself in Photoshop using photo manipulation techniques that look far more complex than they actually are.
This tutorial walks you through the entire process. You’ll construct a cave frame from stone photos, layer in mountains and sky for a convincing background, then place a climber, temple, hawk, and ivy to bring the whole story to life. A warm color tone effect ties everything together at the end.
Let’s get into it.
Sketch Your Vision Before Touching Photoshop
Seriously, don’t skip this step. A quick thumbnail sketch saves hours of confusion later.
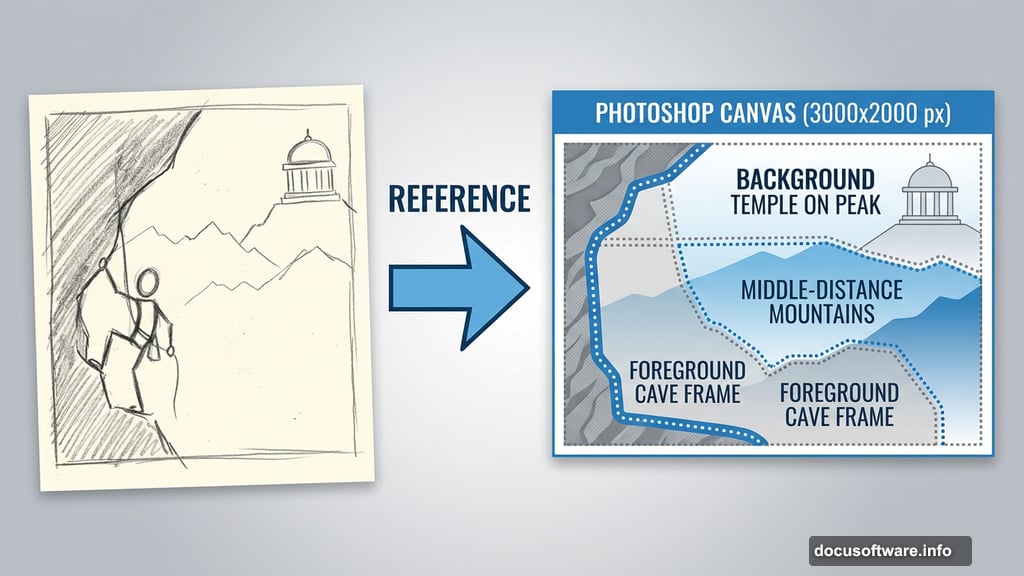
Your sketch doesn’t need to be pretty. Stick figures and rough shapes work fine. The goal is giving yourself a reference so you know which photos to gather and where each element lives in the final composition.
For this scene, you’re building a cave frame in the foreground, mountains in the middle distance, and a temple on a peak in the background. The climber sits inside the cave opening, creating a natural focal point that draws the eye outward.
Setting Up Your Photoshop Document
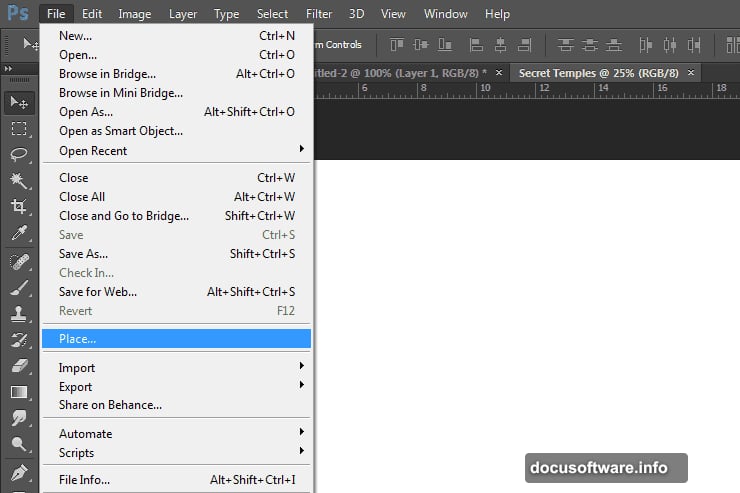
Open Photoshop and create a new document via File > New (or Cmd/Ctrl + N). Set the canvas to 3000 pixels wide by 2000 pixels high. This gives you plenty of resolution to work with detailed elements without things getting muddy.
Once your blank canvas is ready, go to File > Place to start bringing in your photos. Work through them one at a time rather than dumping everything in at once. That approach keeps things manageable.
Adding and Stretching the Sky
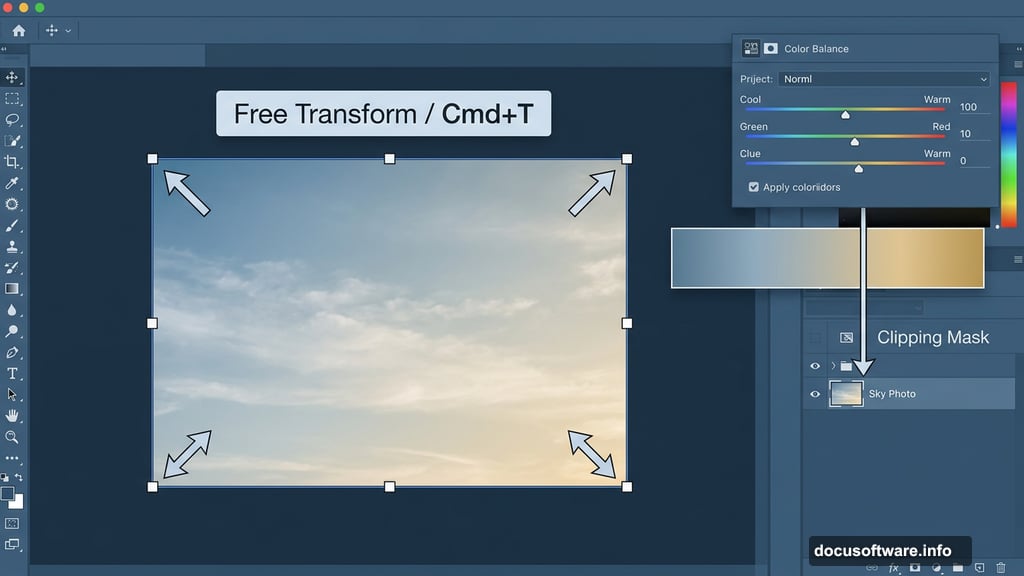
Place your sky photo first. It becomes the foundation everything else sits against. After placing it, Photoshop drops you straight into Free Transform mode, which is exactly where you want to be.
If Transform doesn’t activate automatically, press Cmd/Ctrl + T or head to Edit > Transform > Scale. Drag the corner handles to stretch the sky across your entire canvas. You want full coverage here with no blank edges showing through.
Warming Up the Sky With Color Balance
A raw sky photo often looks too cool or neutral for a dramatic scene like this. Adding a Color Balance adjustment layer fixes that fast.
Go to Layer > New Adjustment Layer > Color Balance. Clip it to your sky layer so the adjustment only affects that element and nothing else. Nudge the sliders toward warmer tones, pushing slightly into the yellows and reds. You’re not going for a sunset exactly, more of a golden atmospheric glow that hints at warmth.

This small adjustment makes everything placed in front of the sky read as part of the same light environment, which is crucial for believable photo manipulation.
Organizing Layers Into Groups
Here’s a habit that will save your sanity on complex compositions like this one. Before adding more elements, group your sky layers together.
Select all the sky-related layers, then drag them to the folder icon in the Layers panel. Alternatively, select them and press Ctrl/Cmd + G. Name the group “Sky.” Clear and simple.
You’ll repeat this process for every major element: cave stones, mountains, temple, climber, hawk, ivy, and color effects. By the end, your Layers panel looks clean and navigable rather than a chaotic stack of unnamed layers. Trust me, when you need to go back and tweak something, this organization pays off massively.
Building the Cave Frame With Stone Photos
This is where the magic starts. The cave frame creates that natural vignette effect that pulls viewers into the scene.
Place your stone photos one at a time. Position them around the edges of the canvas to suggest rough cave walls. Use layer masks to blend the edges so stones feel like they grow organically from the frame rather than sitting on top of it. A soft black brush on the mask erases hard edges gradually.
Pay attention to light direction. Your cave stones should look darker on the interior edges and catch whatever ambient light spills in from outside. This consistency makes the cave feel like a real physical space rather than a collage.
Placing Mountains and Building Depth
Good photo manipulation creates a convincing sense of depth. Mountains in the midground help achieve that.

Place your mountain photos behind the cave frame layers but in front of the sky. Scale them so peaks rise naturally from the bottom of the composition. Use soft masks to fade the mountain bases into mist or atmosphere, which pushes them visually further back in the scene.
Two mountain photos layered with slightly different opacities and positions create that hazy, receding landscape effect you often see in fantasy-style artwork.
Adding the Temple, Climber, Hawk, and Ivy
Now the storytelling elements arrive. Place the temple on a mountain peak in the middle distance. Scale it so it reads as genuinely massive but doesn’t overwhelm the composition.
The climber goes inside the cave opening. Position them so they’re clearly looking out toward the temple. Matching the light direction on the climber to your scene lighting is critical here. If the light in your cave comes primarily from the opening, the climber’s exposed side should be slightly brighter than the side facing the cave interior.
For shadows, create a new layer set to Multiply blending mode and paint soft dark areas where the climber and other elements meet surfaces. This grounds them physically in the scene.
The hawk adds movement and scale reference. A bird in flight near the cave opening reinforces the sense of open air beyond. The ivy draped along stone edges adds organic texture that makes the cave feel ancient and overgrown rather than assembled from separate photos.
One particularly useful technique for repositioning figures is the Puppet Warp tool. It lets you bend and adjust limbs on the climber photo without distorting the whole image. If the climber’s arm angle doesn’t quite match your intended pose, Puppet Warp fixes that elegantly. Many people never discover this tool until a tutorial points them toward it, and it genuinely opens up new possibilities for figure adjustment.
Applying the Final Warm Color Tone
With all elements in place, a global color treatment unifies everything into a single cohesive image.
Add a Color Balance adjustment layer at the very top of your layer stack without a clipping mask this time. You want it to affect the entire composition. Push warmth across shadows, midtones, and highlights. The goal is a consistent amber-gold atmosphere that makes the scene feel like it’s bathed in late afternoon light filtering through the cave entrance.
You can also add a subtle Curves adjustment to deepen the shadows slightly and boost midtone contrast. This gives the final image that polished, dramatic look that separates solid photo manipulations from truly cinematic ones.
What Makes This Technique Worth Learning
Beyond this specific scene, the techniques here apply everywhere in photo manipulation. Masking for seamless blending, Multiply layers for realistic shadows, Color Balance for atmosphere control, and smart layer organization all transfer directly to your next project.
The Puppet Warp tool alone is worth the price of admission for anyone who regularly works with figures. It solves positioning problems that used to require hunting for a perfectly posed stock photo.
Start with the sketch. Build methodically. Group your layers obsessively. And don’t rush the lighting. Those shadow details are what make viewers stop and wonder whether this place might actually exist somewhere.