Creating atmospheric photo manipulations is one of the most satisfying things you can do in Photoshop. And a mysterious forest scene? That’s the perfect project to push your skills forward.
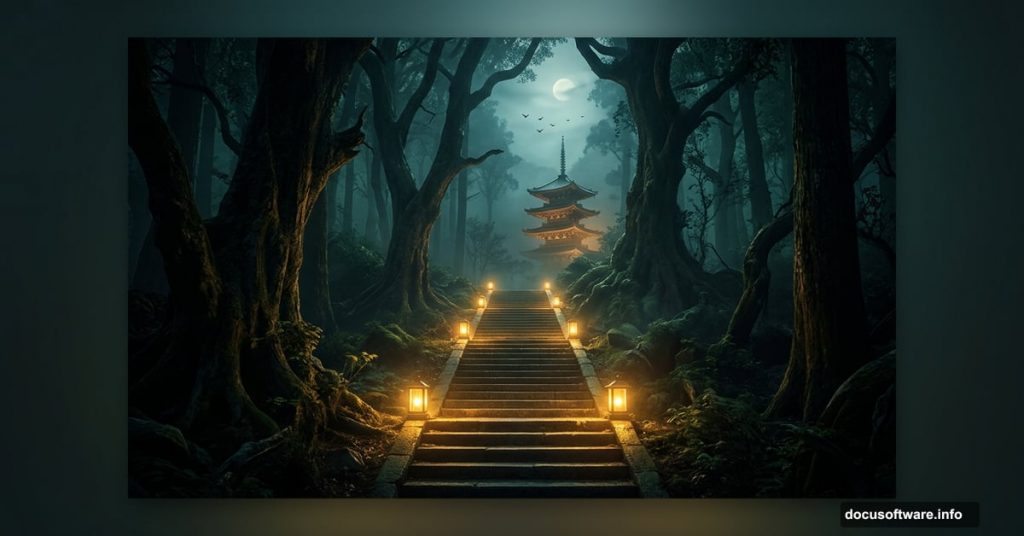
This tutorial walks you through building a moody, layered forest composition from scratch. You’ll combine a forest backdrop, a stone staircase, a pagoda, an entrance, birds, and glowing lamps into one cohesive scene. Plus, you’ll use adjustment layers and lighting effects to tie everything together with a dark, cinematic feel.
Here’s what you’ll need before diving in: a forest image, a staircase photo, a pagoda, an entrance asset, a bird, and a lamp. Grab those resources, open Photoshop, and let’s get started.
Setting Up Your Forest Base
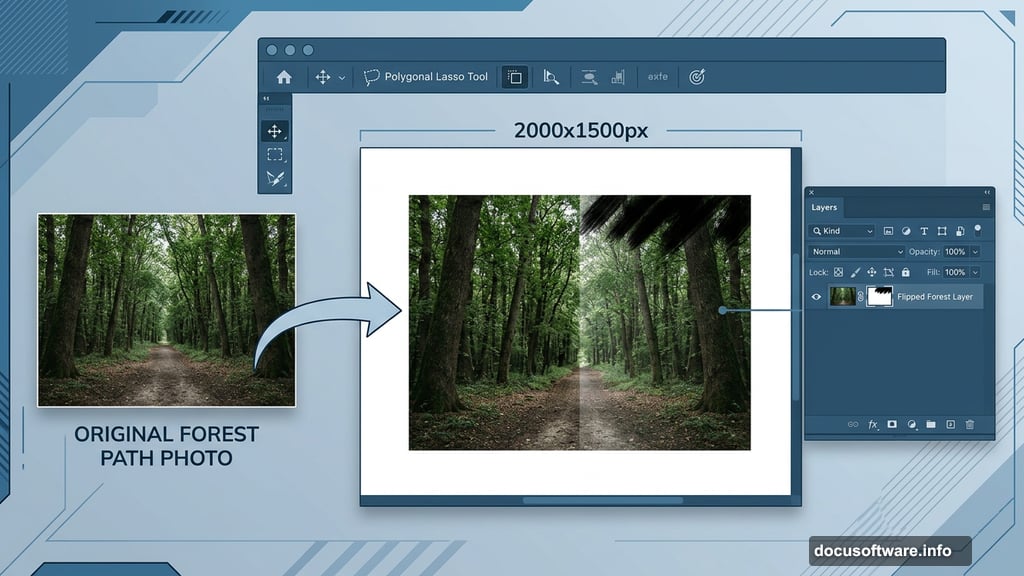
First, create a new document at 2000×1500 pixels and fill it with white. Open your forest image and drag it onto the canvas using the Move Tool (V).
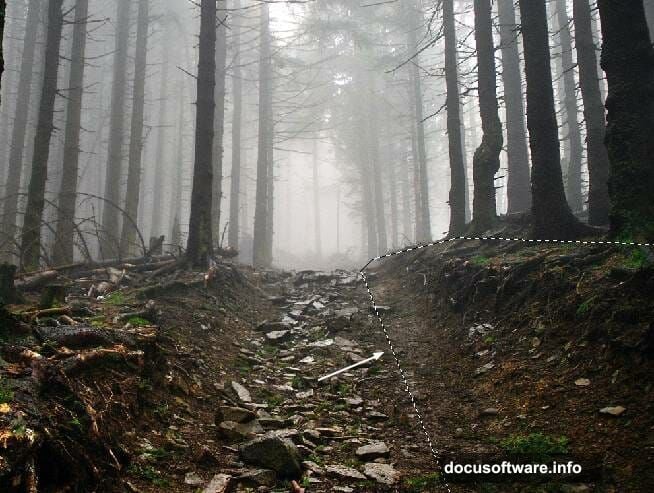
Now here’s a clever trick to fill out the forest path naturally. Activate the Polygonal Lasso Tool (L) and select the right side of the forest path. Press Ctrl+J to duplicate that selection into its own layer. Then flip it horizontally using Edit > Transform > Flip Horizontal. Move this flipped piece to the left side of the forest to create a more symmetrical, enclosed path.
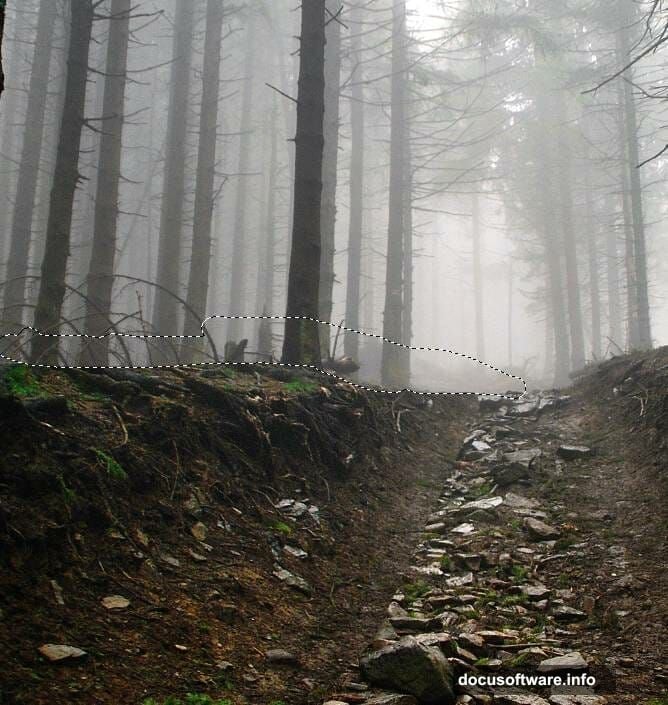
Add a layer mask to this flipped layer. Select the Brush Tool (B), choose a medium-hard round brush, and paint with black to erase the top edge of this piece. That blends it naturally into the existing forest without any hard, visible seams.
Building the Staircase Foundation
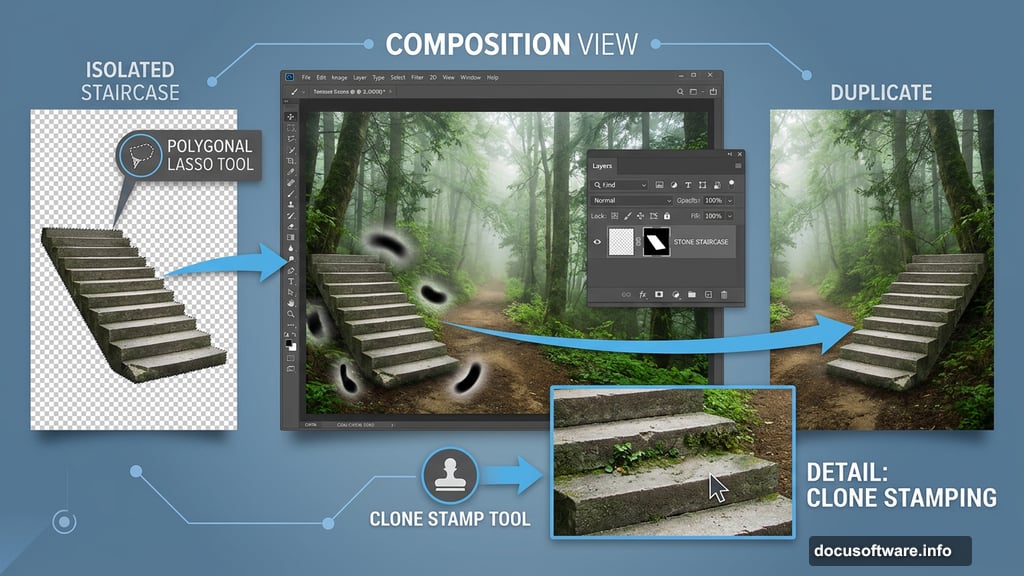
Open your staircase image and use the Polygonal Lasso Tool to isolate just the staircase section. Drag it into the lower portion of your main canvas.
Add a mask to this layer immediately. Use a soft black brush to erase the wall on the left side and blend the right wall smoothly with the existing ground. The goal here is seamless integration, so take your time softening those edges.
Next, duplicate this staircase layer and flip it horizontally. Position it on the right side of the forest path. Use both soft and medium-hard black brushes to refine the mask further. The combination of brush hardness gives you control over which edges stay crisp and which fade gently.
Filling Gaps and Refining Edges
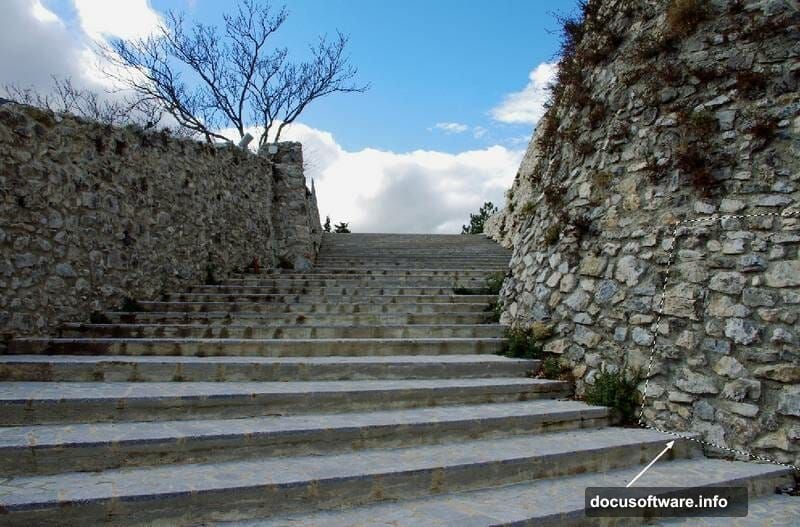
Go back to your original staircase image and cut out a section of the wall. Bring it into your scene and place it at the right edge of the forest to fill any gaps in the existing wall.
Use the Free Transform Tool (Ctrl+T) to distort this wall piece so it matches the perspective and angle of the surrounding elements. Then add a mask and use a soft black brush to blend it naturally with the surface beneath it.
Here’s a small but important detail. Create a new layer and grab the Clone Stamp Tool (S). Use it to remove any plants sitting on one of the left-side staircase steps. Clean steps read more clearly and look more intentional in the final composition.
Organizing Staircase Layers with Adjustments
Select all your staircase layers plus the cloning layer. Press Ctrl+G to group them together. Set the group blending mode to Normal at 100% opacity.
Inside this group, add a Curves adjustment layer. Pull the curve down to darken the staircase area. Then, on the Curves layer mask, paint with a soft black brush over the upper portion of the staircase. That removes the darkening effect from the top section, keeping the lighting gradient feeling natural rather than flat.
This technique of grouping and adjusting within groups is worth remembering. It keeps your layer panel organized and lets you apply adjustments that only affect specific elements in your scene.
Adding the Pagoda and Entrance
With the staircase foundation solid, the next phase brings architectural interest into the midground. Place your pagoda asset into the scene, positioning it deep in the forest path to create a sense of distance and mystery.
Scale and position it carefully. Objects sitting deep in a composition should feel slightly smaller and slightly more desaturated than foreground elements. That’s how your eye reads depth naturally.
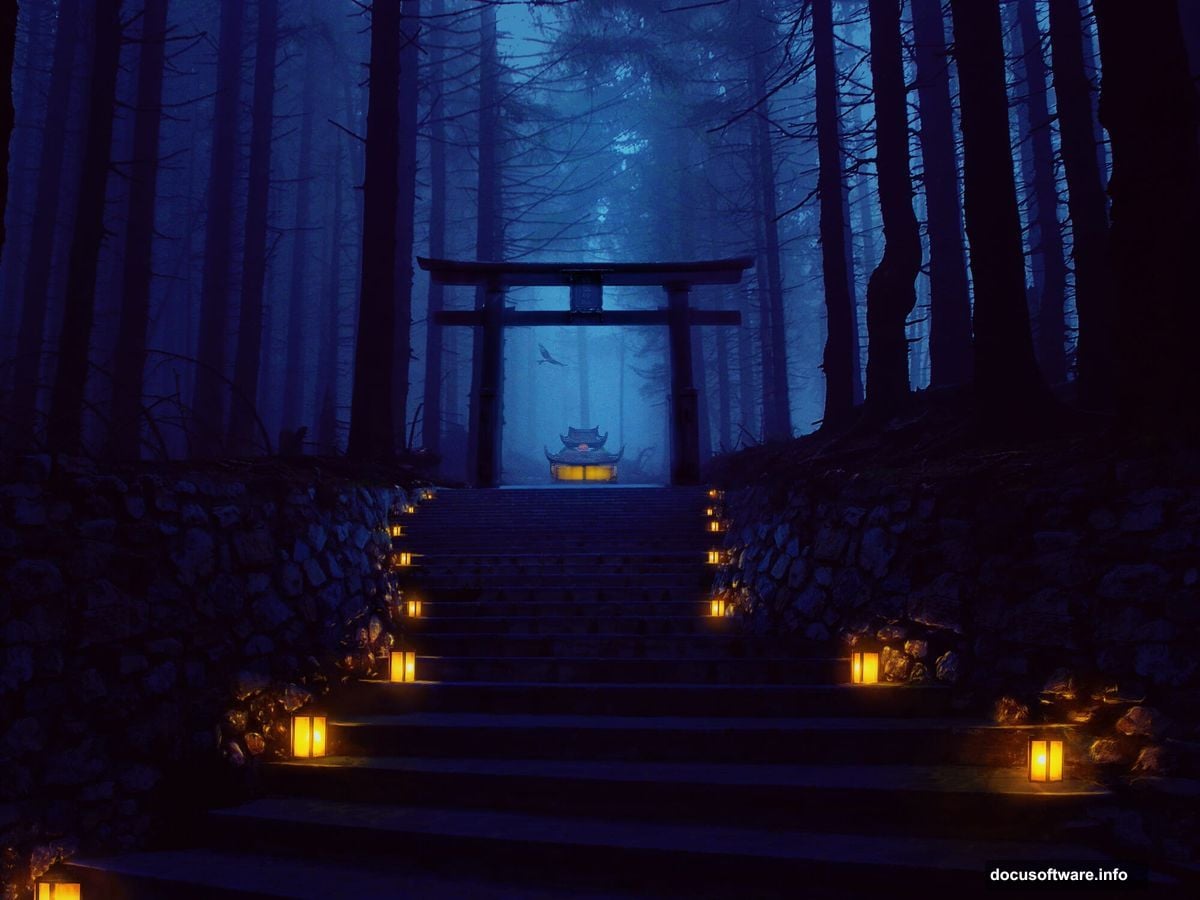
Bring in the entrance element next. Use masking to blend its edges into the surrounding forest. Pay attention to where light would logically fall and adjust your masks accordingly. Hard edges on naturally lit objects break the illusion immediately.
Placing the Bird and Lamps
A single bird placed near the entrance adds life and scale to the scene. It also draws the viewer’s eye exactly where you want it. Add a mask and refine the edges carefully, especially around the wings where detail matters most.
The lamps come next and they’re central to the whole mood. Import each lamp asset and position them along the staircase or pathway. Once placed, create new layers above each lamp and use a soft round brush with a warm yellow or orange color set to a low opacity. Paint gentle glows around each light source by building up multiple soft strokes.
This painted lighting technique looks far more natural than simply adding a lens flare filter. Plus, painting it manually gives you complete control over intensity and direction.
Painting Lighting Effects Across the Scene
Now it’s time to think about how the lamps actually affect the surrounding environment. Light doesn’t just glow, it illuminates nearby surfaces too.
Create new layers in Soft Light or Screen blending mode above your lamp layers. Use warm colors to paint subtle light spill onto the stairs, walls, and ground near each lamp. Keep the opacity low, around 10 to 20 percent per stroke, and build gradually.
Also consider adding a cooler, slightly bluish ambient light to the upper portions of the forest. That contrast between warm lamp light below and cool ambient light above gives the scene real atmospheric depth.
Final Color Grading with Adjustment Layers
This is where the scene transforms from a collection of assets into a cohesive image. Add several adjustment layers above everything to unify the color and mood.
Start with a Hue/Saturation layer. Slightly desaturate the overall scene, then boost the greens and teals specifically. Mysterious forest scenes typically feel more believable with slightly muted, cool-leaning colors.
Add a Color Balance layer and push the midtones toward cyan and blue. Then add another Curves layer and create a subtle S-curve to boost contrast. Finally, consider a Photo Filter adjustment using a cooling filter set to around 15 to 20 percent.
Stack these adjustments thoughtfully and mask any areas where the effect feels too strong. The lamps, for instance, might need to stay warmer even after the cooling adjustments. Just paint black on those masks to protect those areas.
Bringing the Scene to Life
Photo manipulation projects like this one reward patience more than speed. Each masking decision, each painted light stroke, and each adjustment layer interaction builds toward that final mood.
The techniques here, flipping elements for symmetry, using layer groups to organize adjustments, painting light manually, and stacking color grading layers, apply far beyond this specific project. They’re the building blocks of almost every atmospheric composite you’ll ever create.
Start with the foundation solid, refine your masks carefully, and let the lighting tell the story. When the forest feels like somewhere real yet slightly impossible, you know you’ve nailed it.