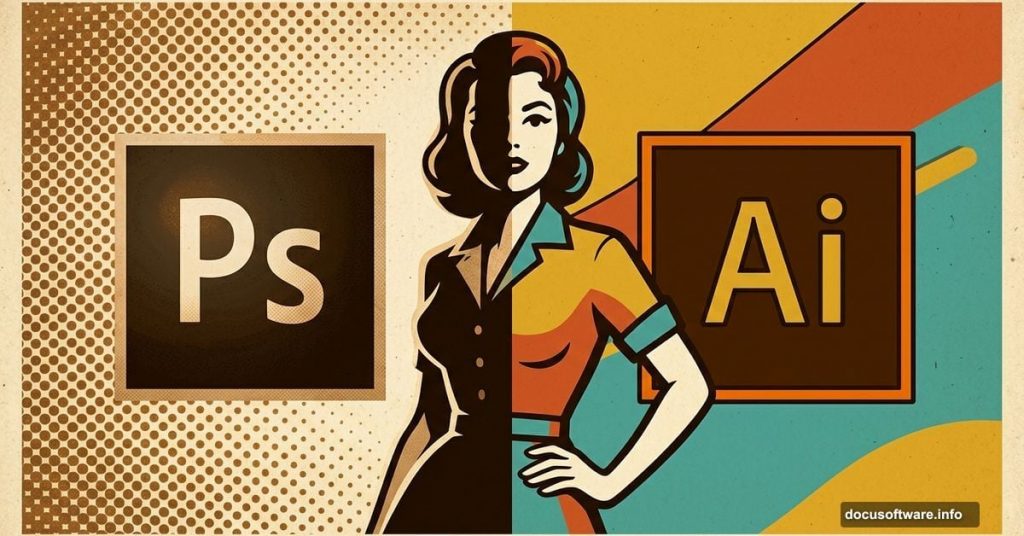
Ever looked at a vintage poster and thought, “I wish I could make something like that”? Good news. You can. And this tutorial walks you through exactly how to turn a simple stock photo into a bold, colorful retro-style artwork using both Photoshop and Illustrator.
The best part? You only need a handful of stock images and some creative techniques that you’ll find yourself using again and again in future projects.
Setting Up Your Canvas First
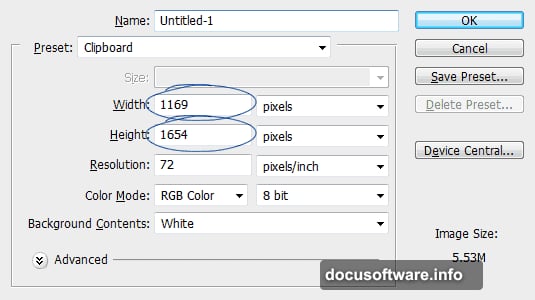
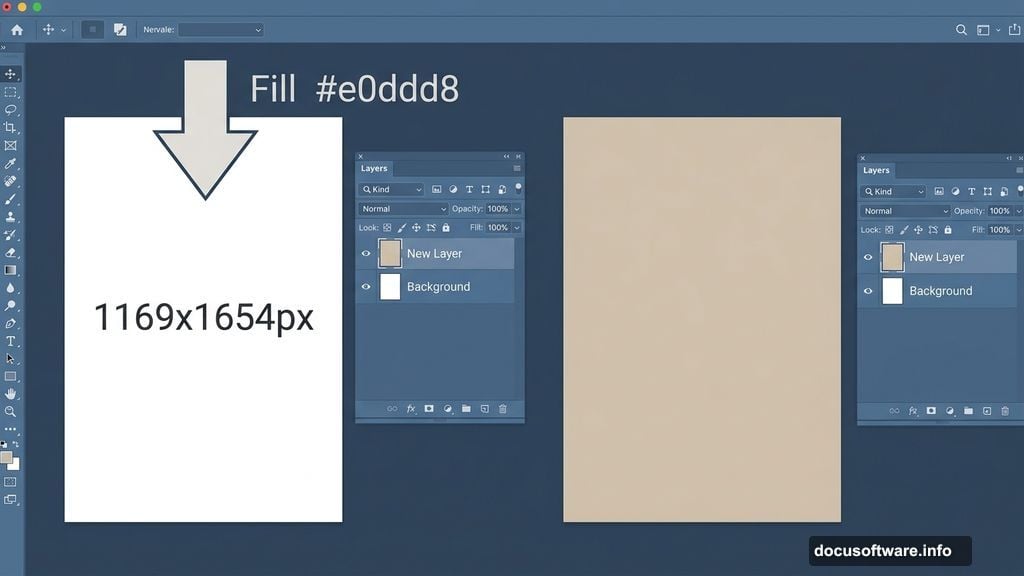
Before anything else, you need a workspace. Start by creating a new canvas at 1169×1654 pixels. That’s the size used in the finished design, so sticking close to it makes following along much easier.

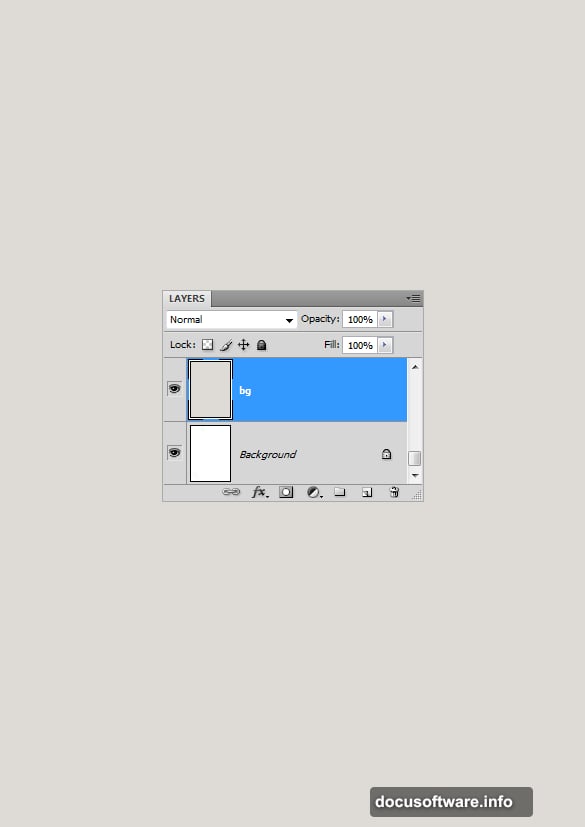
Once Photoshop opens your blank white canvas, that stark white background needs to go. Create a new layer above the default background layer and fill it with the hex color #e0ddd8. That warm, neutral tone gives you a much friendlier base to build on.
Choosing the Right Model Photo
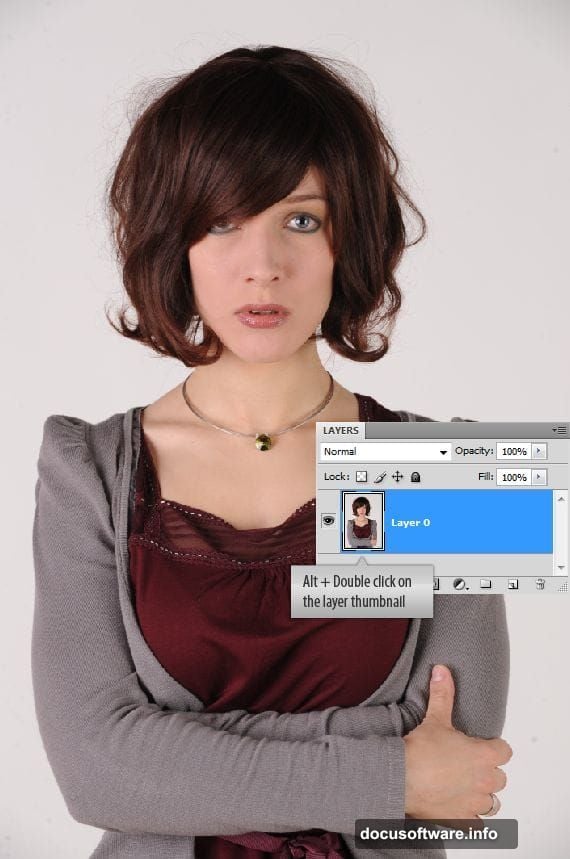
Your model photo makes or breaks this design. For this tutorial, the chosen image features a woman with a slightly worried, uncertain expression. That emotional quality matters. Strong, dramatic lighting might fight against the retro style you’re building toward.
Look for photos with soft tones, minimal harsh shadows, and a plain or simple background. Those qualities make the next step significantly easier.
Cutting Out Your Subject with Color Range
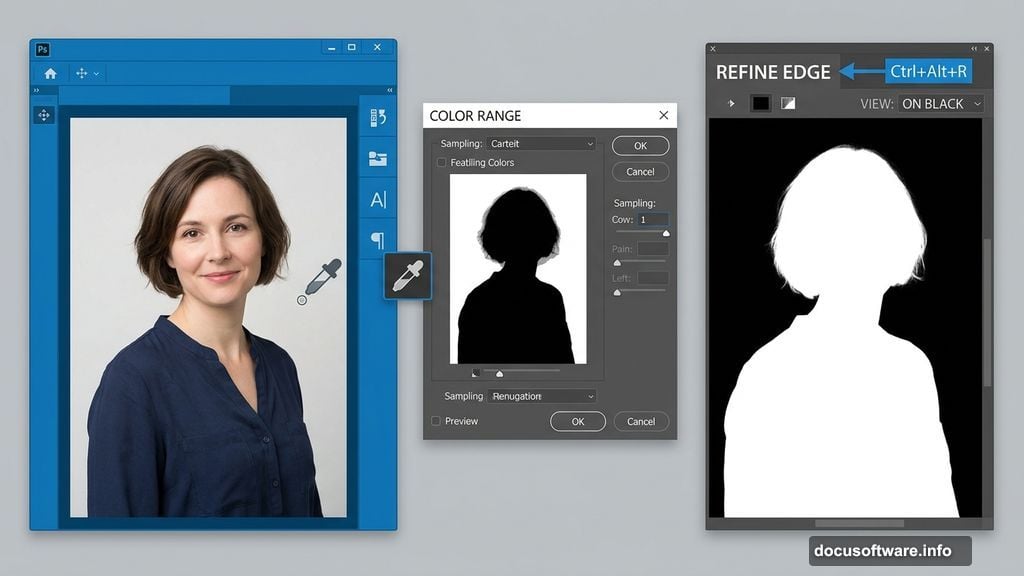
Now comes the fun part. You need to isolate your model from her background. Photoshop gives you several ways to do this, but the Color Range command is a smart choice here, especially with a plain background.
Head to Menu, then Select, then Color Range. A dialog box opens up. Use the color picker inside it to sample the background color. Watch the thumbnail inside the box closely. White areas show what’s selected, while grey areas indicate partial selection. You’ll notice a few grey patches in the corners and around the subject edges. Don’t worry about those yet.
Hit OK to confirm, then invert your selection with Ctrl + Shift + I. Now your model is selected instead of the background.
Refining the Selection Edge
Here’s where your selection goes from rough to polished. Open the Refine Edge command by going to Menu, then Select, then Refine Edge. Alternatively, just hit Ctrl + Alt + R.
This tool is genuinely impressive. You can smooth the selection edge, contract or expand it, and add feathering. Click the “On Black” preview thumbnail so you can see exactly how your selection looks against a dark background. That contrast reveals any rough or messy edges immediately.
Smooth the selection slightly and contract it just a touch. That combination removes the fringe of background color that often clings to extracted subjects. Press OK when you’re happy with the result.
Bringing Illustrator into the Mix
This is where the workflow gets interesting. The retro poster effect relies on vector-style line work and bold graphic elements that Illustrator handles better than Photoshop alone.

You’ll be taking your extracted subject into Illustrator to create traced contour lines, then bringing those vector elements back into Photoshop to layer with textures and color effects. The back-and-forth between the two programs sounds complicated, but the results are worth every step.
For those working without access to Illustrator, the subscription situation is a real consideration. The full Adobe Creative Cloud plan unlocks both apps, though the more affordable Lightroom and Photoshop bundle doesn’t include Illustrator. Something worth planning around before you start.
Combining Vector Art with Photoshop Textures
Once your vector elements come back into Photoshop, the layering process begins. This stage is where the design really starts breathing. Bold graphic lines from Illustrator sit on top of photographic textures, building that classic retro aesthetic layer by layer.
The combination of sharp vector shapes and organic photographic textures is what separates this style from flat illustration. Each layer adds depth without overwhelming the design. Working methodically through each texture and adjustment layer keeps the composition feeling intentional rather than chaotic.
Stock Resources You’ll Need
To follow this tutorial properly, grab these three images before you begin. The model photo comes from Poorsouls Stock. The galaxy background is available from Decoybg on DeviantArt. The umbrella image is sourced from SXC. Having all three ready before you start means no interruptions mid-workflow.
Tips for Making It Your Own
Once you’ve completed the tutorial once, the real learning kicks in. Try swapping the model photo for a different subject. Experiment with different color palettes. The retro aesthetic works beautifully with deep teals and warm oranges, but also with dusty pinks and muted greens.
The techniques you pick up here, including Color Range selections, Refine Edge refinements, and mixing vector art with photographic textures, carry into almost every complex compositing project you’ll tackle. So consider this tutorial a foundation rather than a one-time exercise.
This tutorial genuinely earns its reputation for covering a lot of ground in one project. You get selection techniques, cross-application workflow, texture layering, and composition skills all in one creative exercise. For designers who want to build versatile skills without switching between dozens of separate lessons, it’s a genuinely satisfying challenge to work through.