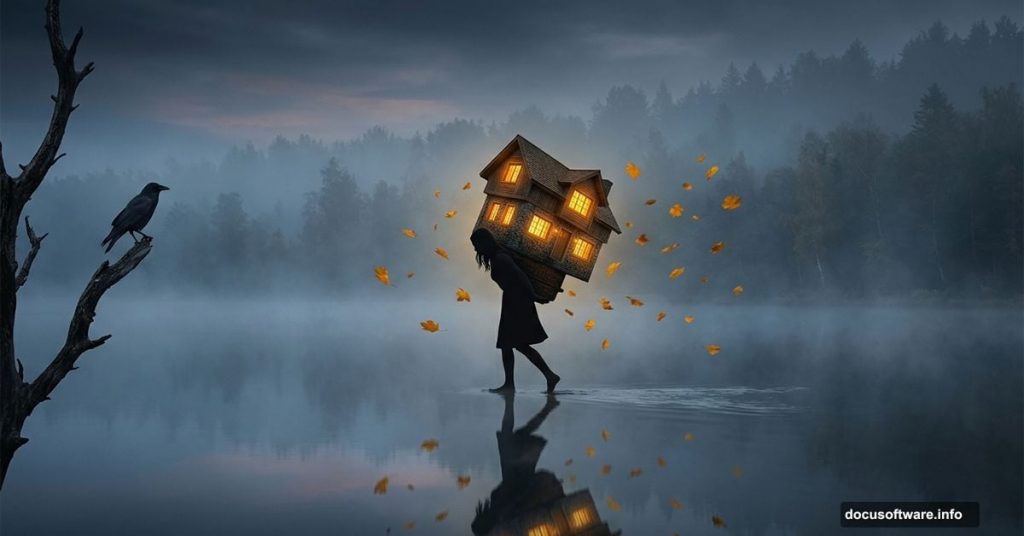
Ever looked at a piece of surreal digital art and wondered how someone actually builds that from scratch? That dreamy, impossible world where a woman walks across a misty lake carrying an entire house on her back — it sounds wild, but it comes together step by step in Adobe Photoshop.
This tutorial walks you through the whole process. You’ll blend a lake background, add a model, import a house, scatter dead branches and falling leaves, and top it all off with a crow for that perfect eerie atmosphere. Plus, you’ll use adjustment layers to tie everything together with a moody, cohesive look.
Let’s get into it.
Setting Up Your Canvas and Lake Background
Start fresh. Create a new document in Photoshop at 2674×2000 px and fill it with white. Then open your lake image and drag it onto the canvas using the Move Tool (V).
Use Free Transform (Ctrl+T) to resize the lake image until it fills the document completely. This becomes your base — everything else builds on top of it.
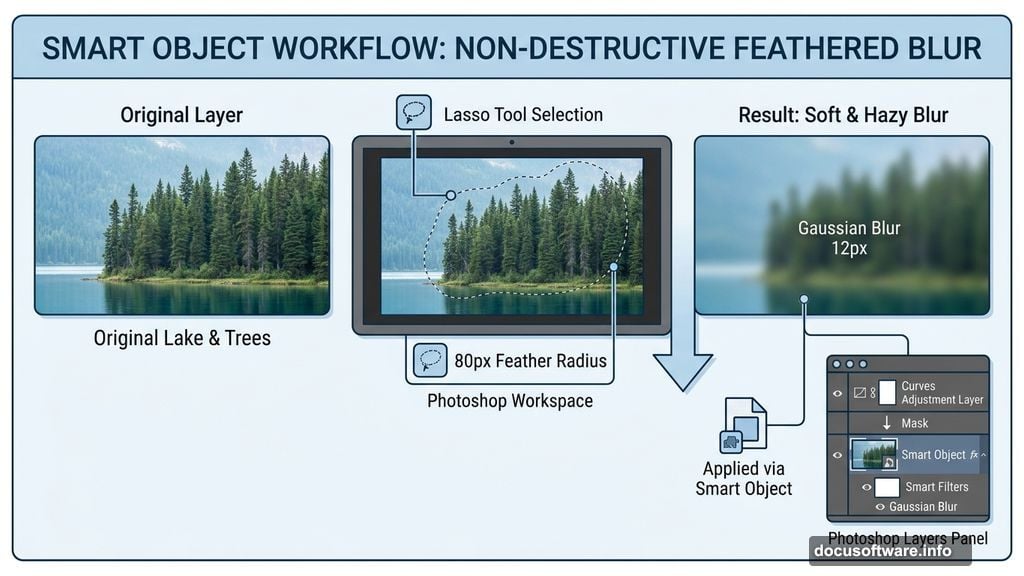
Softening the Background Trees with Gaussian Blur
Sharp background trees will fight for attention and break the surreal mood. So the next step is pushing them back visually.
Grab the Lasso Tool (L) and select the tree area. Set the feather radius to 80 — that soft edge is important. Hit Ctrl+J to duplicate just that selection onto its own layer, then convert it to a Smart Object.

Now go to Filter > Blur > Gaussian Blur and set the radius to 12 px. The trees will turn soft and hazy, almost like fog swallowed them. That creates natural depth without much effort.
Color Grading the Background
Add a Curves adjustment layer directly on the blurred tree layer and clip it as a Clipping Mask. Use this to shift the lightness and color of that background section slightly.
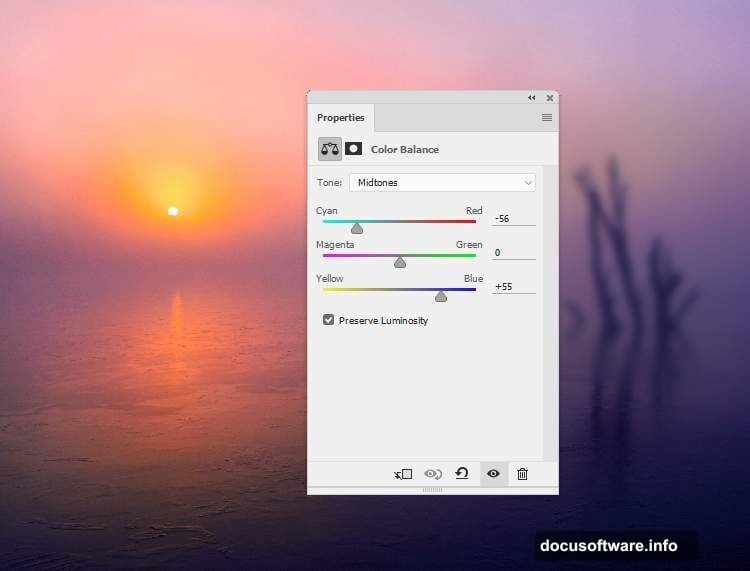
Then add a Color Balance adjustment layer above all your current layers. Tweak the Midtones settings to push the overall scene toward the color mood you’re after — cooler tones tend to work well for surreal, melancholic atmospheres.
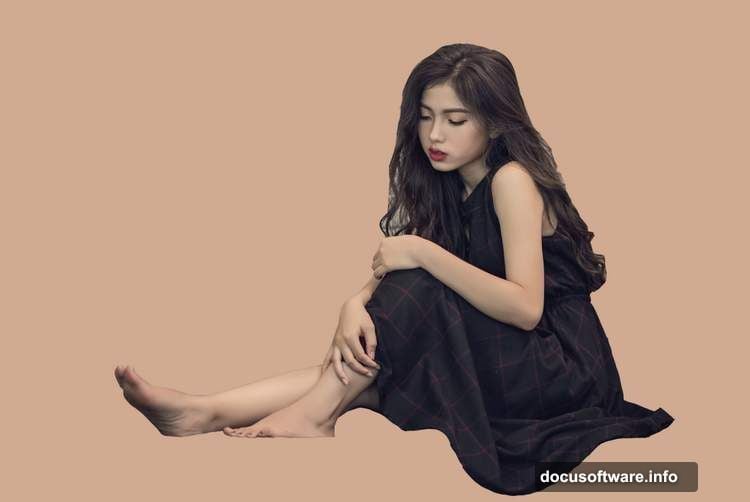
Cutting Out and Placing the Model
This is where your scene starts feeling real. Cut the model out from her original background cleanly, then duplicate the extracted layer.
Place a Color Fill layer between your background and the extracted model. This gives you a clean view while you work on blending the model into the scene.
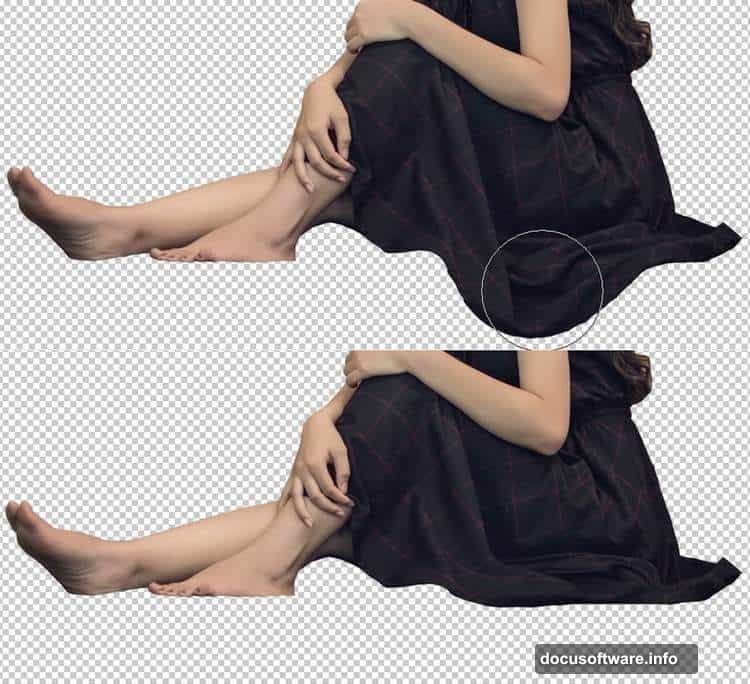
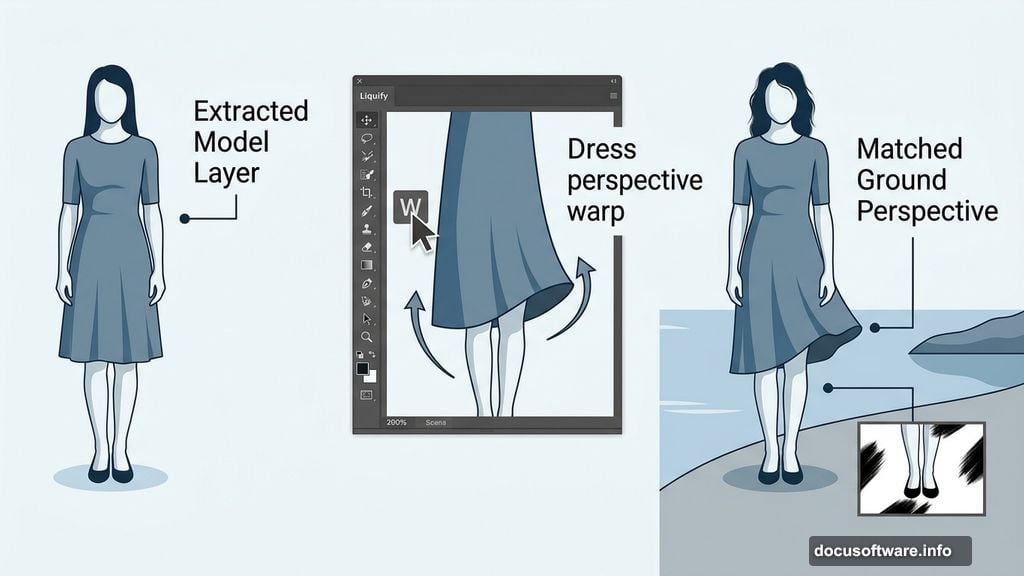
Warping the Dress to Match Ground Perspective
Here’s a detail that separates good composites from great ones. The dress needs to follow the ground’s perspective, not just sit awkwardly on top of it.
Go to Filter > Liquify and use the Forward Warp Tool (W) to gently pull the bottom of the dress upward until it matches the perspective of the lake ground. Small adjustments make a huge difference here.
After warping, add a layer mask to the model layer. Use a hard round brush in black to remove any unwanted bits around the dress edges, hair, and feet.
Adding a Replacement Foot
The model’s existing foot might not work perfectly for the composition. Open the foot image, take the right foot, and flip it horizontally using Edit > Transform > Flip Horizontal.
Use Ctrl+T to rotate it slightly until the angle looks natural. Add a mask to this layer, then paint over the edges with a soft black brush to blend it smoothly into the existing leg. When it’s done right, nobody should notice the swap.
Add a Hue/Saturation adjustment layer clipped to the foot layer and desaturate it slightly. Skin tones from different photos rarely match perfectly, and this small tweak brings them into harmony.
Bringing In the House
Import your house image and position it so it looks like the model is genuinely carrying it. Scale and rotate using Free Transform until the perspective feels believable. A slight tilt goes a long way toward selling the illusion.
Mask out any background from the house image and blend the base of the house where it meets the model’s body. Pay attention to shadows — where the house contacts the model, there should be a suggestion of weight and contact.
Decorating with Dead Branches
Dead branches add texture and a slightly ominous quality that pushes the scene deeper into surreal territory. Place them around the composition — framing the house or reaching out from the edges works well.
Mask each branch carefully and use soft brushes to fade the ends. Branches that simply cut off at the edge of the frame look artificial. Fading them out naturally makes them feel like part of the world.
Adding the Crow and Falling Leaves
A crow perched on the house sells the mood immediately. Place it on a roof edge or peak, mask it cleanly, and match its tone to the overall scene using a Hue/Saturation or Curves adjustment layer clipped to it.
Scatter falling leaves across the composition for movement and life. Resize and rotate individual leaves so they look like they’re caught mid-fall rather than copy-pasted in place. Vary the opacity on some leaves slightly — leaves closer to camera can be sharper, while distant ones blur gently.
Final Adjustment Layers for a Unified Look
This is where the whole scene pulls together. Stack several adjustment layers at the top of your layer panel to unify the color and light across every element.
A Curves layer to control overall contrast and lift or crush the shadows. A Color Balance layer to push the scene toward your target palette. Maybe a Photo Filter layer to add a subtle warm or cool cast over everything. Each adjustment should be subtle — the goal is unity, not drama.
When every element shares the same light quality and color temperature, the composite stops looking like a collection of separate photos. It starts looking like one real, impossible moment.
Surreal compositing is really just problem-solving with creativity. Each step handles one specific challenge — perspective, color matching, blending, atmosphere. Stack those solutions carefully and the final result feels genuinely magical, even though every piece of it is methodical and deliberate.