Movie posters have a distinct visual language. Bold. Dramatic. Instantly recognizable.
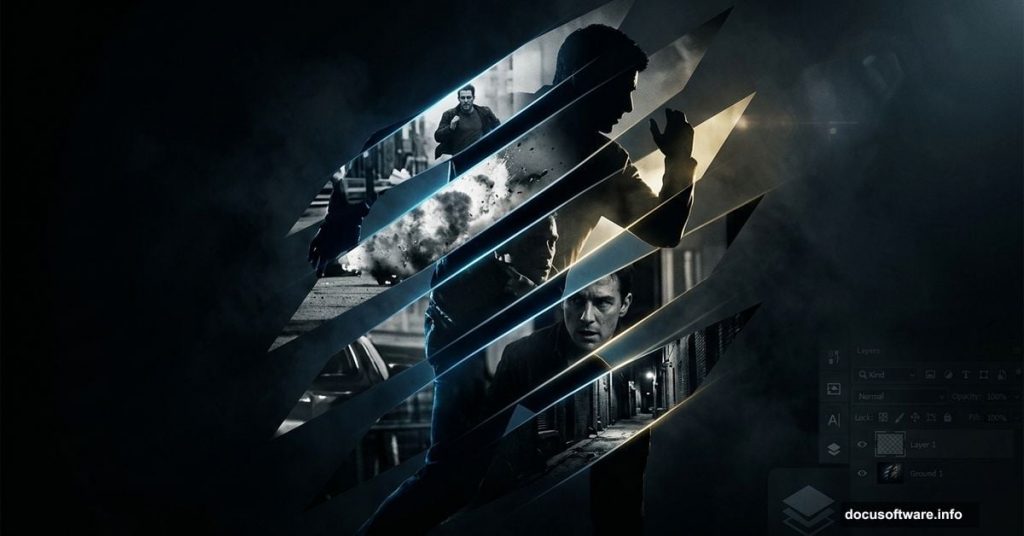
The Bourne Legacy poster is a perfect example. That striking stripe pattern mask creates tension and movement without feeling overdone. The good news? You can recreate this effect in Photoshop CS6 using nothing but non-destructive editing techniques. Even if you’re brand new to Photoshop, this tutorial walks you through every step clearly.
Let’s get into it.
What You Need Before Starting
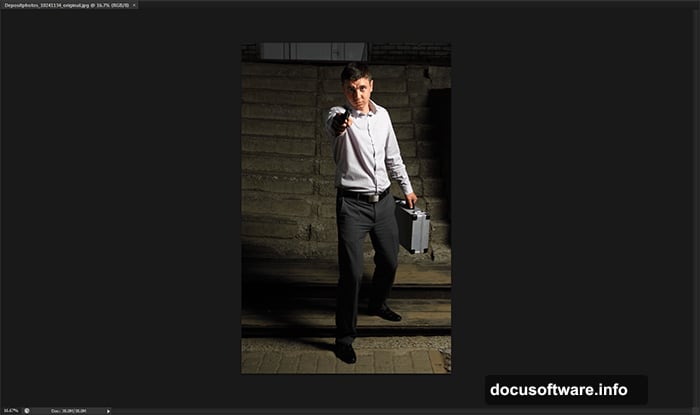
You don’t need much to follow along. Photoshop CS6 is the main tool here. For the photo, the tutorial uses a professional figure shot from Depositphotos. However, any strong portrait or full-body shot works fine.
One commenter in the community pointed out that this free Adobe Stock image works beautifully as a substitute. So don’t worry if the original stock image requires a paid download. The technique applies to almost any photo.
Also, download the highest resolution version of whatever image you choose. We’ll be cropping it later, and a low-res file will show quality loss.
Converting Your Photo to a Smart Object
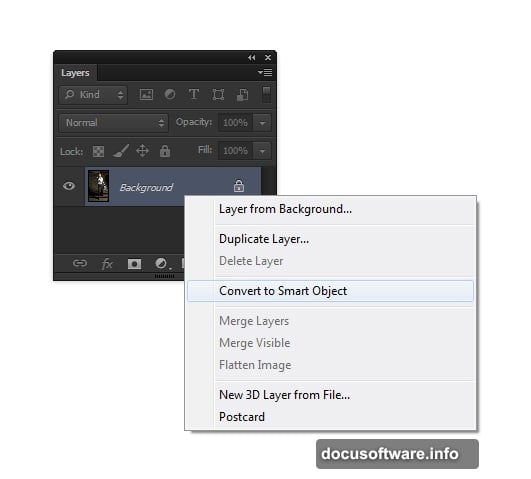
First, open your image in Photoshop by going to File > Open.
Once it loads, right-click on the layer in the Layers panel and select Convert to Smart Object. This single step is crucial. Smart Objects let you apply filters and adjustments without permanently changing the original pixels.
Think of it like editing a photocopy instead of the original document. You can always undo or tweak settings later without starting from scratch.
Setting Up the Black Background Layer
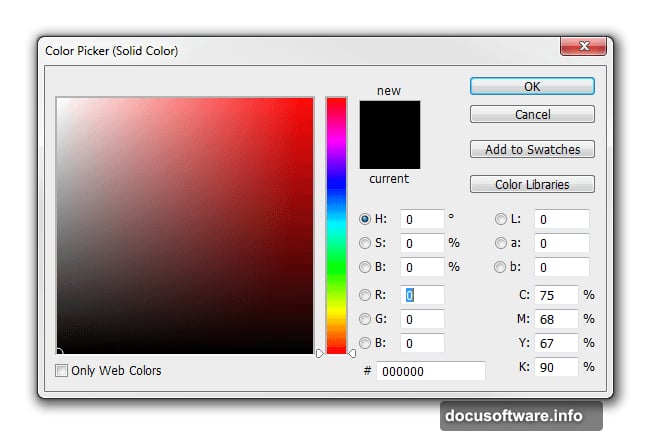
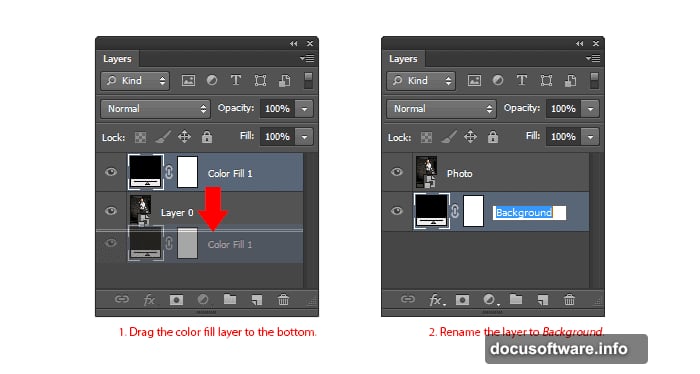
Next, we need a solid black base beneath the photo. Go to Layer > New Fill Layer > Solid Color. Choose black and click OK.
Then open the Layers panel (Window > Layers) and drag this Color Fill layer to the bottom of the stack. Rename your layers to stay organized. Double-click the layer name text to rename it. Call the top layer “Photo” and the bottom one “Background.”
This seems like a small housekeeping step. But staying organized now saves real frustration later when you’re juggling multiple adjustment layers.
Adding the Gritty Photo Effect
Here’s where the visual style starts taking shape. We’ll stack two adjustment layers to create that grungy, cinematic look.
First, add a Black & White adjustment layer by going to Layer > New Adjustment Layer > Black & White. Then change its blending mode to Overlay. You’ll see the image immediately pick up a rougher, more dramatic lighting quality. Play around with the sliders in the Properties panel (Window > Properties) to push the effect further.
Next, add a Vibrance adjustment layer (Layer > New Adjustment Layer > Vibrance). Pull the Vibrance slider down until just a trace of color remains. The goal is desaturated but not fully black and white. That hint of color adds mood without distracting from the composition.
Fixing the Dark Areas with Shadows/Highlights
The adjustment layers do great work. But they also darken the image, which creates a problem. If the photo blends too deeply into the black background, the stripe pattern won’t read clearly.
To fix this, select the Photo layer in the Layers panel and go to Image > Adjustments > Shadows/Highlights. Set Shadows to around 35% and Highlights to around 15%, then click OK.
This pulls detail back into the darker areas of the image. So your subject stays visible and the stripes will pop once we build the mask. It’s a subtle adjustment but makes a noticeable difference in the final result.
Why Non-Destructive Editing Matters Here
Throughout this tutorial, every technique either uses adjustment layers or Smart Object filters. Nothing permanently alters your original photo.
This approach matters more than it might seem. If you decide the stripe width looks off, or the grungy effect feels too heavy, you can go back and change individual settings without rebuilding the whole composition. That flexibility is what separates a frustrating editing session from a smooth one.
Many Photoshop beginners skip Smart Objects and adjustment layers because they seem like extra steps. They’re actually the opposite. They save you from redoing work.
A Quick Note on Older Photoshop Versions
If you’re running Photoshop CS3, you won’t find the Vibrance adjustment layer in Step 6. One option is to use a Hue/Saturation adjustment layer instead and pull the Saturation slider down. It achieves a similar desaturated look.
CS4 users have reported some differences at Step 14 of the full tutorial. If you hit a snag there, check the comments section of the original tutorial page. Several community members have shared workarounds that solve the compatibility issue.
The core technique still works across most modern versions of Photoshop, though. So don’t let version differences discourage you from trying.
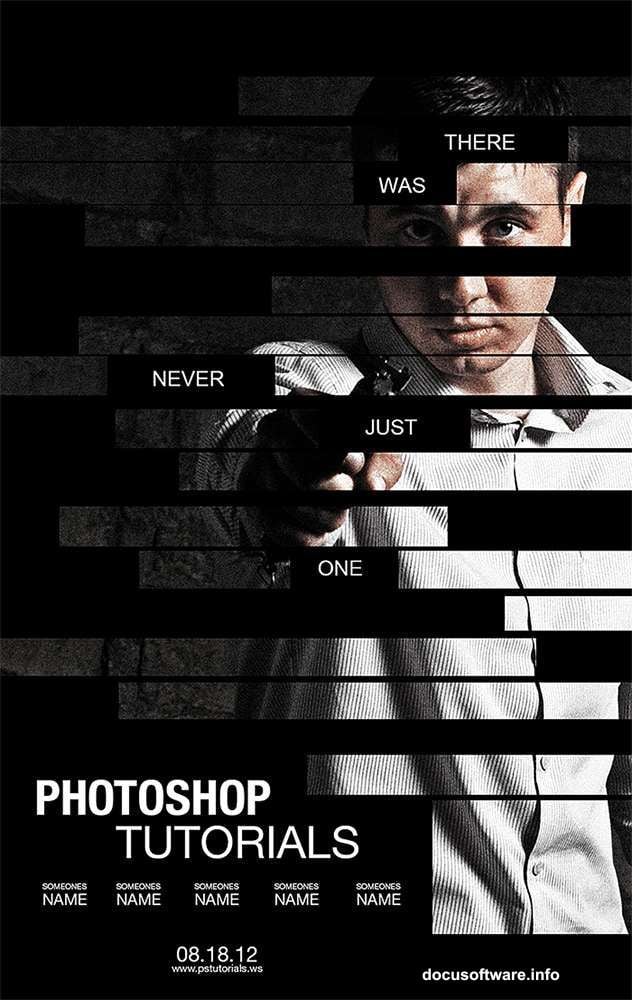
Building the Stripe Pattern Mask
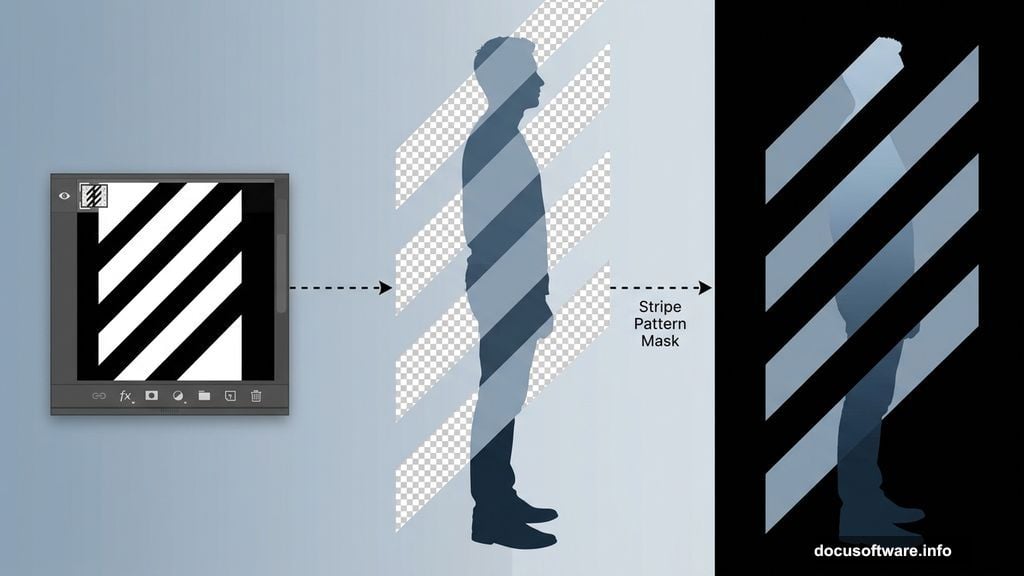
The stripe pattern is the signature element that ties the whole poster together. This is where the design starts looking like a real movie poster rather than a filtered photo.
The technique involves creating a repeating diagonal stripe pattern and applying it as a layer mask to the photo. The mask controls which parts of the image show through and which parts reveal the black background beneath.
Getting the stripe width and angle right takes a little experimentation. The original Bourne Legacy poster uses tight, evenly spaced diagonal stripes that create a sense of speed and motion. Start with similar proportions and adjust from there based on how your particular photo responds.
Working through the remaining steps of this tutorial, you’ll see how the stripe mask transforms what looked like a grungy portrait into something that genuinely feels like a professional film poster.
This is one of those Photoshop effects that looks complex from the outside but breaks down into manageable pieces once you work through it step by step. The end result is worth the effort. And once you’ve built it once, you’ll have a technique you can reuse across many different portrait photos and compositions.