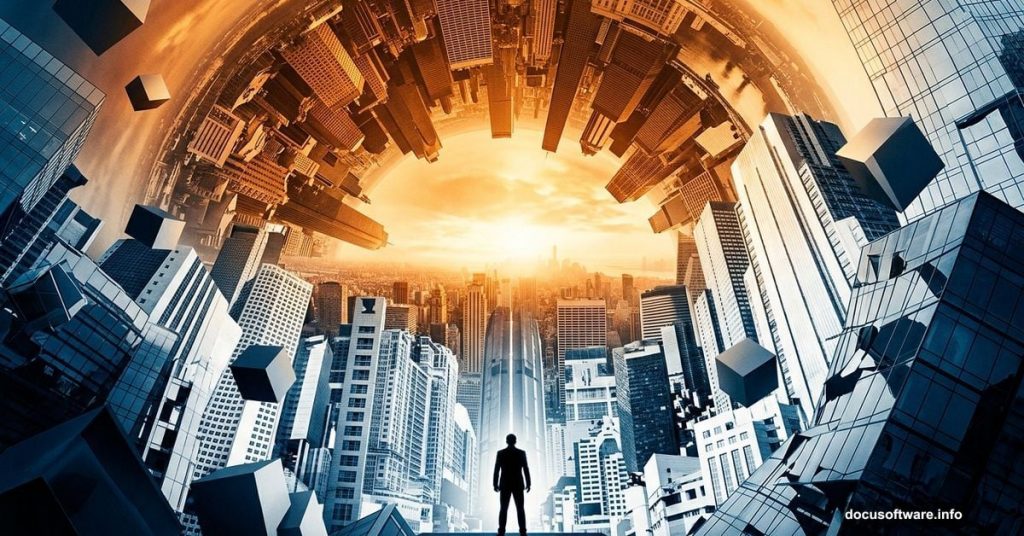
Ever look at a piece of digital art and feel like you’ve stepped into another dimension? That’s exactly the feeling this Photoshop tutorial chases. Artist Maria Semelevich walks us through creating a mind-bending surreal photo manipulation called “Inception” — a composite that blends cityscapes, geometric cubes, and a dynamic model figure into one jaw-dropping abstract world.
Whether you’re a seasoned Photoshop user or someone still getting comfortable with layers, this project teaches some genuinely useful techniques. Plus, the end result looks like something straight out of a sci-fi film concept reel.
Setting Up Your Canvas
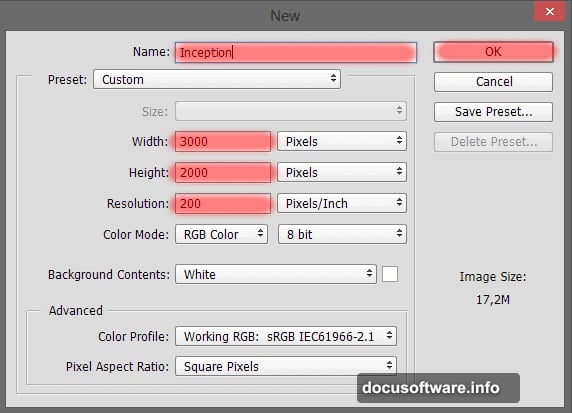
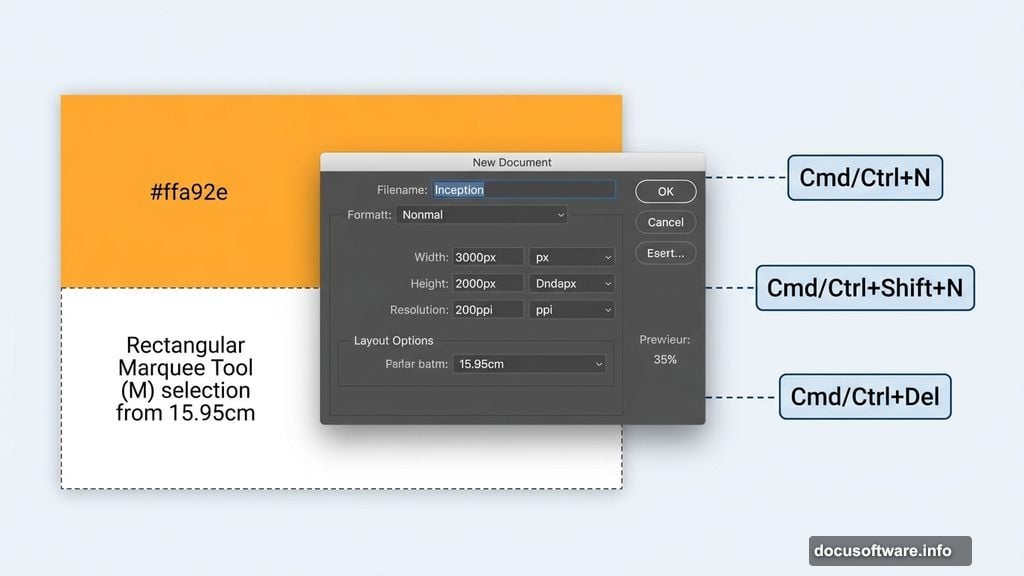
First things first — open Photoshop and create a new document. Head to File > New (or hit Cmd/Ctrl + N on your keyboard) and set your canvas to 3000 pixels wide by 2000 pixels high with a resolution of 200 pixels per inch. Maria named hers “Inception,” which feels fitting for a project this ambitious.
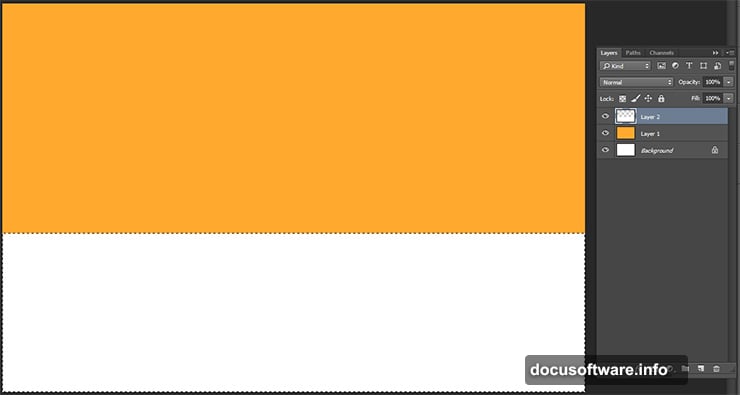
Next, create a new layer using Cmd/Ctrl + Shift + N. Fill it with a warm orange color — specifically hex code #ffa92e. You can do this using the Paint Bucket Tool (G) or simply by pressing Cmd/Ctrl + Del after setting your background color.
Then create another fresh layer. Use the Rectangular Marquee Tool (M) to select the lower portion of your canvas — roughly from the 15.95 cm mark downward. Switch your background color to white and fill that selection. Hit Cmd/Ctrl + D to deselect when you’re done. This two-tone base gives you a clean foundation to build everything else on top of.
Placing and Selecting Your Model
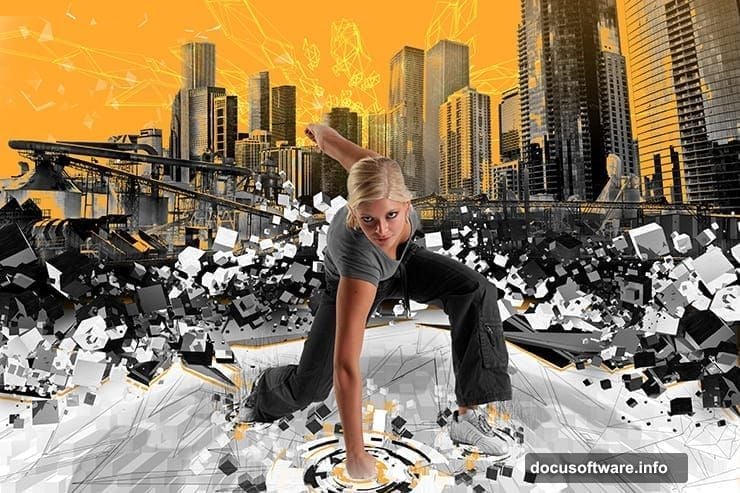
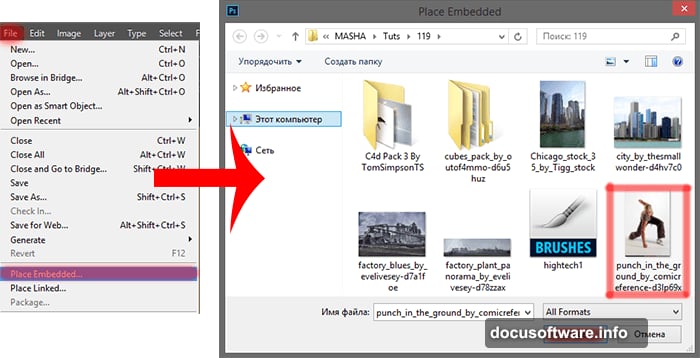
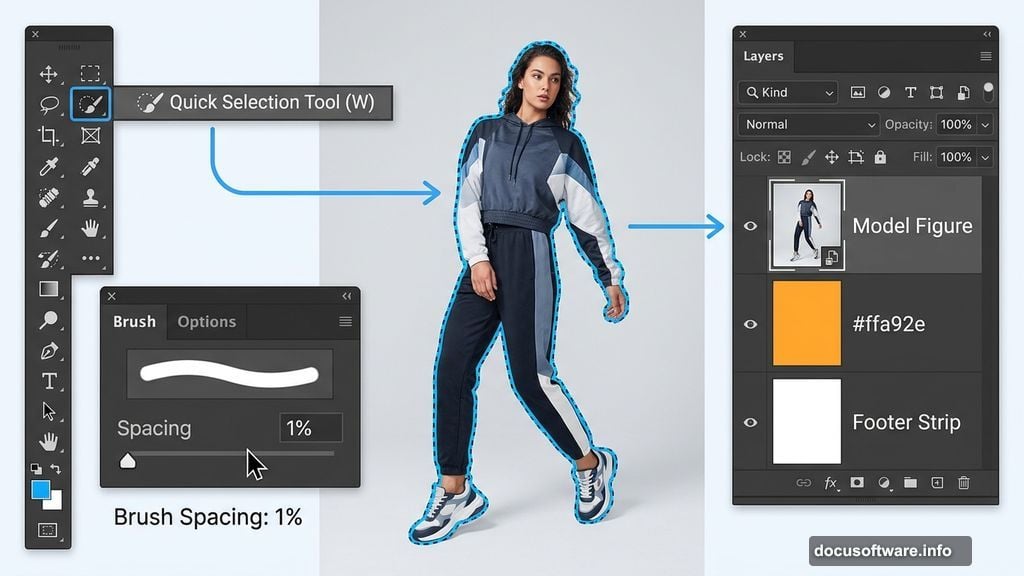
The model is the heart of this whole composition, so she goes in early. Go to File > Place (or Place Embedded) and load the model file from your downloaded resources. This keeps her on her own smart object layer, which makes resizing and repositioning much easier down the road.
Once she’s placed, grab the Quick Selection Tool (W) to isolate her from the background. Here’s a tip that tripped up several people in the comments: if your selection keeps cutting off parts of the sneakers, check your brush spacing settings. Click the brush icon in the toolbar and reduce the Spacing value down to 1%. That small tweak makes a big difference in selection accuracy.
Not comfortable with the Quick Selection Tool? The Pen Tool (P) is a fantastic alternative. Trace a path around your model, right-click and choose Make Selection with a feather radius of 0px, then apply a layer mask to hide the background cleanly. It takes longer but gives you razor-sharp edges.
Building the Cityscape Environment
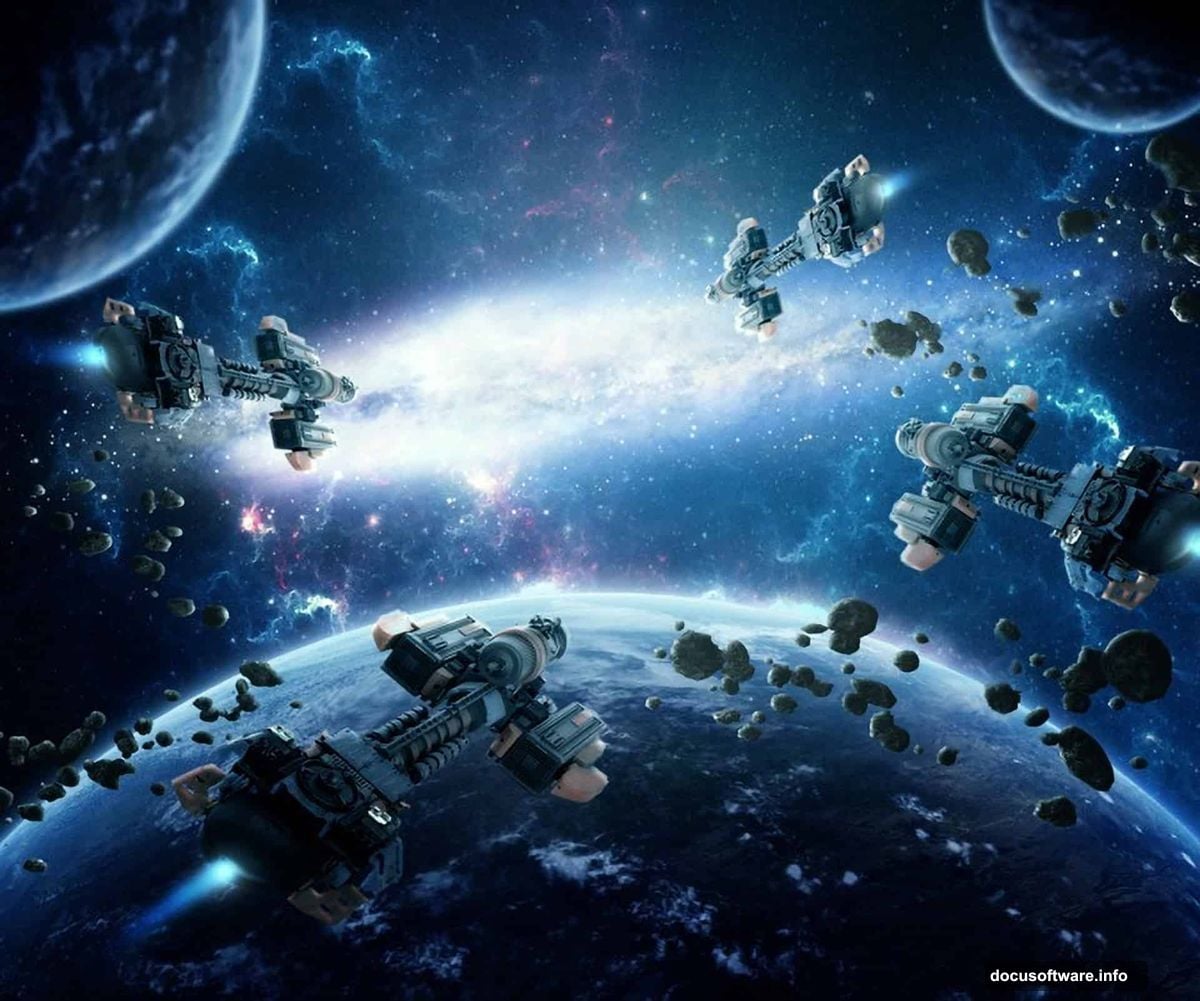
With the model locked in place, it’s time to bring in the urban scenery. The tutorial uses several cityscape and factory images layered together to build a dense, industrial-feeling environment around the central figure. Skyscrapers get stacked, factory panoramas blend in, and each element gets shaped with masking and blending modes.
This part of the process rewards experimentation. Try Overlay or Soft Light blending modes on your city layers and watch how they interact with that orange background. The goal isn’t photorealism here — it’s creating a world that feels both familiar and completely alien at the same time.
The Cube Section Needs Patience
Maria is refreshingly honest about this part: it takes patience. The C4D and cube pack elements need to be individually transformed, rotated, and positioned to build up that floating, fragmented geometry effect that makes Inception-style art so visually striking.
Use Free Transform (Cmd/Ctrl + T) constantly here. Rotate cubes at odd angles. Stack them loosely. Let some overlap the model and some sit behind her. The randomness is the point. It creates visual tension that makes the eye jump around the composition.
Also, don’t stress about perfect placement on the first pass. Work loosely and adjust as the overall picture takes shape.
Final Effects and Painterly Touches
The finishing stage pulls everything together. This is where you add atmospheric effects — light leaks, color grading, and some digital painting using high-tech brushes to add texture and depth across the image.
One thing worth noting: Maria intentionally skipped adding drop shadows or reflections under the model. Someone in the comments pointed this out as a potential issue. Her reasoning makes complete sense for this type of work — there’s no defined light source in a fragmented digital world. The model floats in this space like a glitch in the matrix, which is exactly the vibe the piece aims for. That said, if you want to add subtle shadows to ground your own version, nothing stops you.
What You’ll Walk Away With
This project isn’t just about recreating one specific image. It teaches a versatile set of skills — selective masking, layer blending, smart object workflow, and building complex multi-element compositions from scratch. Those skills transfer to practically any photo manipulation project you tackle next.
The tutorial was created in Adobe Photoshop CC 2014, but Maria confirmed it works across both CS and CC versions. So whatever version you’re running, you should be in good shape.
If something goes wrong mid-project, the comment section on the original tutorial is actually quite helpful. Maria personally responded to questions about tool settings, selection issues, and even addressed compatibility concerns about running Photoshop on Windows 8. That kind of direct support from the creator makes tackling a complex project like this much less intimidating.
So fire up Photoshop, grab the resource files, and start building your own impossible world. The only real requirements are patience with those cubes, a willingness to experiment with blending modes, and maybe a good playlist to keep the creative energy flowing.