
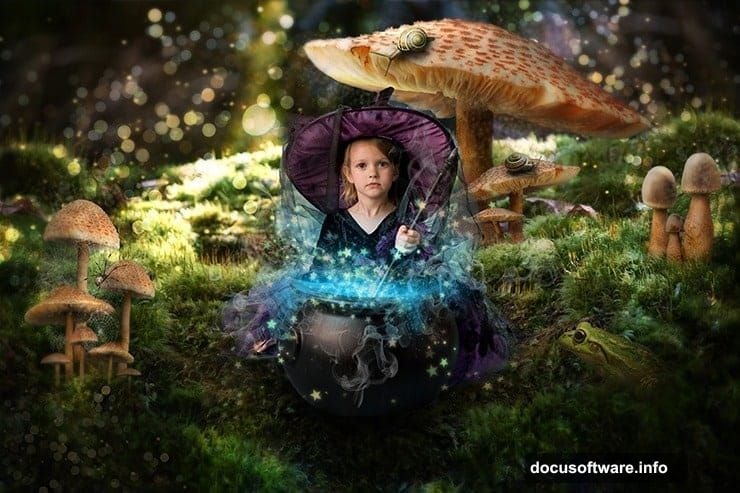
Every parent wants a photo that feels truly special. Not just another snapshot, but something that looks like it belongs in a storybook.
That’s exactly what this Photoshop tutorial delivers. You’ll take a simple baby photo and transform it into a stunning fairy tale composite, complete with glowing mushrooms, crawling critters, and phosphorescent neon stars. And the best part? You don’t need advanced skills to pull it off.
Let’s walk through how it all comes together.
What You’re Building Here
The final image is a full fantasy scene built in four main stages.
First, you’ll build the background and layer in mossy textures. Then mushrooms and bugs populate the scene. Next, the baby model drops in, surrounded by magical glowing star effects. Finally, small details and special effects tie the whole composition together.
It’s a layered process, but each step is manageable on its own. So don’t feel overwhelmed by the big picture just yet.
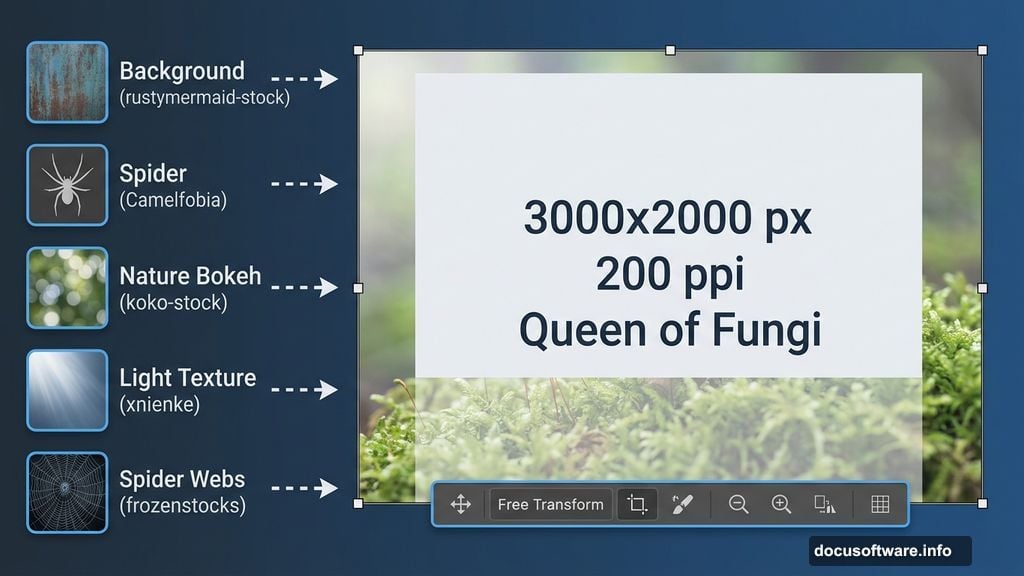
Gathering Your Tutorial Resources
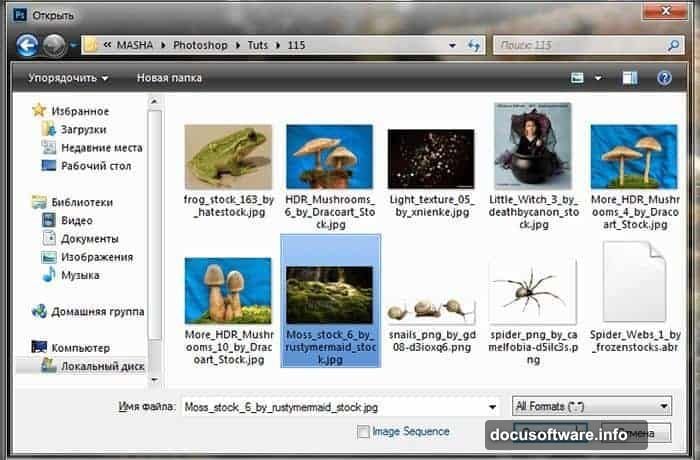
Before opening Photoshop, pull all your assets together in one folder. Working with scattered files slows everything down and breaks your creative flow.
Here’s what you’ll need for this composite:
- Baby model photo (deathbycanon-stock)
- Background image (rustymermaid-stock)
- Snails (gd08)
- Spider (Camelfobia)
- Mushrooms – three separate sets (Dracoart-Stock)
- Light texture (xnienke)
- Frog (hatestock)
- Spider Webs (frozenstocks)
- Nature bokeh (koko-stock)
Most of these assets come from DeviantART. When downloading, click the “Download” button in the top-right corner of each resource page. Always grab the highest quality version available. Blurry source files make the final composite look rough no matter how good your technique is.
Any version of Photoshop works here. Beyond that, you just need attention, patience, and a good mood.
Step 1: Set Up Your Canvas
Open Photoshop and start fresh. Go to File > New (or press Cmd/Ctrl + N).
Set your document to 3000 pixels wide and 2000 pixels high, with a resolution of 200 pixels per inch. Name it something like “Queen of Fungi” so you can find it easily later.
This canvas size gives you plenty of room to work without things feeling cramped. Plus, the high resolution ensures your final export looks sharp whether you print it or share it online.
Step 2: Drop In the Background
Now bring in your background image. Go to File > Place and select the moss stock image from rustymermaid-stock.
The image needs to fill the entire canvas. If it doesn’t stretch to cover the full working area, go back to the resource page and redownload it at maximum quality. Small source images simply won’t scale up cleanly.
Step 3: Scale and Position with Free Transform
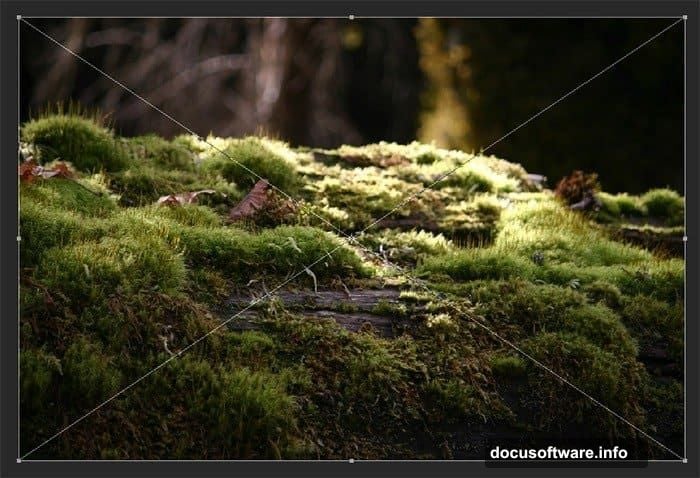
Zoom into the image slightly to get a better view of how it sits on your canvas.
Then use the Free Transform tool to adjust the scale. Press Cmd/Ctrl + T, or go to Edit > Transform > Scale. Drag the corners until the background fills the canvas the way you want it.
Free Transform is your best friend in composite work. You’ll use it constantly throughout this project.
Step 4: Flip and Layer the Background
Duplicate your background layer with Cmd/Ctrl + J, or go to Layer > Duplicate Layer.
Take that duplicate and flip it horizontally. Go to Edit > Transform > Flip Horizontal. Then nudge the original (non-flipped) layer down slightly, as shown in the reference image.
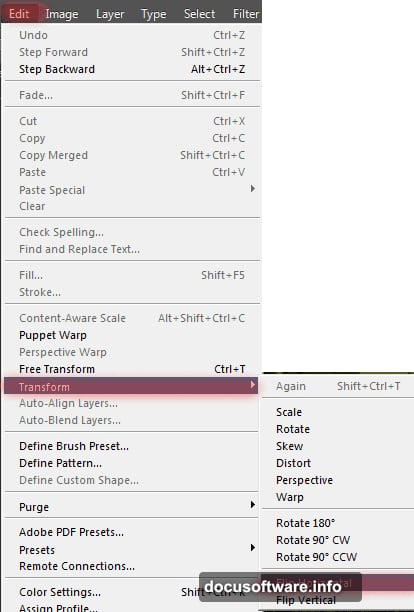
This doubling technique creates more visual depth and symmetry in the background. It’s a small trick that makes the scene feel richer immediately.
Step 5: Add a Layer Mask for Smooth Blending
With your background layer selected, add a layer mask. Then grab the Brush Tool by pressing B.
Set your brush to these values:
- Size: 100px
- Hardness: 0%
- Opacity: 50–100%
- Flow: 100%
Paint over the edges of your background layer with black to soften where the two background copies meet. The goal is a seamless blend, not a hard seam. Soft brushes at lower opacity give you much more control here.
Take your time with this step. The background is the foundation of the whole image, so a rough blend here will haunt you through every later stage.
Building the Scene Forward
From here, the tutorial continues through adding mushrooms and creepy crawlies, placing the baby model into the scene, and creating that signature phosphorescent star effect.
The star effect is one of the most satisfying parts of the whole project. It involves custom star brushes and glow techniques that give the image that unmistakable magical quality. Some users have noted the star brush instructions can get a little technical, so take your time reading that section carefully before diving in.
Each element you add builds on the last. Snails tuck into corners. A spider adds a touch of whimsy. Frog details ground the fantasy in something organic. Spider webs catch soft light between mushroom caps.
The bokeh nature texture, layered in during the later stages, adds that dreamy atmospheric quality you see in professional fantasy composites. It’s the visual equivalent of soft background music.
Why This Project Is Worth Your Time
Photo manipulation like this sits at the perfect intersection of technical skill and pure creativity. You’re not just learning Photoshop tricks in isolation. You’re learning how compositing actually works, how layers interact, and how light and texture create believable fantasy scenes.
And the subject matter makes it personal. A baby photo turned into a fairy tale image is the kind of gift people actually keep forever. It beats any store-bought print by a mile.
If you’ve never tried a composite this complex before, this tutorial is honestly a great starting point. The steps are manageable, the resource list is clear, and the end result genuinely looks impressive. Give it a full afternoon and you’ll come away with something magical and a set of skills you’ll use again and again.