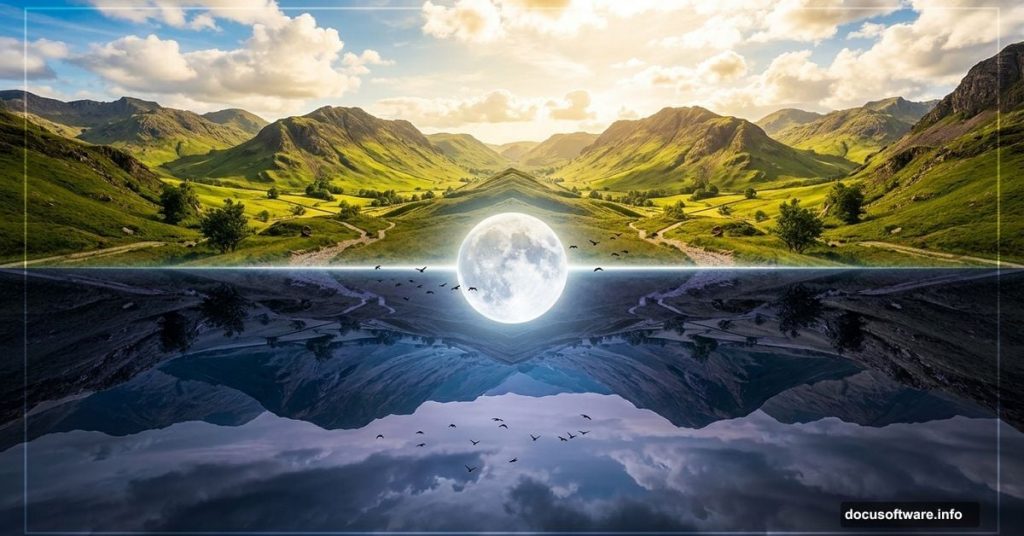
Ever looked at a reflection in still water and thought, “That would make an incredible photo?” This tutorial takes that idea and runs with it. We’re going to build a surreal scene where day meets night in a flipped, dreamlike landscape using Photoshop.
The finished piece combines sky, terrain, mountains, the moon, and birds into one cohesive world that feels both familiar and completely impossible. And honestly, it’s more approachable than it looks.
Here’s what you’ll need before we start: two sky images, two landscape images, a mountains shot, a soil texture, and three separate bird images. Gather those stock photos first, then let’s build something wild.
Setting Up the Base Canvas
Start by creating a new document at 2000×1500 pixels and fill it with white. This gives you plenty of room to work without things feeling cramped.
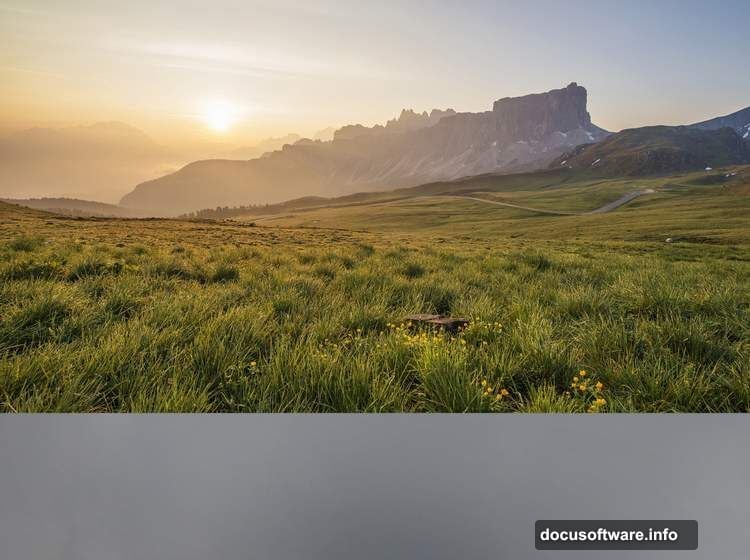
Open your first sky image and drag it onto the white canvas using the Move Tool (V). Position it so the right side of the sky covers the canvas edge to edge. Think of this as your foundation. Everything else builds on top of it.
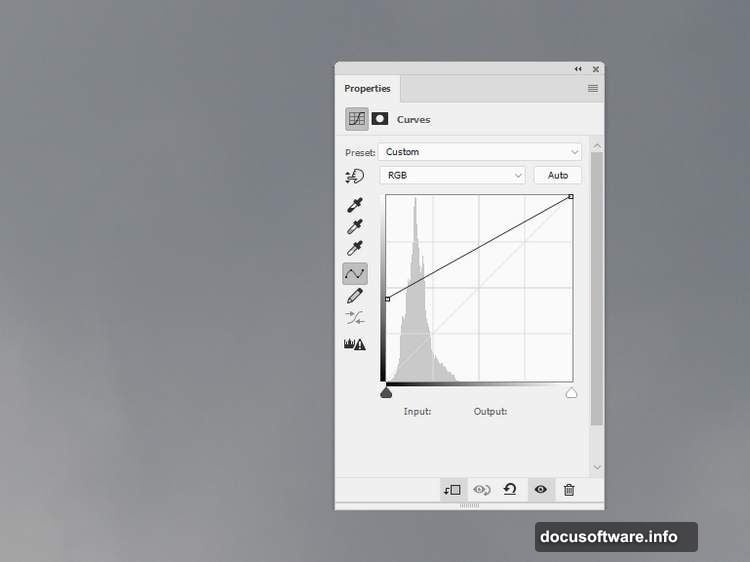
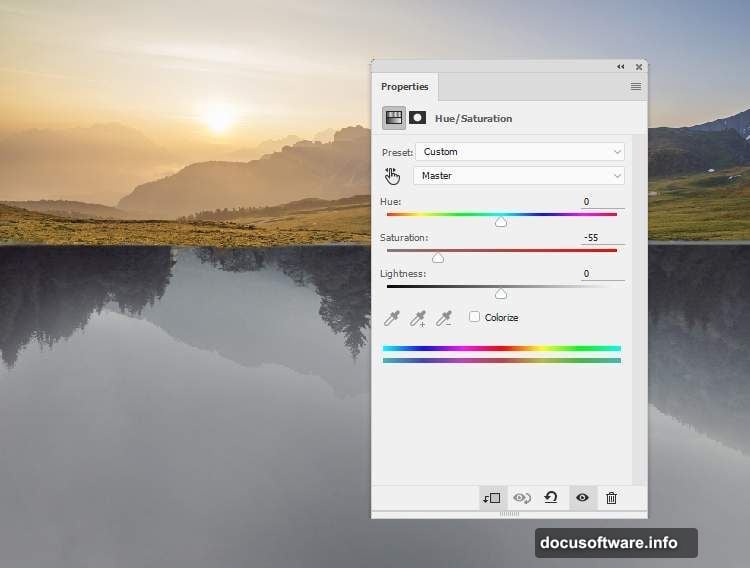
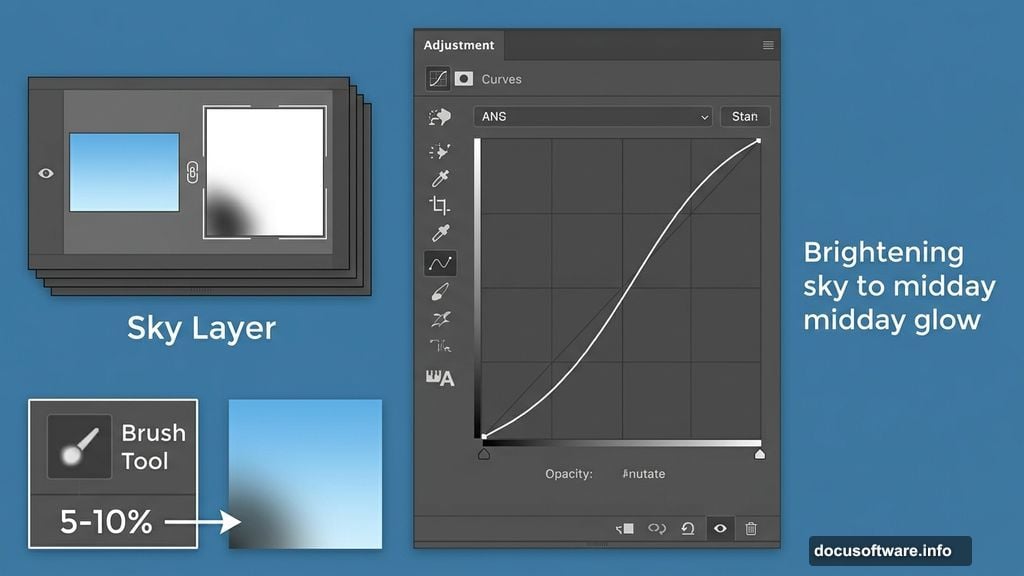
Brightening the Sky with Curves
Now go to Layer > New Adjustment Layer > Curves and push that hazy light up. You want the sky to look bright and slightly overexposed, like a warm midday glow.
Here’s a small but important trick. On the Curves layer mask, grab the Brush Tool (B) and pick a soft round brush set to black. Drop the opacity down to just 5-10%. Then gently paint over the bottom-left corner of the sky. This subtle darkening keeps the transition looking natural instead of flat.
Bringing In the First Landscape
Open landscape 1 and drag it onto the upper portion of your canvas. Use the Free Transform Tool (Ctrl+T) to resize it until it fits the document width comfortably.
Next, click the second icon at the bottom of the Layers panel to add a layer mask. Select a medium-soft black brush and paint over the bottom edge of the landscape. This removes the hard line and lets the landscape blend smoothly into the sky below it.
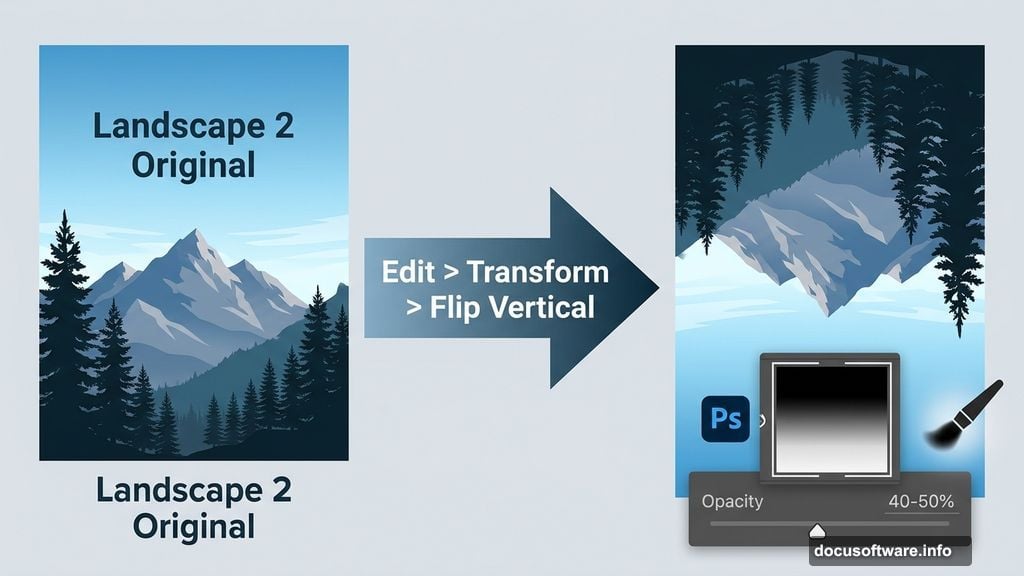
Flipping the Second Landscape
Place landscape 2 below landscape 1 in your layers stack. Then go to Edit > Transform > Flip Vertical. This is where things start to get interesting. That flipped landscape creates the upside-down world effect that makes the whole piece feel surreal.
Add a mask to this layer. Using a soft black brush at about 40-50% opacity, paint over the sky portion of this flipped image. You want the trees and mountains to stay visible while the sky fades away, blending naturally with the existing background.
Desaturating and Darkening the Flipped Layer
With landscape 2 selected, go to Layer > New Adjustment Layer > Hue/Saturation and set it as a Clipping Mask. Pull the Saturation slider down to -55. This cools off the flipped landscape and separates it visually from the warmer upper world.
Then add a Curves adjustment layer, also as a Clipping Mask, and reduce the overall lightness. Don’t go too dark though. On the Curves layer mask, use a soft black brush to paint back some brightness on the trees and any details that disappear too much into shadow.
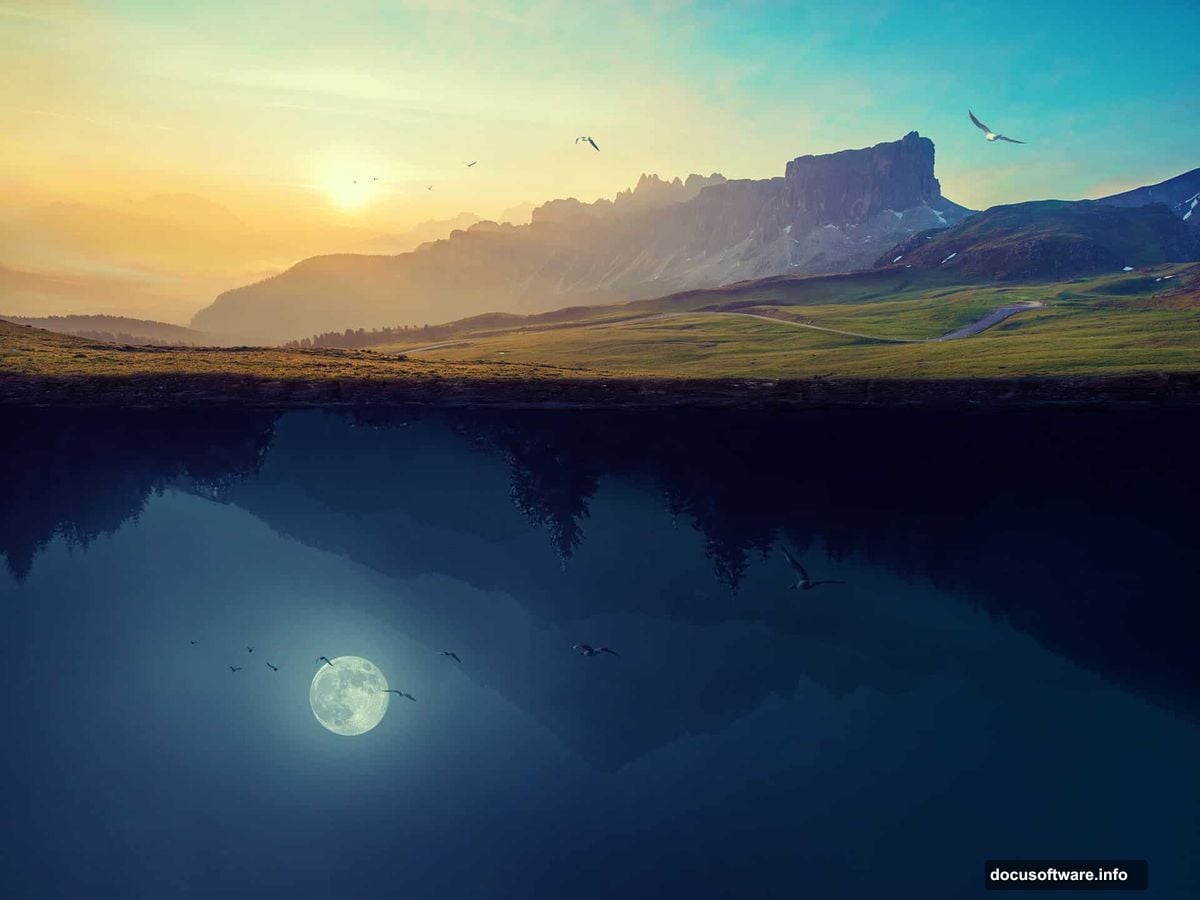
Adding the Underground Mountains
Place your mountains image below landscape 2 in the layers stack. Flip it vertically just like you did with landscape 2. Move it down toward the lower section of your scene.
Now change the blend mode for this layer to Hard Light at 100%. Hard Light is a fantastic mode for this kind of work. It intensifies contrast and helps the mountains integrate into the dark lower half of the scene without looking pasted on.
Refining the Scene with Brushes and Dodge Tools
At this point your base scene is taking shape. The next phase is all about polish. Use a soft brush set to very low opacity to add subtle atmospheric haze between the two worlds. This sells the idea that there’s distance and depth.
The Dodge Tool works brilliantly for brightening specific areas, like mountain peaks catching light or horizon edges. Work lightly and build up the effect gradually. Heavy-handed dodging looks obvious fast.
Adding the Moon and Birds
Bring in your moon image and position it in the lower half of the composition, the underground night side. Adjust the layer mode to something like Screen or Lighten so it glows rather than sitting on top of everything like a flat sticker.
For the birds, add all three bird images to the upper daytime section. Scatter them naturally. Resize some smaller to suggest distance and depth. A few birds near the horizon line help lead the eye toward the boundary between the two worlds.
Final Adjustments with Adjustment Layers
Once everything is positioned, do a final pass with adjustment layers across the whole composition. A gentle Color Balance adjustment can unify the warm tones in the upper half and cool tones in the lower half. A slight Levels tweak to boost contrast makes the whole thing pop.
Add a Photo Filter adjustment layer with a warm orange tone at about 15-20% density across the top half only. This reinforces the day feel. Then add a cooler blue Photo Filter across the bottom half to deepen the night atmosphere.
The two worlds should feel connected but clearly different. Day above, night below, with just enough blending at the boundary to make it feel like one continuous scene rather than two photos stacked together.
Building surreal composites like this is really about controlling light and atmosphere. Get those two things right and viewers will feel the scene before they even start picking apart how it was made. That’s the goal every time.