Space has always captured our imagination. And now you can bring that cosmic perspective straight into Photoshop.
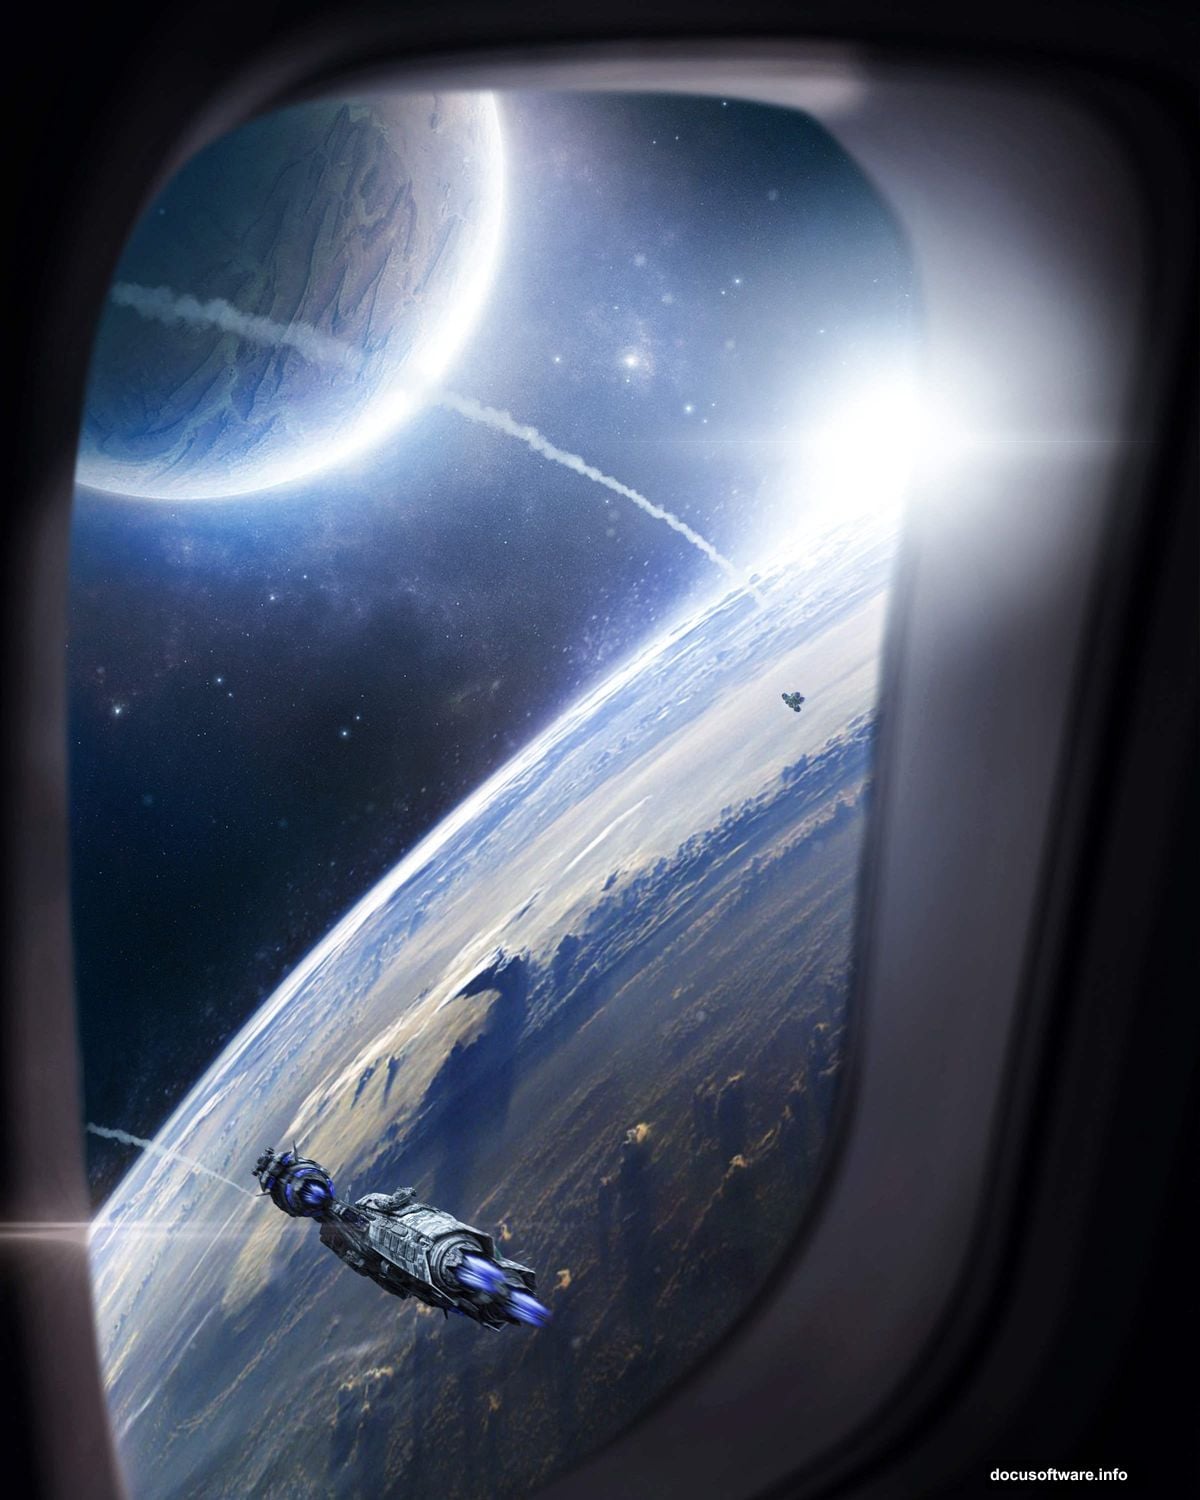
This tutorial walks you through creating a stunning view from the galaxy looking down toward Earth. You’ll blend planets, add dramatic lighting, and finish everything with a Camera Raw polish that makes the whole scene feel real. Plus, the techniques you’ll pick up here work great for all kinds of sci-fi photo manipulations.
Ready to start? Grab these resources first: an Earth photo, a planet image, a window texture, a spaceship, a lens flare image, a cloud brush, and a general texture. Once you have everything downloaded, let’s build this scene from scratch.
Canvas Setup: Getting the Size Right
First things first. Open Photoshop and create a new file.
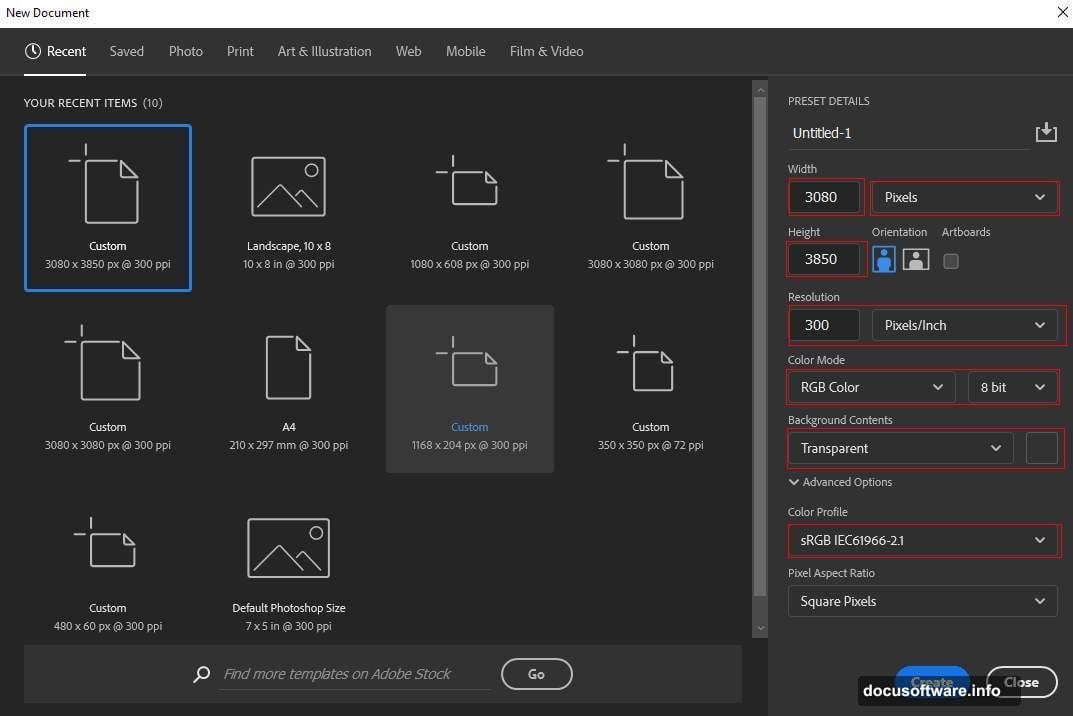
Go to File > New and enter these exact settings. Set the width to 3080px and the height to 3850px. Keep the resolution at 300px, the color mode as RGB Color 8-bit, and set the background contents to transparent.
Why transparent? Because we’re building this scene in layers from the ground up. A transparent background gives you full control over every element without a white canvas getting in the way.
Placing and Warping the Earth
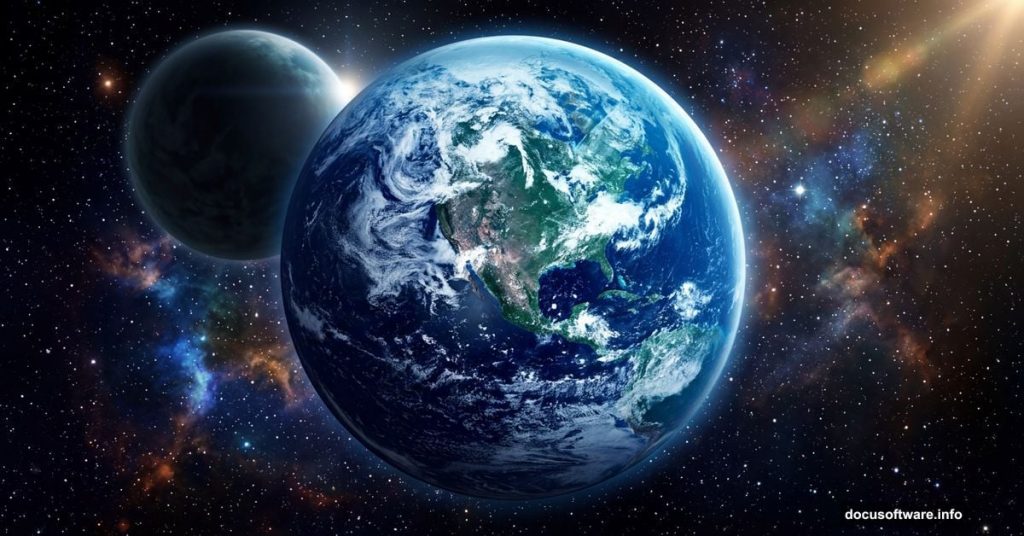
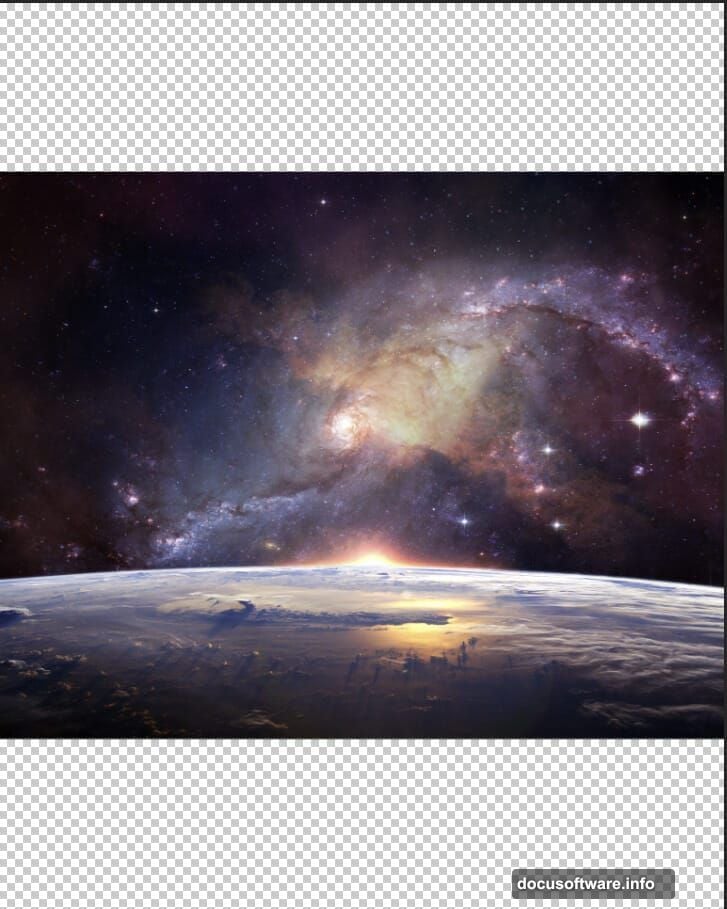
Now the fun begins. Go to File > Place and select your Earth photo.
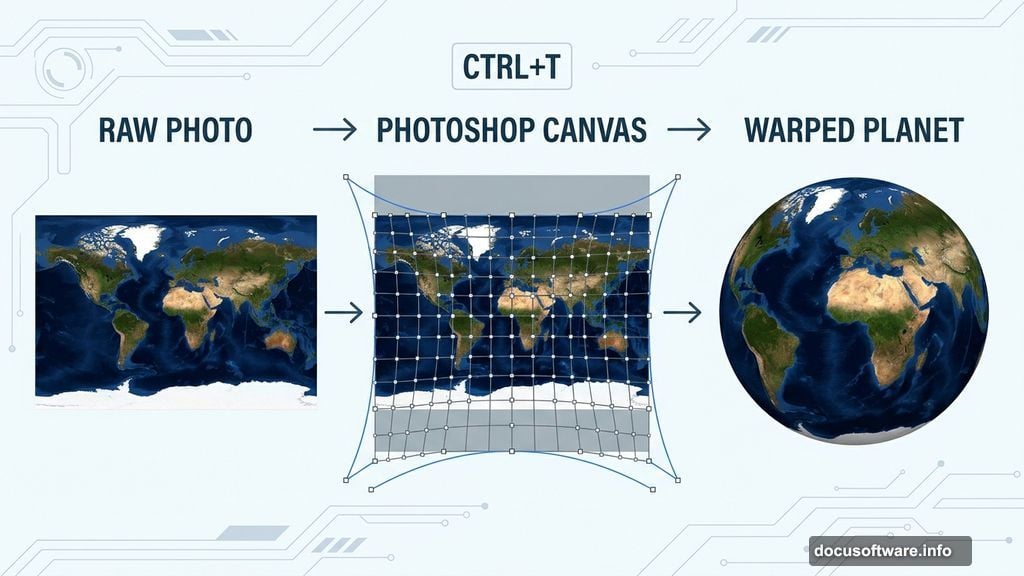
Once it lands on the canvas, grab the transform tool with Ctrl/Cmd + T. Hold Alt + Shift to resize from the center while keeping proportions locked. In Photoshop CC, just hold Alt alone and all sides scale together.
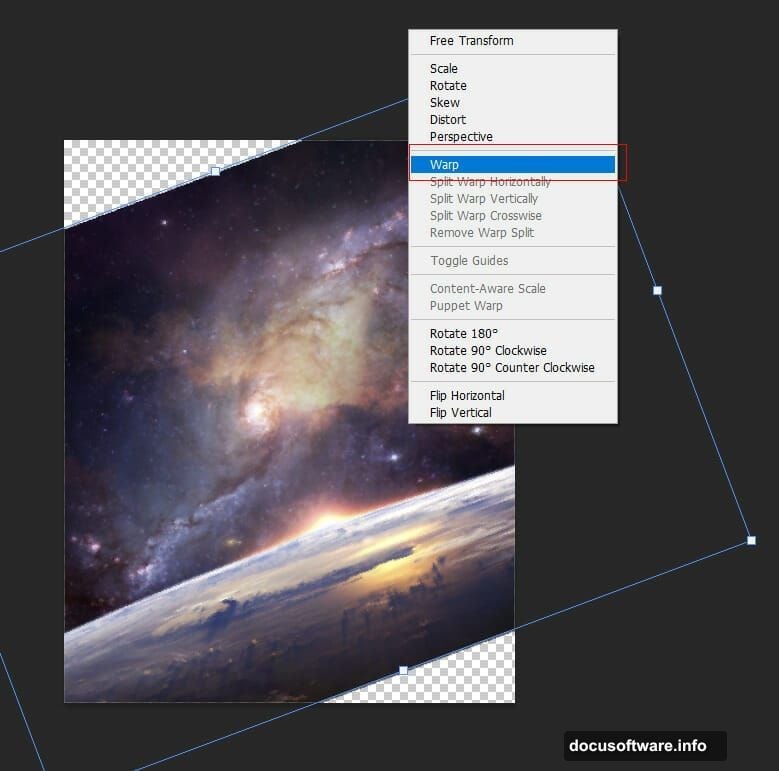
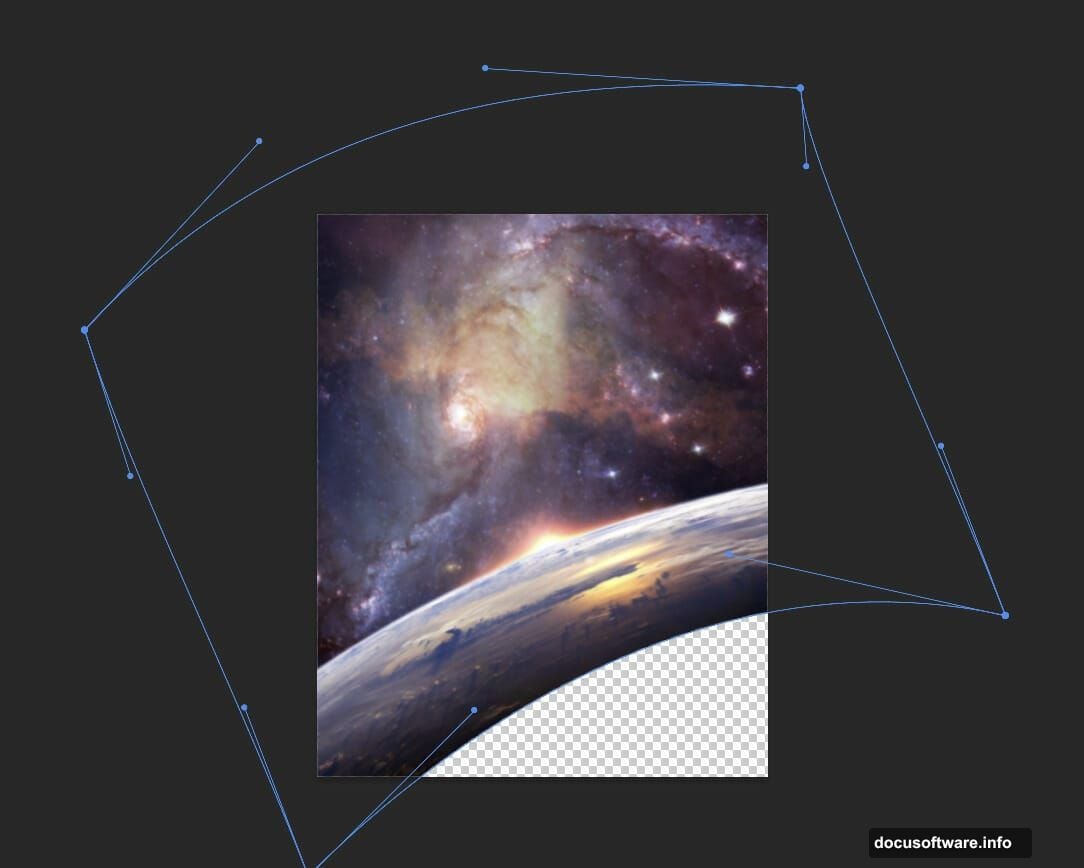
After scaling, right-click the transform handles and choose Warp. This lets you push and pull the Earth into a more dramatic curved shape. Think of it like bending a map around a globe. Pull the edges gently to create that beautiful rounded planetary look you see in NASA photographs.
Color Balance and Hue Tweaks for Earth
Raw photos rarely match a space scene straight out of the box. So we fix that with adjustment layers.
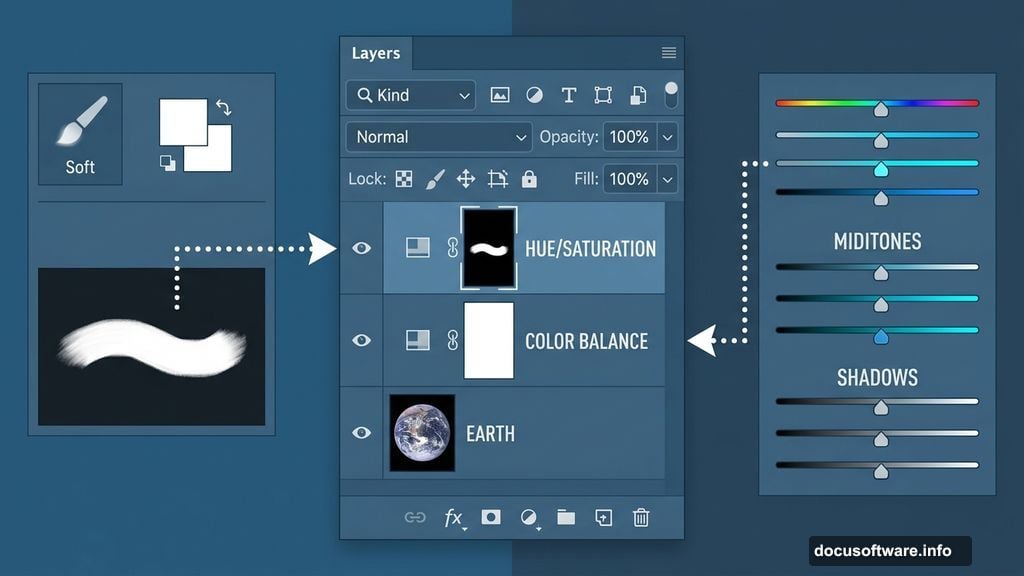
Add a Color Balance adjustment layer clipped to your Earth layer. This lets you push the colors toward cooler blues and cyans, which gives the planet that authentic deep-space look. Tweak the midtones and shadows until it feels right.
Next, add a Hue/Saturation adjustment layer. Here’s the clever part: press Ctrl/Cmd + I to invert the mask, which hides the adjustment everywhere. Then grab a soft round brush with white as your foreground color and paint over just the areas you want the saturation change to affect. This targeted approach keeps your edits precise rather than sloppy.
Adding the Second Planet
A single planet looks lonely. So let’s bring in a companion.
Go to File > Place and select your planet image. Use Ctrl/Cmd + T again to scale and position it. Place it toward the upper portion of the canvas to create a sense of depth and distance.
Create a layer mask on the planet layer. Then take a soft round brush with black as the foreground color and gently paint over the bottom edge of the planet. This fades it out naturally, like it’s partially obscured by atmosphere or distance. Hard edges on space objects always look fake, so this soft blend makes a huge difference.
Color Balance, Curves, and Hue for the Planet
The second planet needs its own color treatment to match the scene’s overall mood.
Start with a Color Balance adjustment layer clipped to the planet. Then add a Curves adjustment layer to control the brightness and contrast. Pull the curve into a slight S-shape for richer contrast without blowing out the highlights.
Finally, repeat the Hue/Saturation trick from earlier. Invert the mask, then paint with a white brush to selectively bring in color shifts exactly where you want them. The planet should feel like it belongs in the same universe as Earth, not like a stock photo pasted on top.
Soft Light Layers for Atmospheric Color
This step is where the scene really starts to glow.
Create two new blank layers above your planet work. Change the blend mode on both to Soft Light. This mode adds color richness without completely covering what’s underneath, which is perfect for atmospheric lighting effects.
On the first layer, grab a large soft round brush and set your foreground color to blue, specifically #1967d6. Paint loosely across the scene, focusing on the areas around Earth and the background. Soft Light with blue creates that cold, deep-space atmosphere instantly.
On the second layer, switch your foreground color to a warm orange, #d6b6aa. Paint this more sparingly around planet edges and any light sources. The contrast between the cool blue background and warm orange highlights gives the scene a cinematic quality. Think of it the same way a movie director uses colored stage lighting to create mood.
Spaceships, Lens Flares, and Texture
With the planets established, it’s time to add detail and drama.
Place your spaceship image into the scene and scale it down to feel appropriately small against the massive planets. Even a tiny ship tells a powerful story about scale. Add a layer mask and refine edges if needed to blend it cleanly.
For the lens flare, place it on a new layer and change the blend mode to Screen. Screen mode makes black invisible, so only the bright flare light shows through. Position it near your light source for the most believable result.
Add your texture layer above everything else and set it to Soft Light or Overlay. This roughens up the scene slightly and ties all the elements together so nothing looks too pristine.
Finishing With Camera Raw Filter
The Camera Raw Filter is your final polish step, and it’s worth the effort.
Select all your layers and merge them into a single smart object. Then go to Filter > Camera Raw Filter. Here you can fine-tune exposure, contrast, highlights, shadows, vibrance, and clarity all in one place.
Pull the highlights down slightly to reveal detail in bright areas. Lift the shadows a little to keep dark areas from going completely black. Boost the clarity just enough to add edge definition without making things look crunchy. Finally, a slight boost to vibrance enriches the colors without oversaturating them.
The difference between before and after Camera Raw is usually dramatic. It’s the step that turns a good composite into something that looks like it was shot on location.
Space manipulation projects like this one reward patience. Each step builds on the last, and the final result is genuinely worth the time investment. Once you understand how adjustment layers, blend modes, and Camera Raw work together, you can apply these same techniques to any sci-fi scene you dream up.