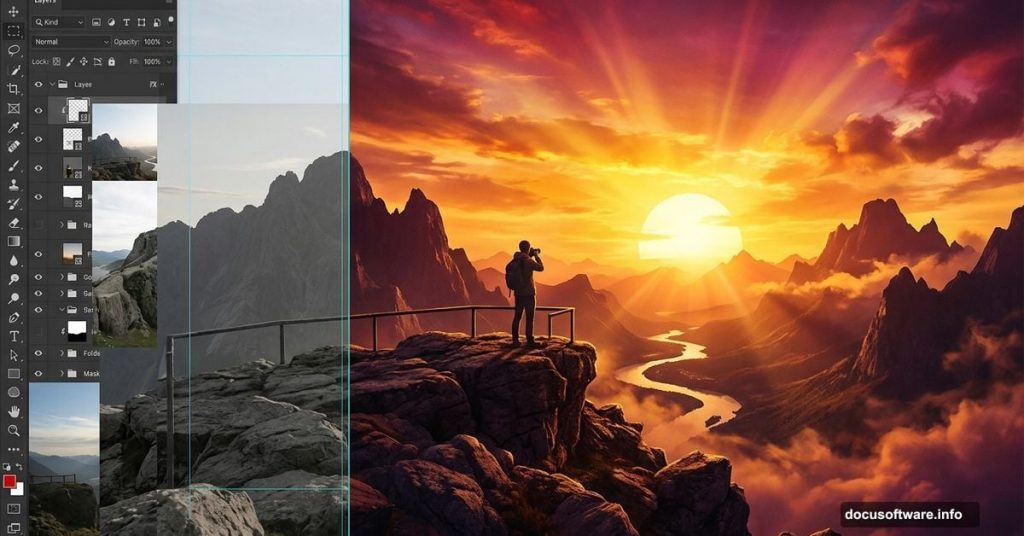
Ever looked at those dreamy, painted-looking sunset scenes and wondered how they’re made? Turns out, most of them start with simple stock photos and a whole lot of Photoshop magic. This tutorial walks you through creating a gorgeous sunset landscape photo manipulation from the ground up.
You’ll combine a landscape, sky, mountain, rocks, a balcony, a model, and trees into one seamless scene. Along the way, you’ll practice masking, adjustment layers, lighting effects, and matte painting techniques. Perfect for intermediate Photoshop users ready to level up.
Here’s what you’ll need before diving in: landscape, sky, mountain, rock, balcony, model, tree, and birds stock images.
Setting Up Your Natural Scene
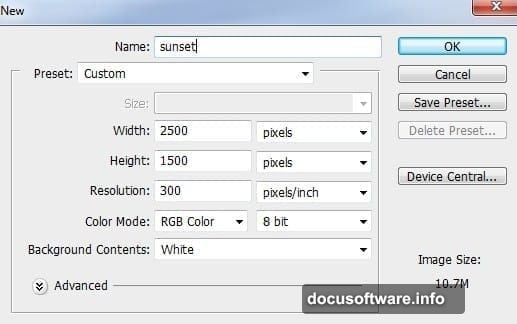
Start by creating a new document in Photoshop with your preferred canvas settings. This gives you a clean workspace to build everything from scratch.
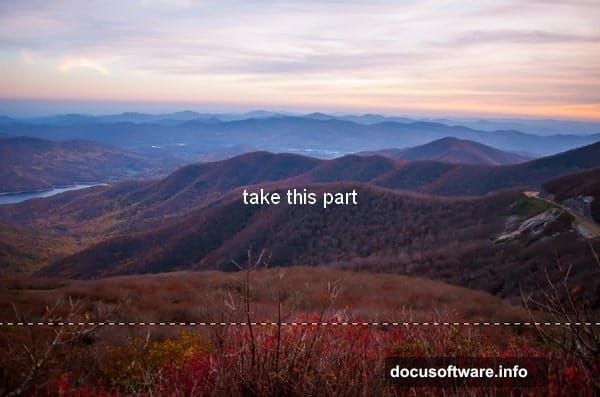
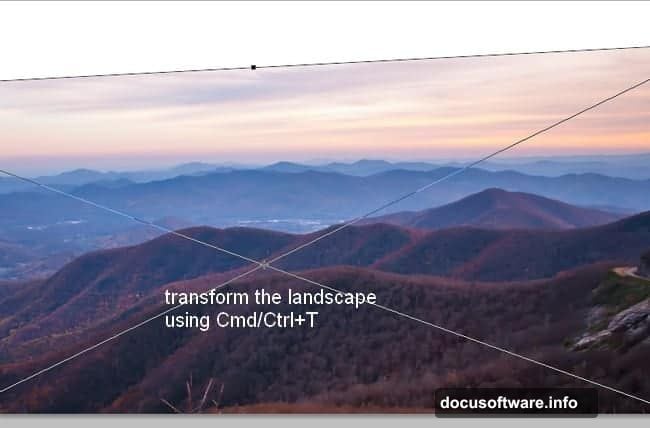
Next, open your landscape image. Grab the Rectangular Marquee Tool (M) and select just the upper portion of the landscape. Drag that selection into your new document, then use Cmd/Ctrl+T to transform and position it where you want it.
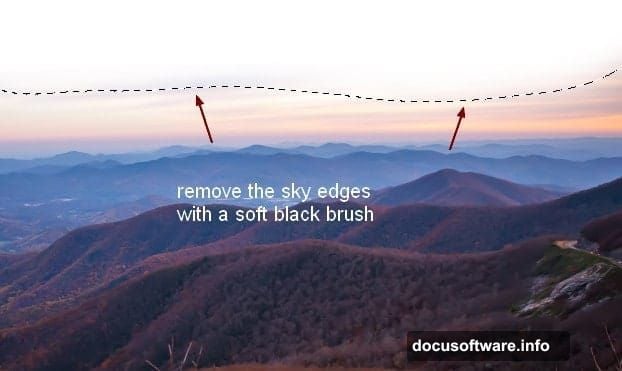
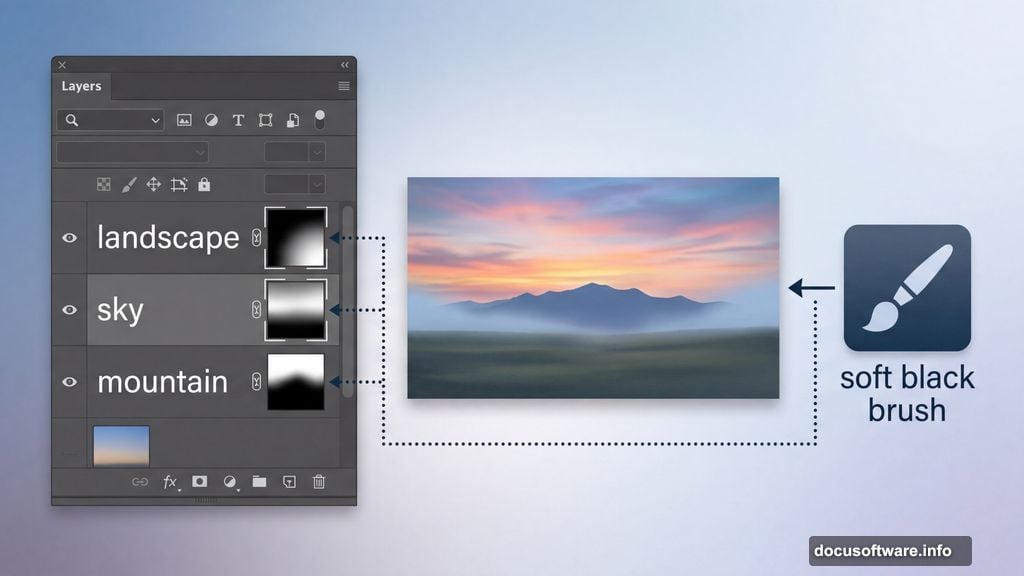
Now add a layer mask. Click the second button at the bottom of the Layers Panel to do this. Then pick a soft, basic brush in black and paint over the hard sky edges to blend them out cleanly.
Blending the Landscape and Sky
With the landscape layer selected, head to Filter > Blur > Gaussian Blur and set the radius to 4px. This softens the landscape slightly and helps it read as a natural, atmospheric scene rather than a sharp stock photo.
To darken the landscape, add a Curves adjustment layer via Layer > New Adjustment Layer > Curves. On that layer’s mask, use a soft black brush to protect the top right of the scene from the darkening effect.
Now place your sky image above the landscape layer. Rotate it using Cmd/Ctrl+T to get the angle just right. Add a mask to this sky layer and use a soft black brush to smooth out any rough or obvious edges. Then apply a 2px Gaussian Blur to soften the sky and help it blend naturally with the rest of the scene.
Brightening the Sky With Curves
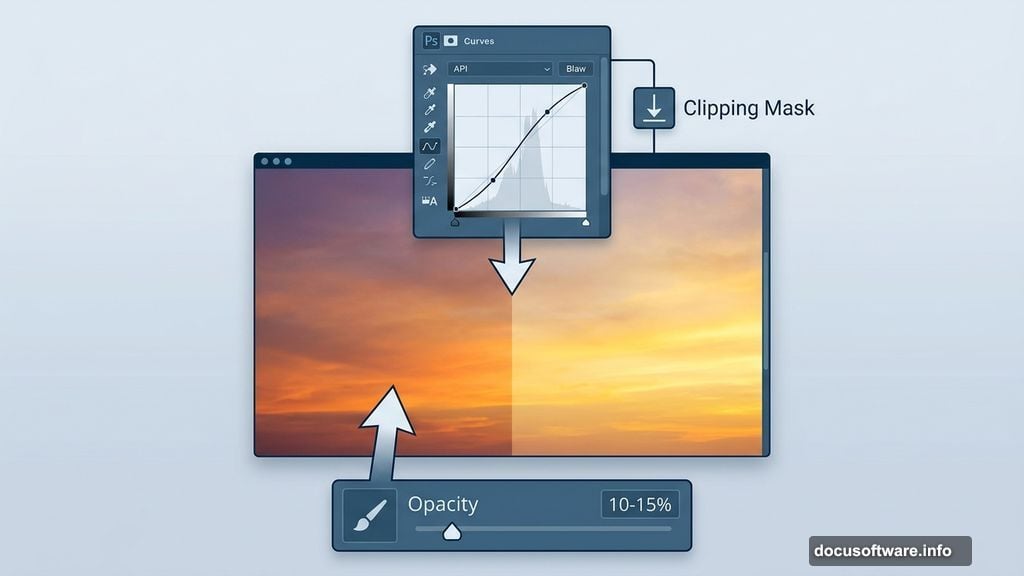
Add another Curves adjustment layer, this time with a Clipping Mask so it only affects the sky. Brighten things up a touch. Then, on that adjustment layer’s mask, use a soft black brush at a very low opacity, around 10 to 15 percent, and lightly brush the left side of the sky. This reduces the brightness there and creates a more natural light gradient across the scene.
The goal here is subtlety. Small adjustments build up to a believable, cohesive look. Too much brightening too fast can make the sky feel flat and artificial.
Adding the Mountain
Open your mountain stock image and carefully extract the mountain shape. Place it on the left side of your composition.
Add a Curves adjustment layer with a Clipping Mask to brighten the mountain. On that mask, use a soft black brush to darken the mountain edges that would naturally fall into shadow, away from the light source. This is where the scene starts to feel three-dimensional.
For a finishing touch on this section, add a Solid Color fill layer via Layer > New Fill Layer > Solid Color. Use it to very slightly darken the edges of the composition. This subtle vignette draws the eye toward the center of the scene.
Rocks, Balcony, Model, and Trees
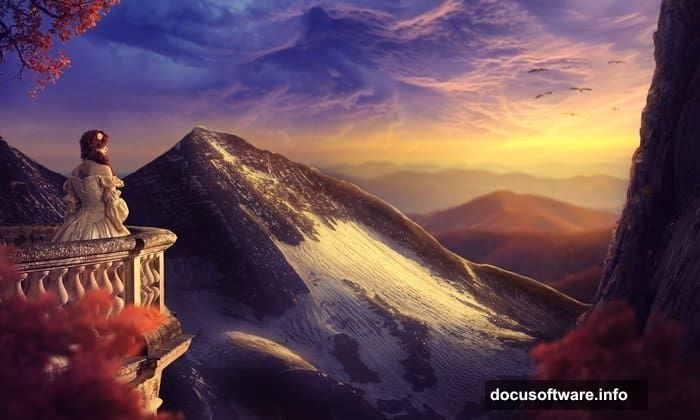
With the base scene established, it’s time to populate the foreground. Bring in your rock image and position it to anchor the bottom of the composition. Place the balcony on top of the rocks, then add your model to the balcony area.
Trees come next. Layer three different tree images around the scene to frame the composition naturally. Birds in the sky add that final touch of life and movement to the whole image.
Each element needs its own masking work to blend into the scene. Use soft brushes and low-opacity strokes to fade edges gently. Rushing this step shows immediately, so take your time here.
Color Grading and Lighting Effects
Once all your elements are in place, the real fun begins. Adjustment layers are your best friends for unifying the scene’s colors.
A Color Balance adjustment layer lets you shift the tonal colors across midtones and highlights. Warmer tones in the highlights push the sunset feeling. Cooler midtones add depth. Experiment until the whole image feels like it belongs to the same golden hour moment.
Finally, add a few dedicated lighting effect layers. Use soft, low-opacity brushes in warm oranges and yellows to simulate where the sun’s light would actually hit your scene. Apply these on separate layers set to Screen or Overlay blend modes. This creates that glowing, painterly quality that makes sunset manipulations look so compelling.
The whole image comes together when the light feels consistent. Every element, from the mountain to the model, should look like it exists under the same beautiful sky.
If you want to push the effect further, try a subtle Color Lookup adjustment layer at the end. Many photographers and digital artists use these to add a cinematic, matte-painting quality to the final image. It takes just seconds but can dramatically elevate the overall mood.